Previous post
too many ideas. too little time. (and far too much chai.)


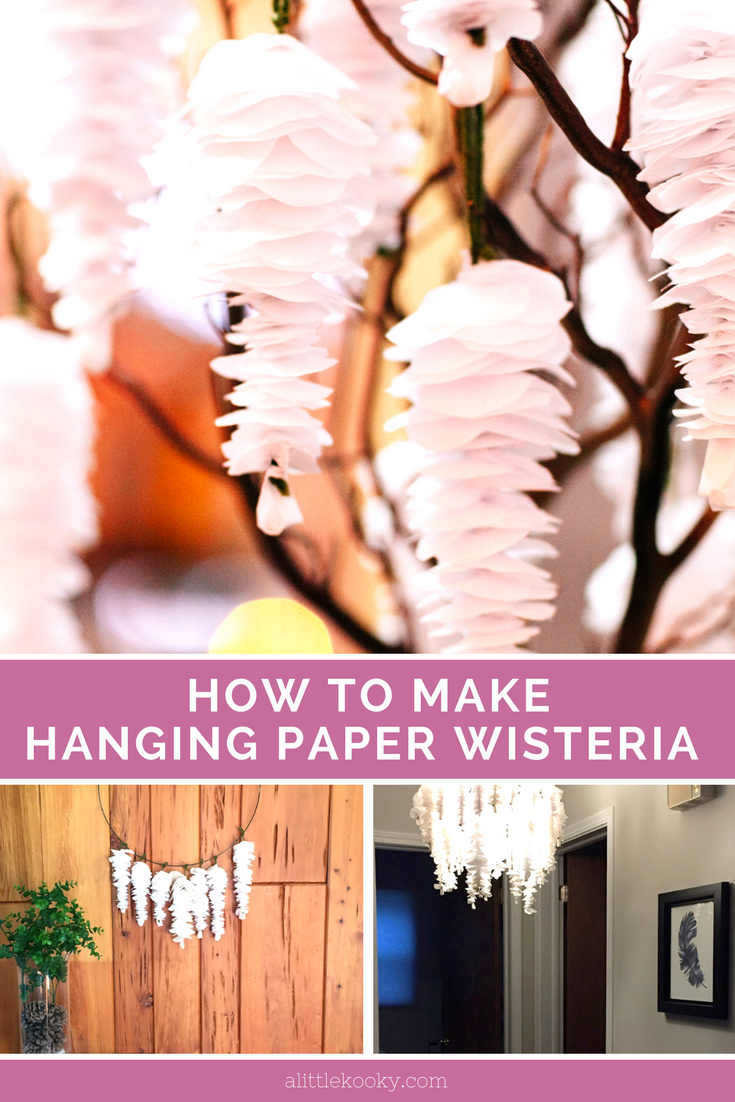
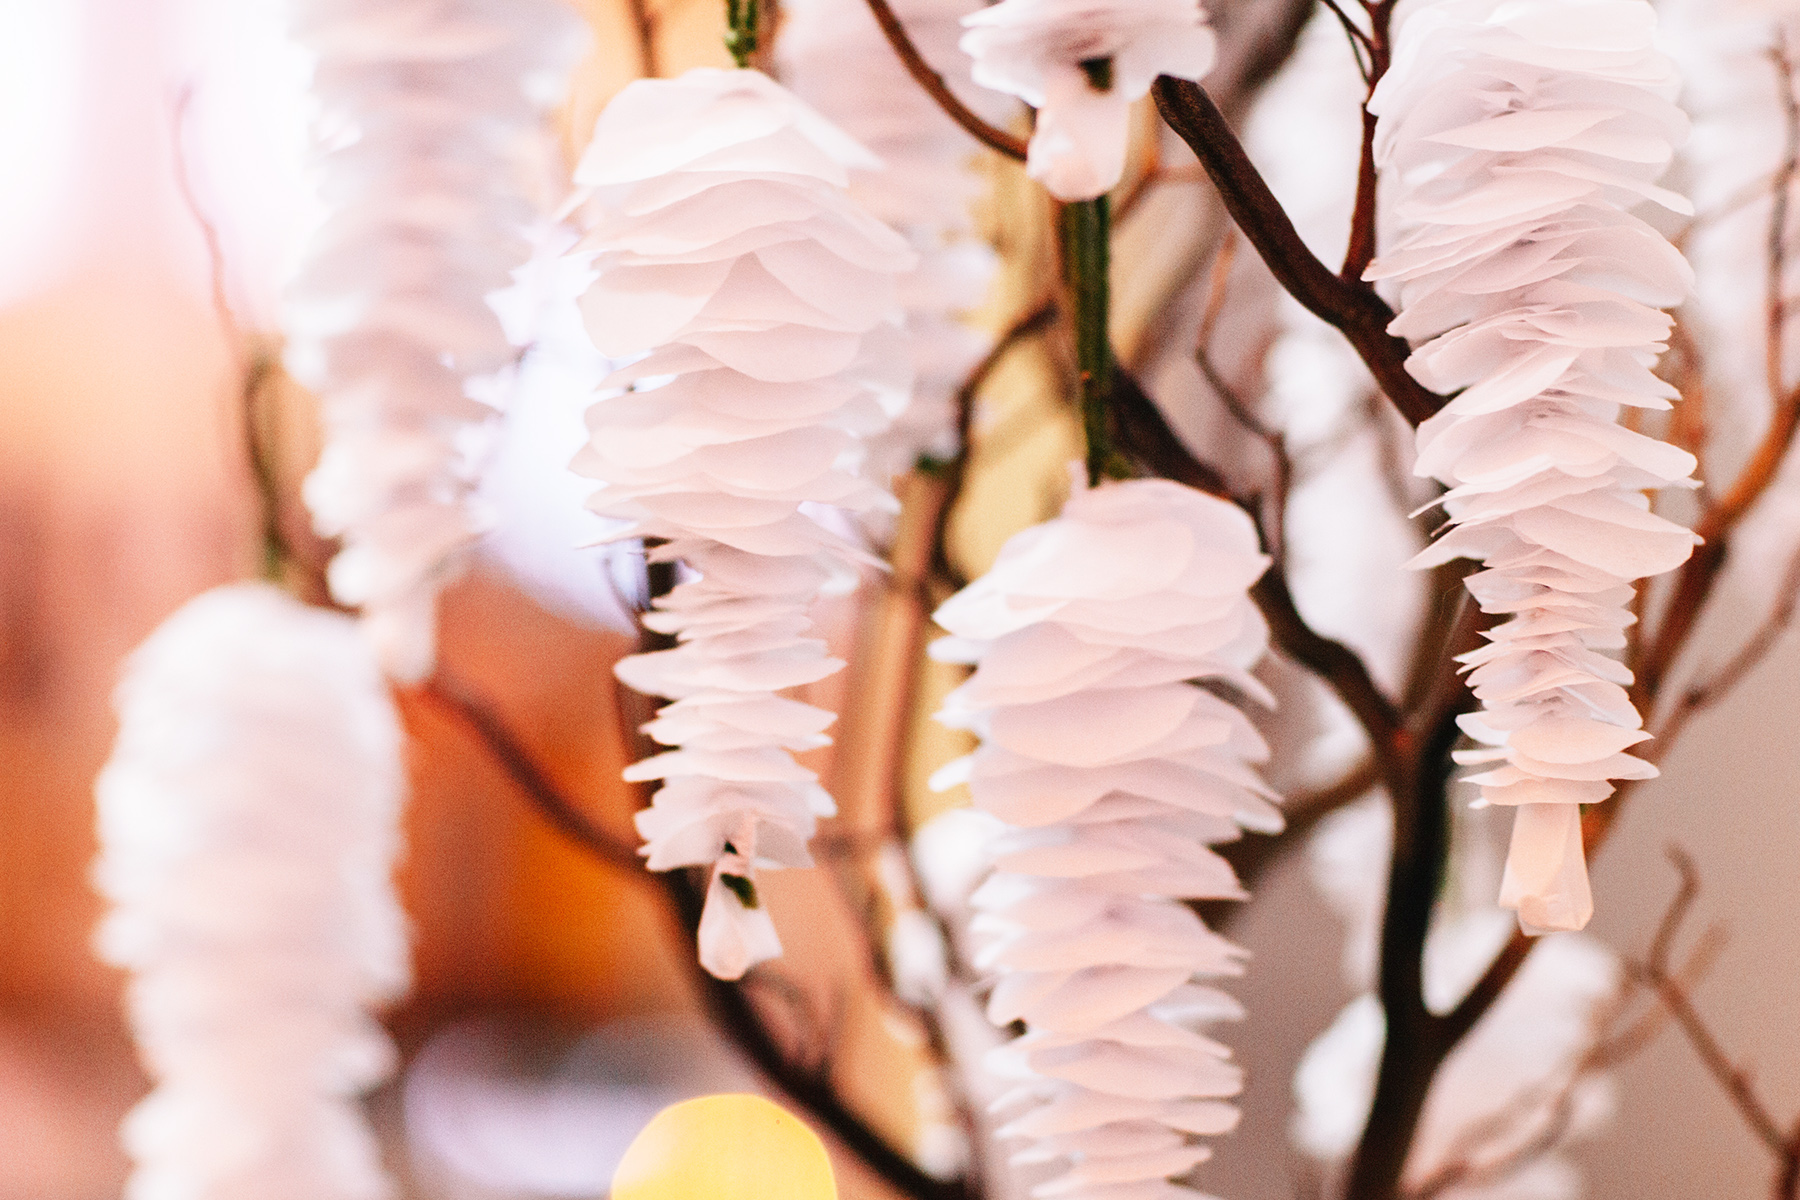
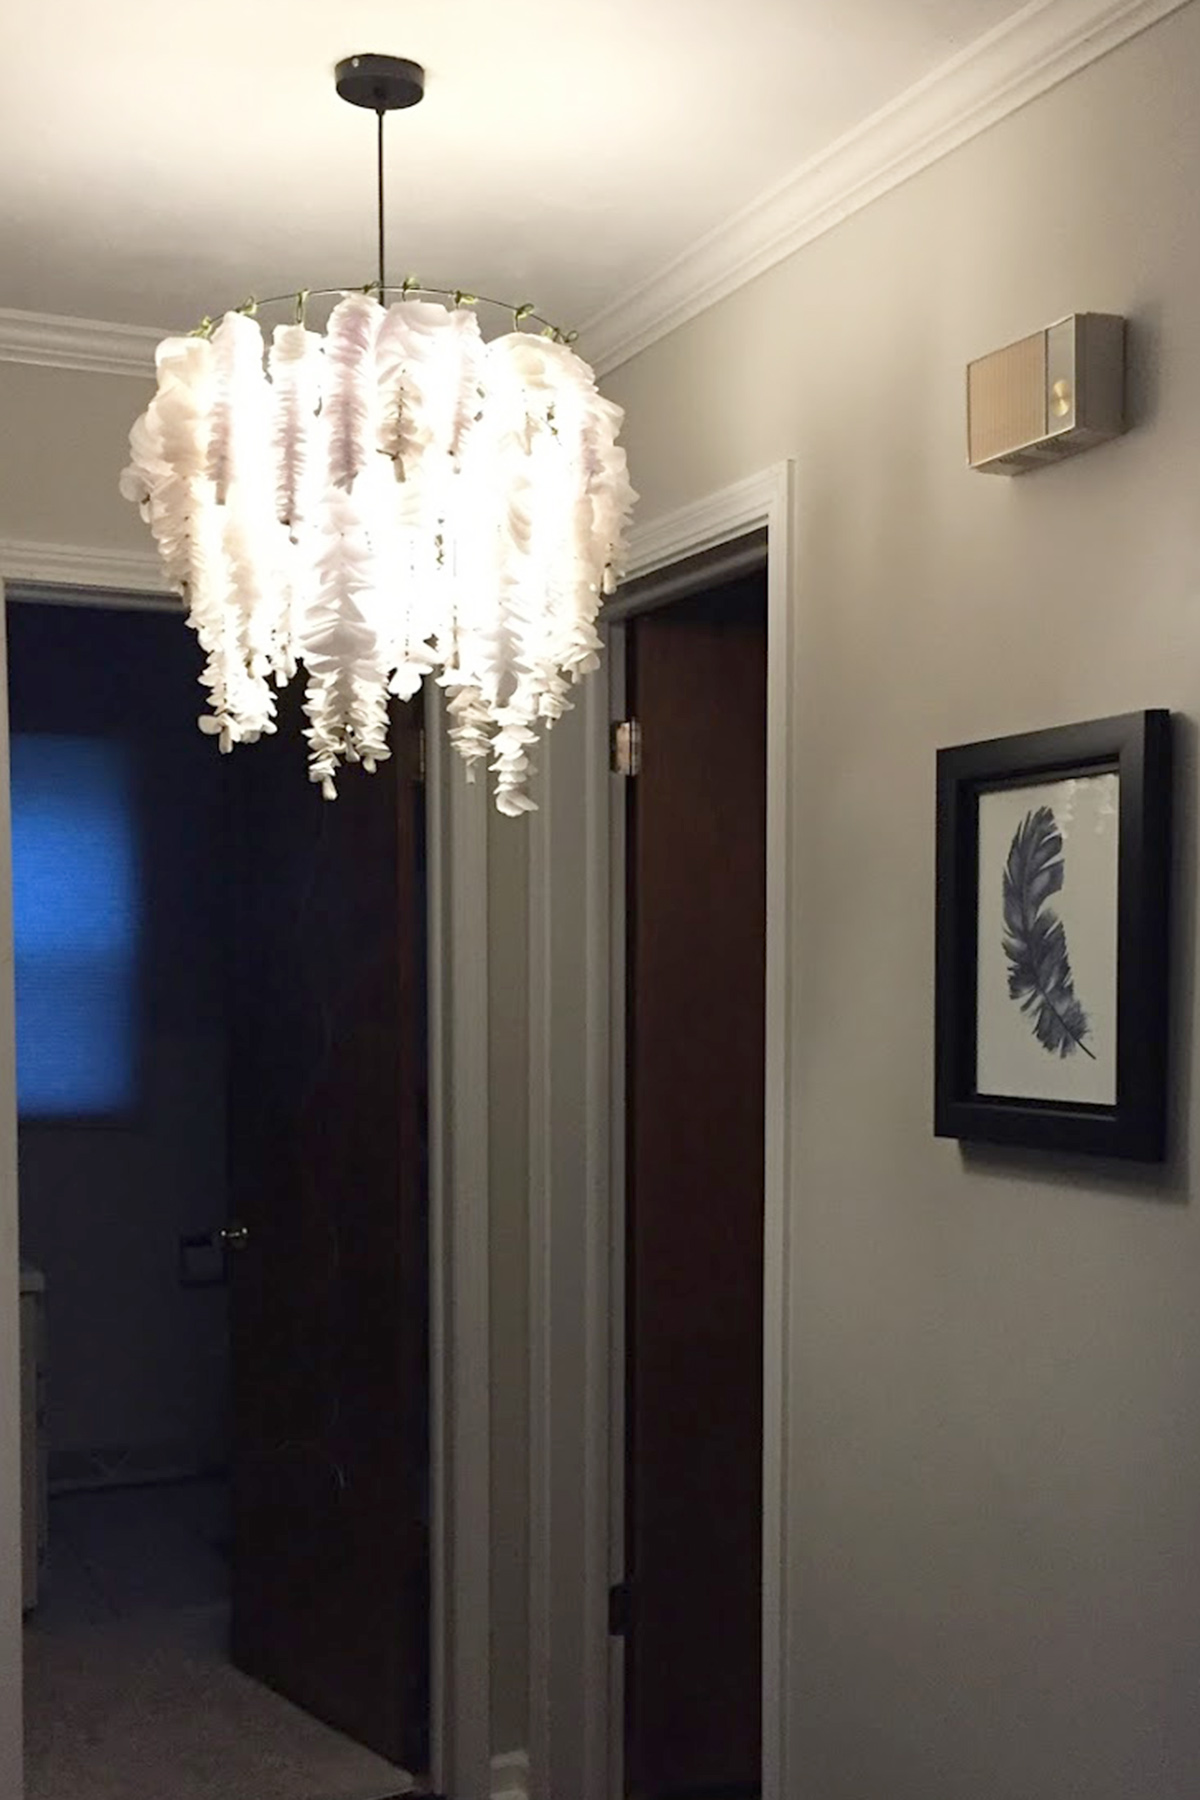
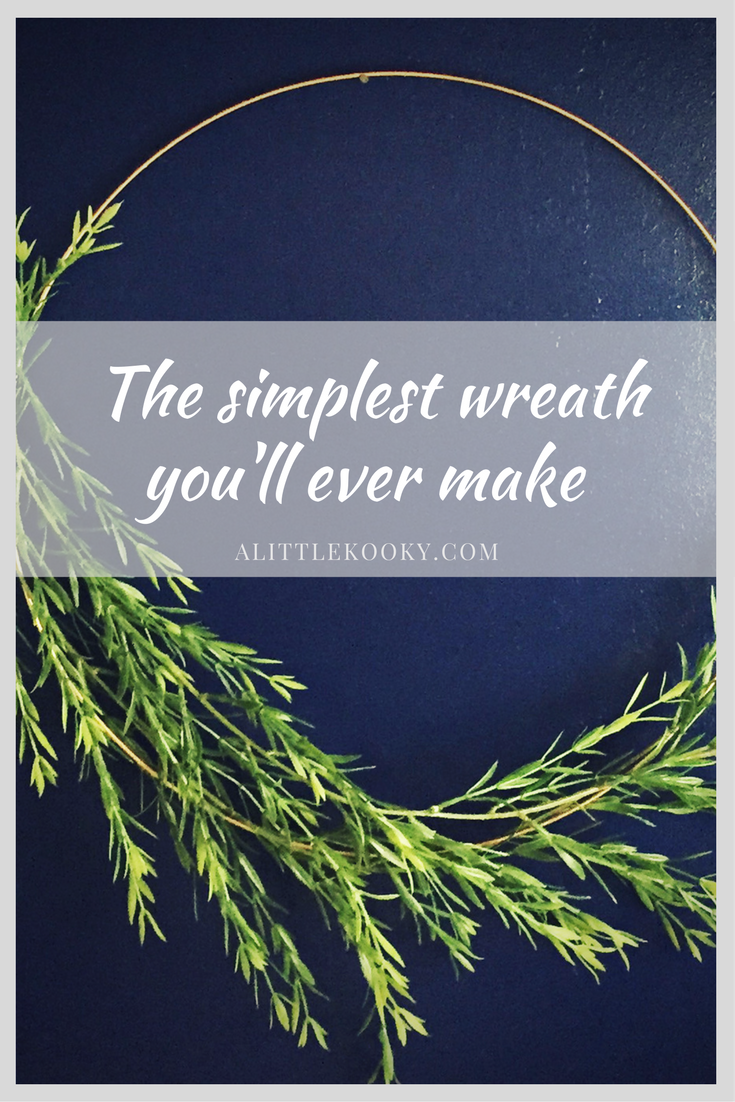
I love wisteria, so the idea of making wisteria-inspired tissue flowers was a no-brainer for me. They are gorgeous, and the options for using them are endless. Wall hangings, ceiling light fixtures, home or wedding decor and on and on.
I used them for two different events in my life: My wedding, and my baby’s nursery. So this is really two tutorials in one.
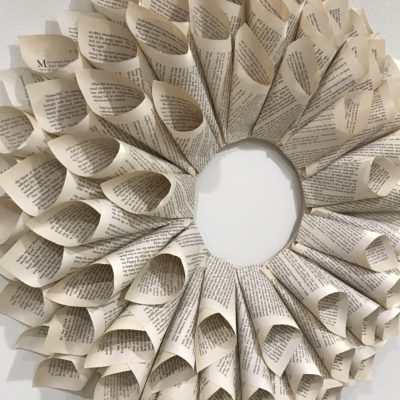
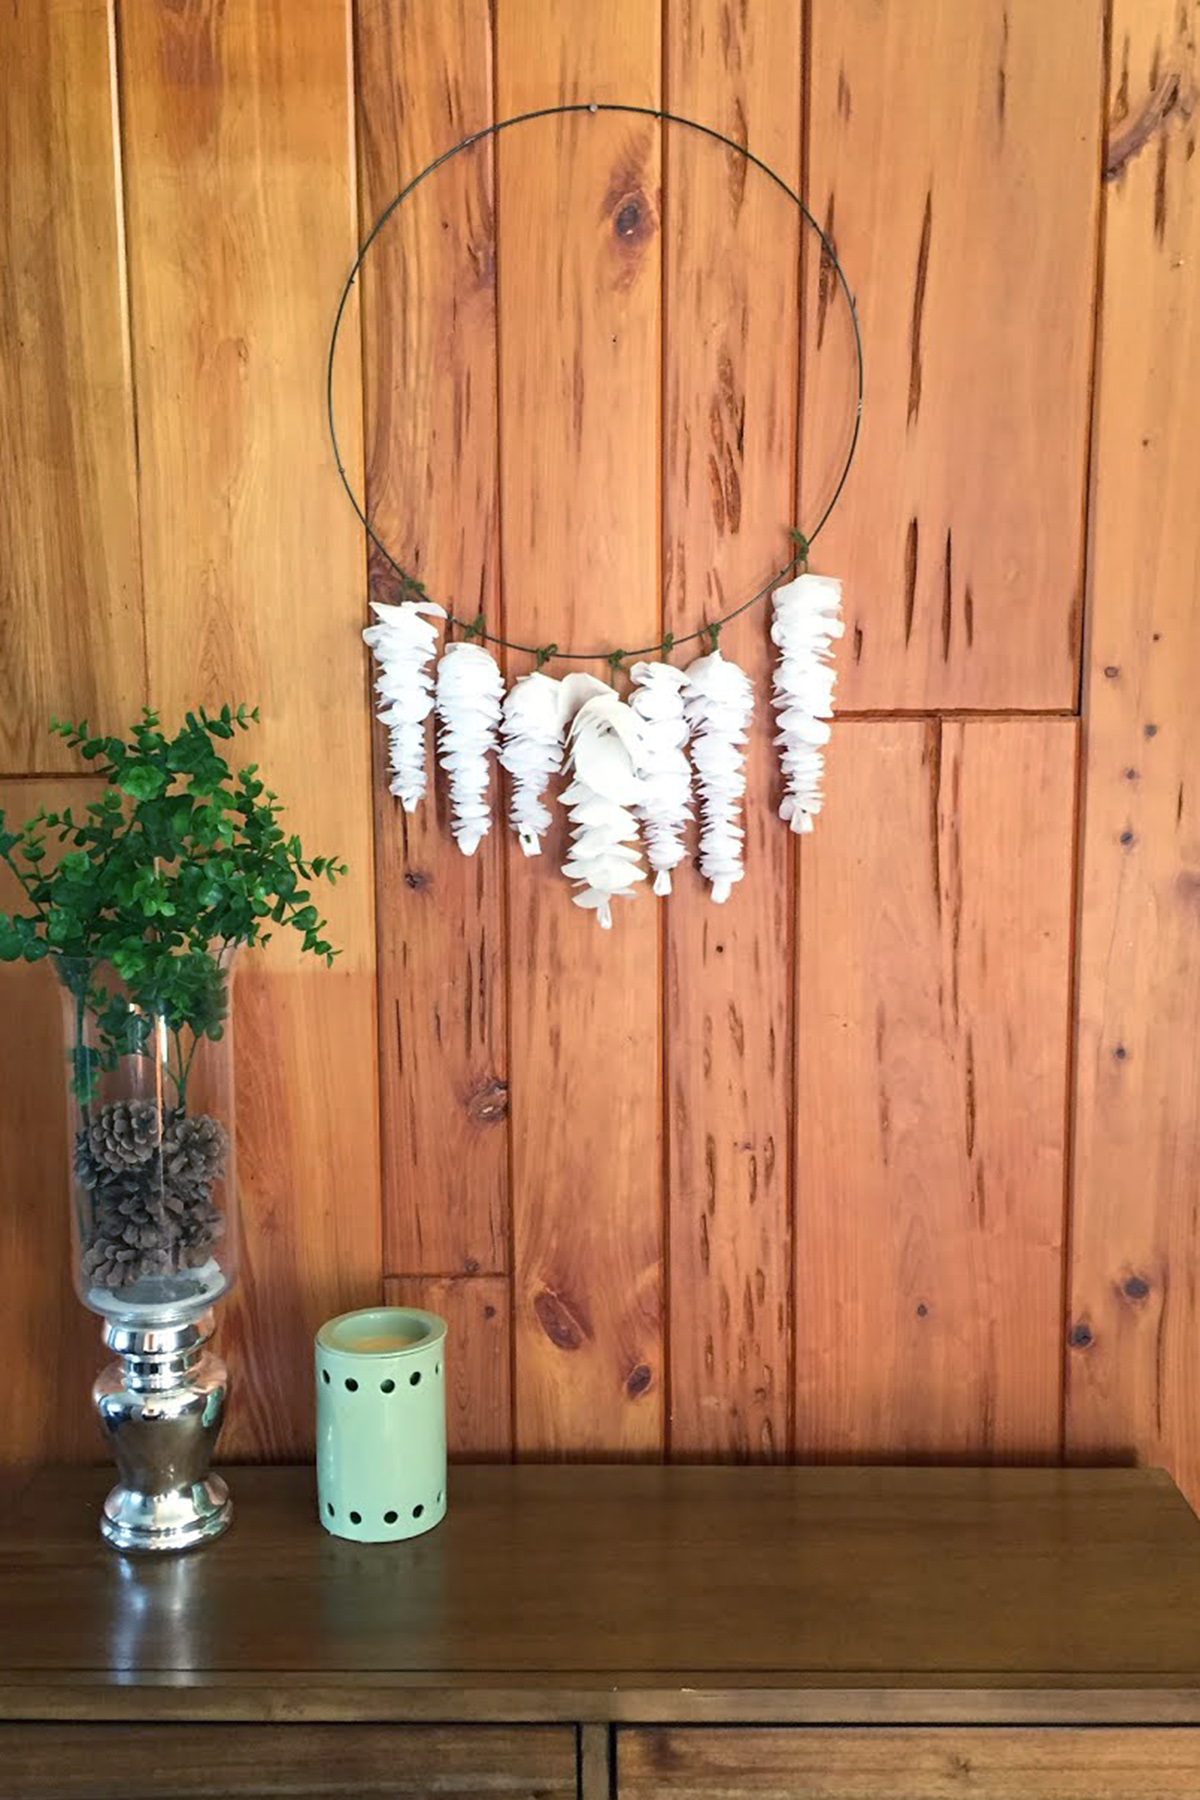
First off, remember my wispy wreath tutorial where I needed a wreath form to pull apart for another project? This is that project. I opted to use a wreath form here because I needed two different-sized hoops and figured this would be the most economical choice. Plus, I used the rest of the wreath form to make… you guessed it… two more wreaths!
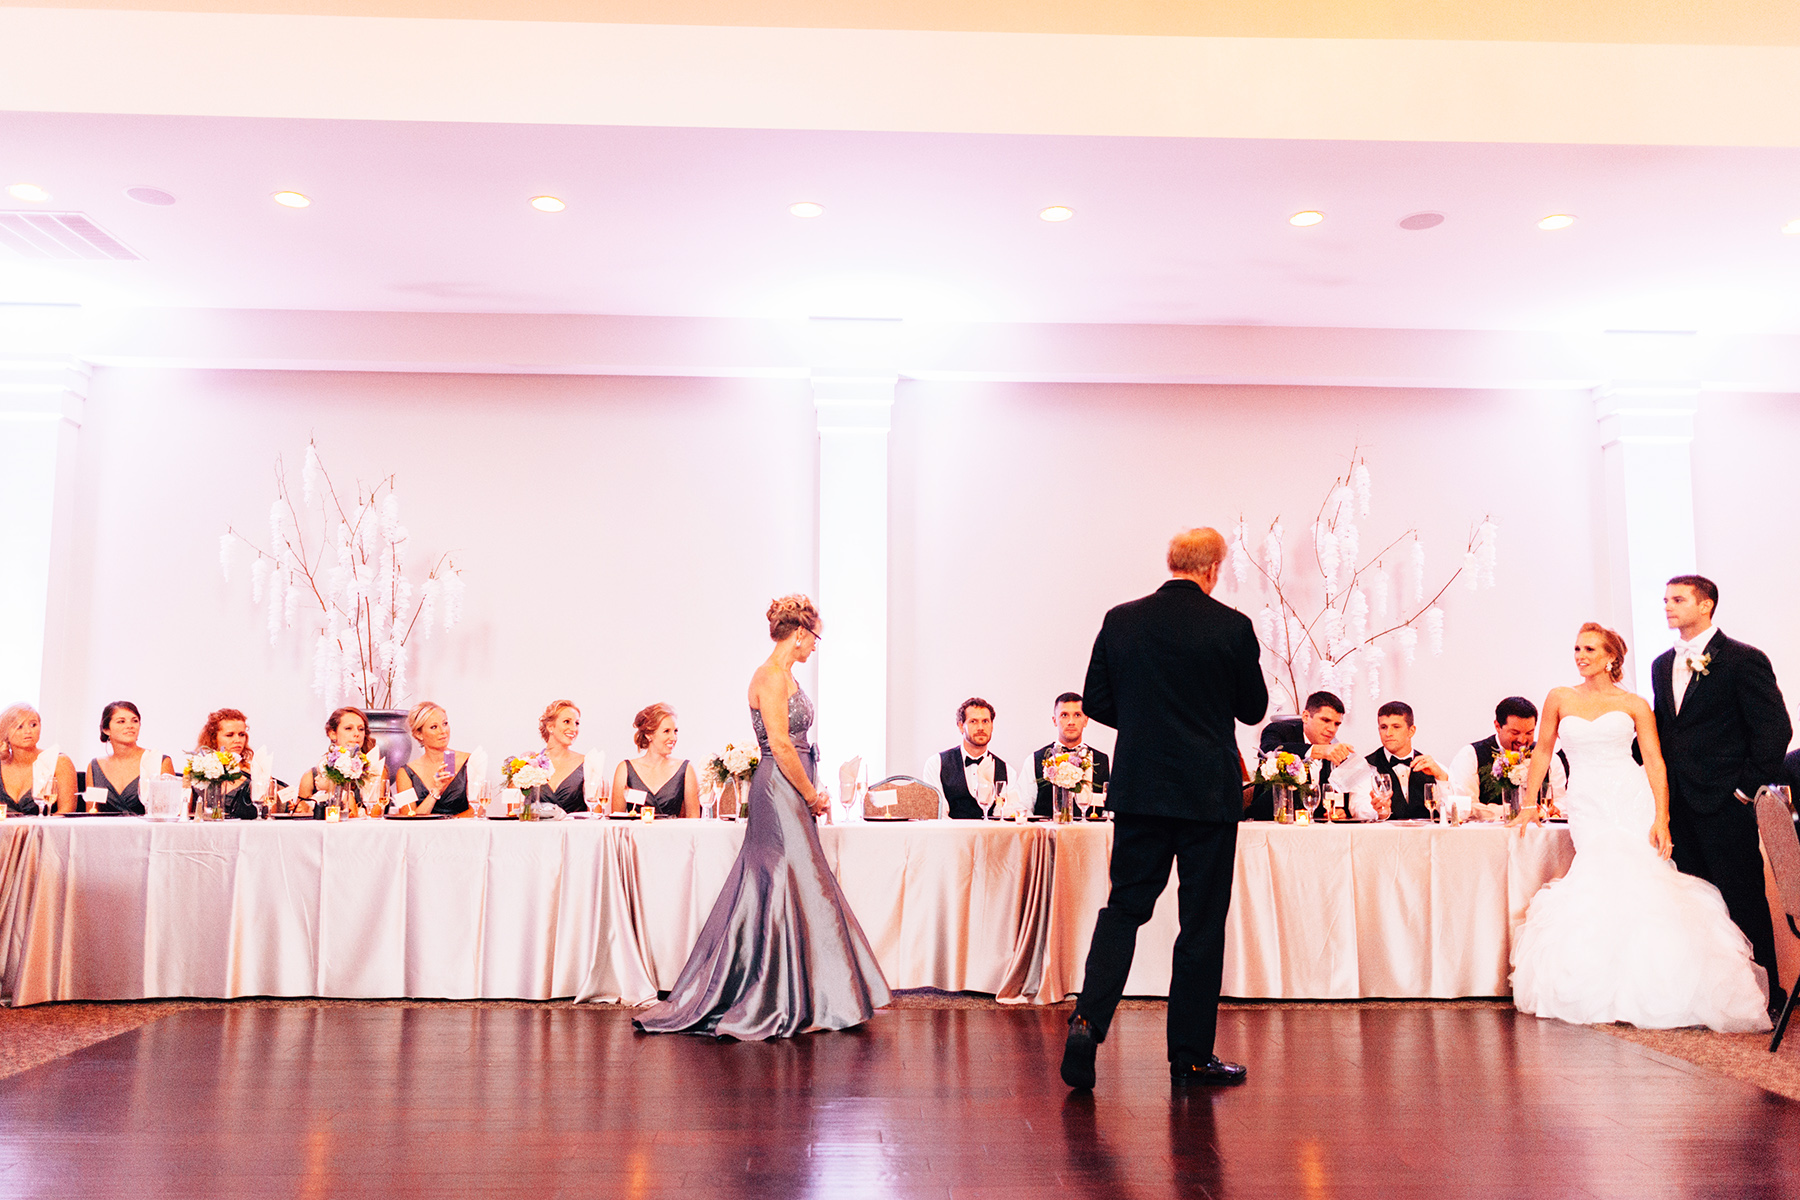
I first made these pretty wisteria-inspired tissue flowers for my wedding. I found a few large branches in my parent’s backyard, stuck them in sand inside some tall planters, hung the flowers and voila, my very own wispy wisteria trees to flank my head table.
Were they time-consuming? Yes. Was it worth it? Absolutely. Besides being beautiful, they’re versatile and cost pennies to make, which is incredibly important when planning a wedding. Like most of my wedding crafts, I made a day of it (or two or three). I’d make myself a cup of coffee, put on a movie and mindlessly work. It was actually a great stress reliever.
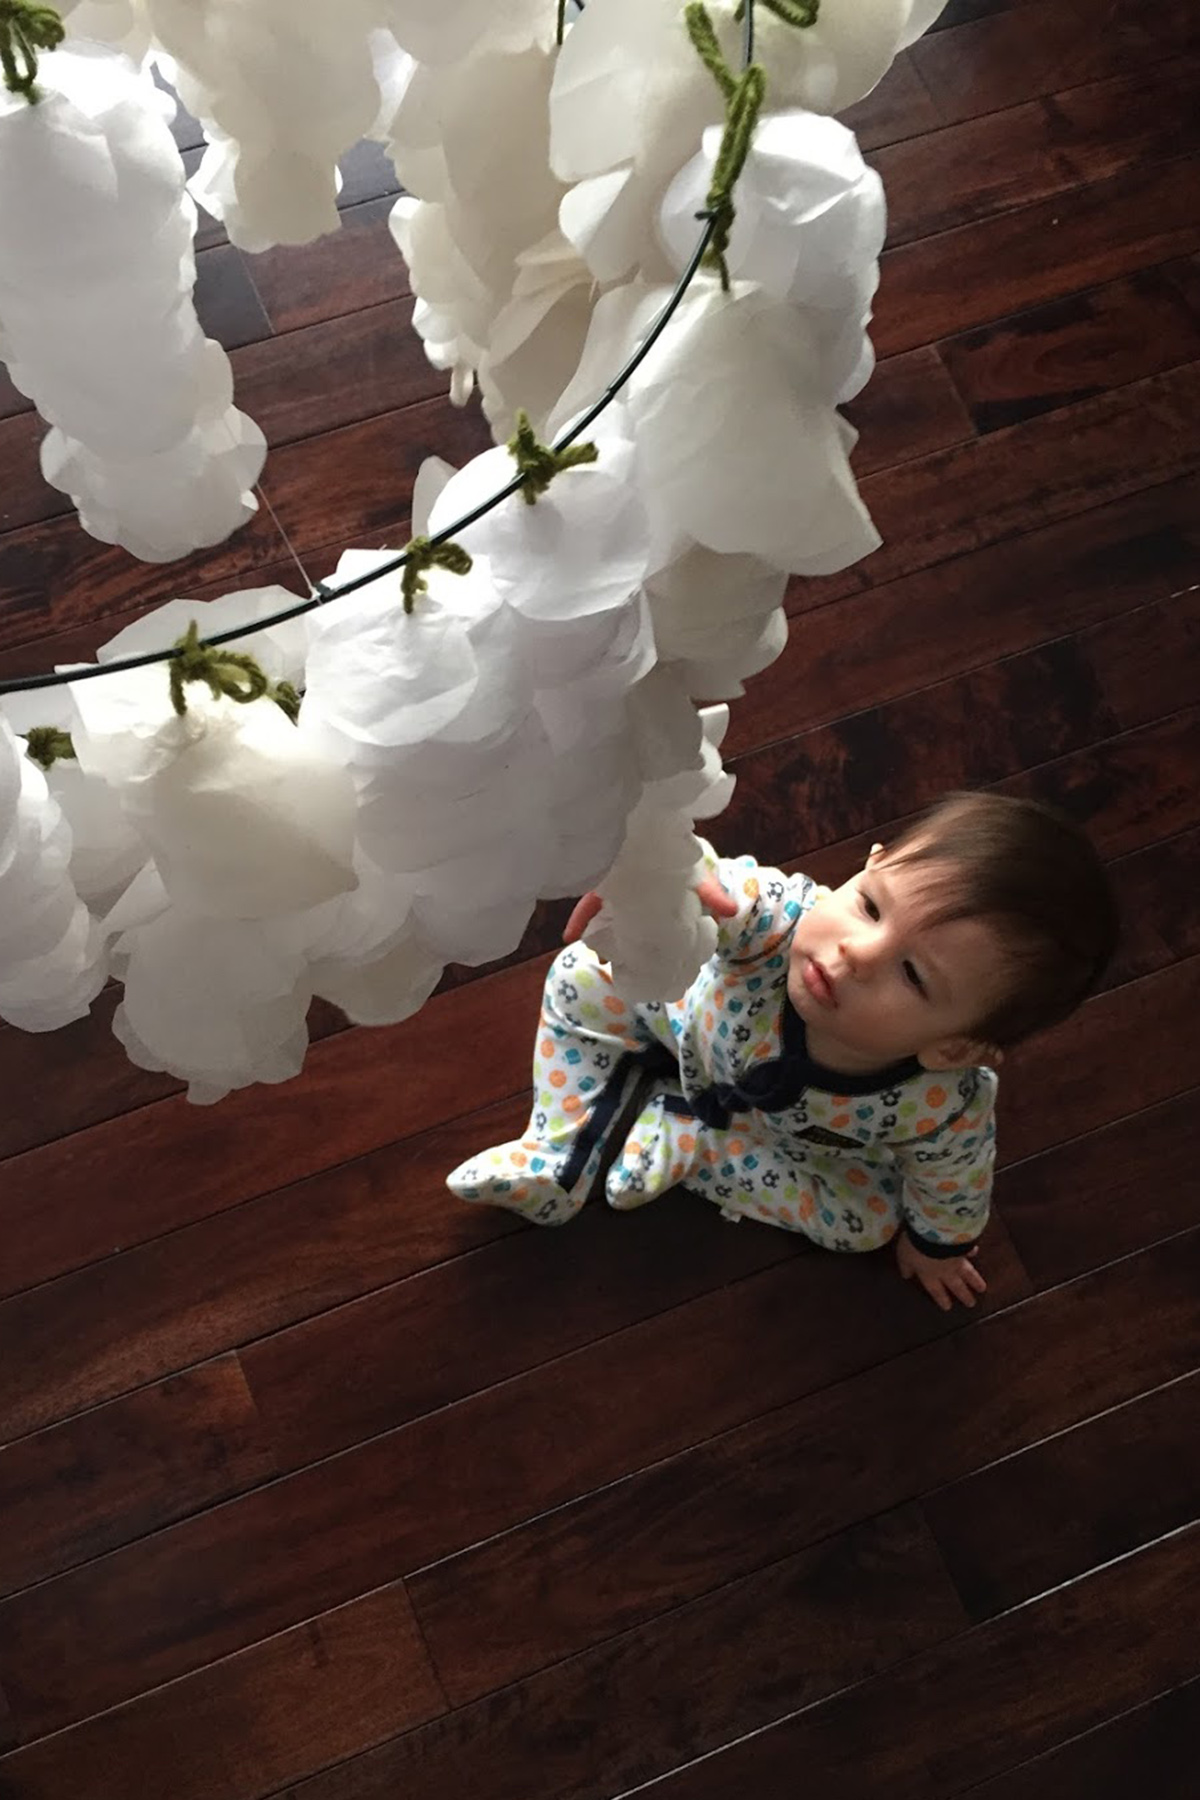
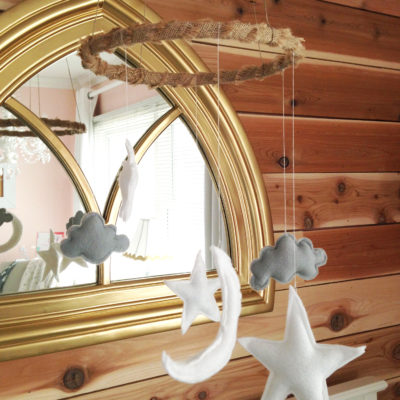
Fast forward three years to the arrival of our first baby. Like most of our house, I wanted to decorate with a lot of furniture and decor I already owned. These wisteria tissue flowers were perfect.
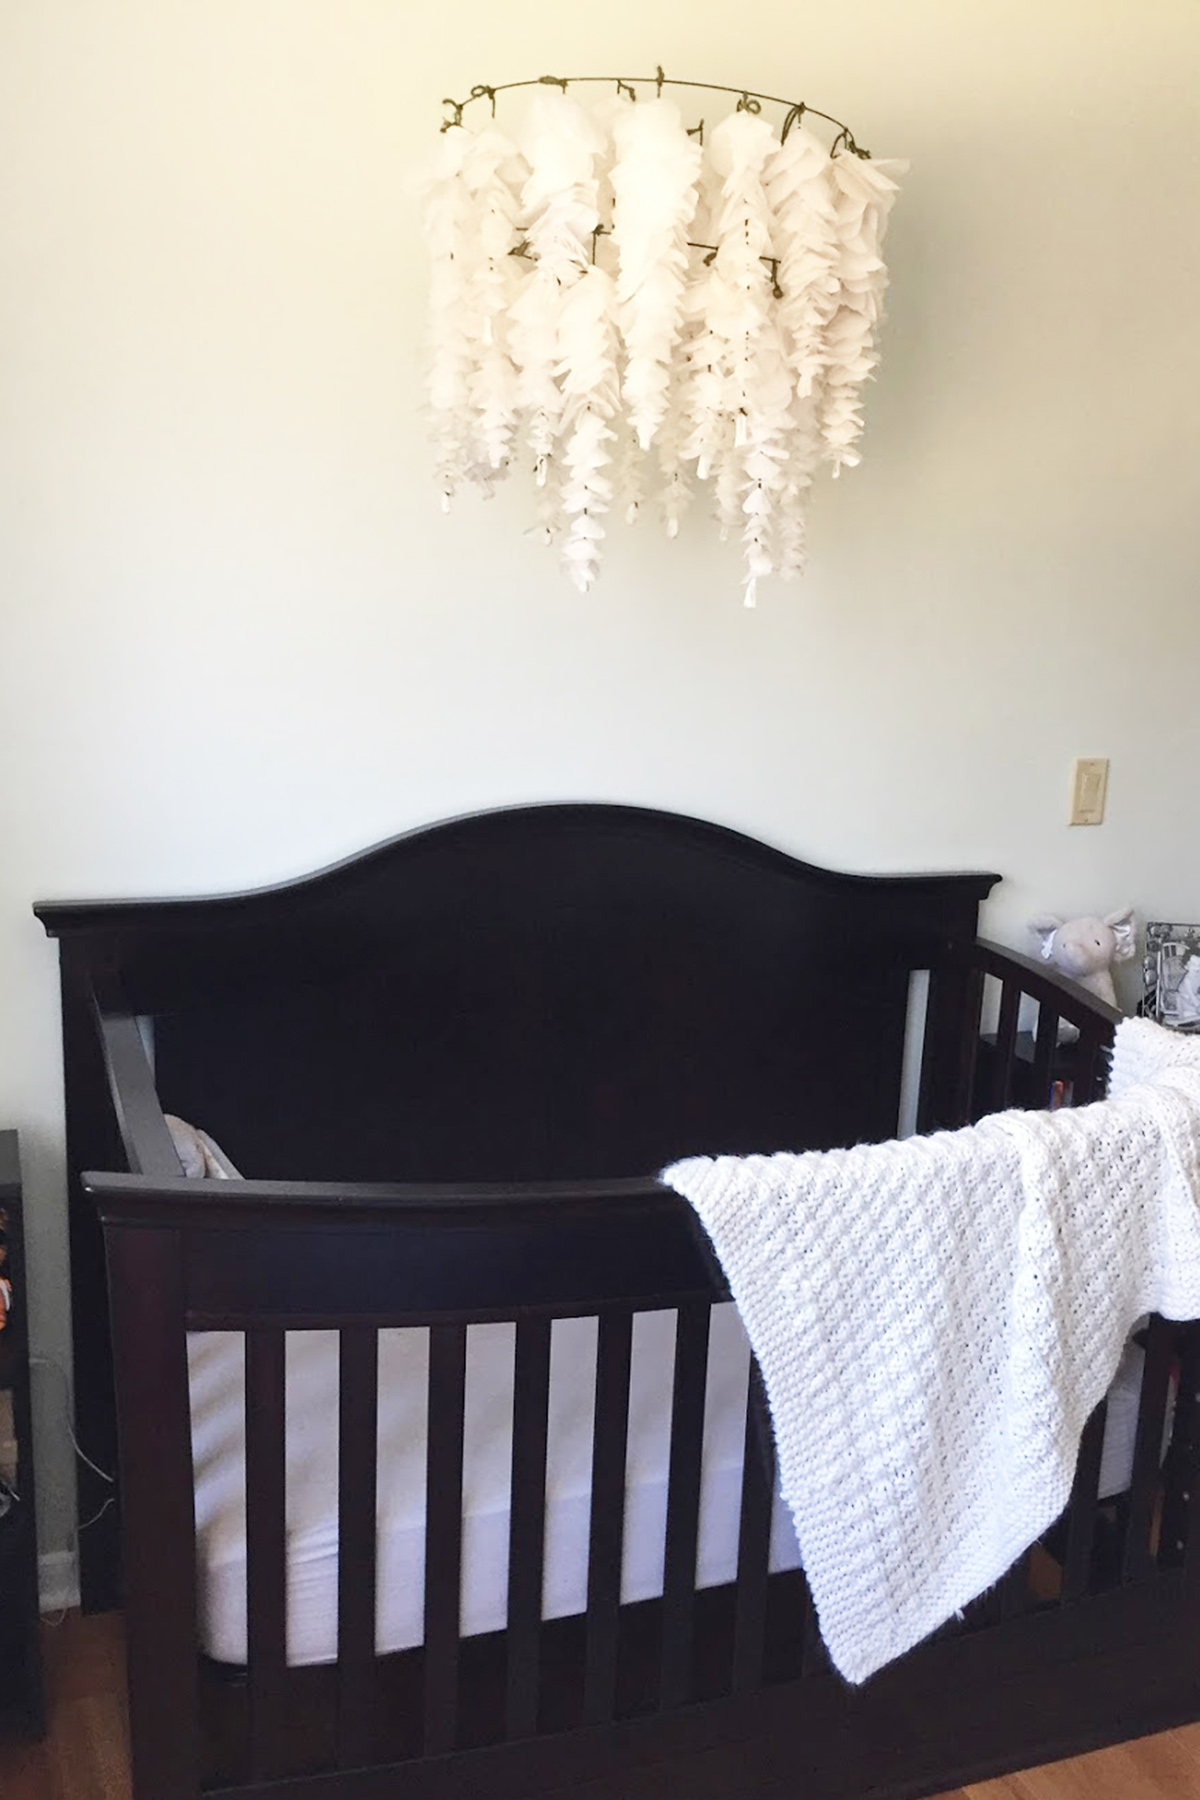

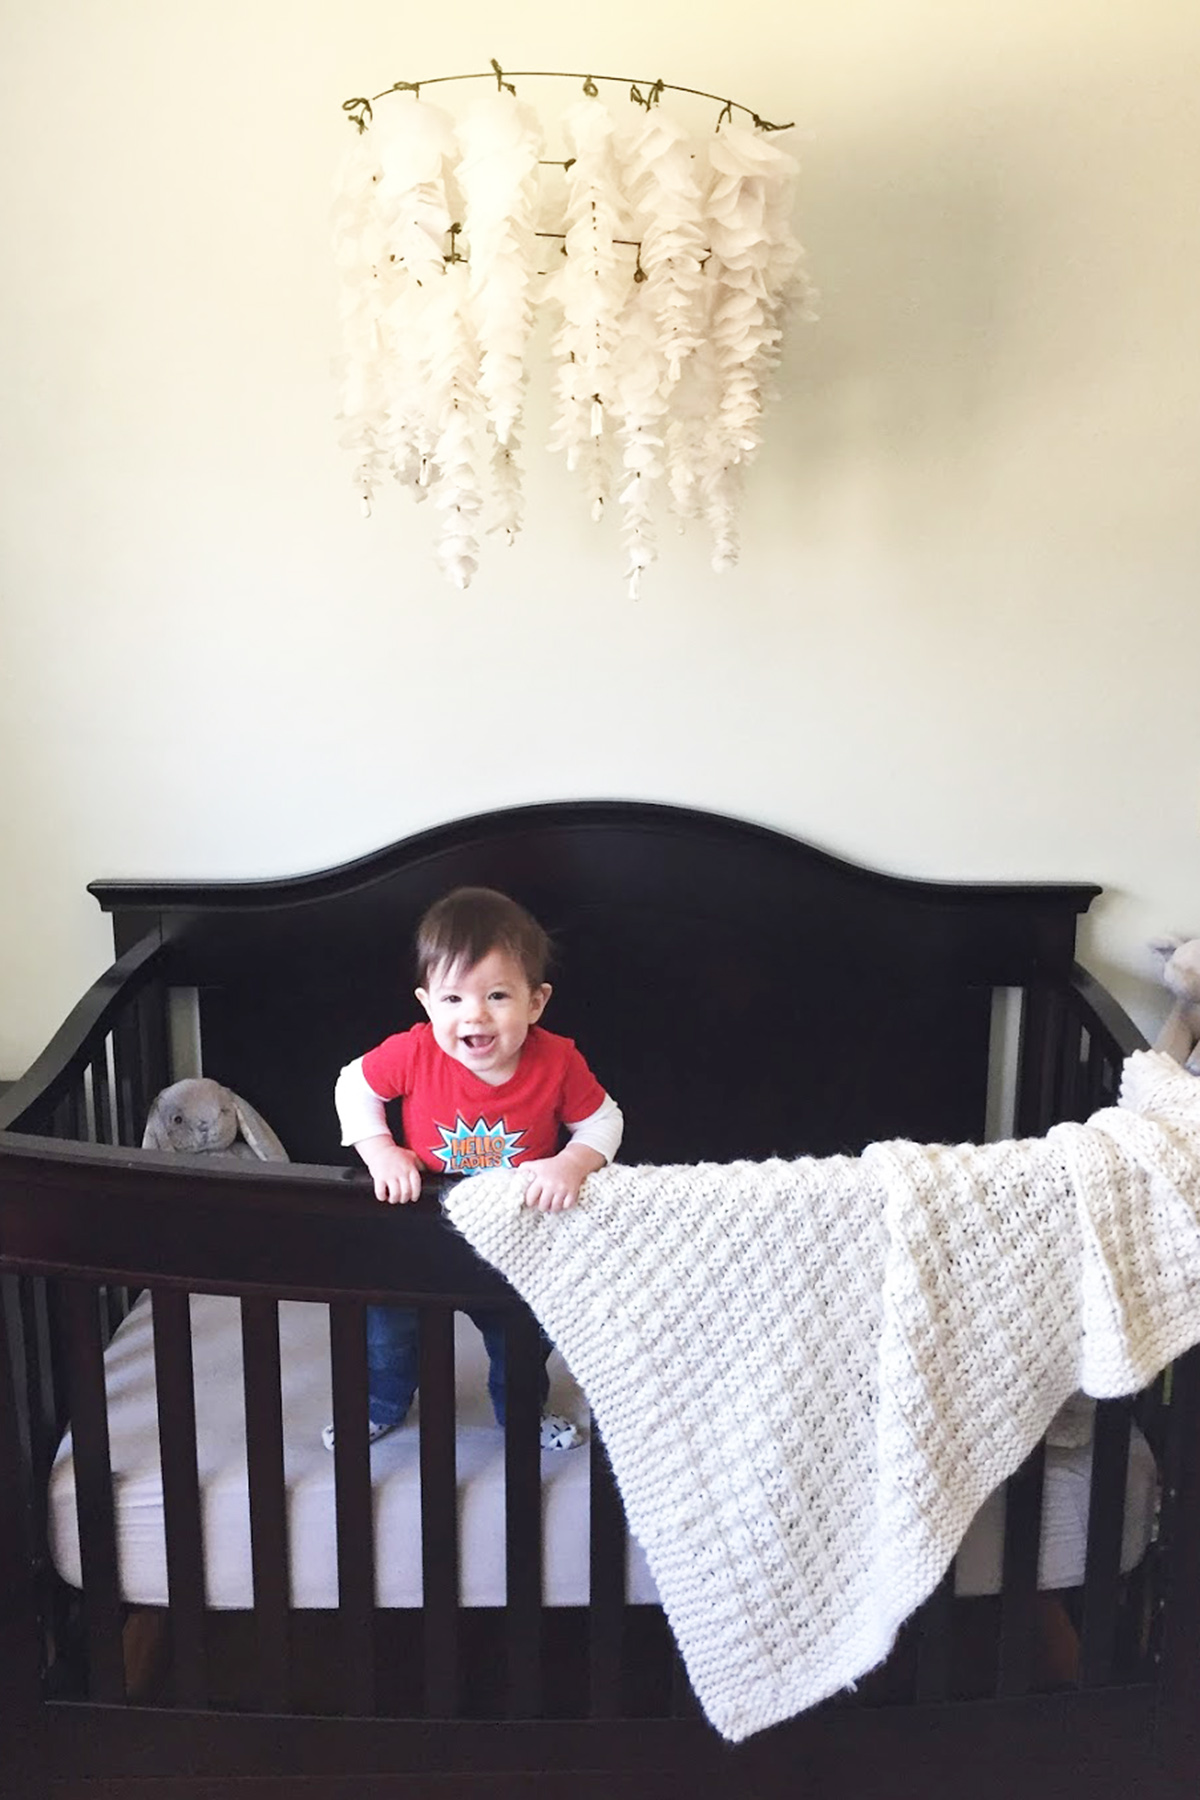
The sentimental value of them being made for our wedding meant that I couldn’t get rid of them, much to my parent’s dismay (since their basement was the lucky winner of storing them). Finally, I came up with a re-use for the next chapter of our life: A DIY baby mobile.
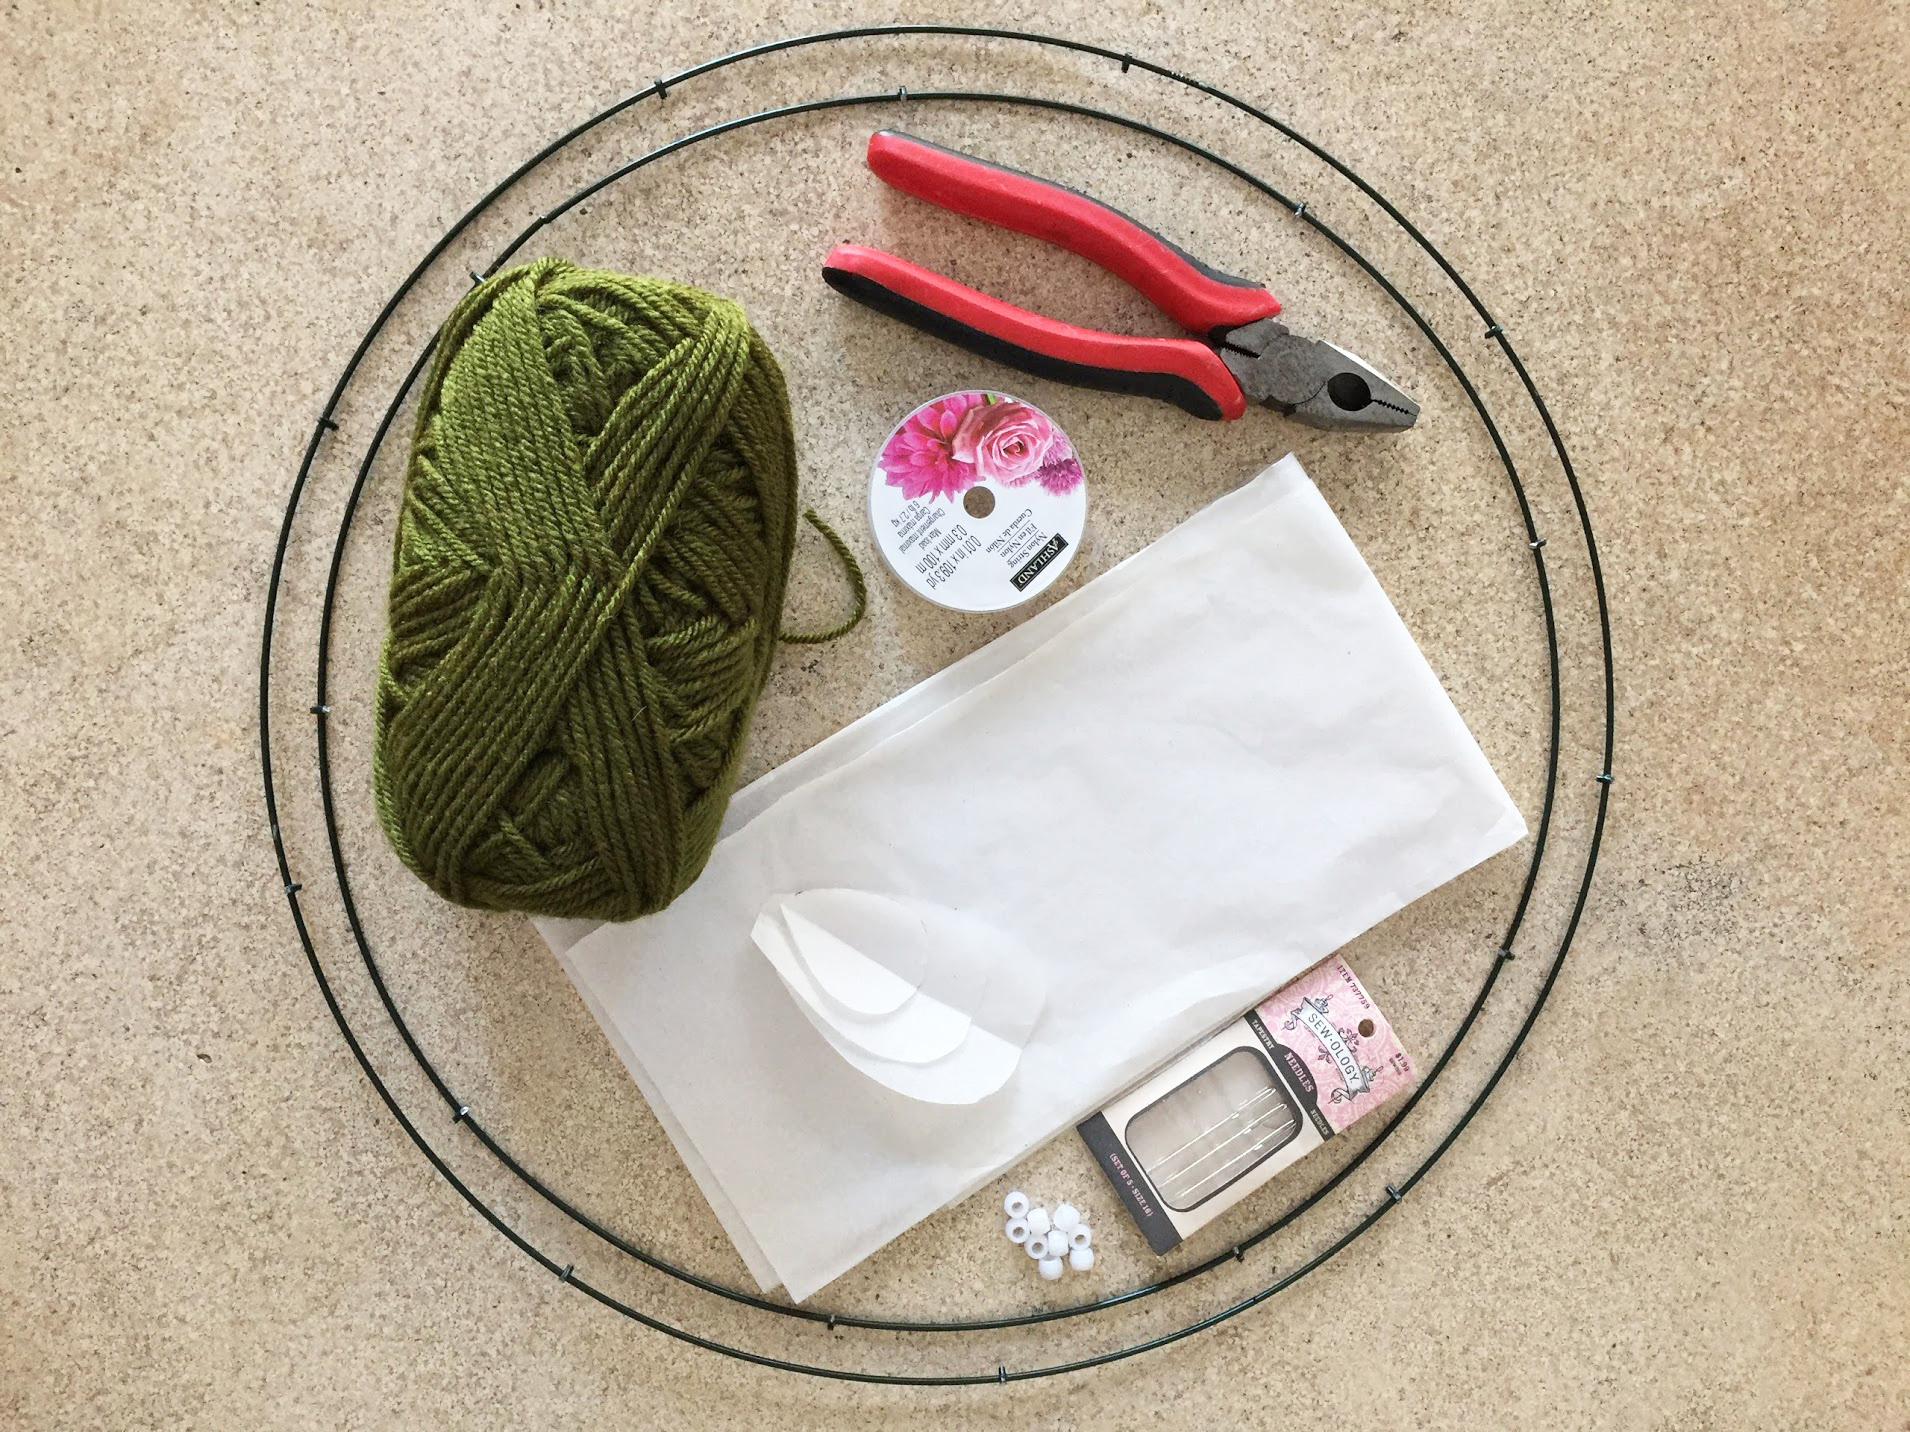
– Wreath form pulled apart – you’ll need two different-sized hoops
– Pliers (I used needle nose & Lineman’s because that’s what I had on hand)
– Gift wrap tissue (I used white)
– Acrylic beads the same color as your tissue (any inexpensive bead will work)
– Green yarn
– Nylon string/fishing line
– Ceiling hook
– Tapestry needle (thick enough to thread your yarn – I used size 16)
– Scissors
– Pen or pencil
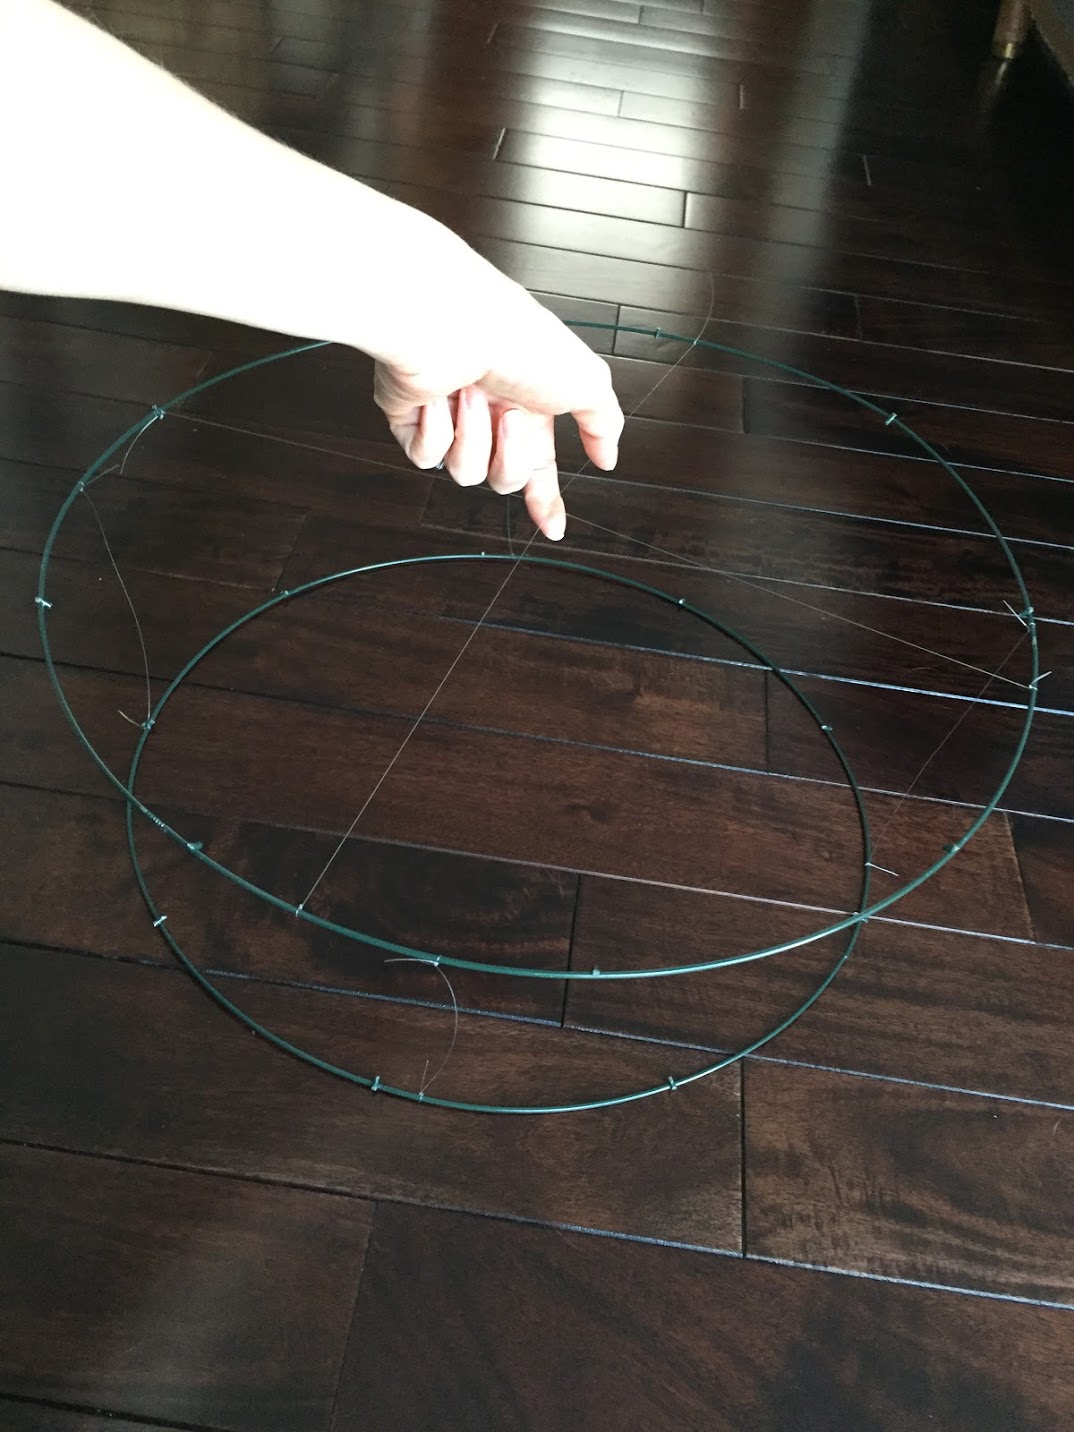
To start, pull apart your wreath form with pliers. I only needed half of the form to make two tiers, but customize to your liking… or patience level.
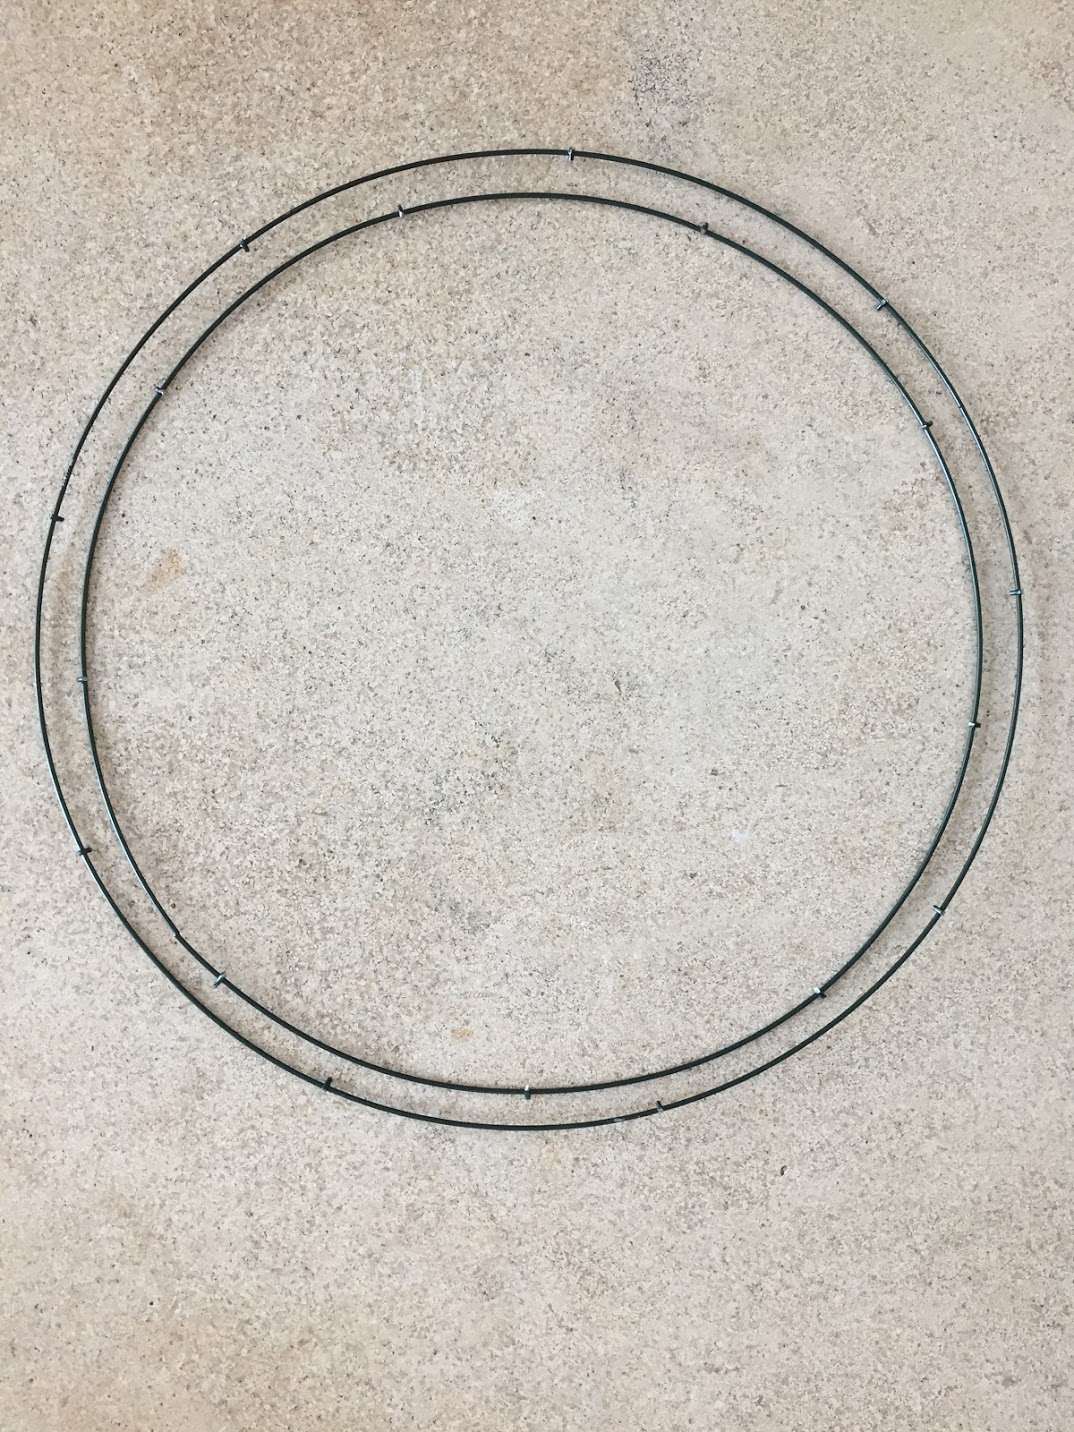
Once disassembled, you should be left with three or four single hoops, depending on your form. Save the hoops with no hook attachments for future projects like this one.
Use the wire cutters on your pliers to cut off the hooks as closely to the hoop as possible. You’ll still be left with little wire nubs, but you’re going to be tying yarn over the nubs, so you won’t ever see them (be careful because the nubs are sharp).
If you choose to spray paint the hoops, now’s the time. I kept mine dark green so they blended with the green yarn.
Now hunker down and put on a movie or music because this is the time-consuming bit! I felt it was easiest to cut out a ton of tissue petals all at once so I could set up an assembly line.
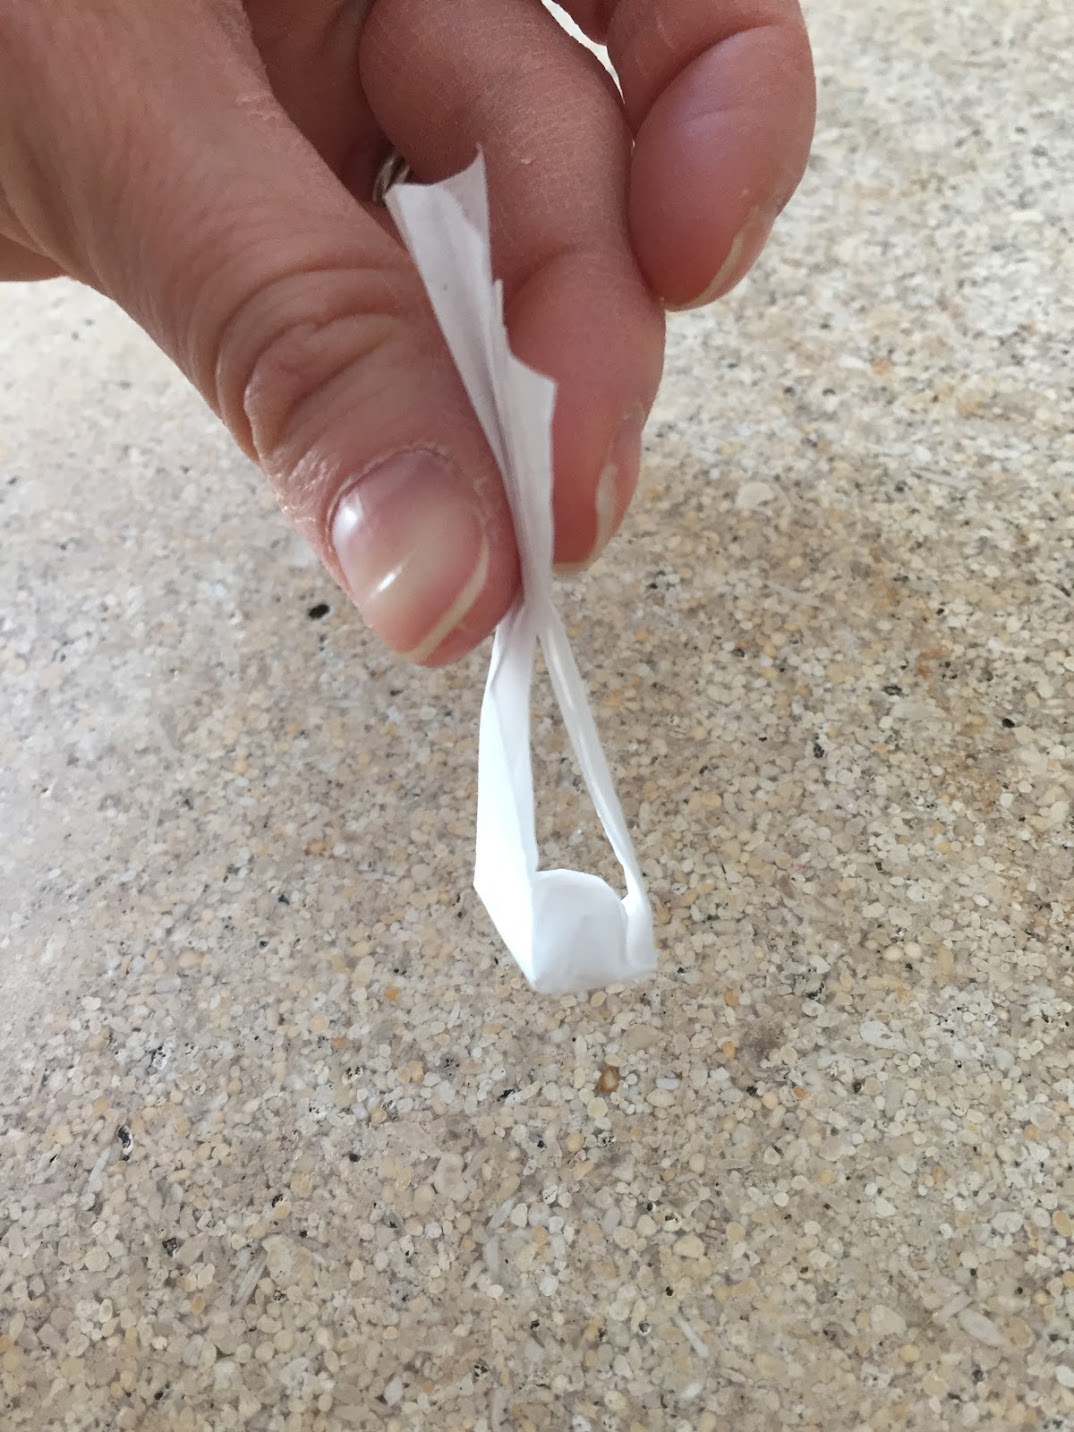
First, fold your tissue sheets accordion style so you can cut out many petals at once. Free-hand a teardrop shape, and cut. I wouldn’t waste time trying to make one as a tracer – that gets a little difficult with tissue, plus, variety makes these look more interesting.
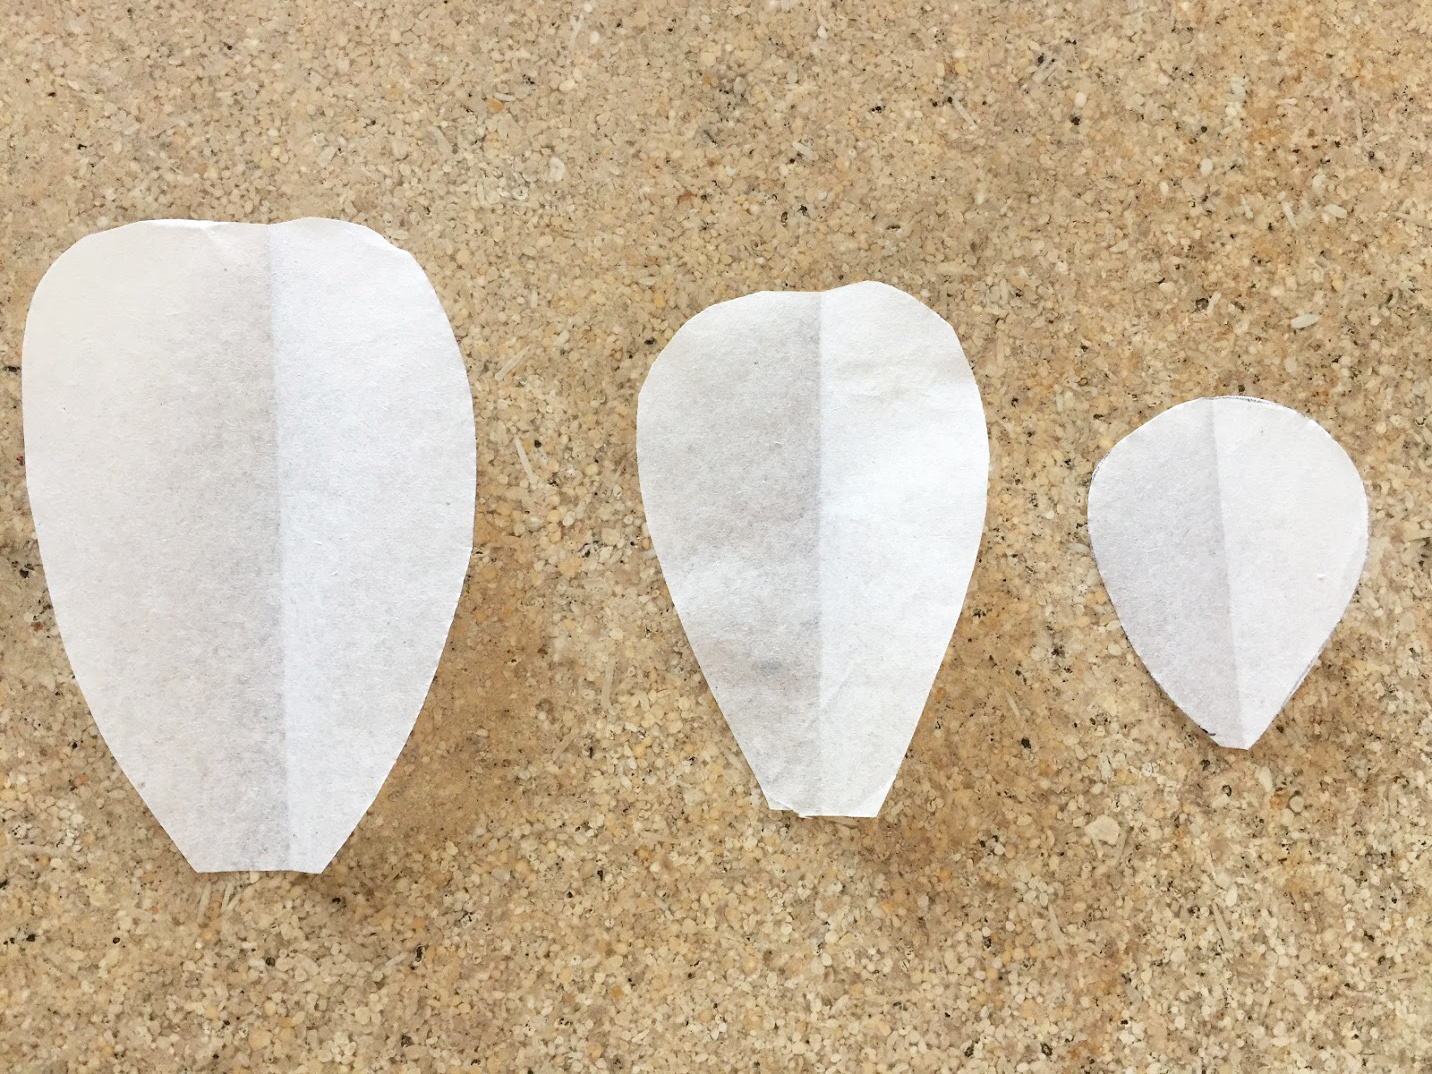
You should make about three different sizes: Small, medium and large. Lengthwise, mine measured between 1.5 and 3.5 inches, but the sizes varied quite a bit. After you’ve made a good amount, stack a few together and fold them in half lengthwise so you get a crease down the center of the petal and set aside.
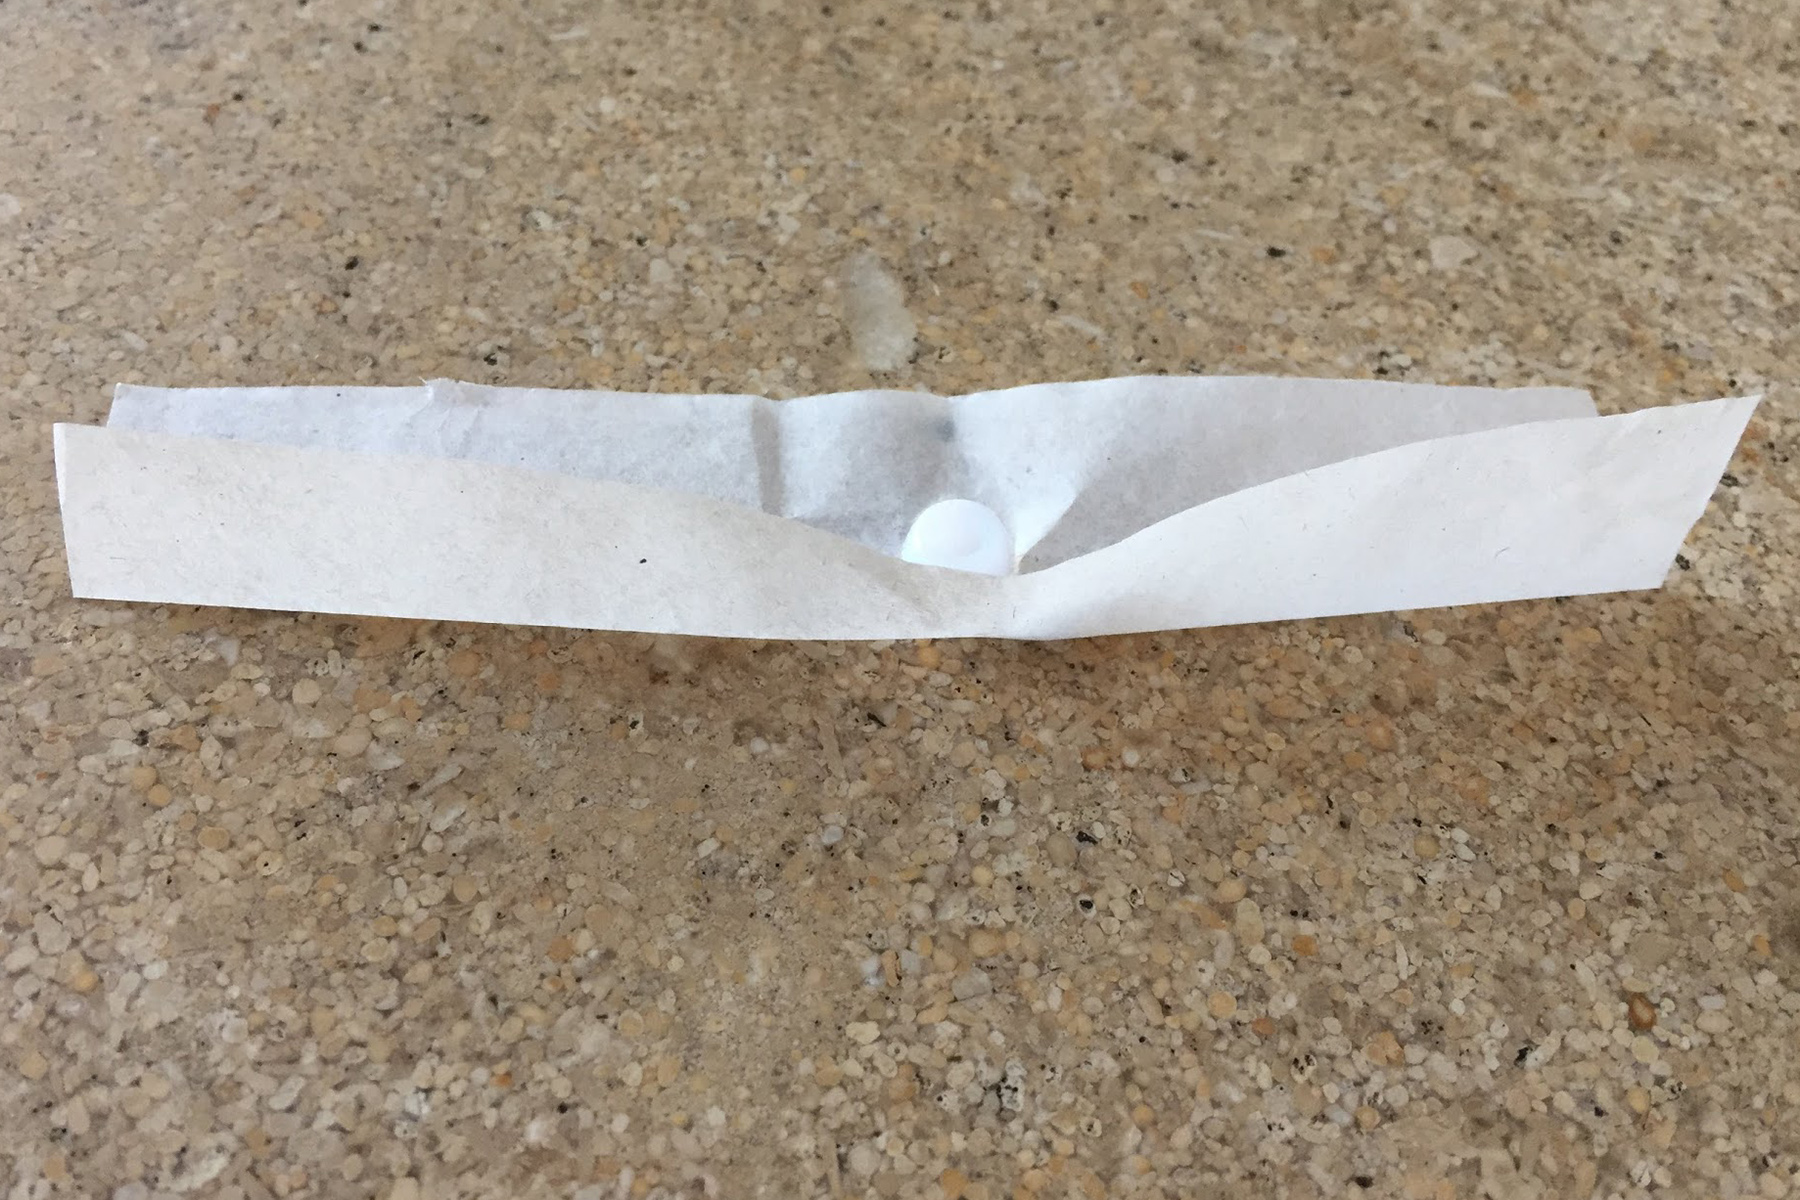
Next, cut out little strips of tissue for the bud at the bottom of the stem, about 3/4 by 3 inches, and set aside.

Once you have a stack of each size of the petals and strips for the buds, it’s time to start assembling the flower.
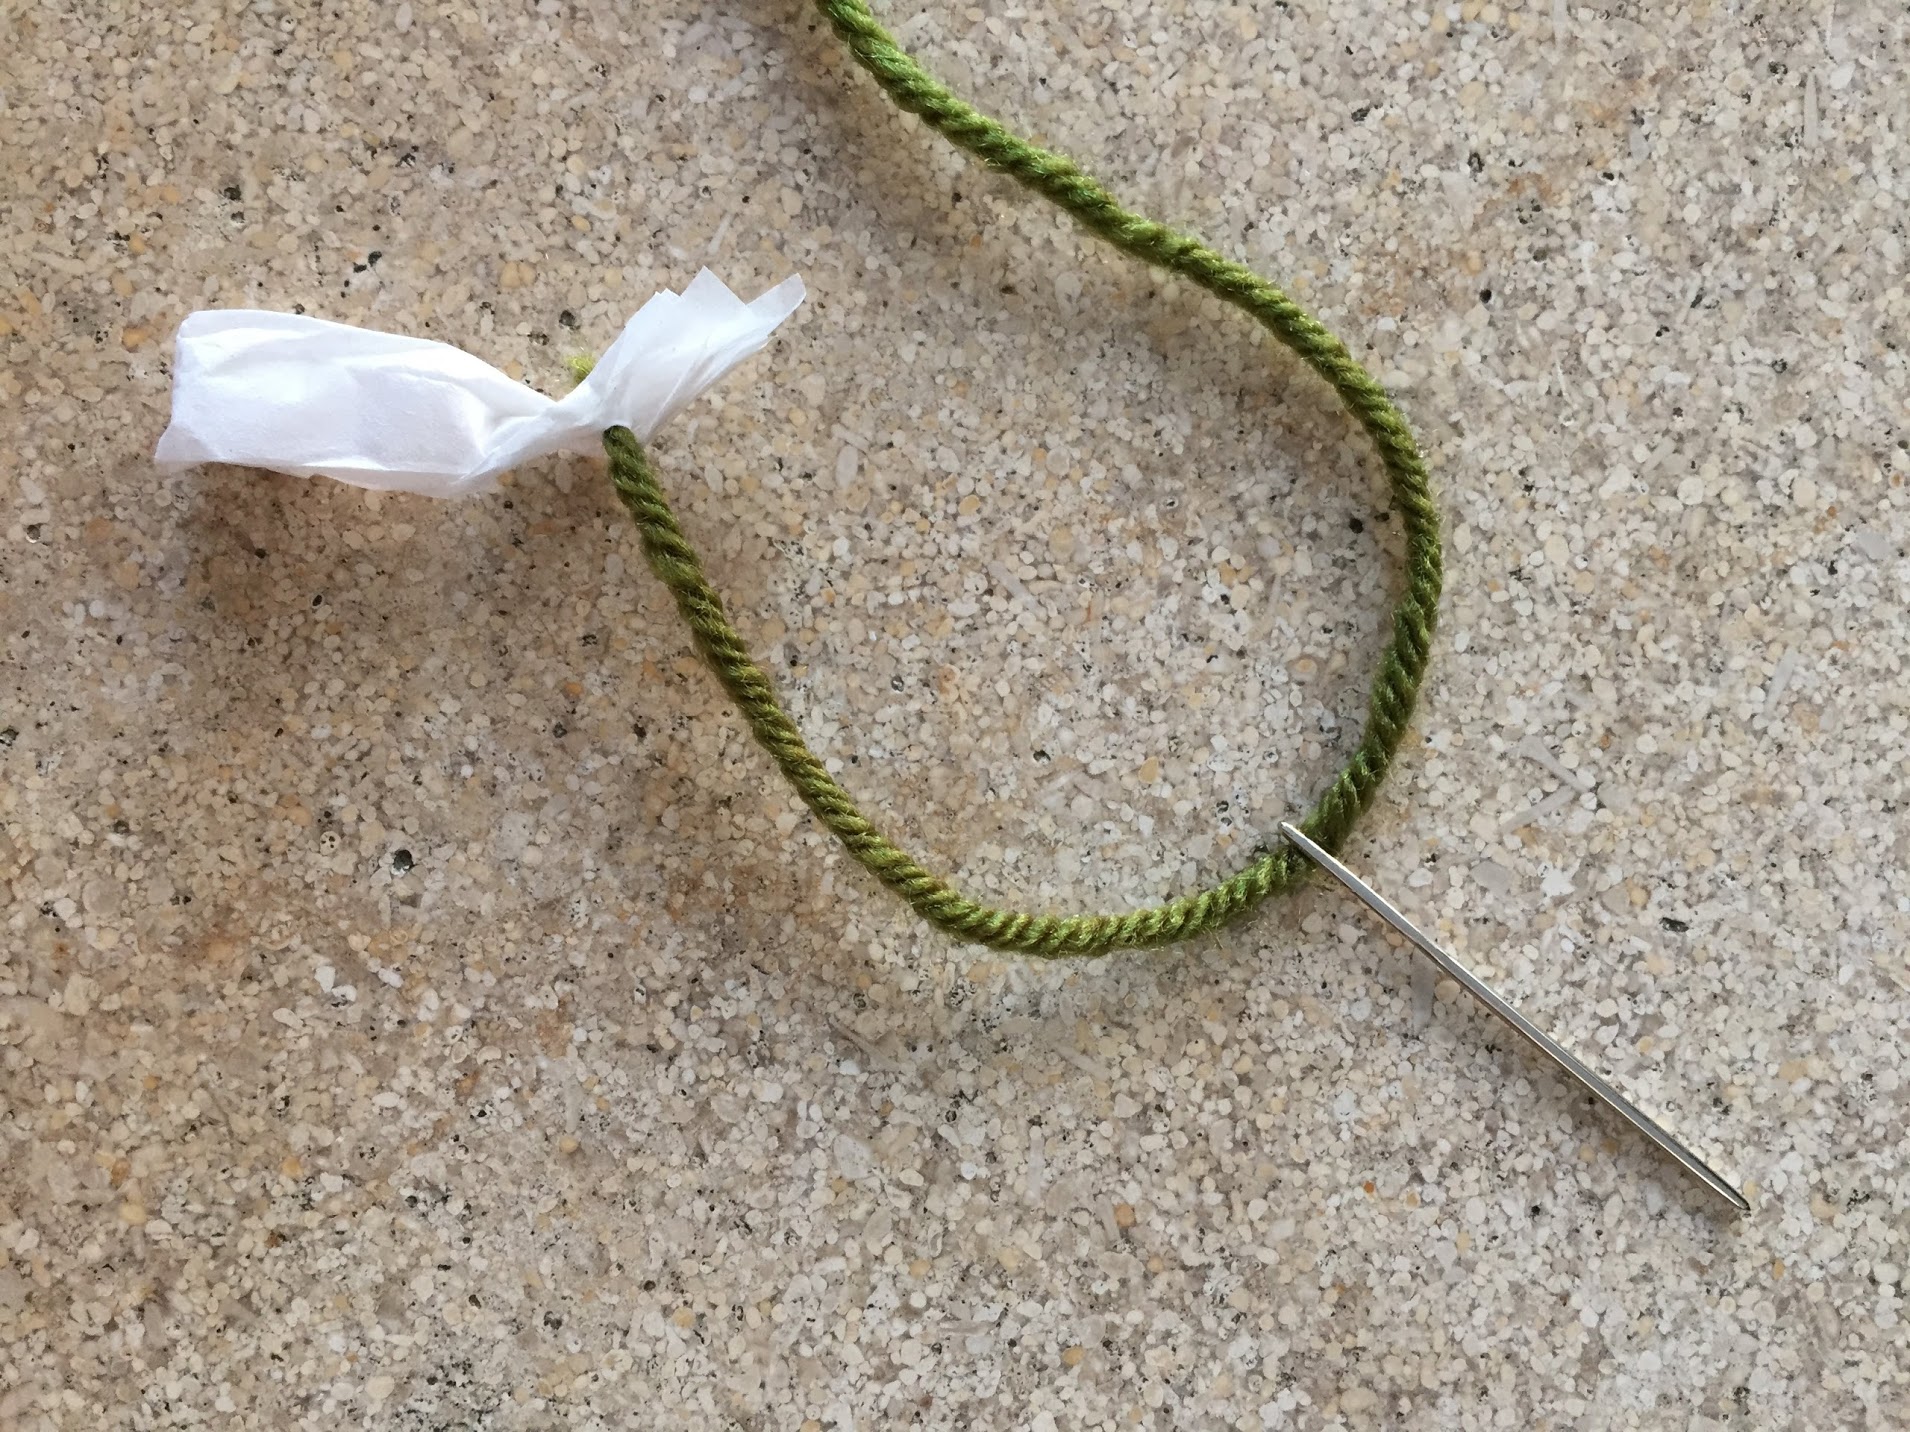
Your yarn will act as the stem of each flower. Cut different lengths to get a variety of sizes (mine measured anywhere between 7 & 17 inches). Take one piece of yarn and thread it through your tapestry needle and tie a tiny knot at one end – set aside.
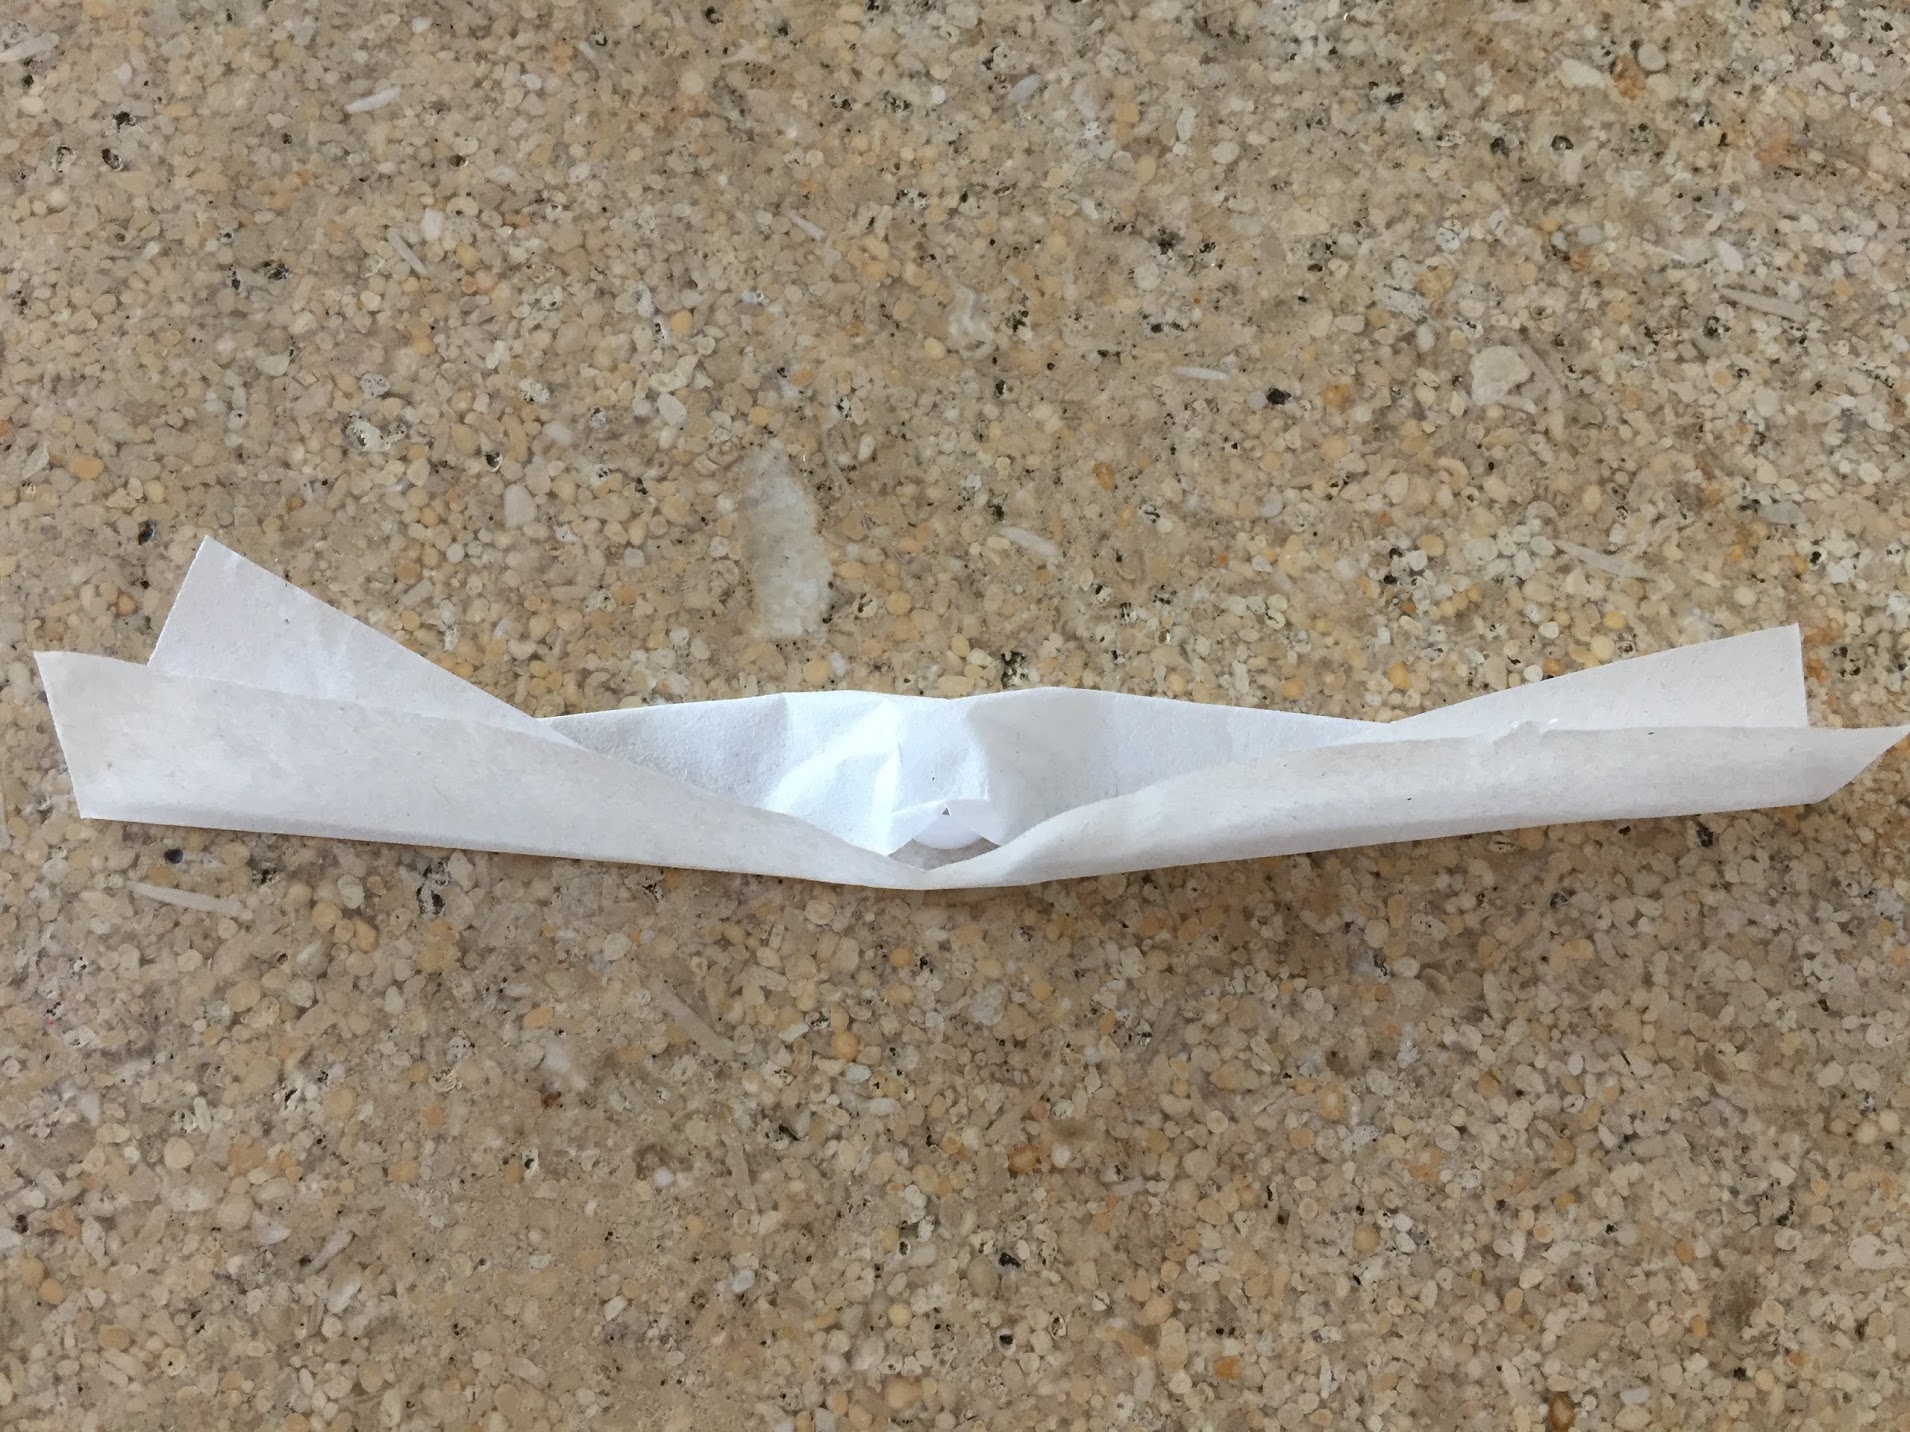
Then, start to make the bud: Take one bead, set it in the center of a strip of tissue, wrap it up and twist slightly at the top to keep the bead tucked away. Put your needle through the twist to hold it closed and slip on the bud toward the knot.
Now you can start adding your petals.
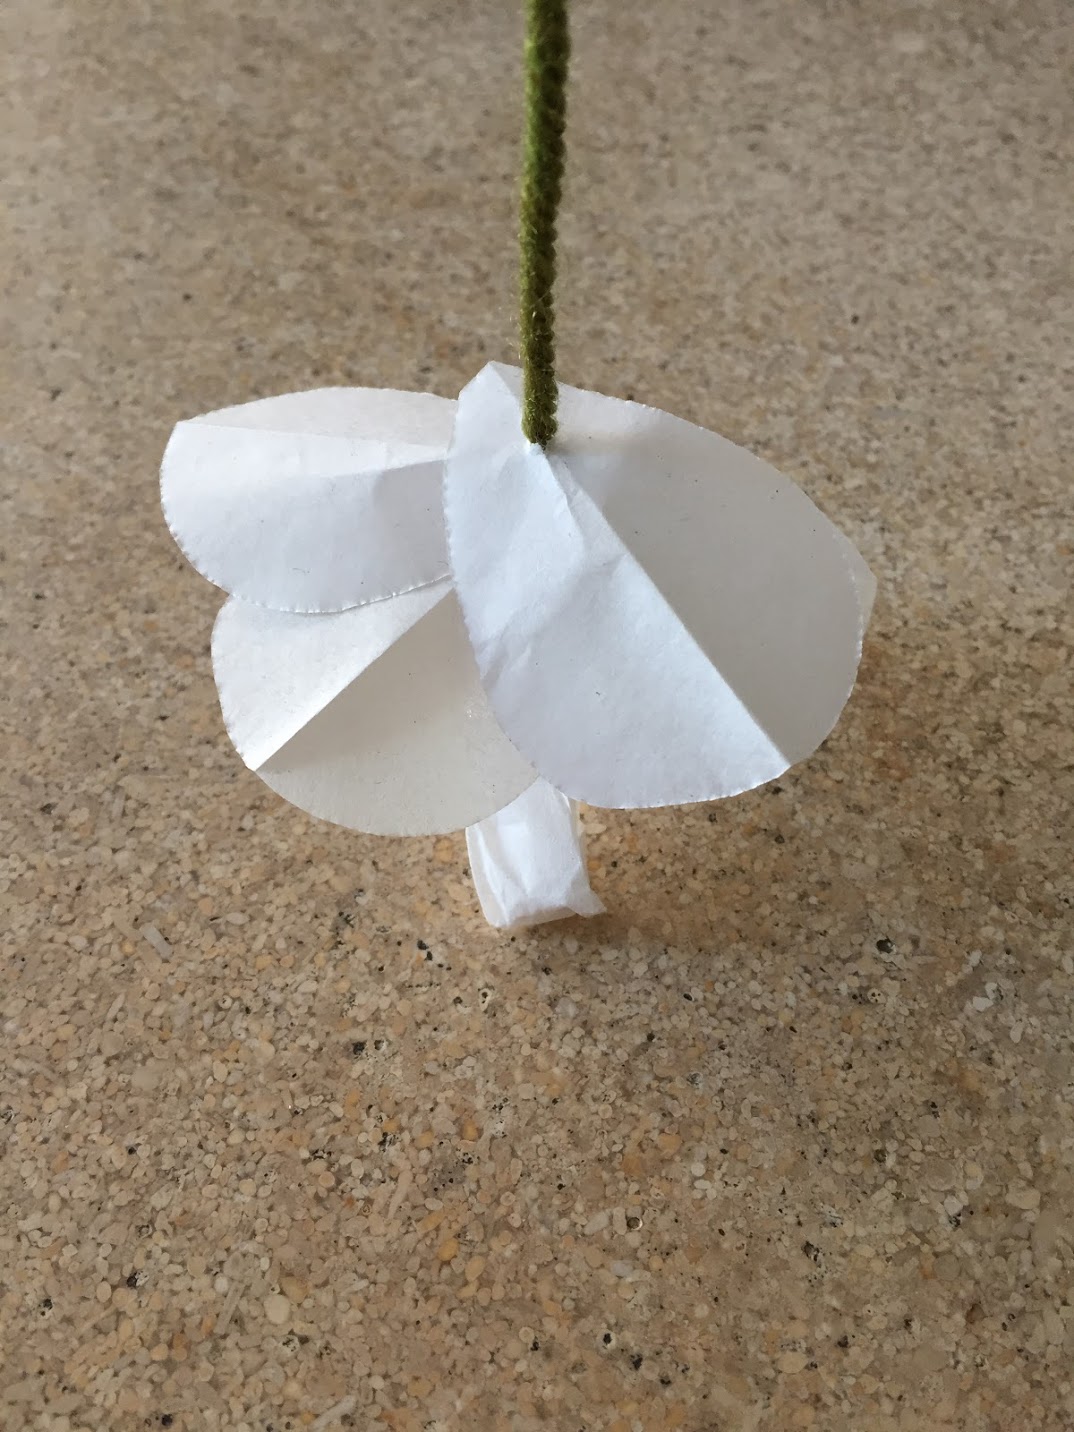
You’ll be working from the bottom up, so start with about five small petals and thread your needle through the small end of the teardrops, crease opening down to give your flower more volume. Fan them out and adjust where they lay on the stem as needed.
Continue with more small petals, then move on to medium and large. Some of the flowers I made were very uniform with the same number of small, medium and large petals, whereas others varied. It all depends on the look you like.
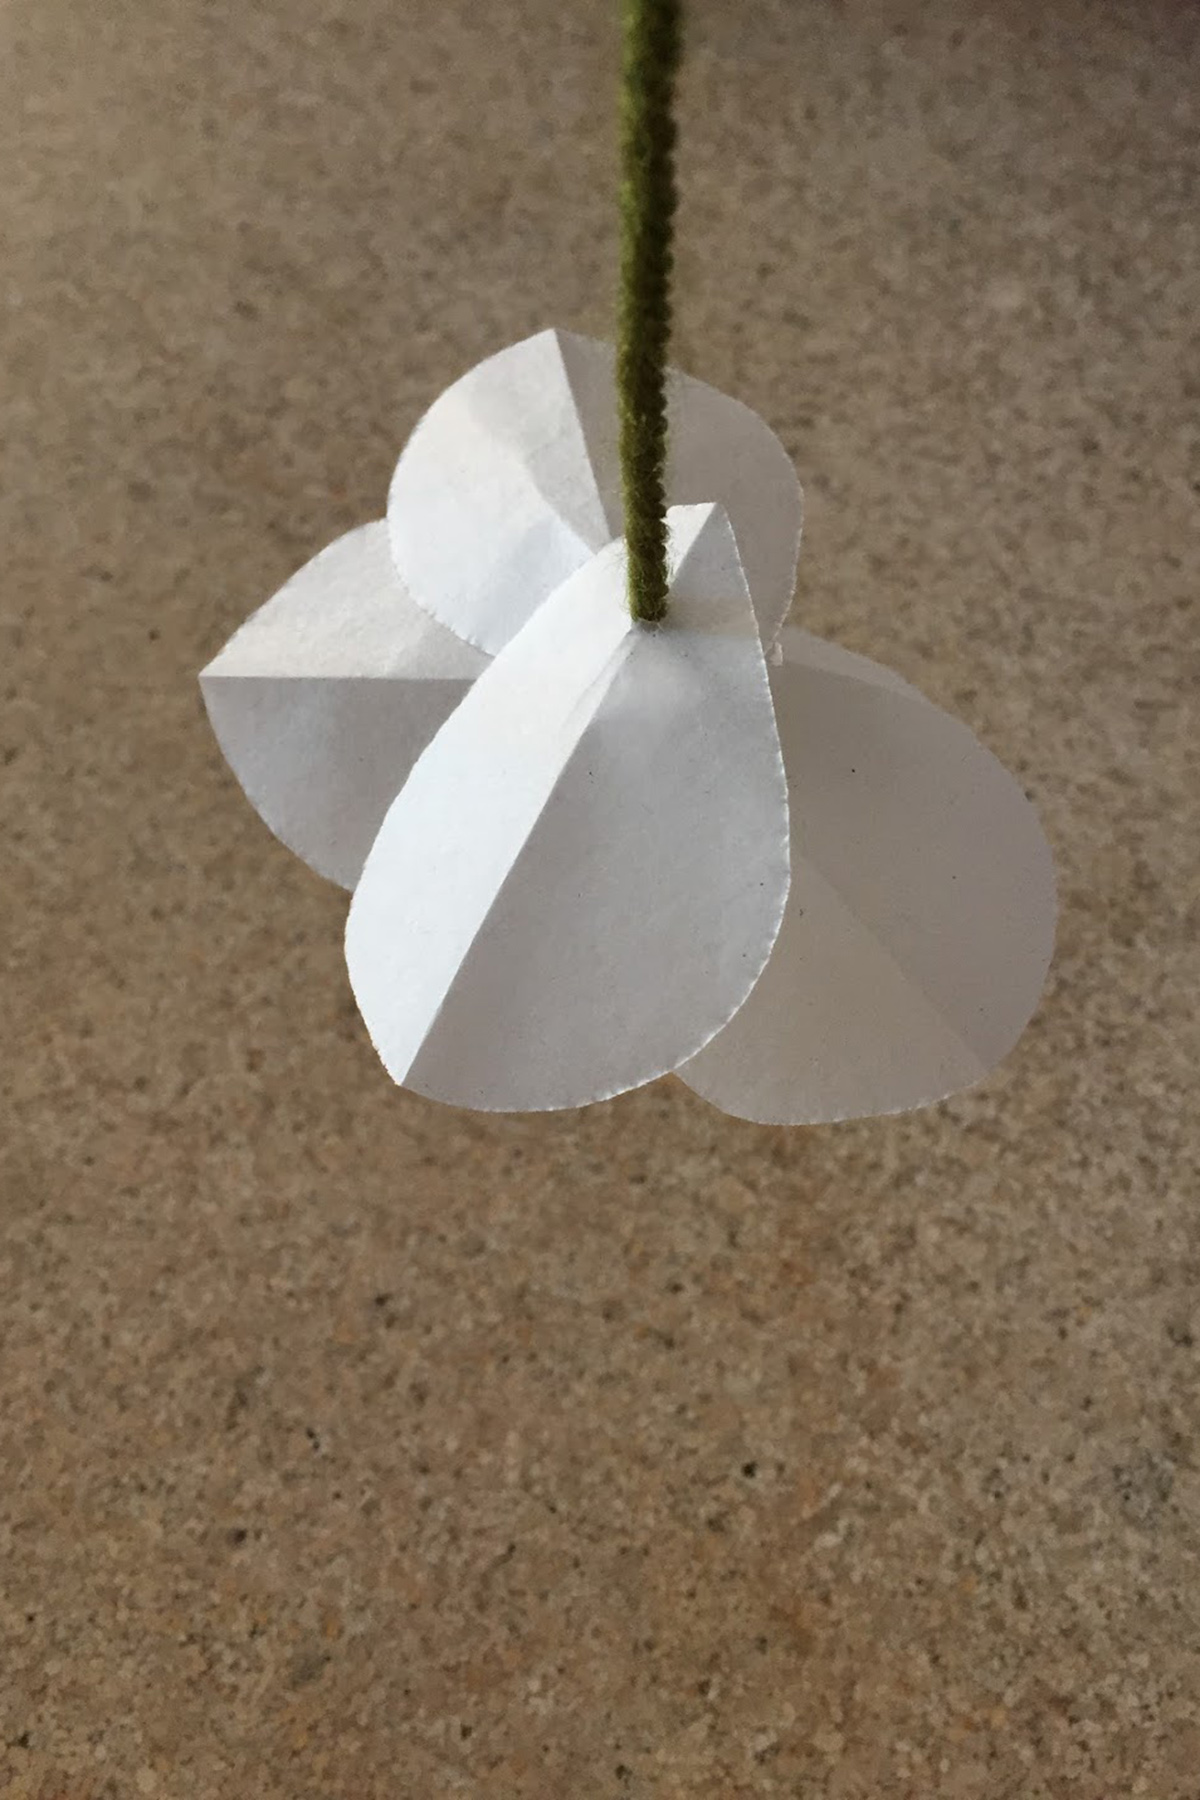
Because I originally made mine to be hooked onto branches, I knotted a loop at the top of each flower. However, for the baby mobile, simply tie them to the hoop – no loop necessary.
I used anywhere from fifteen to thirty flowers per hoop. Since I used two hoops, that means I needed about thirty to sixty flowers for the mobile total. You can make a goal of thirty flowers to start, then if you realize it’s not enough while assembling, it’s easy to go back and make more.
Now… it’s assembly time. (Whether you’re making a baby mobile, light fixture, wall hanging or whatever, these steps are relatively the same.)
Even after making a few of these, I still can’t decide if attaching the hoops together first, or tying on all the flowers first and then attaching the hoops is easier. Do whichever makes sense to you.
Place your two separated hoops together on the ground, one inside the other, and tie them together with nylon string.
I used four of the same length string to attach them. Hold it up and eyeball it to make sure the space between the two hoops is even. NOTE: This doesn’t have to be perfect since the flowers cover so much of it. I found it all evens out in the end.
Then, take two long pieces of nylon string and tie each straight across the large hoop, crossing them at the middle – this is necessary for hanging.
When you’re ready to hang, cut one very long nylon string, and tie one end to the intersection of strings in the center of the large hoop. Leave it extra long until you know how high you want it to hang. If you’d like, loosely tie the long string to a hanger to help you suspend the mobile in order to tie on your flowers.
Attach flowers one by one to each hoop, using a simple knot. I recommend starting with longer flowers first, spreading them out evenly and filling in between with medium and short. Since I had some leftover flowers, I also added five flowers to the nylon string crossing the top hoop, one to each quarter and one at the intersection of strings.
Trim any loose ends and it’s time to hang! It’s a lot of work, but it’s such a precious (and rewarding) addition to a nursery. As always, have patience, have fun (maybe have some wine!) and most of all, GOOD LUCK!

LOVE!!!!
I am going to try to
Make this for my sister in laws gift for her nursery. How long does it take to make? Hours total.


4 Comments