
Previous post
too many ideas. too little time. (and far too much chai.)

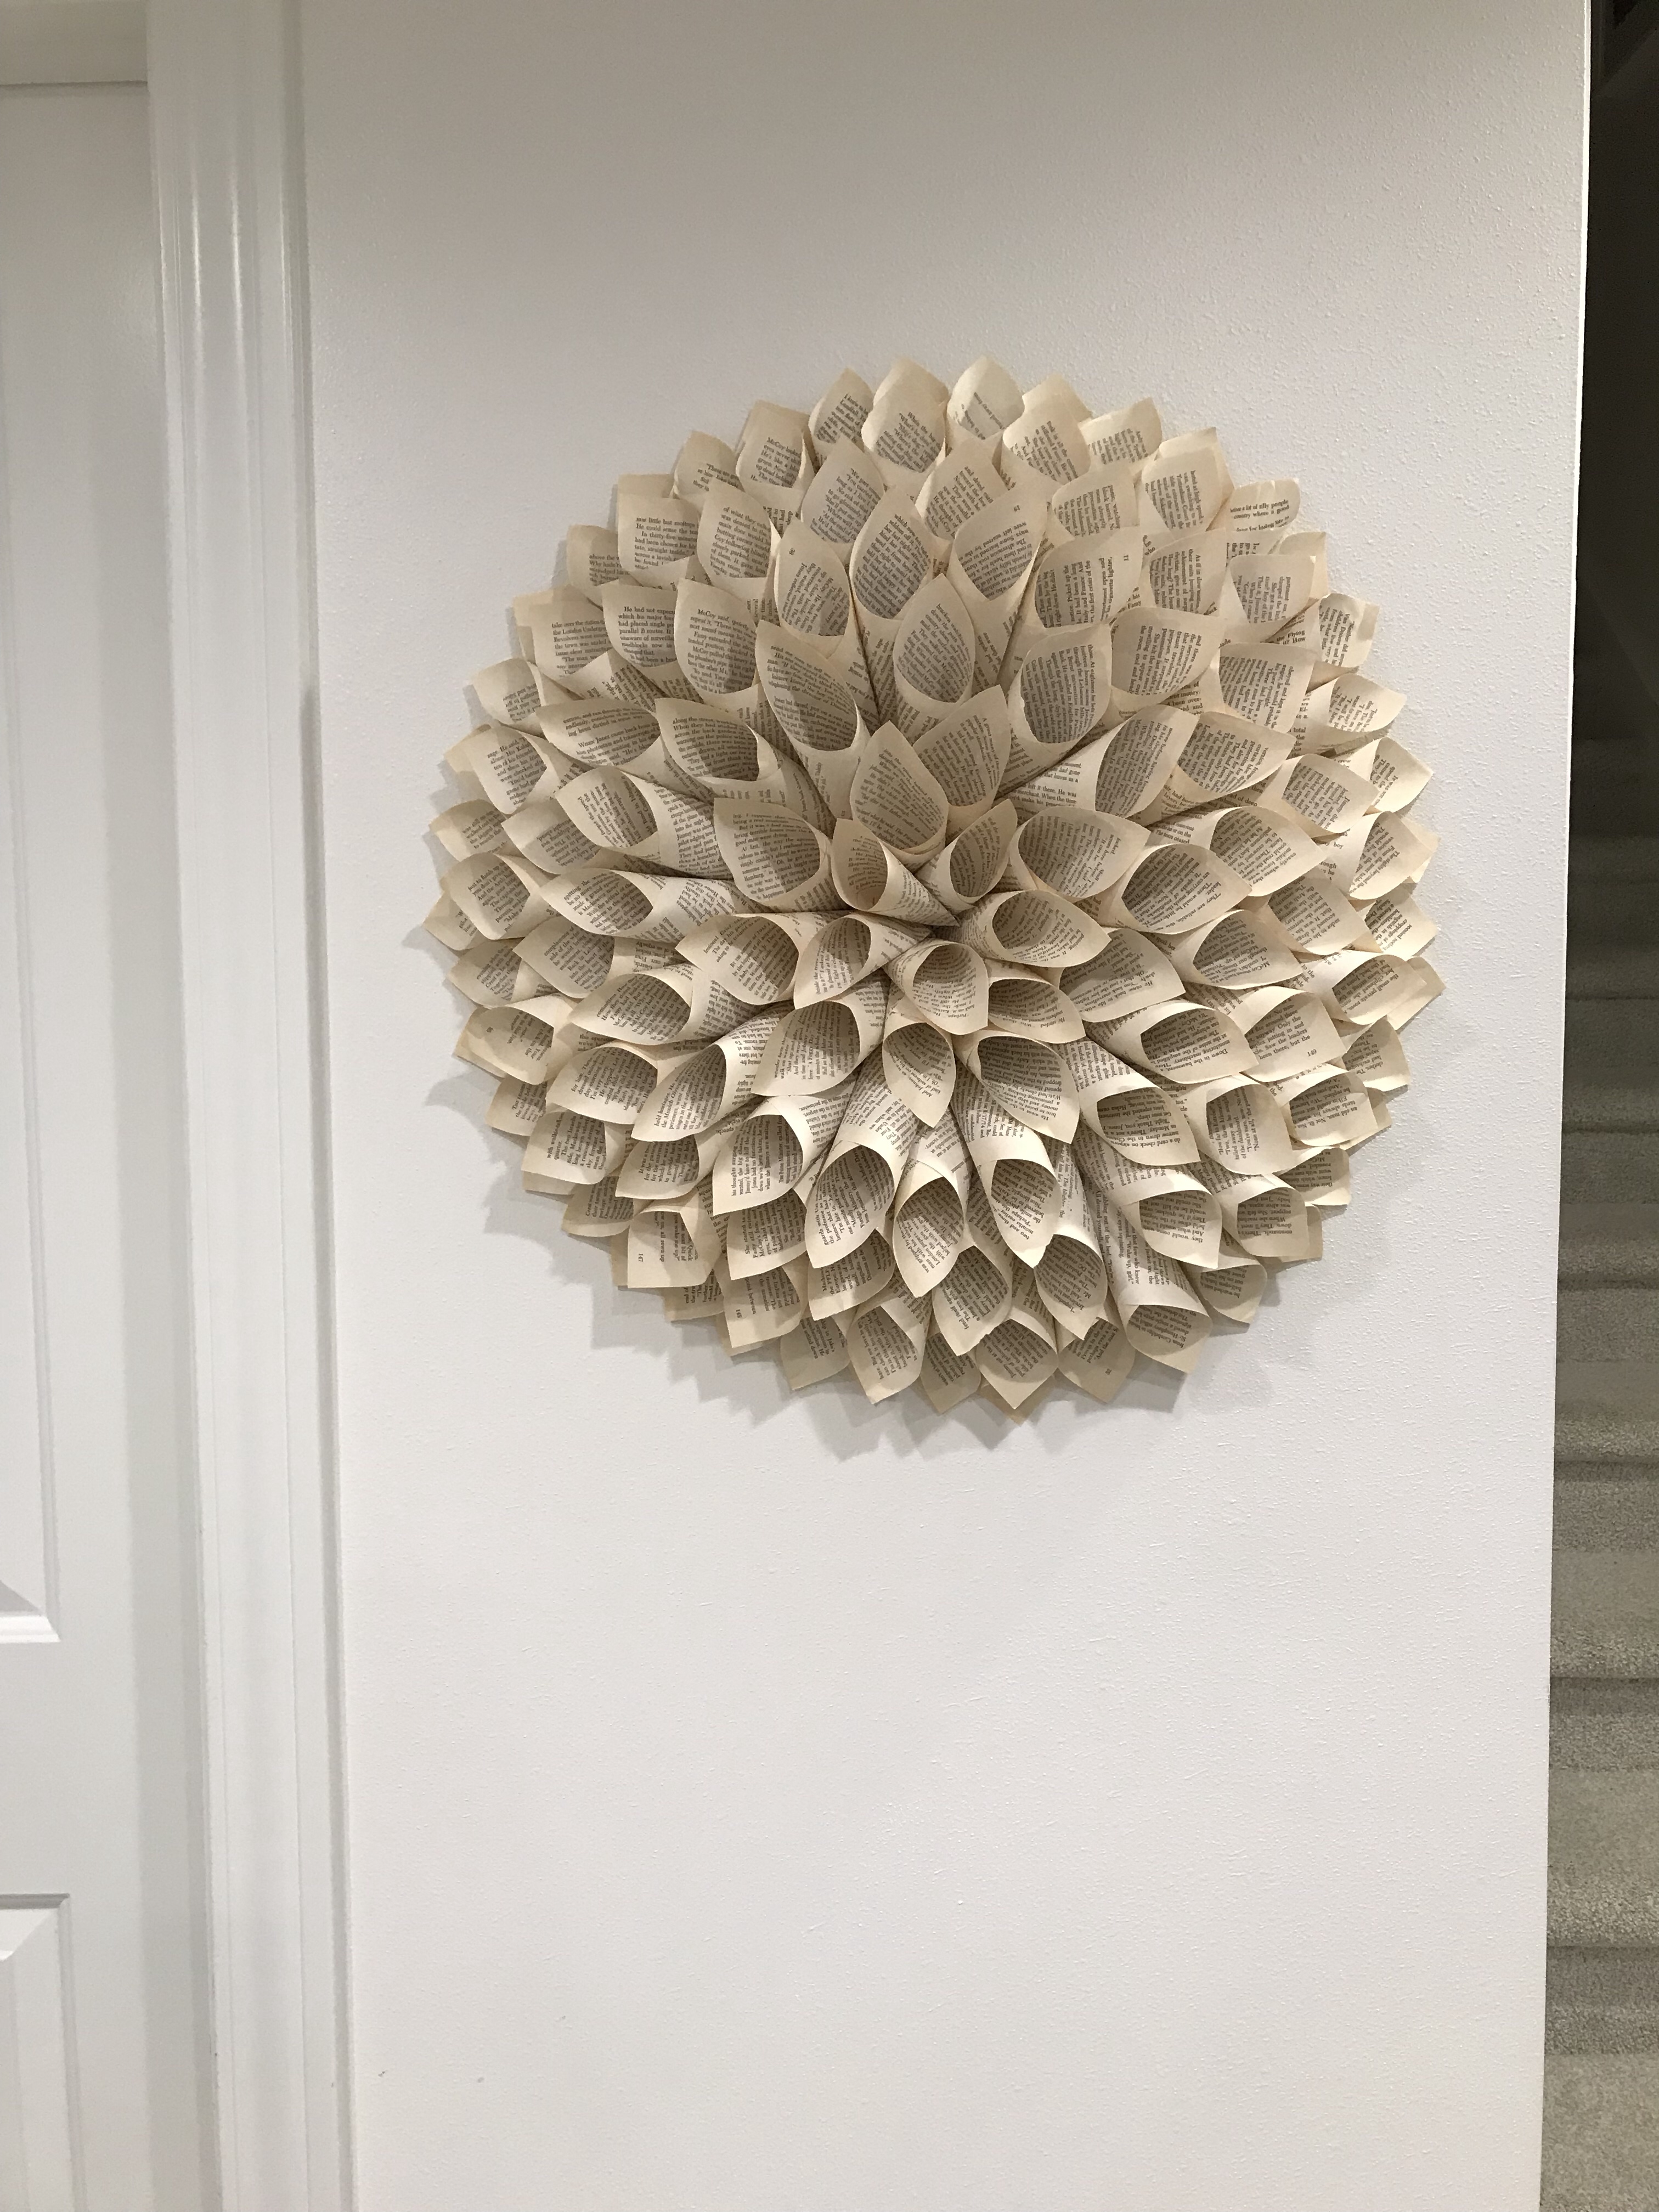
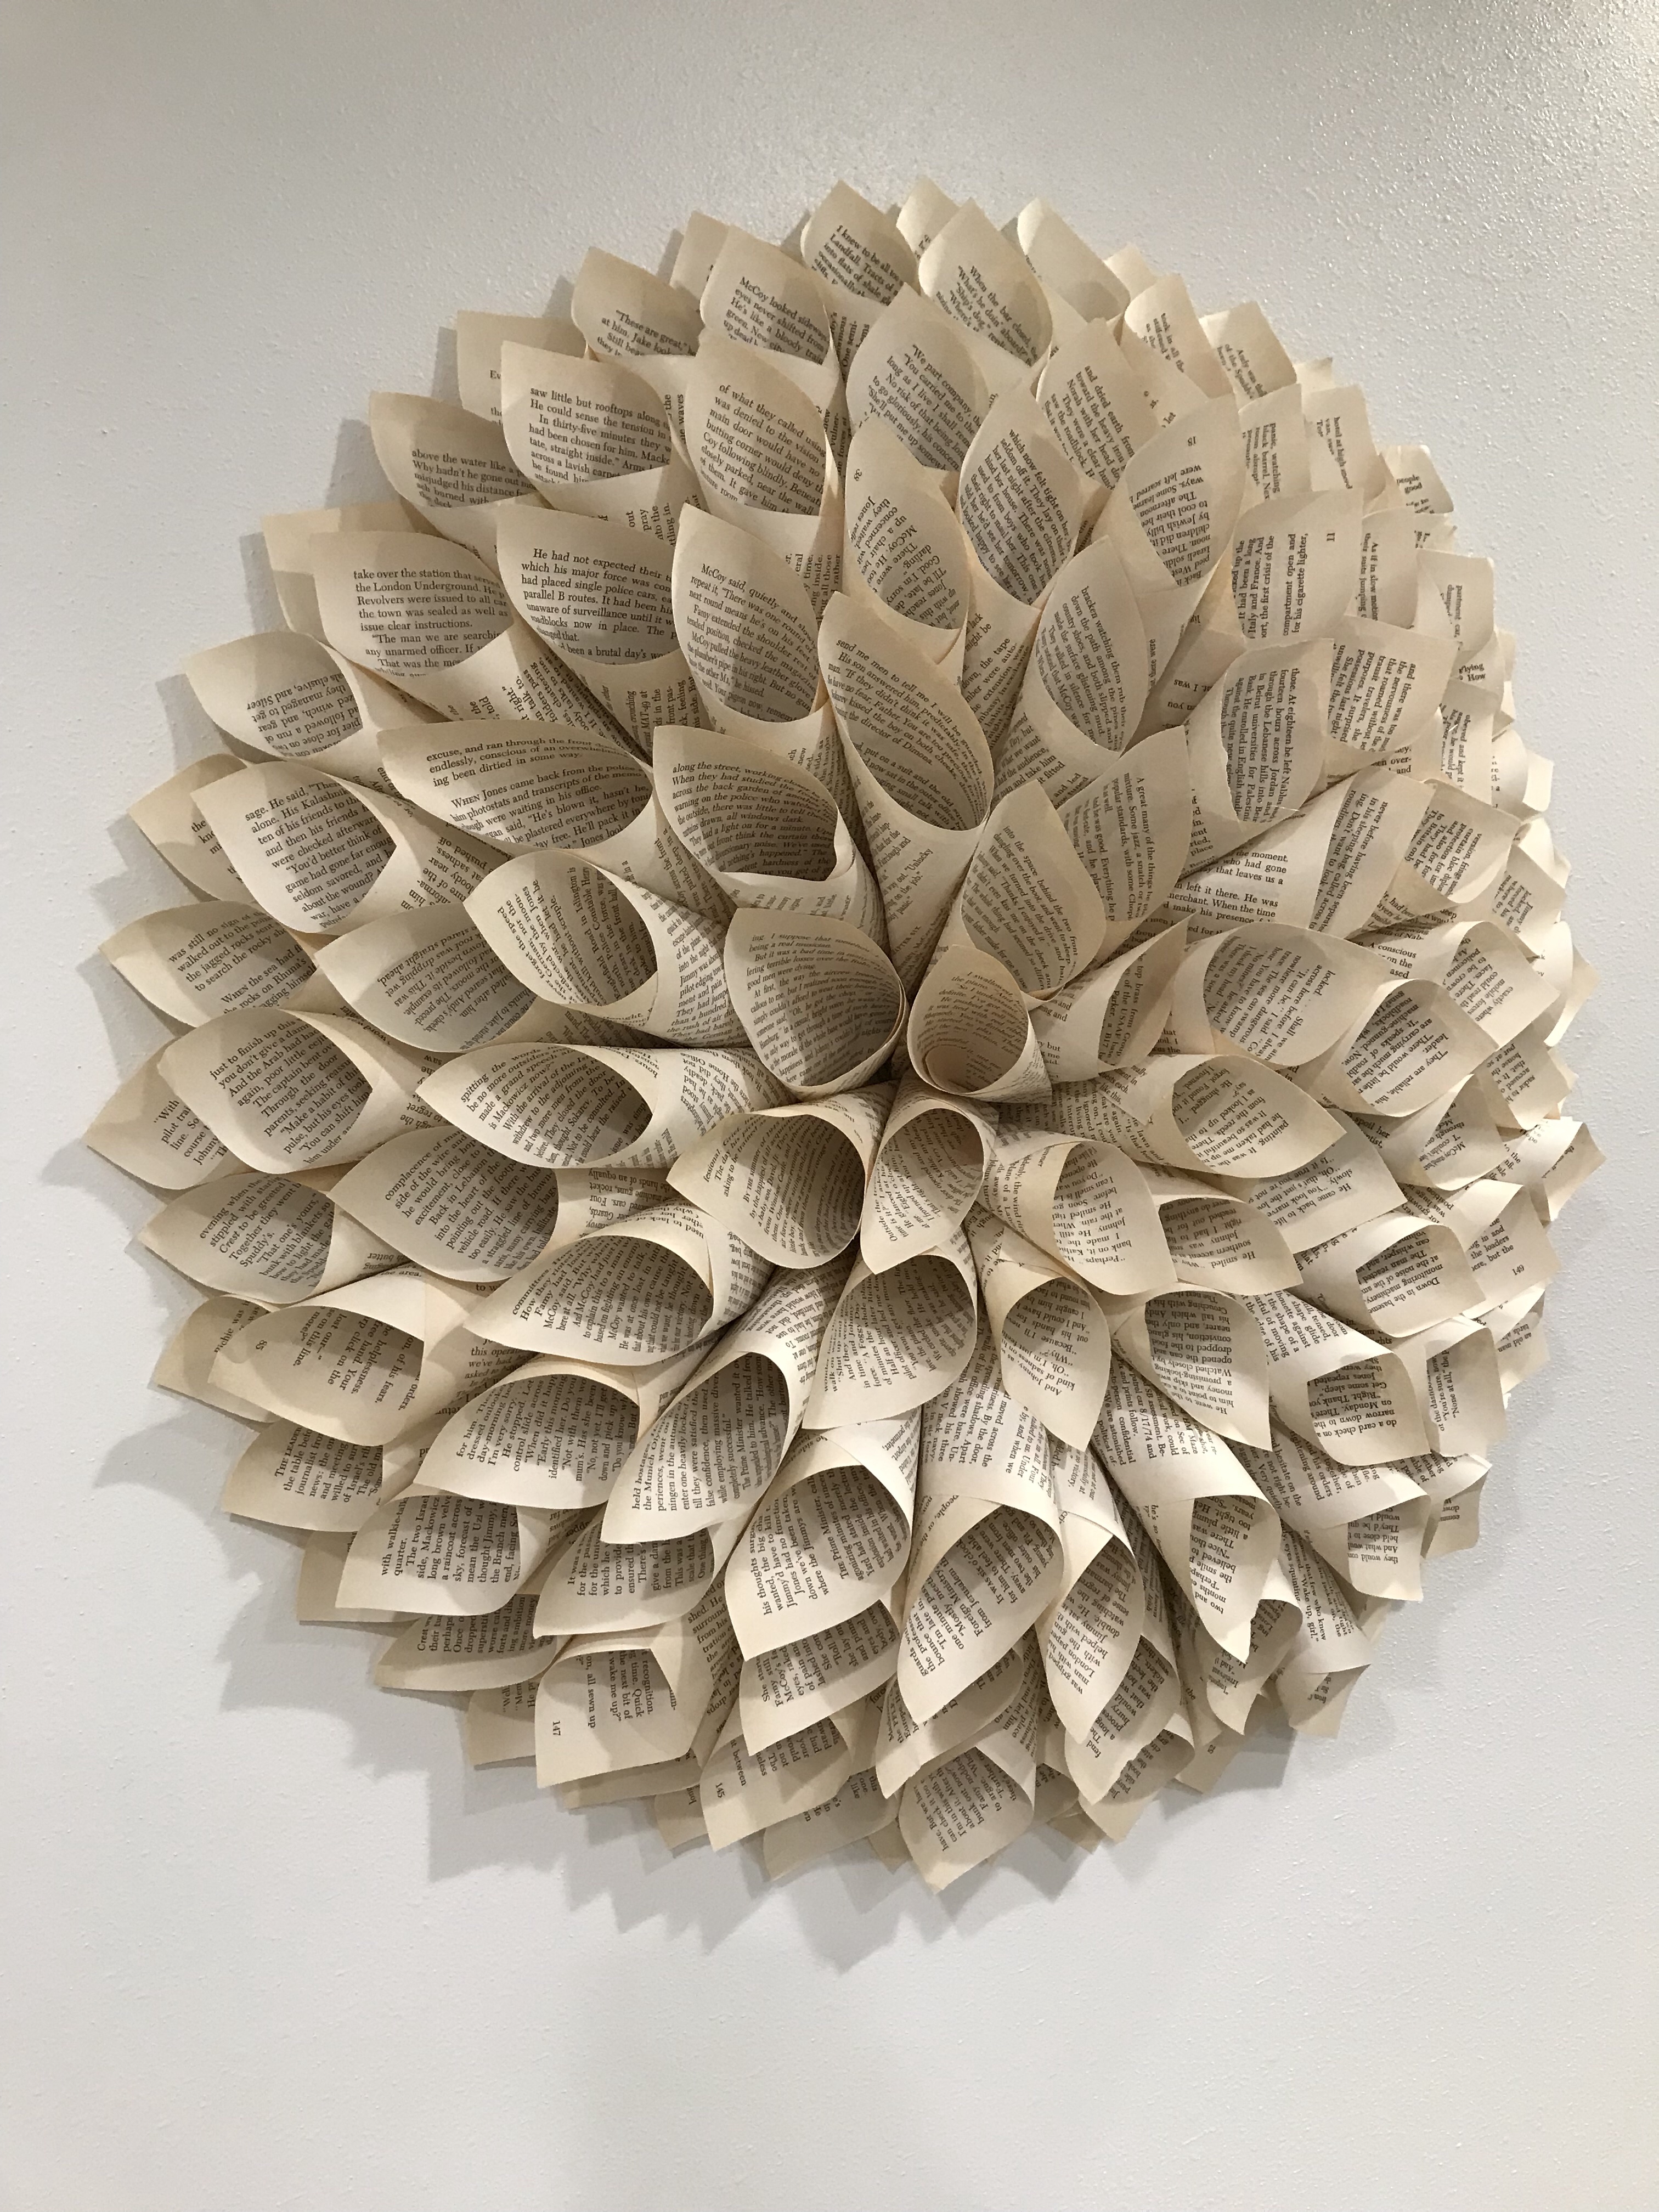
This may be my favorite DIY project of all time. It’s a wreath, and it’s made out of book pages. BOOK PAGES, people. I have made two to date, and they have both turned out gorgeous. That’s why I know there are plenty more in my future. As long as you can snag some vintage books, it costs next to nothing to make one, which is half the reason I love this project so much. Who doesn’t have a few books lying around collecting dust?!
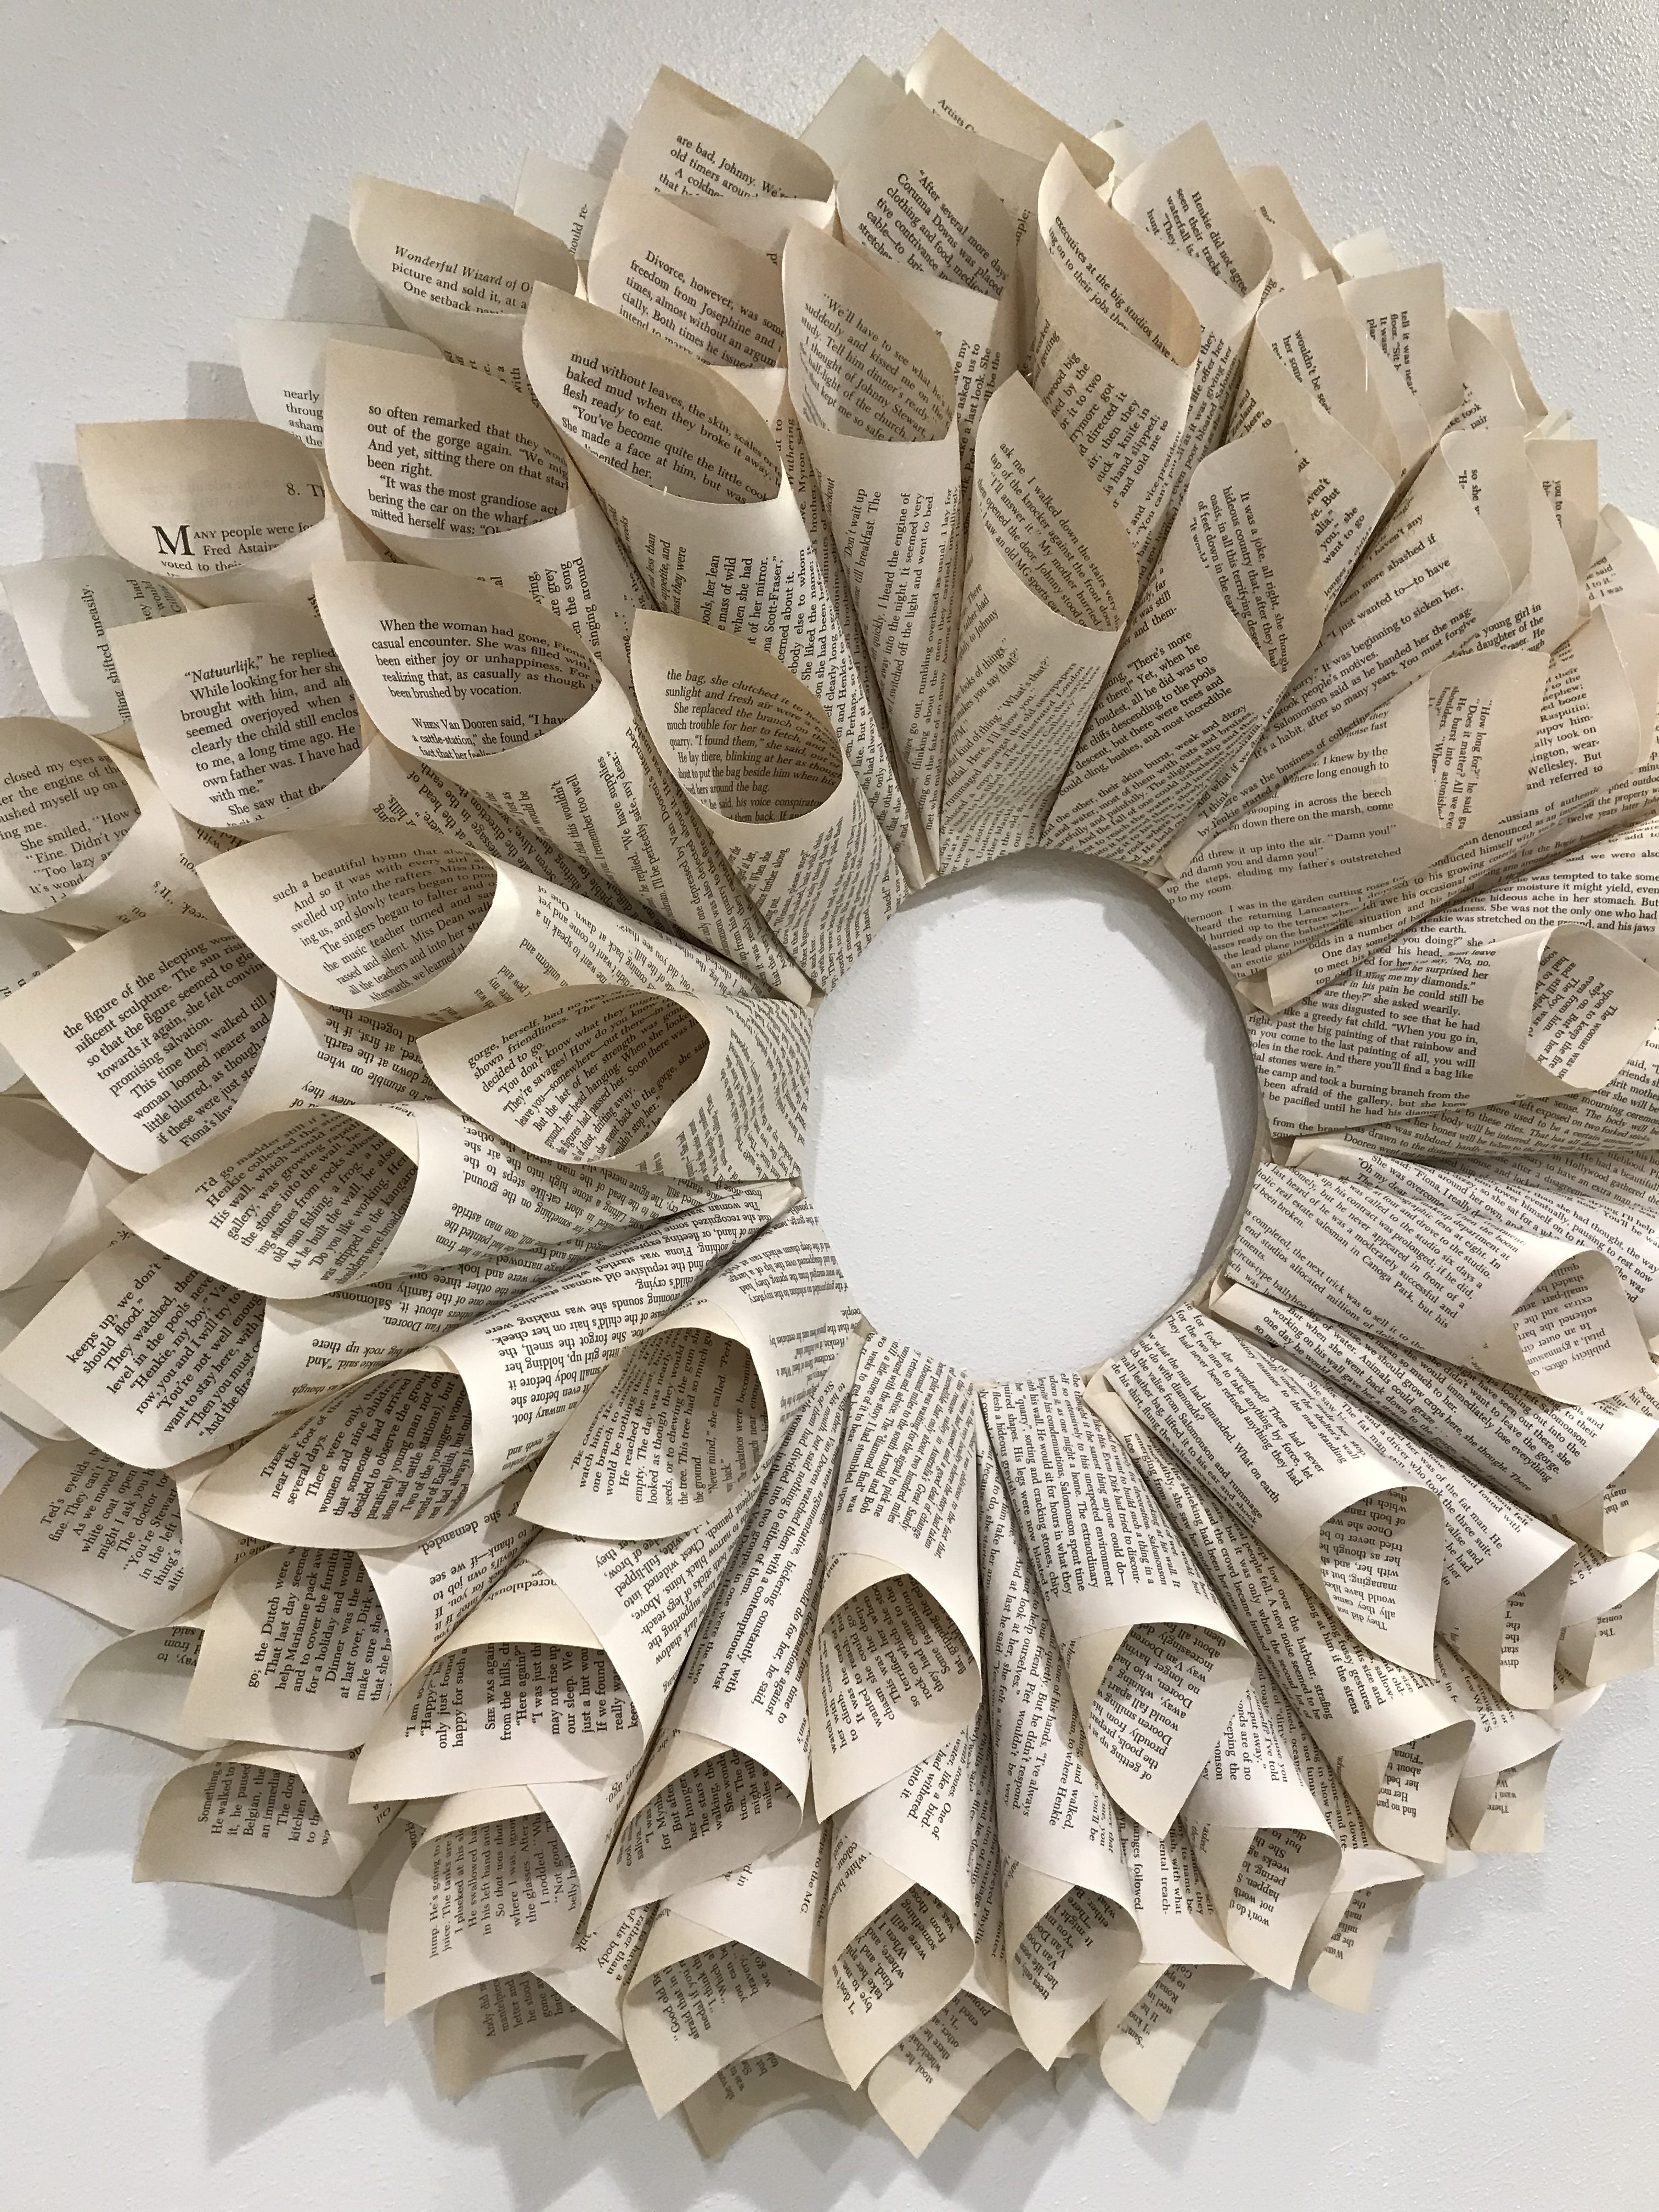
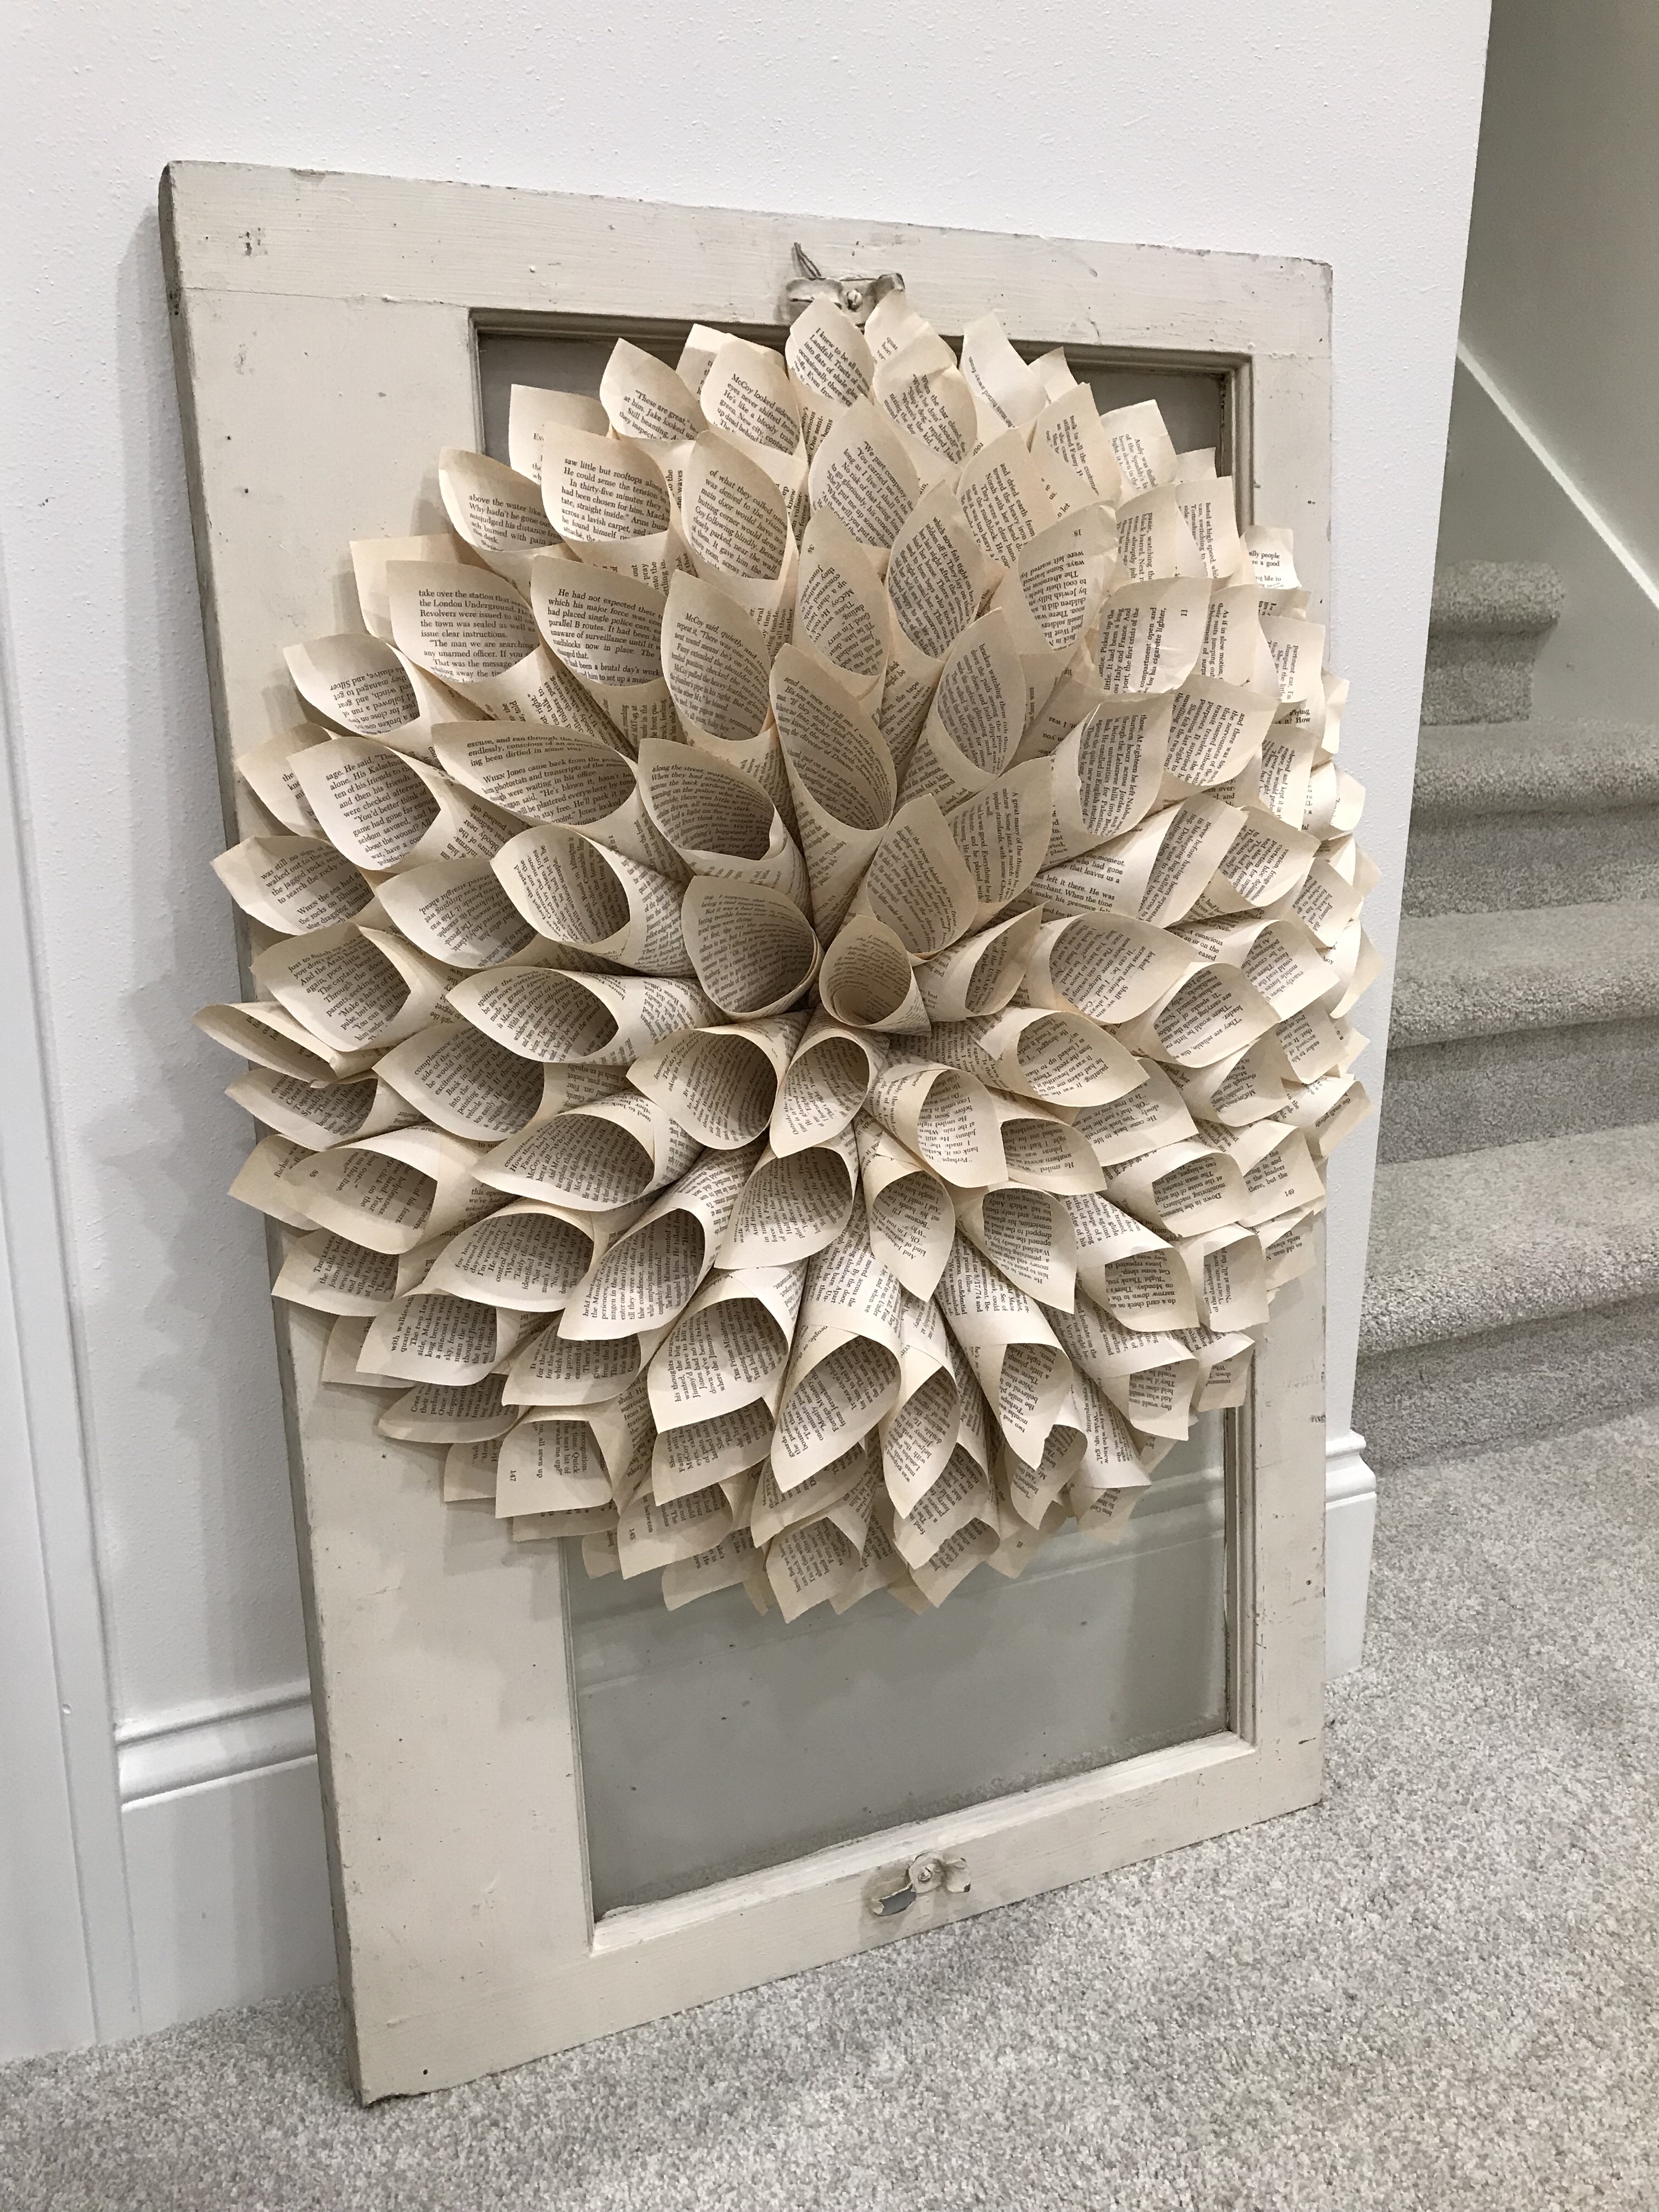
Here are two that I made to sell at my first craft fair, including an image of how I had it staged during the actual show. One was a full circle, while the other had a hollow center. Both are equally stunning in person.
Here’s the nitty gritty on the process.
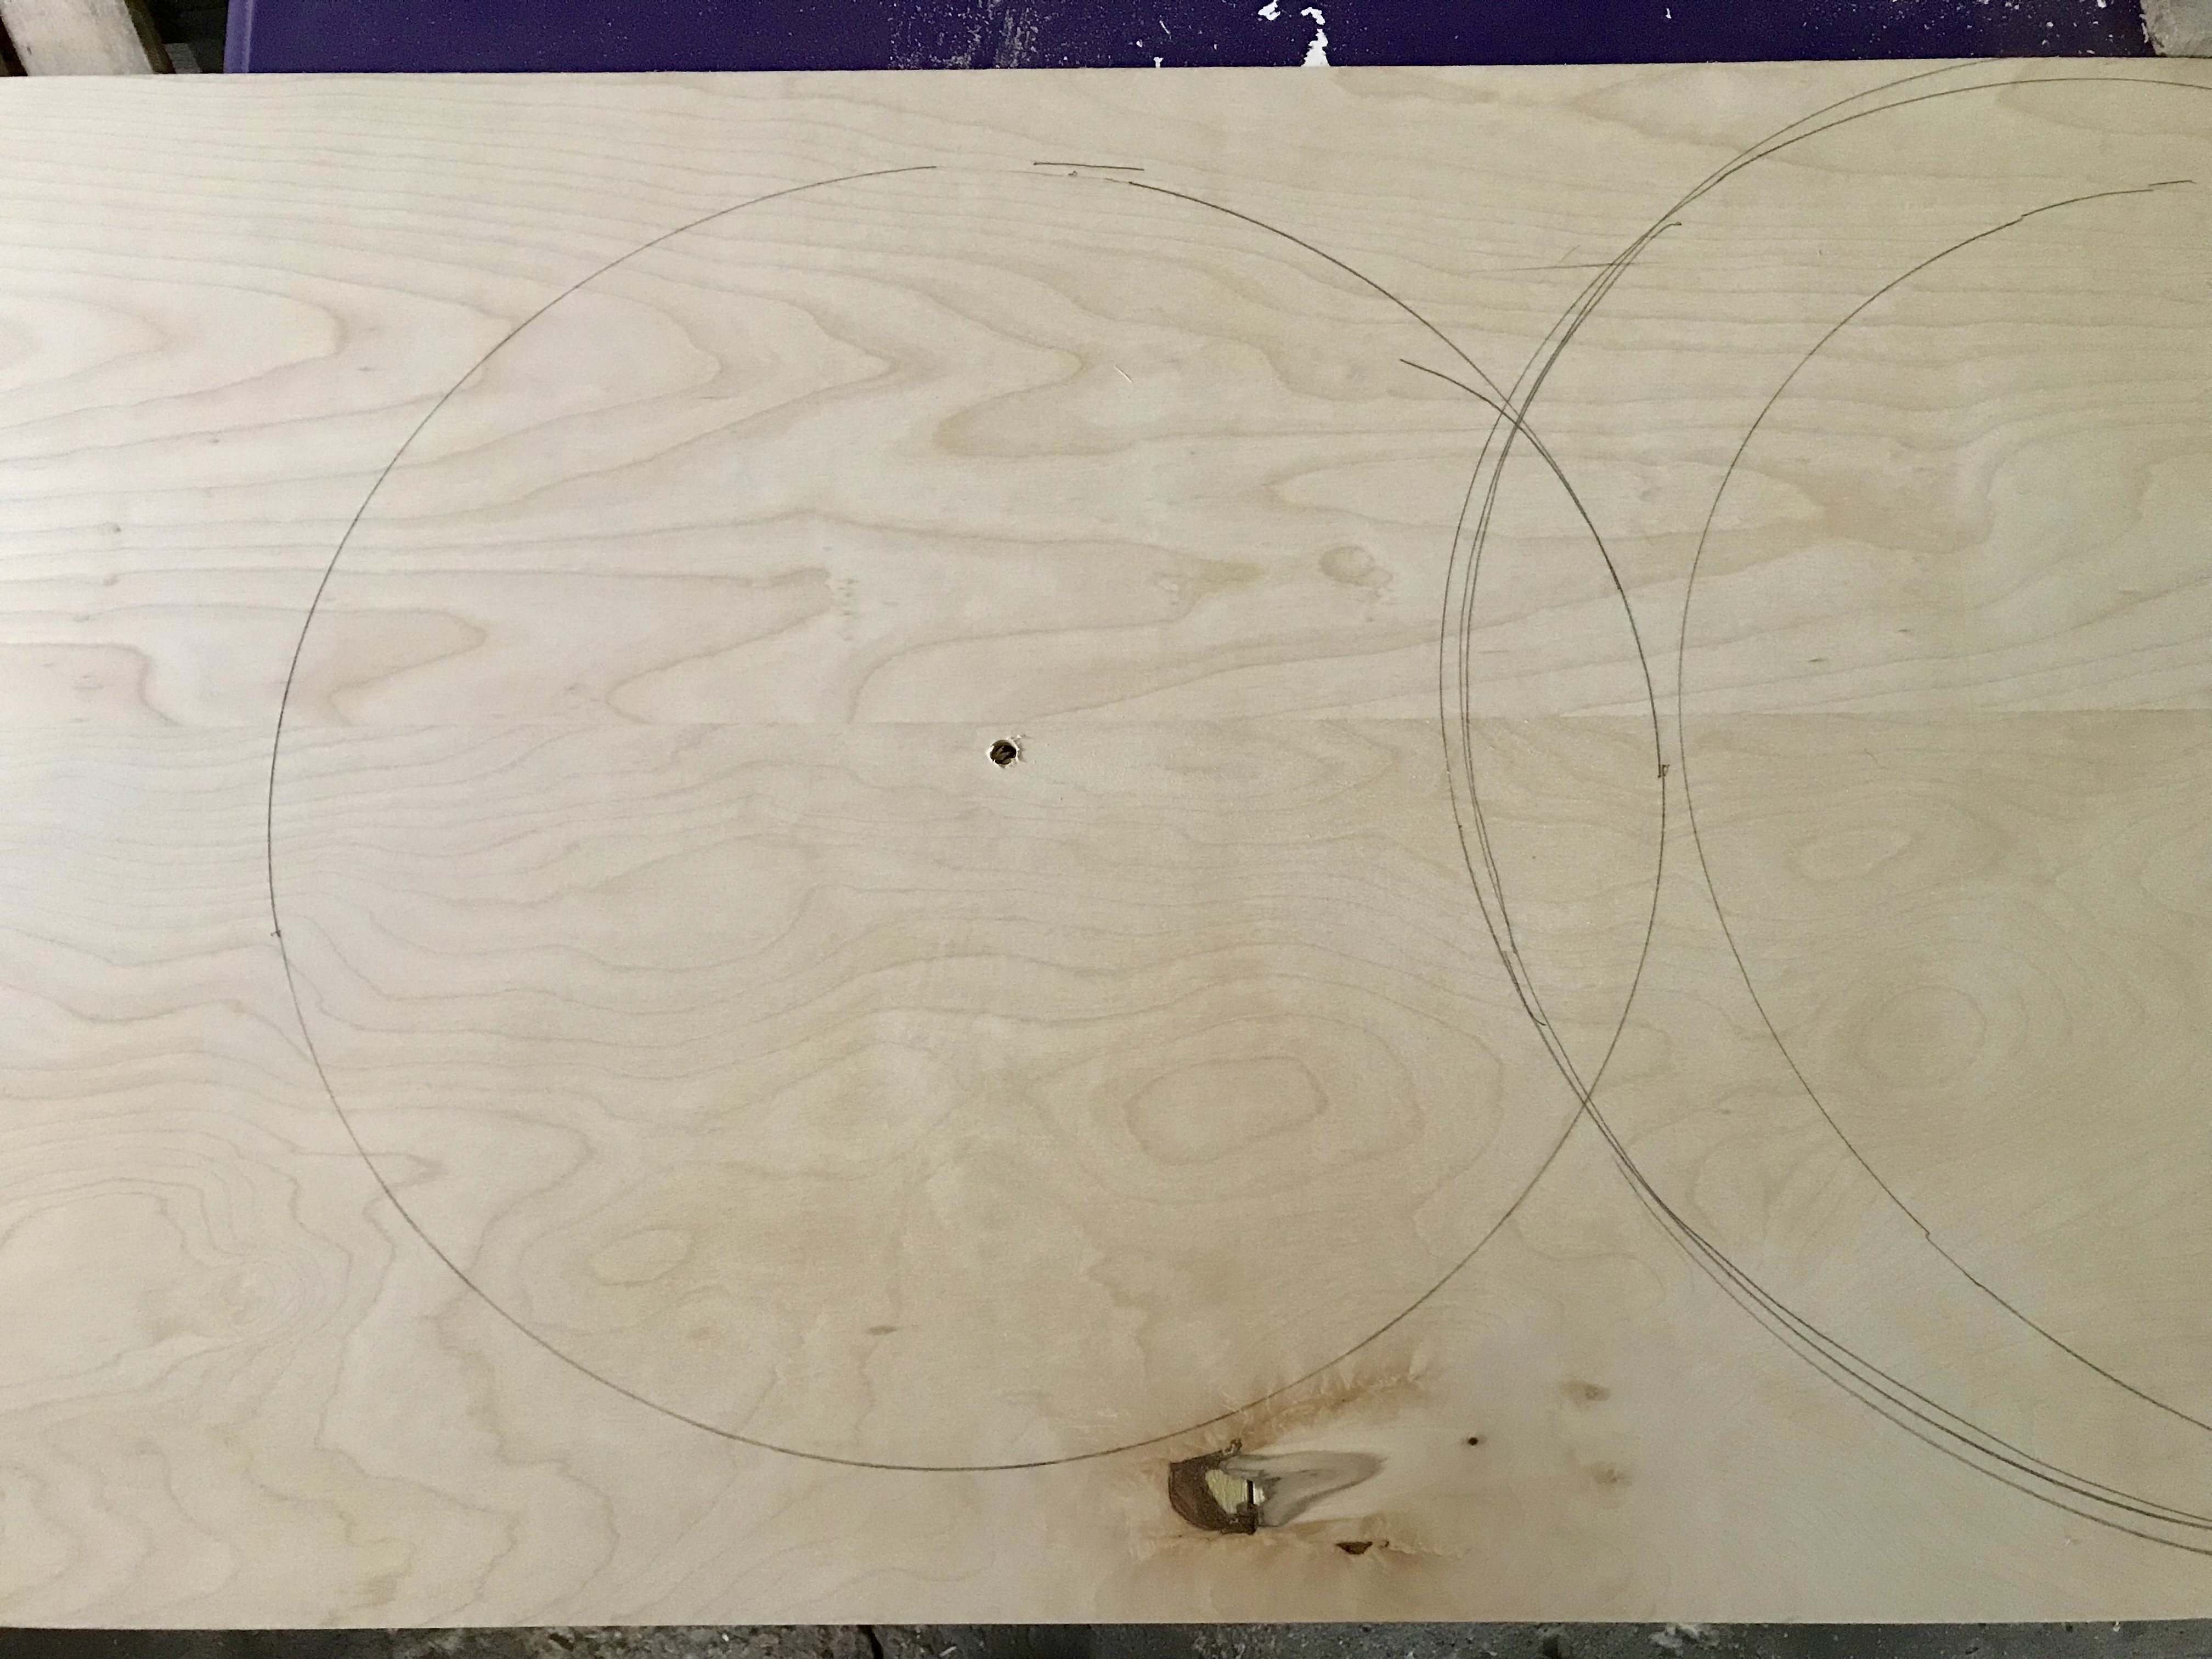
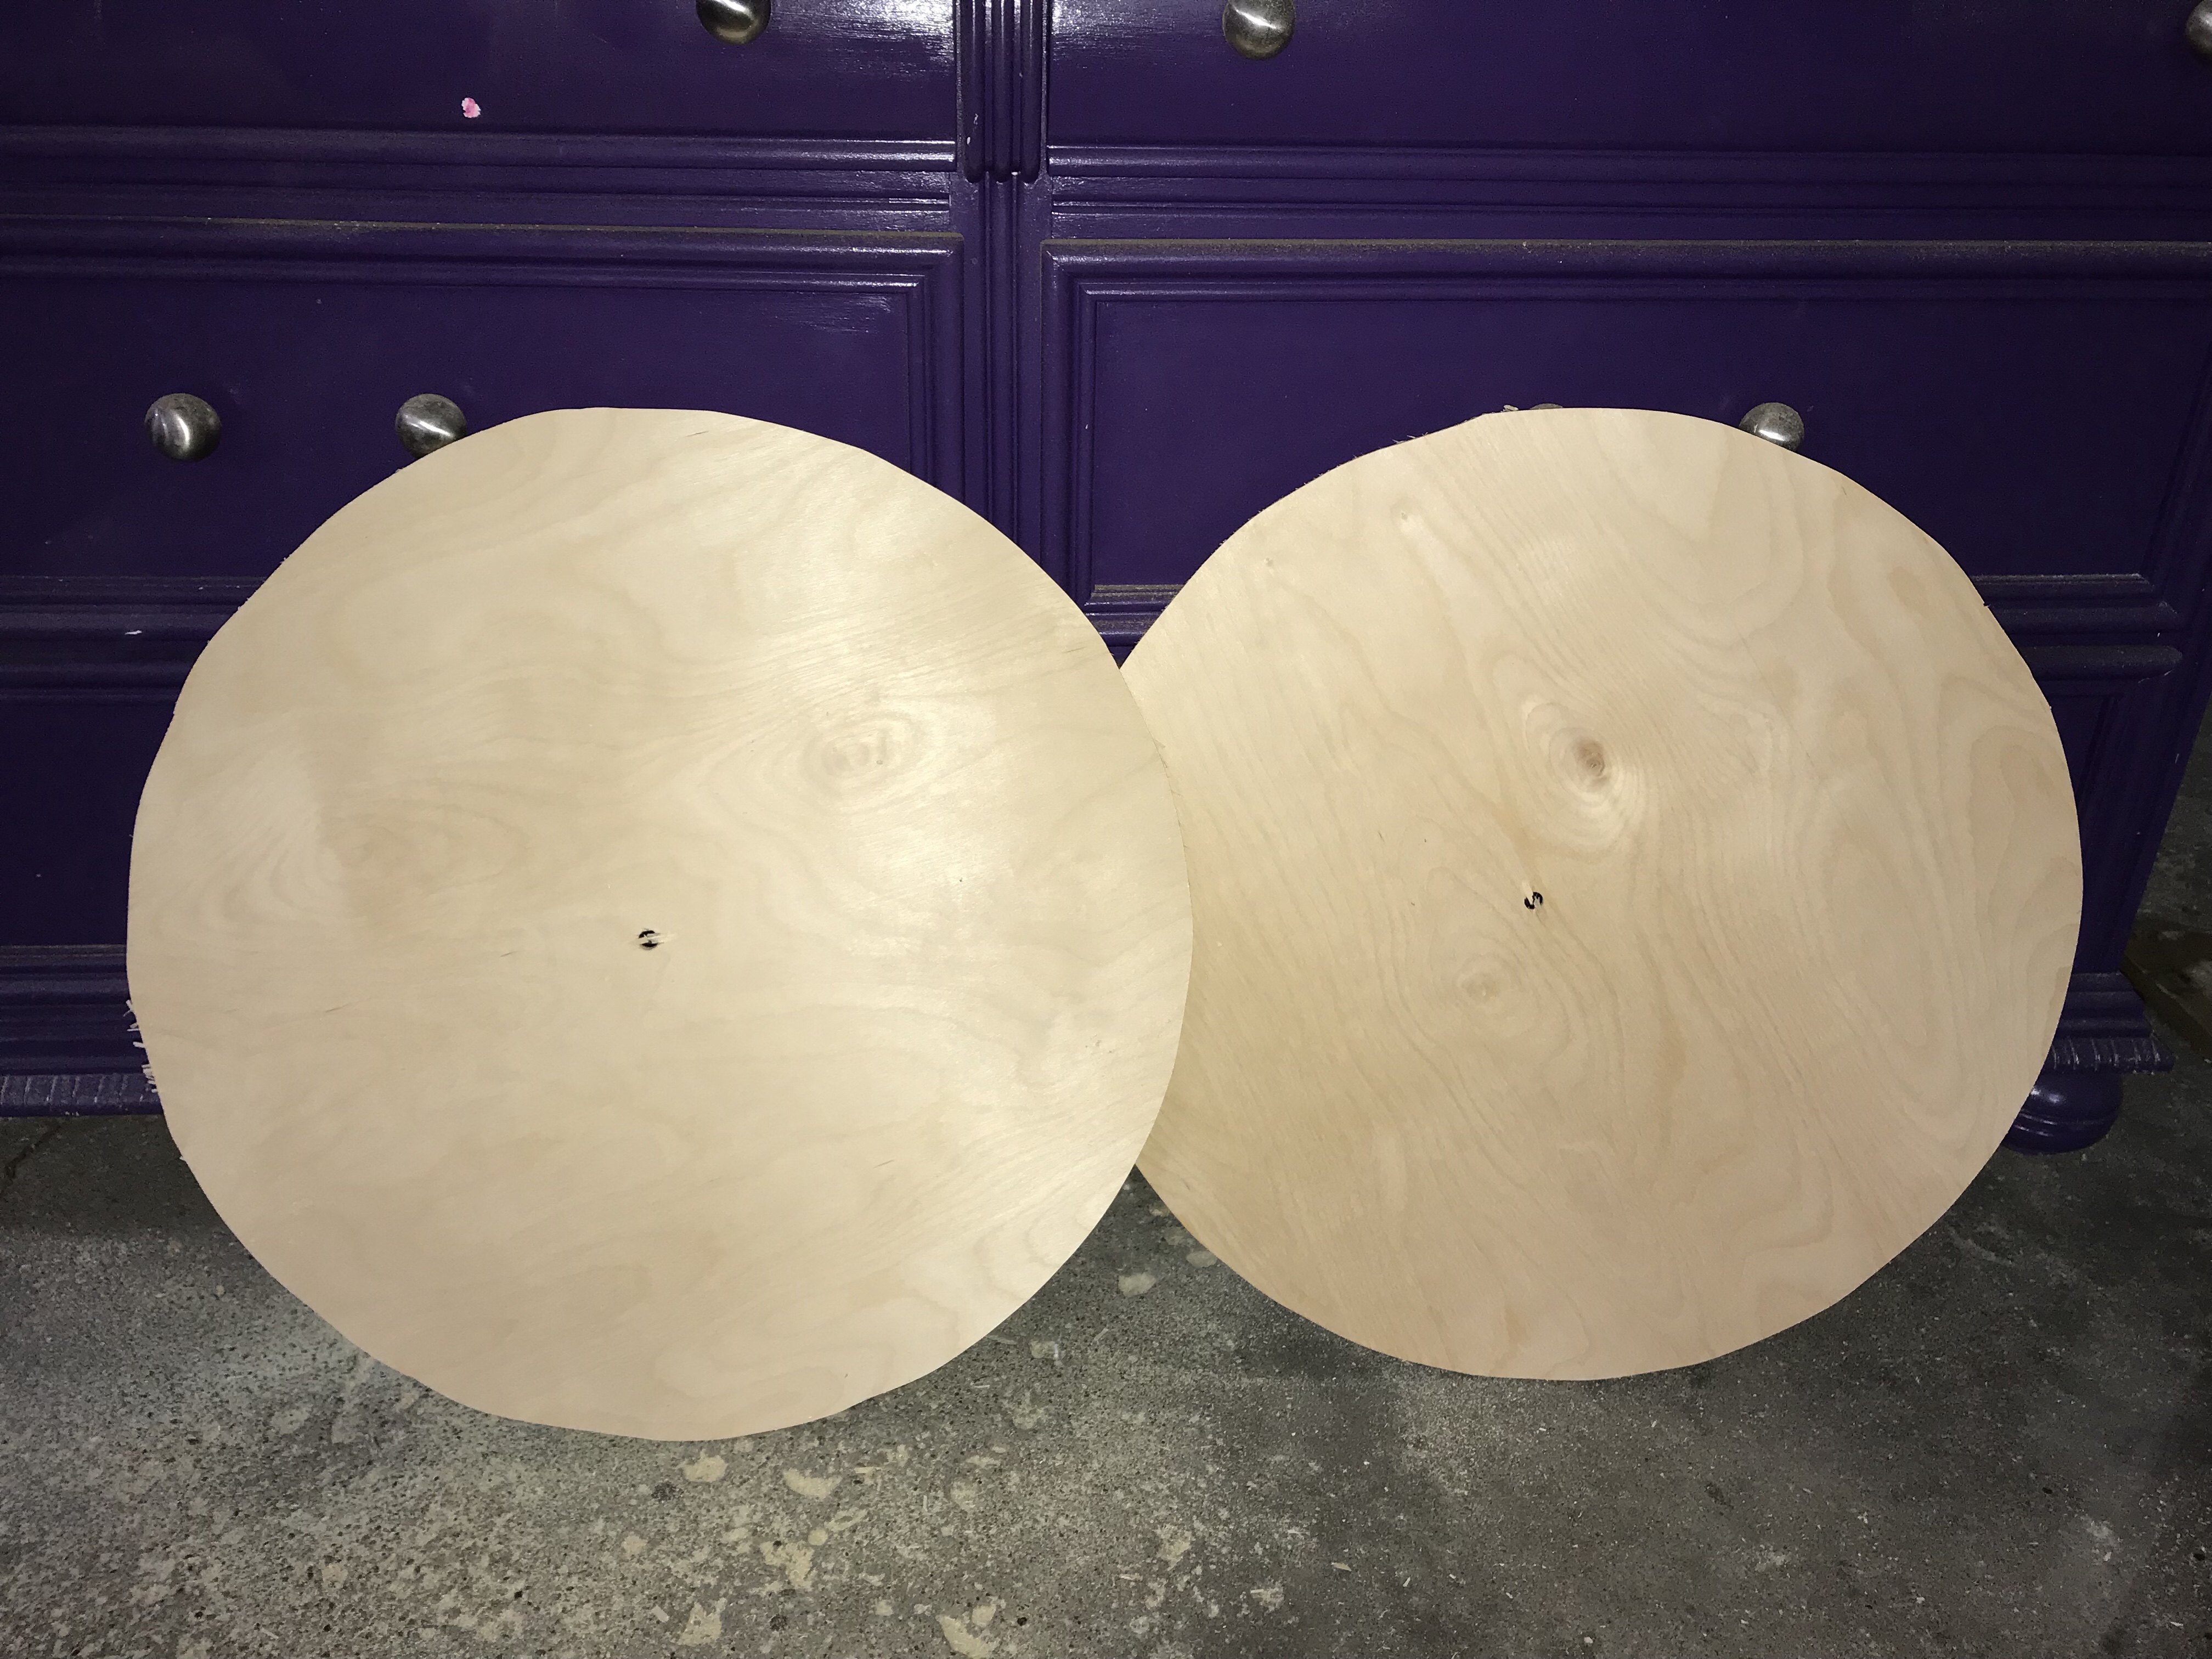
I used 1/4″ thick plywood, mostly because I had a piece leftover from another project. You could also use poster board or even cardboard (pizza box, anyone?). Part of the reason I preferred plywood was also for durability. I wanted mine to last, so I wanted a sturdy base.
First, I drilled a hole in the center, and used a not-so-technical “string and pencil” technique to draw my circle. If you are super anal, you could also use a compass. Being that the book pages will cover your base, it’s okay if it’s imperfect. To cut, I used my trusty Ryobi jigsaw, and boom, plywood rounds.
TIP: At this point, PLEASE FOR THE LOVE OF ALL THAT IS HOLY, don’t forget to add your sawtooth hanger to the back. I discovered this the hard way. I forgot to add it until after I had already glued on my cones = No bueno on a suuuuuuper fragile paper wreath. I ended up okay, but it was a big pain in the butt.
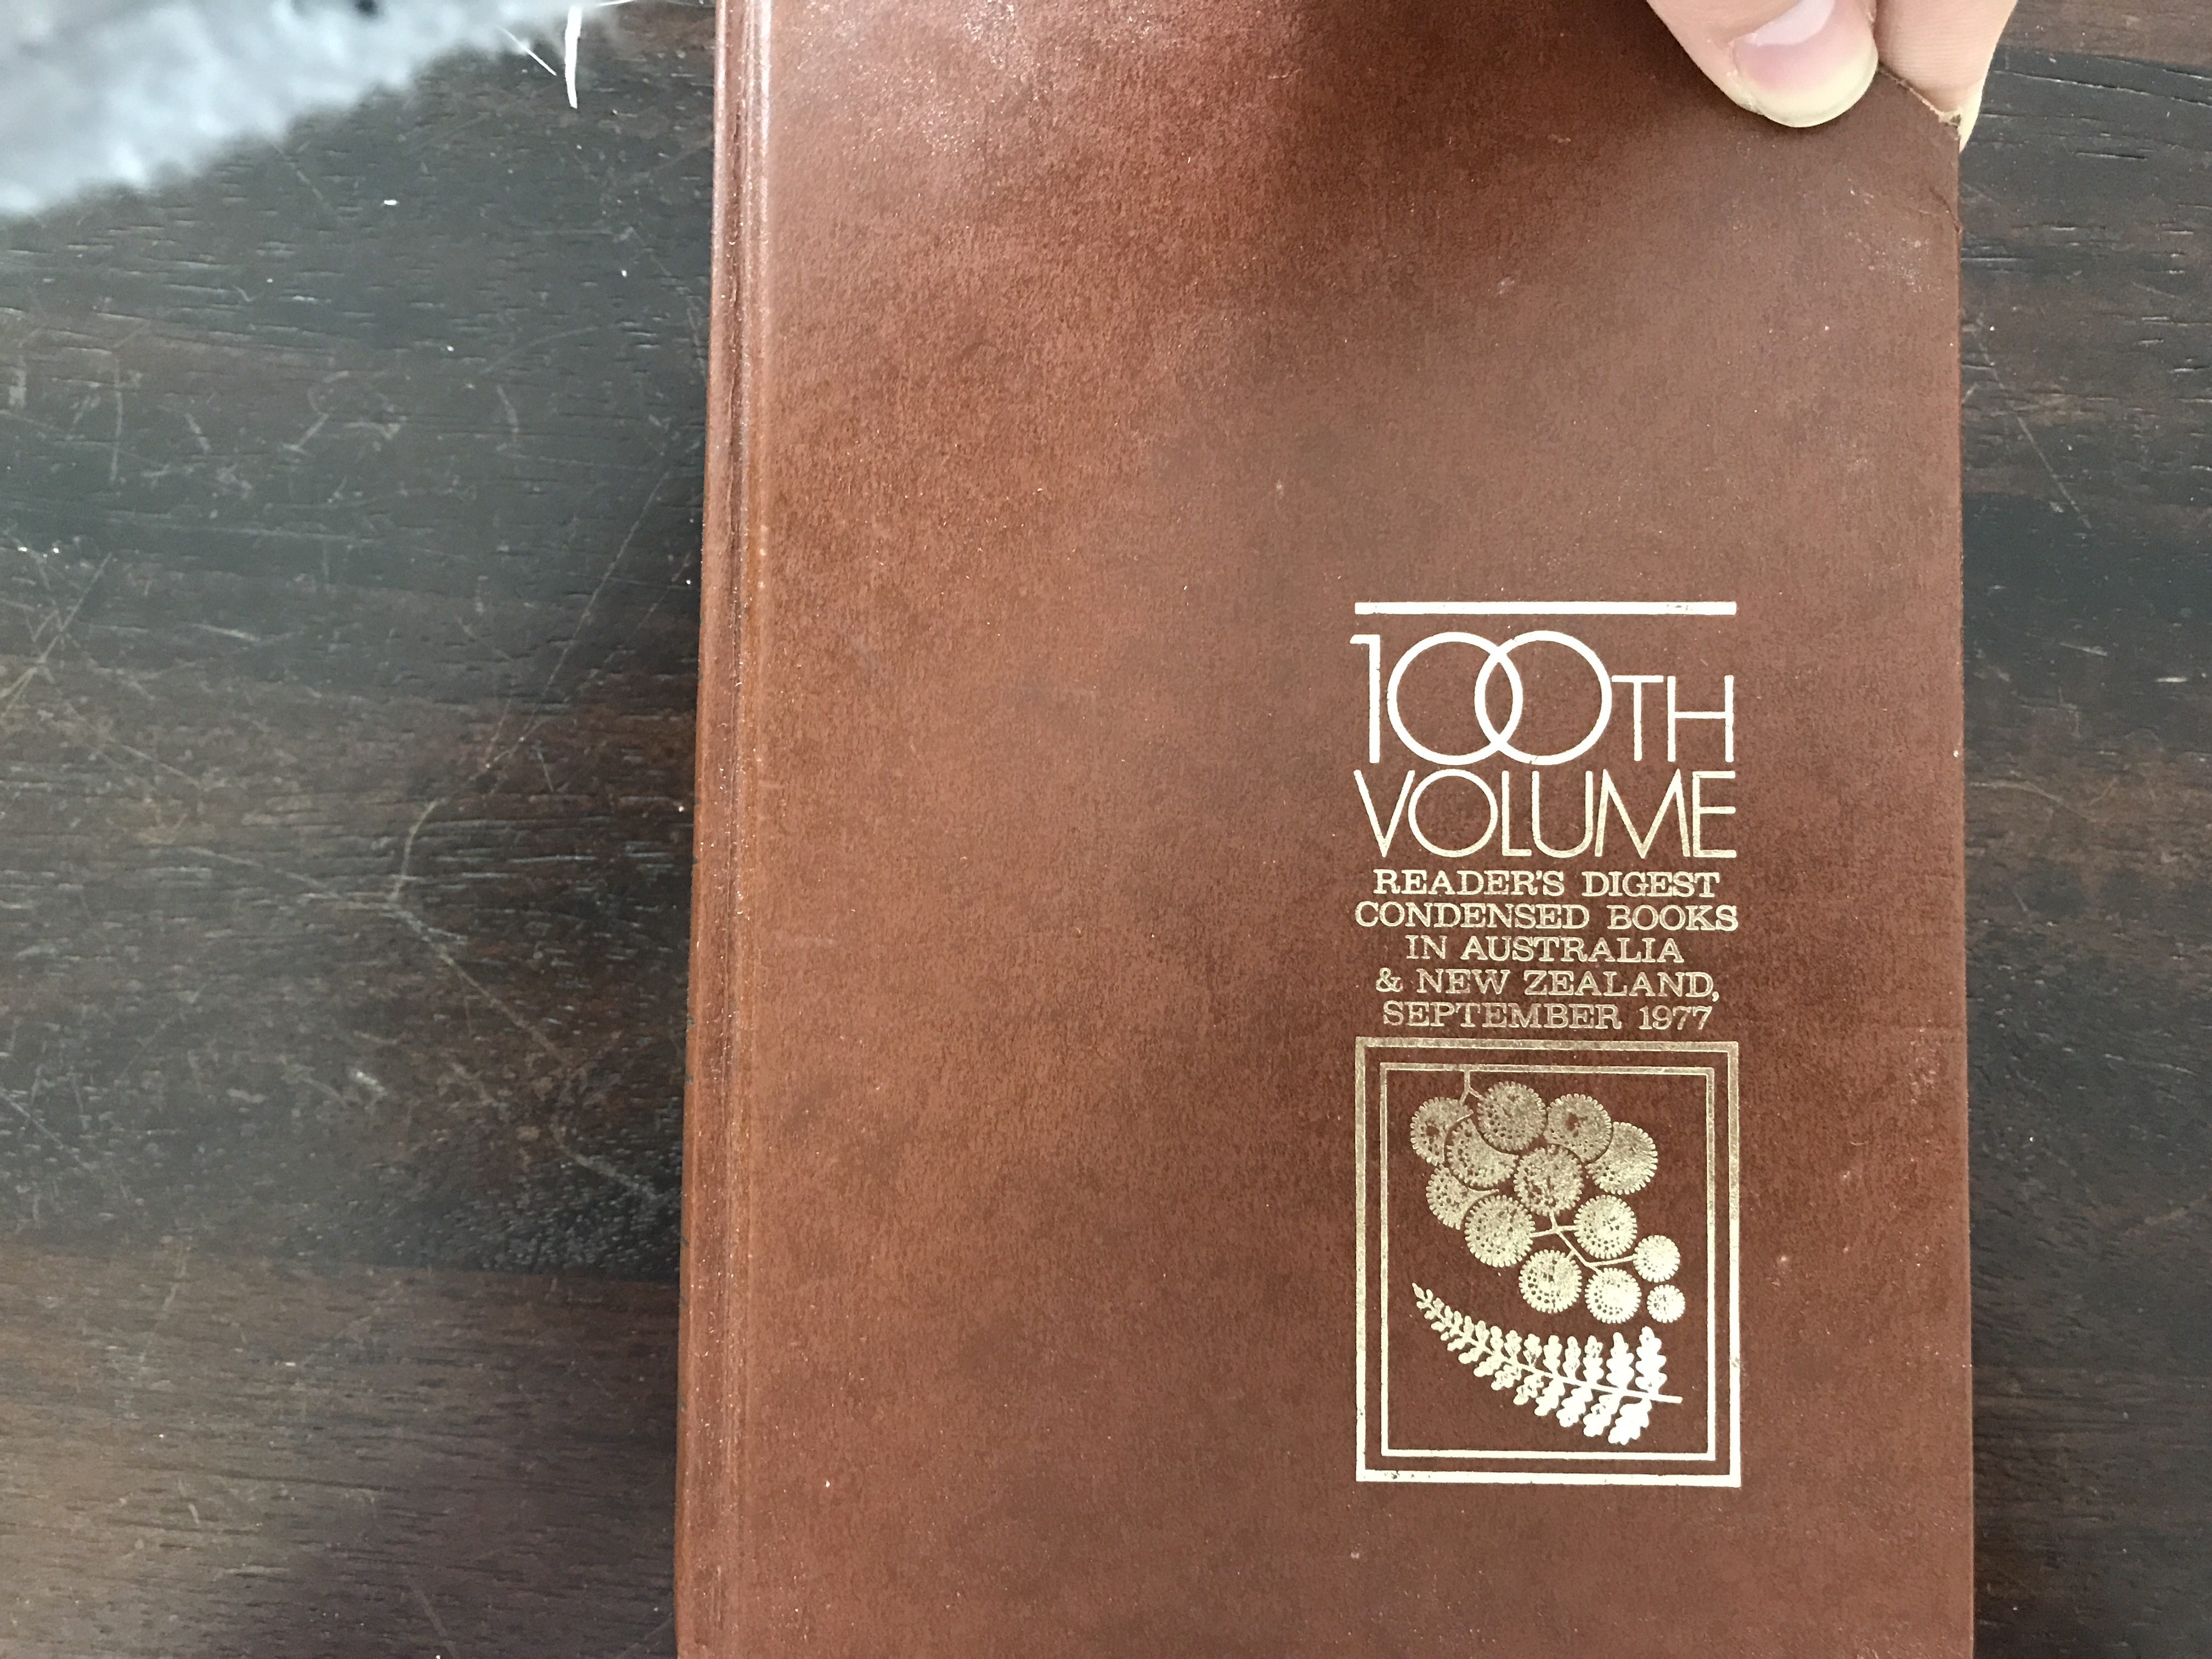
The book I chose was a vintage Reader’s Digest. My late grandmother had a ton of these, and I thought a beautiful wreath would be a great use for them – one that she would smile at undoubtedly.
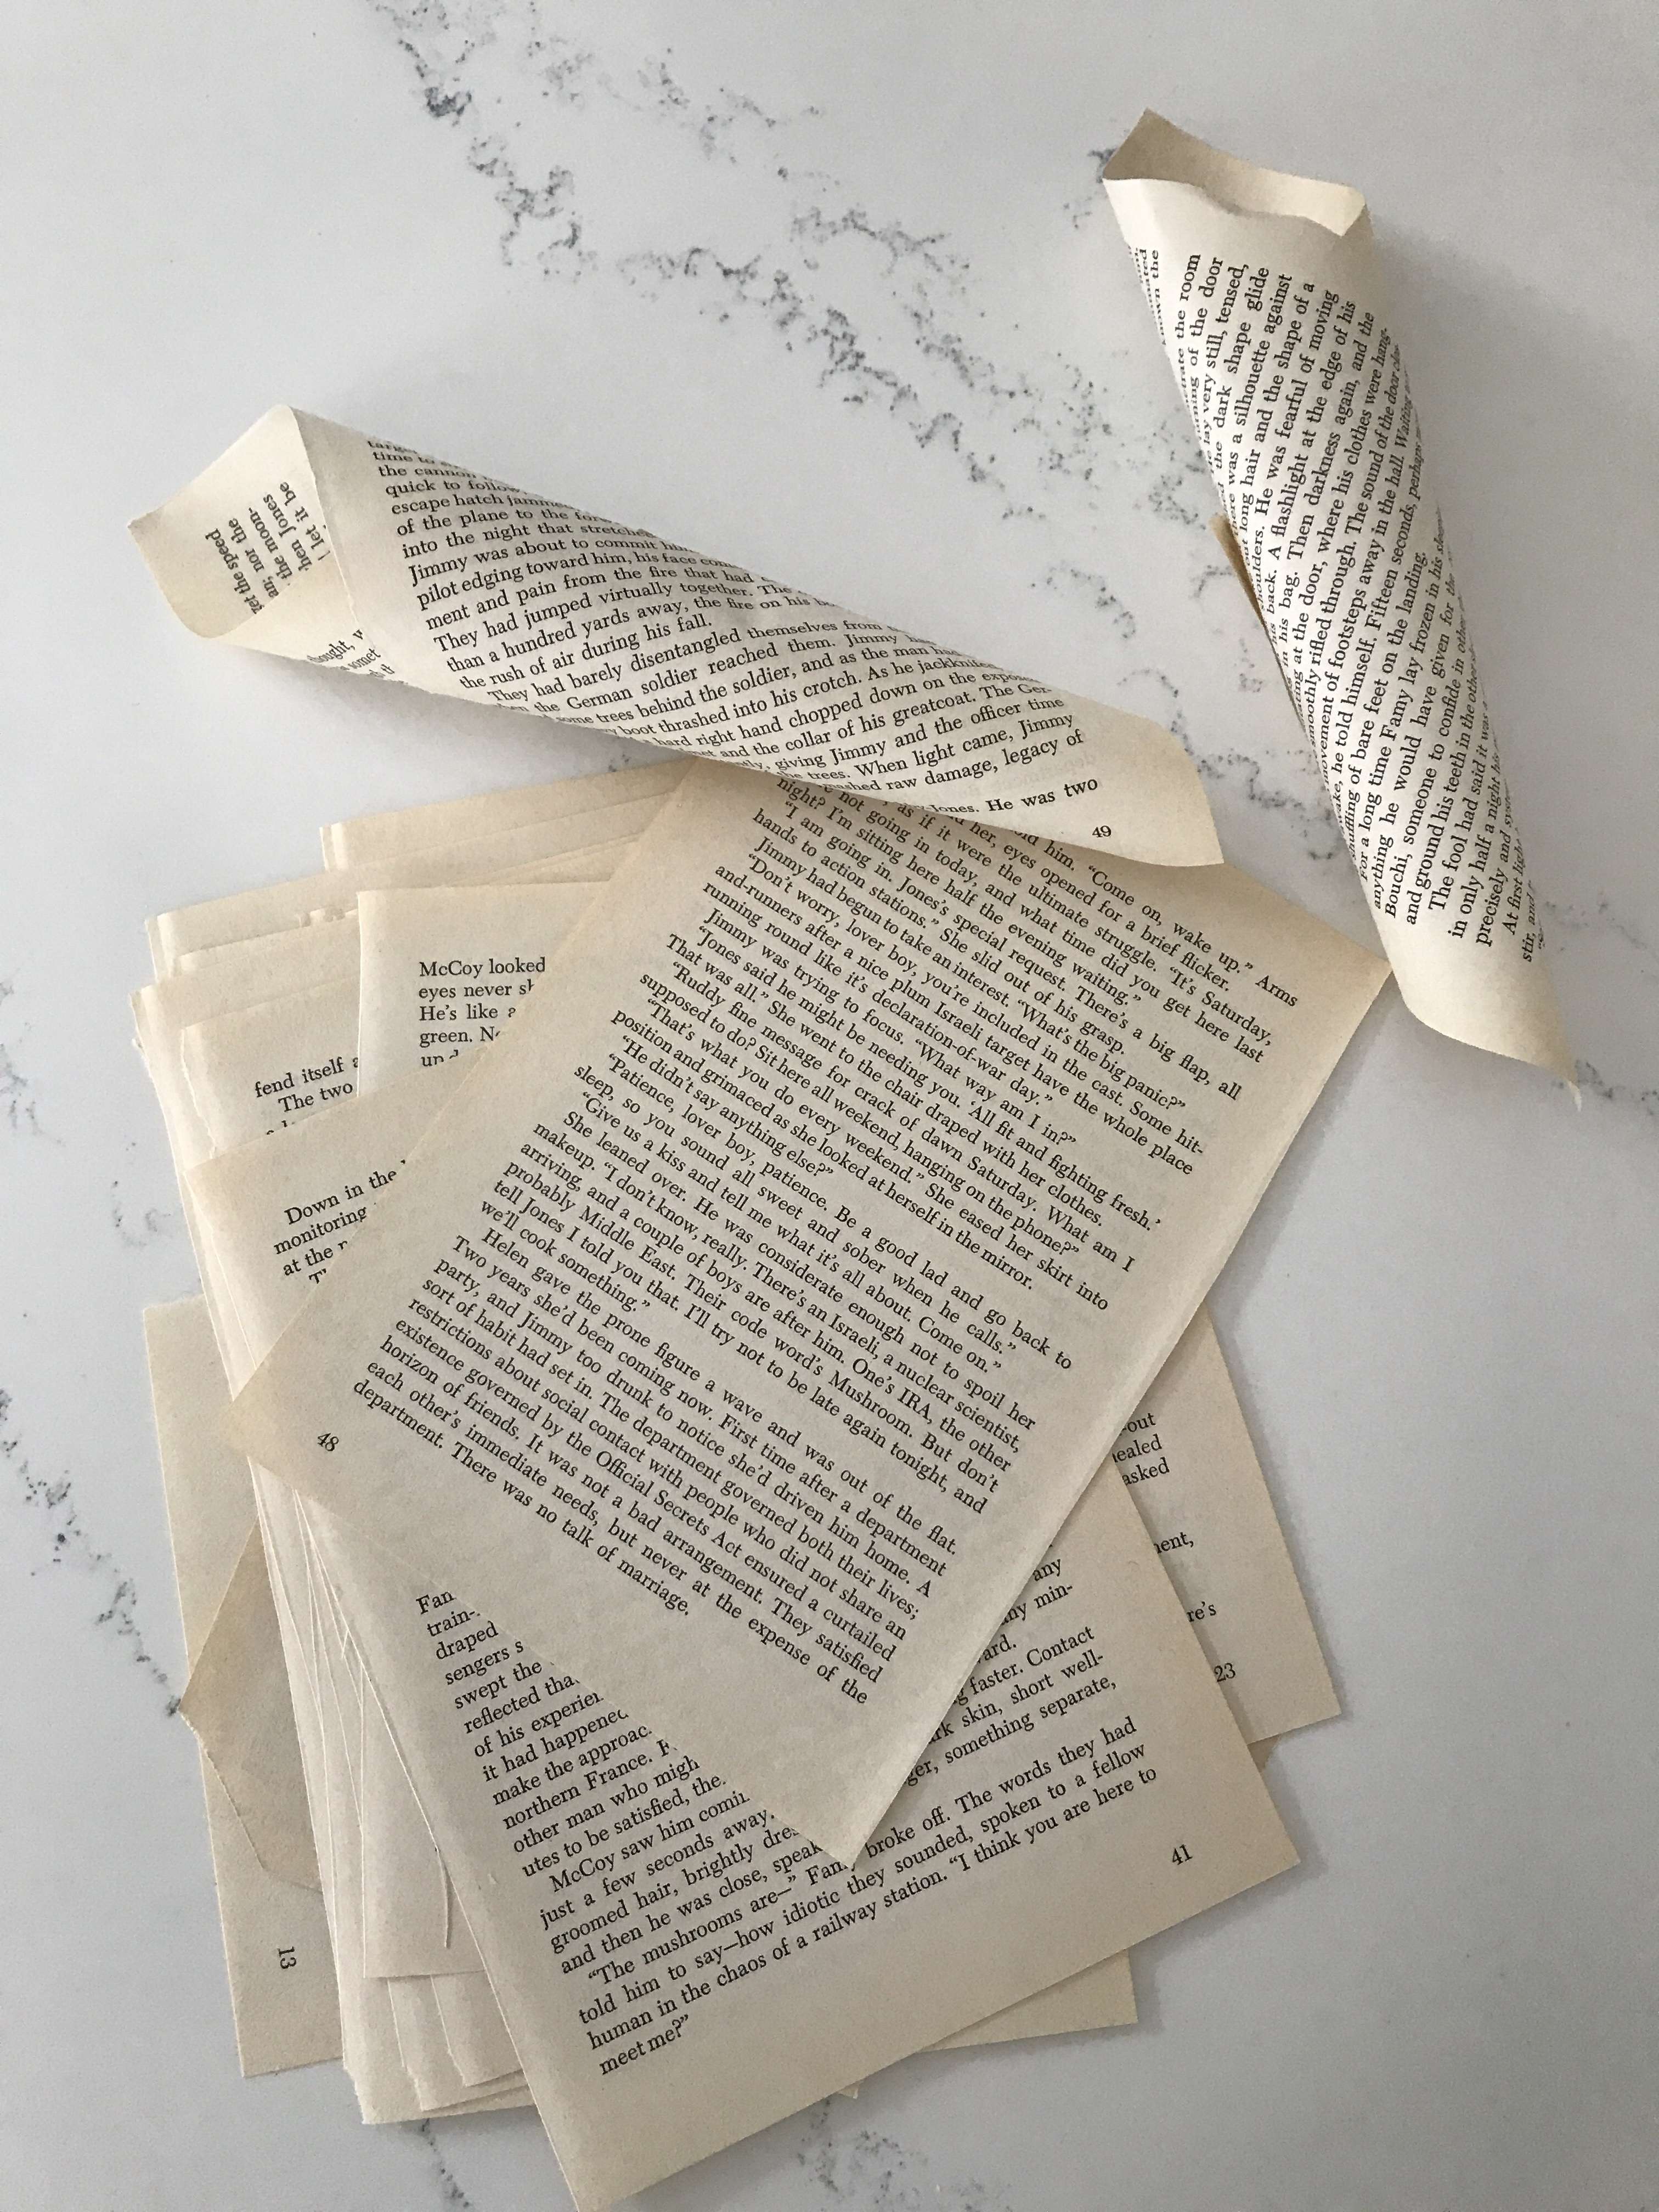
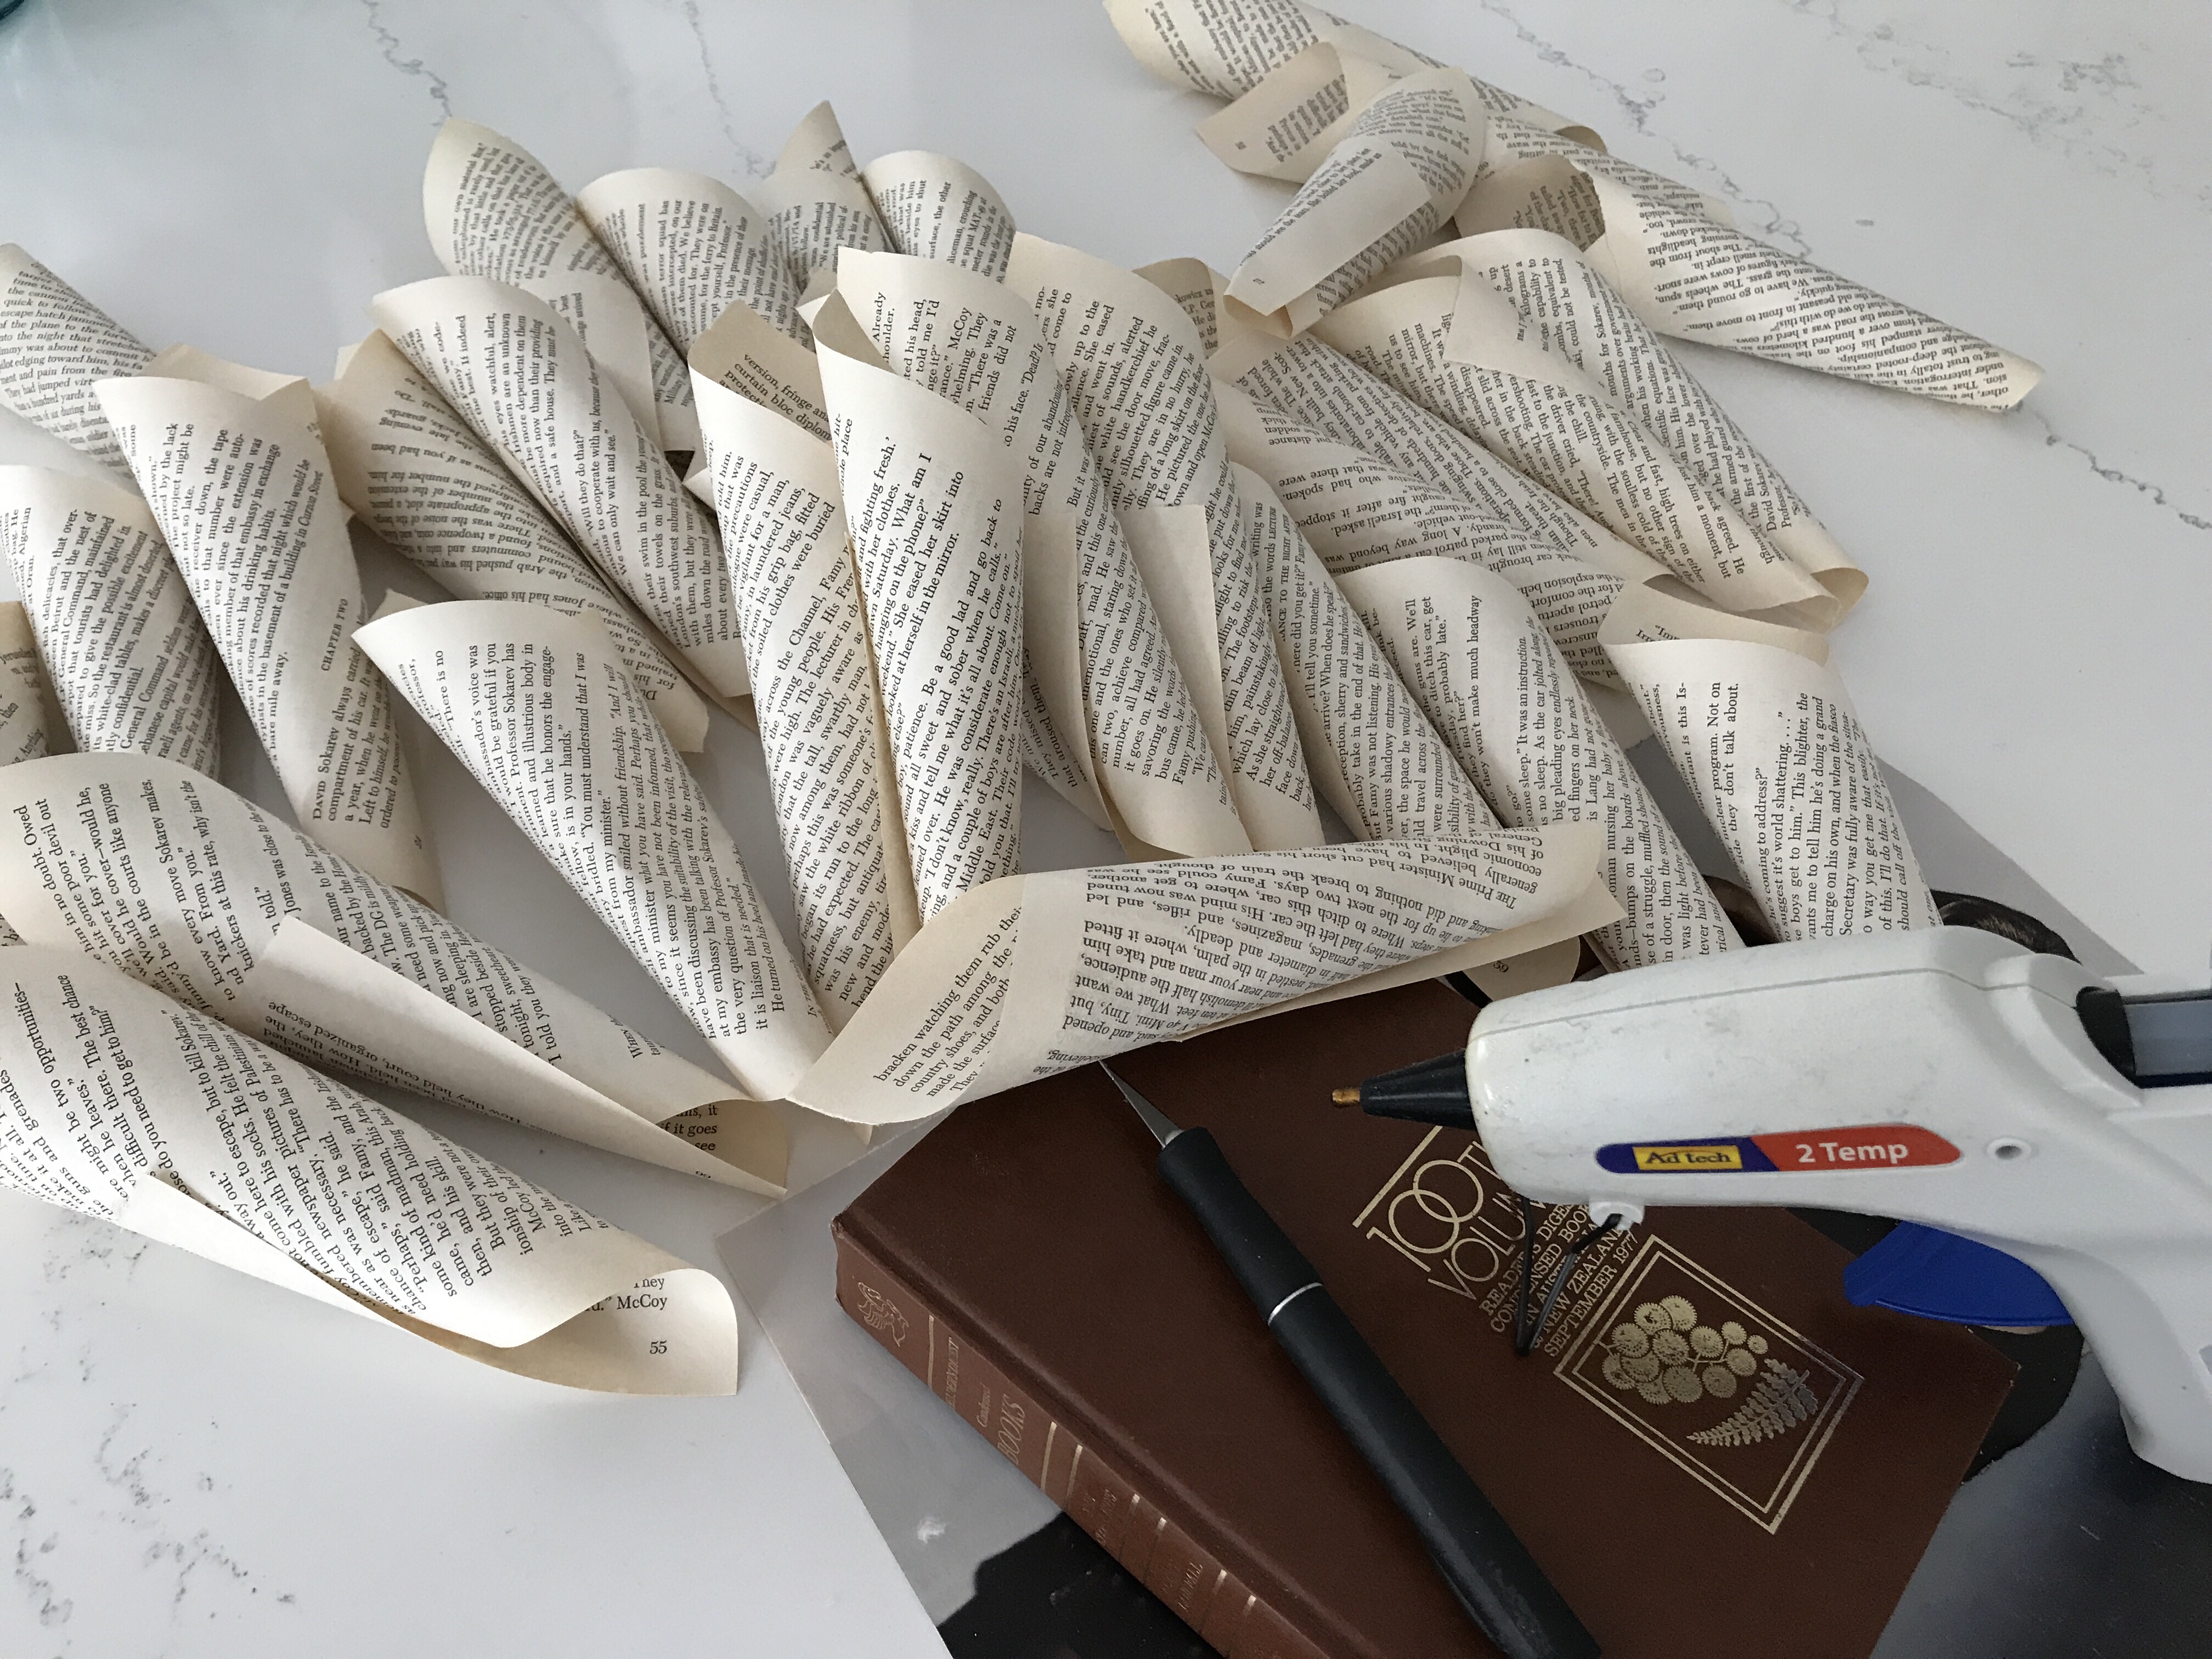
I used an exacto knife to cut out the pages when I first started, but once the binding got worked in, I was able to tear the pages out without much difficulty. You could also use scissors.
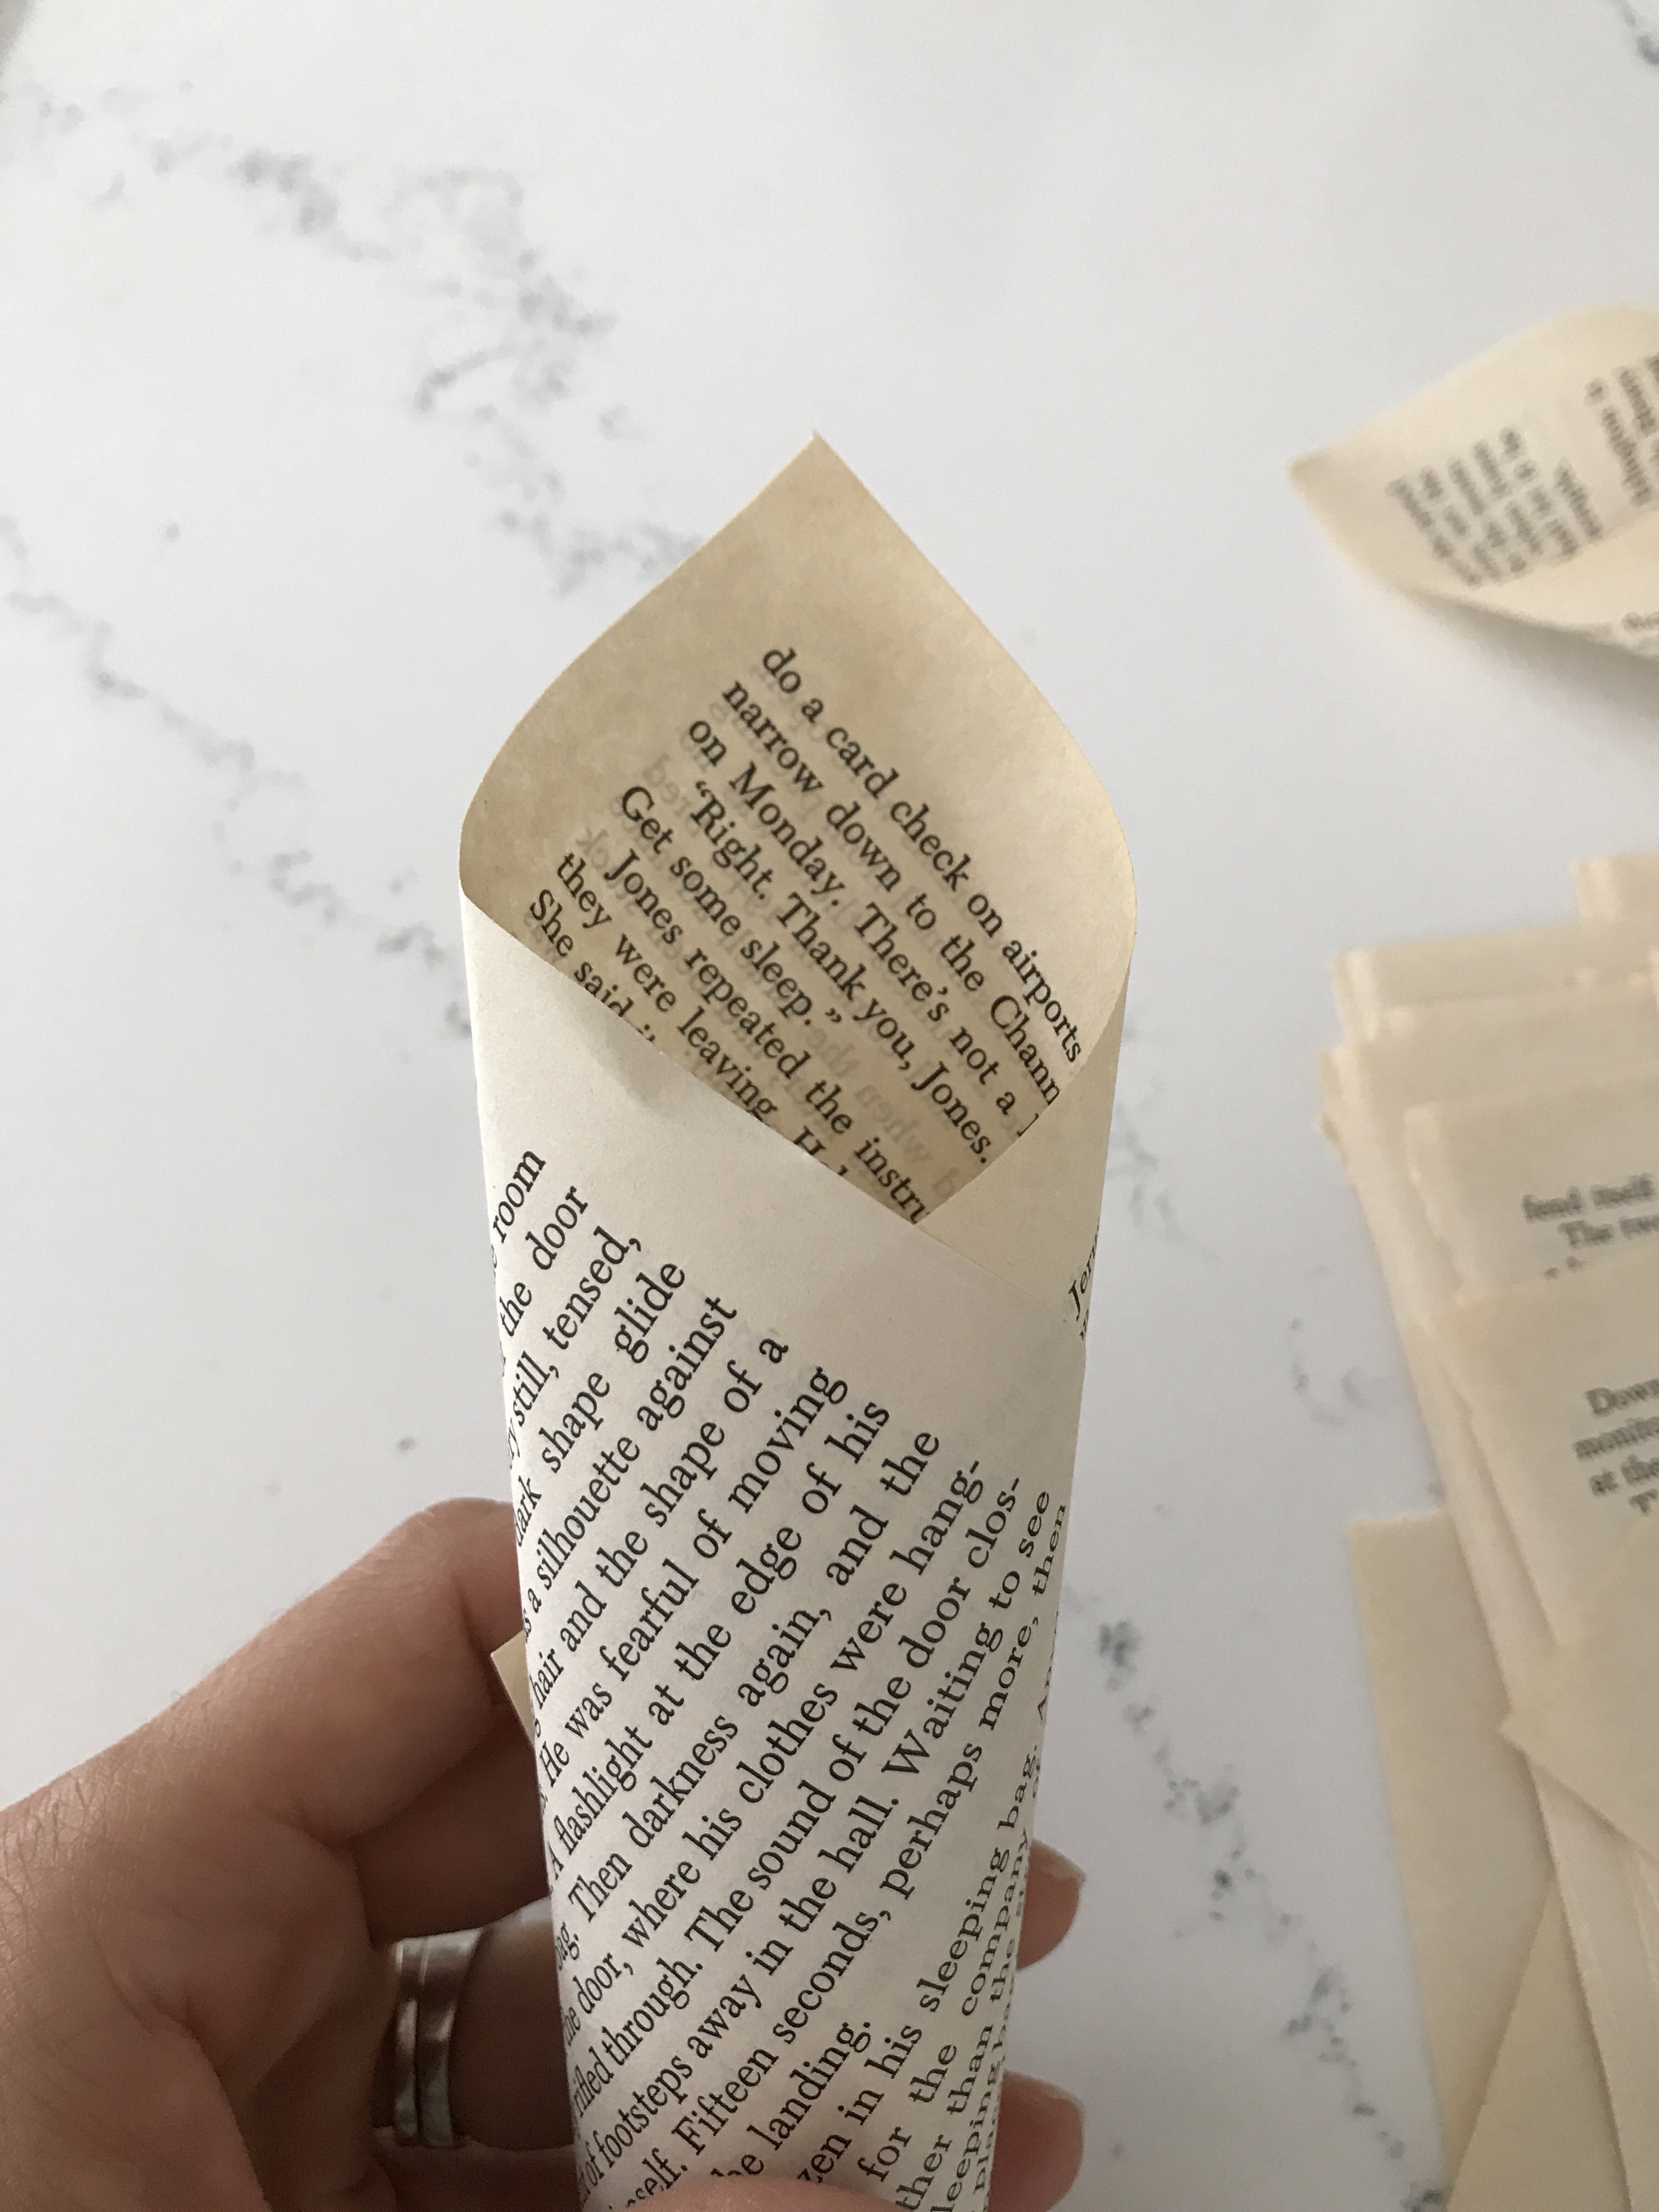
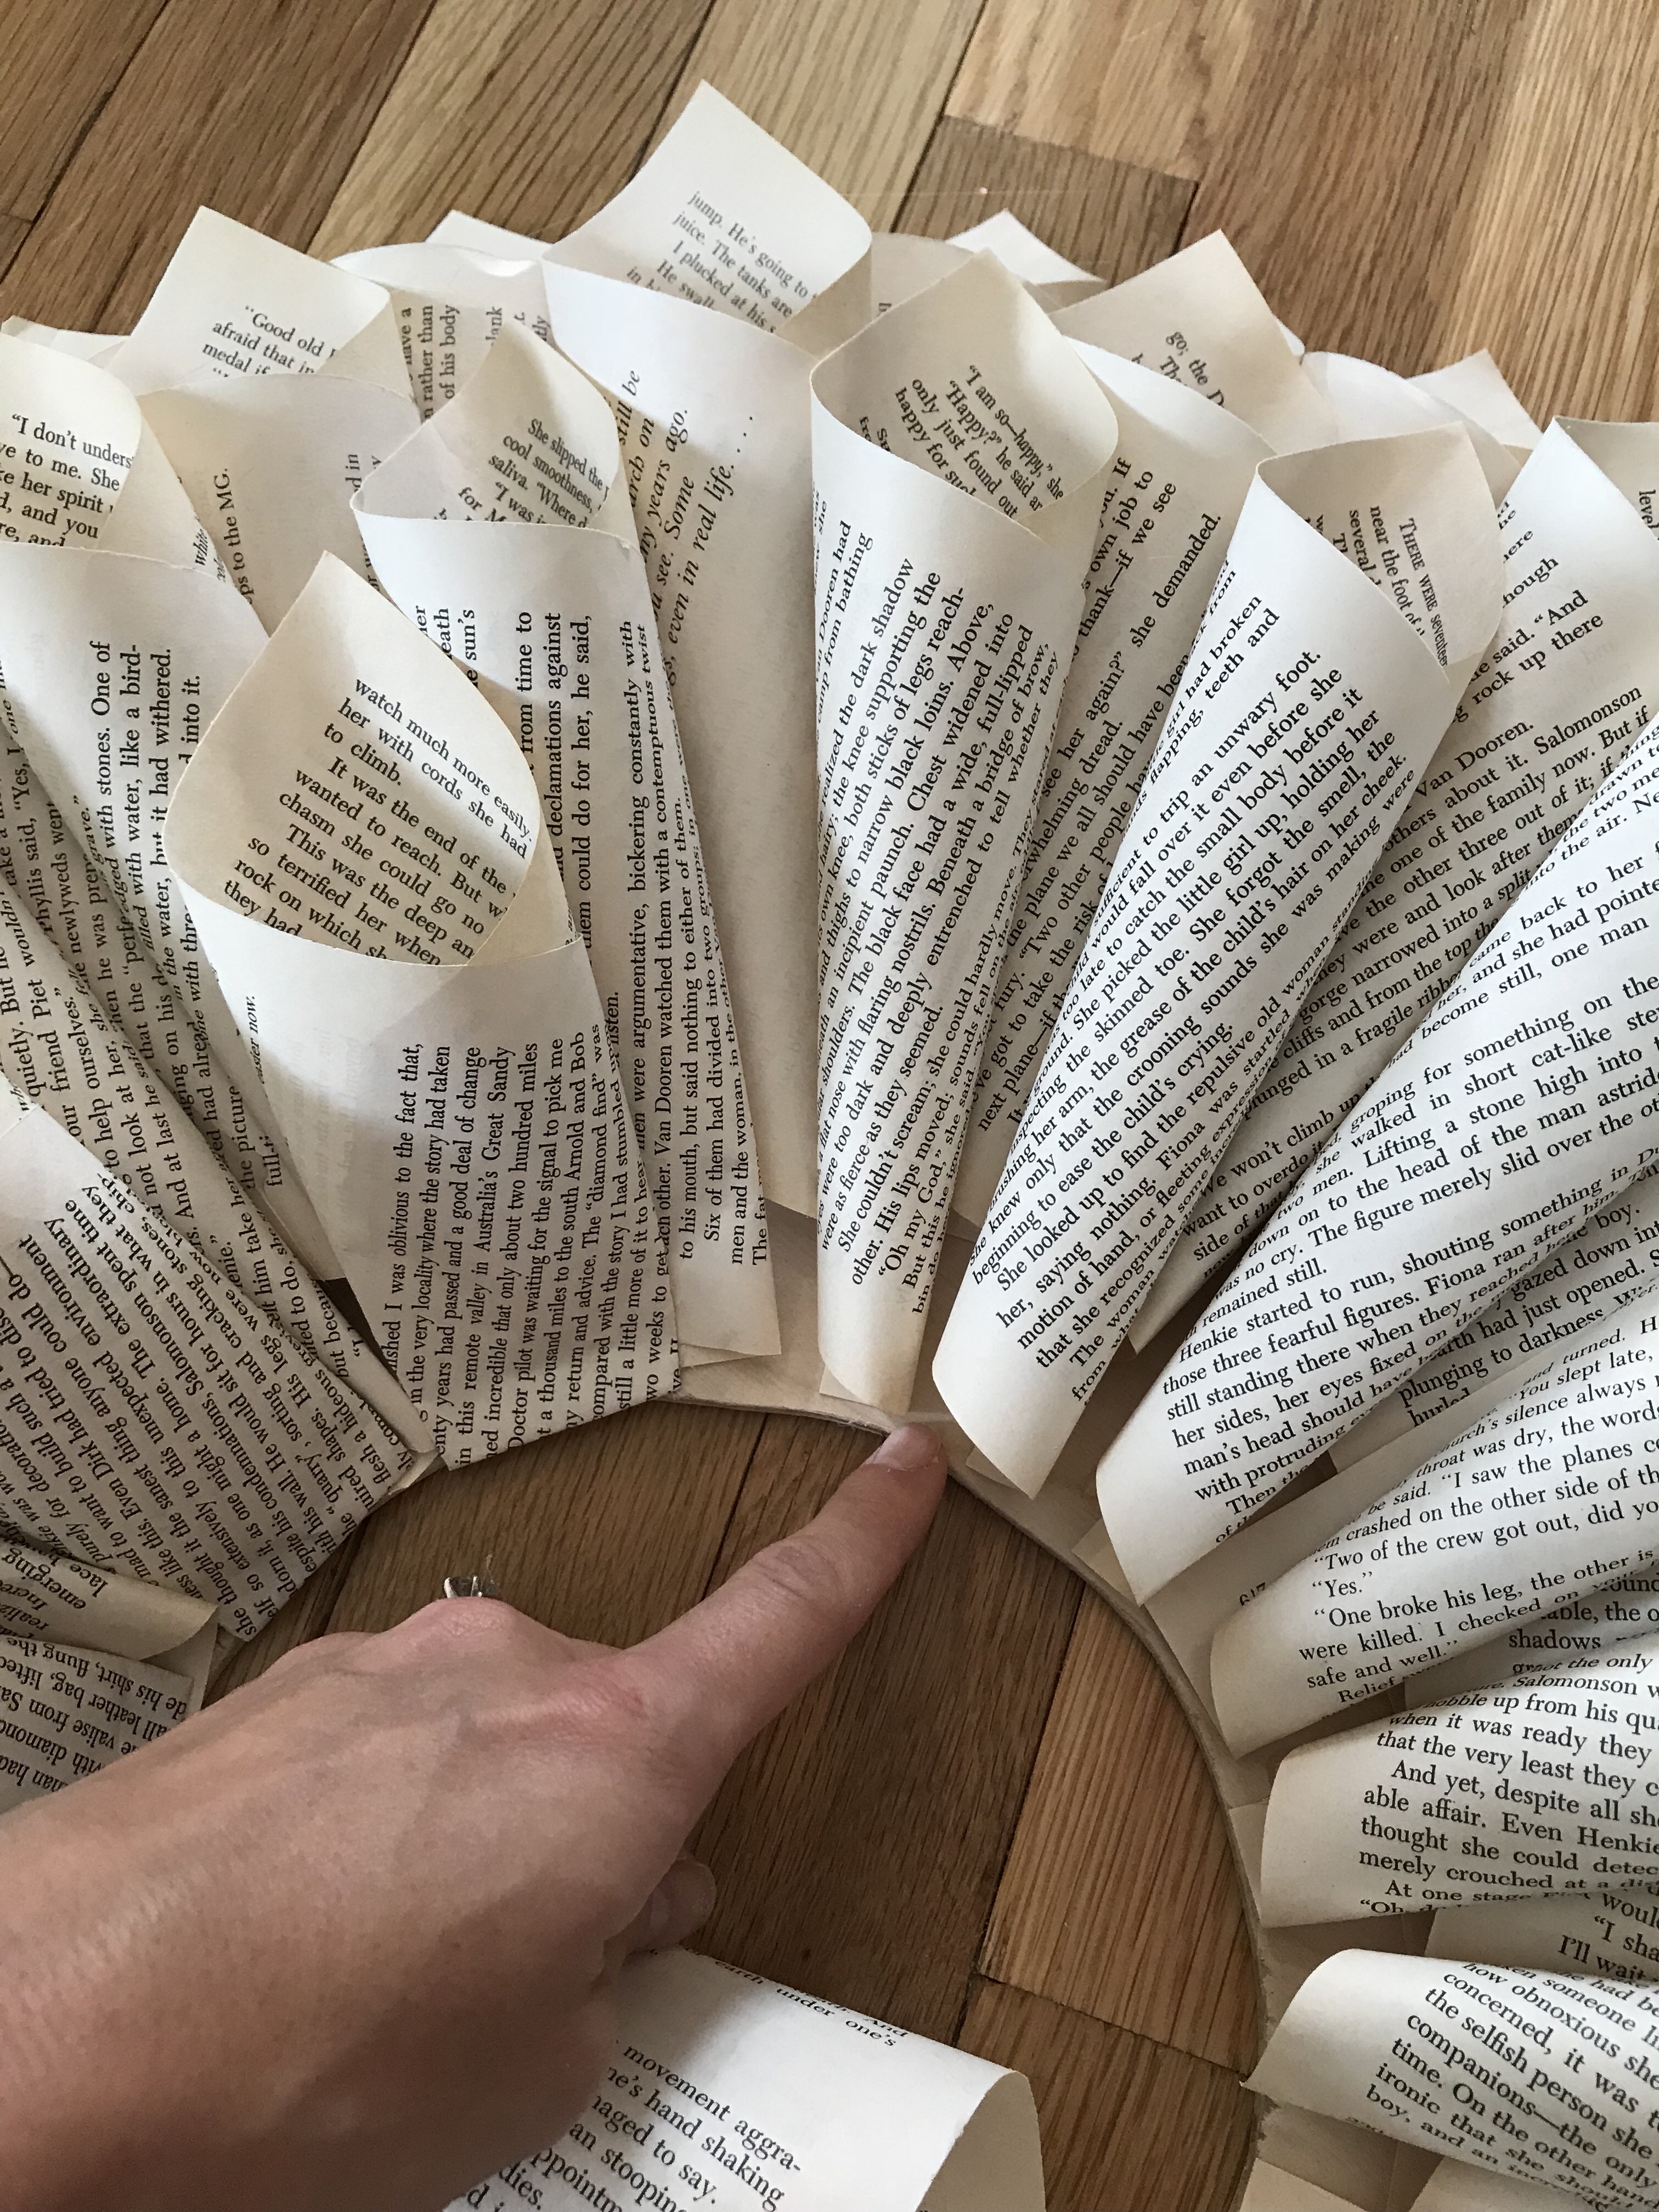
Plug in your hot glue gun… you will need a lot of it. Play around with this a bit to get the look you want. I made sure the page number was never showing (always on the back), and just start rolling until you achieve your desired look. Secure with a dab of glue, and repeat. Make sure you are forming them all the same so you don’t throw off the look of your wreath.
I did this over a few days (in about 30-60 minute increments over some trashy tv and delicious vino : ) , but if you are motivated, you could probably take one evening and be done. Just be prepared for some finger burns.
If you don’t have great attention to detail, I suggest drawing yourself some guidelines before you start gluing. But if you’re a risk-taker like me, just be careful and have at it.
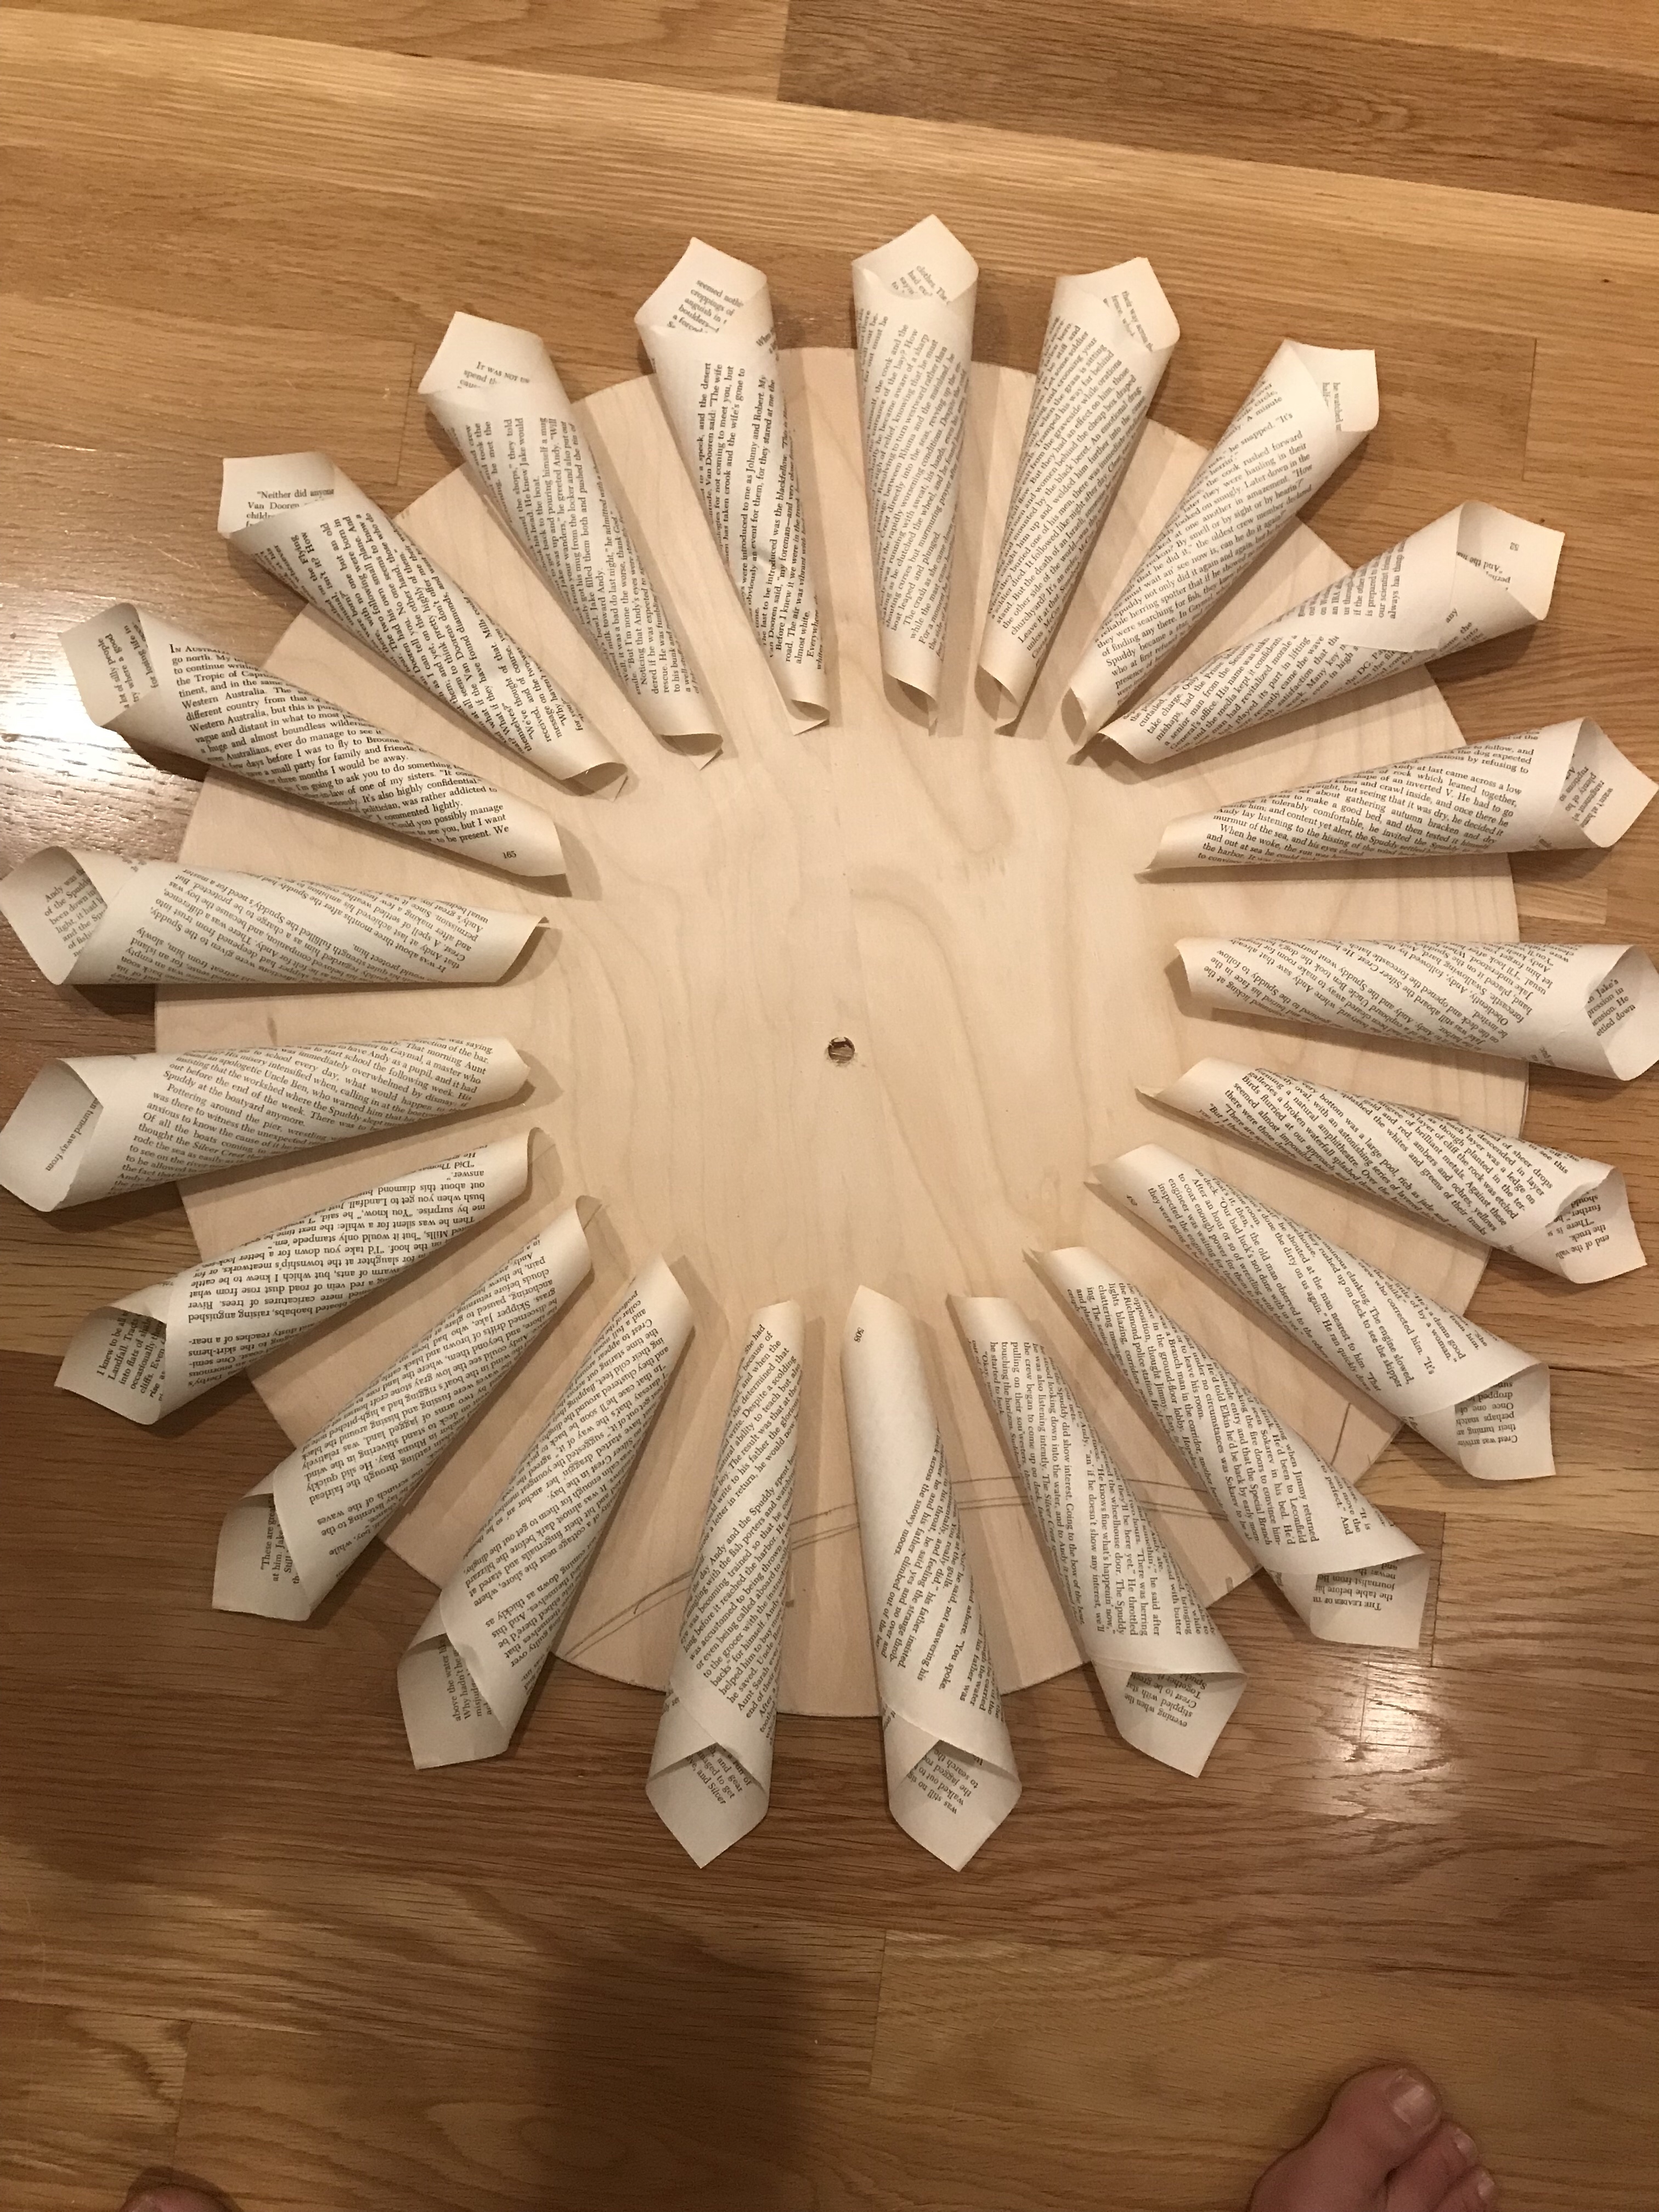
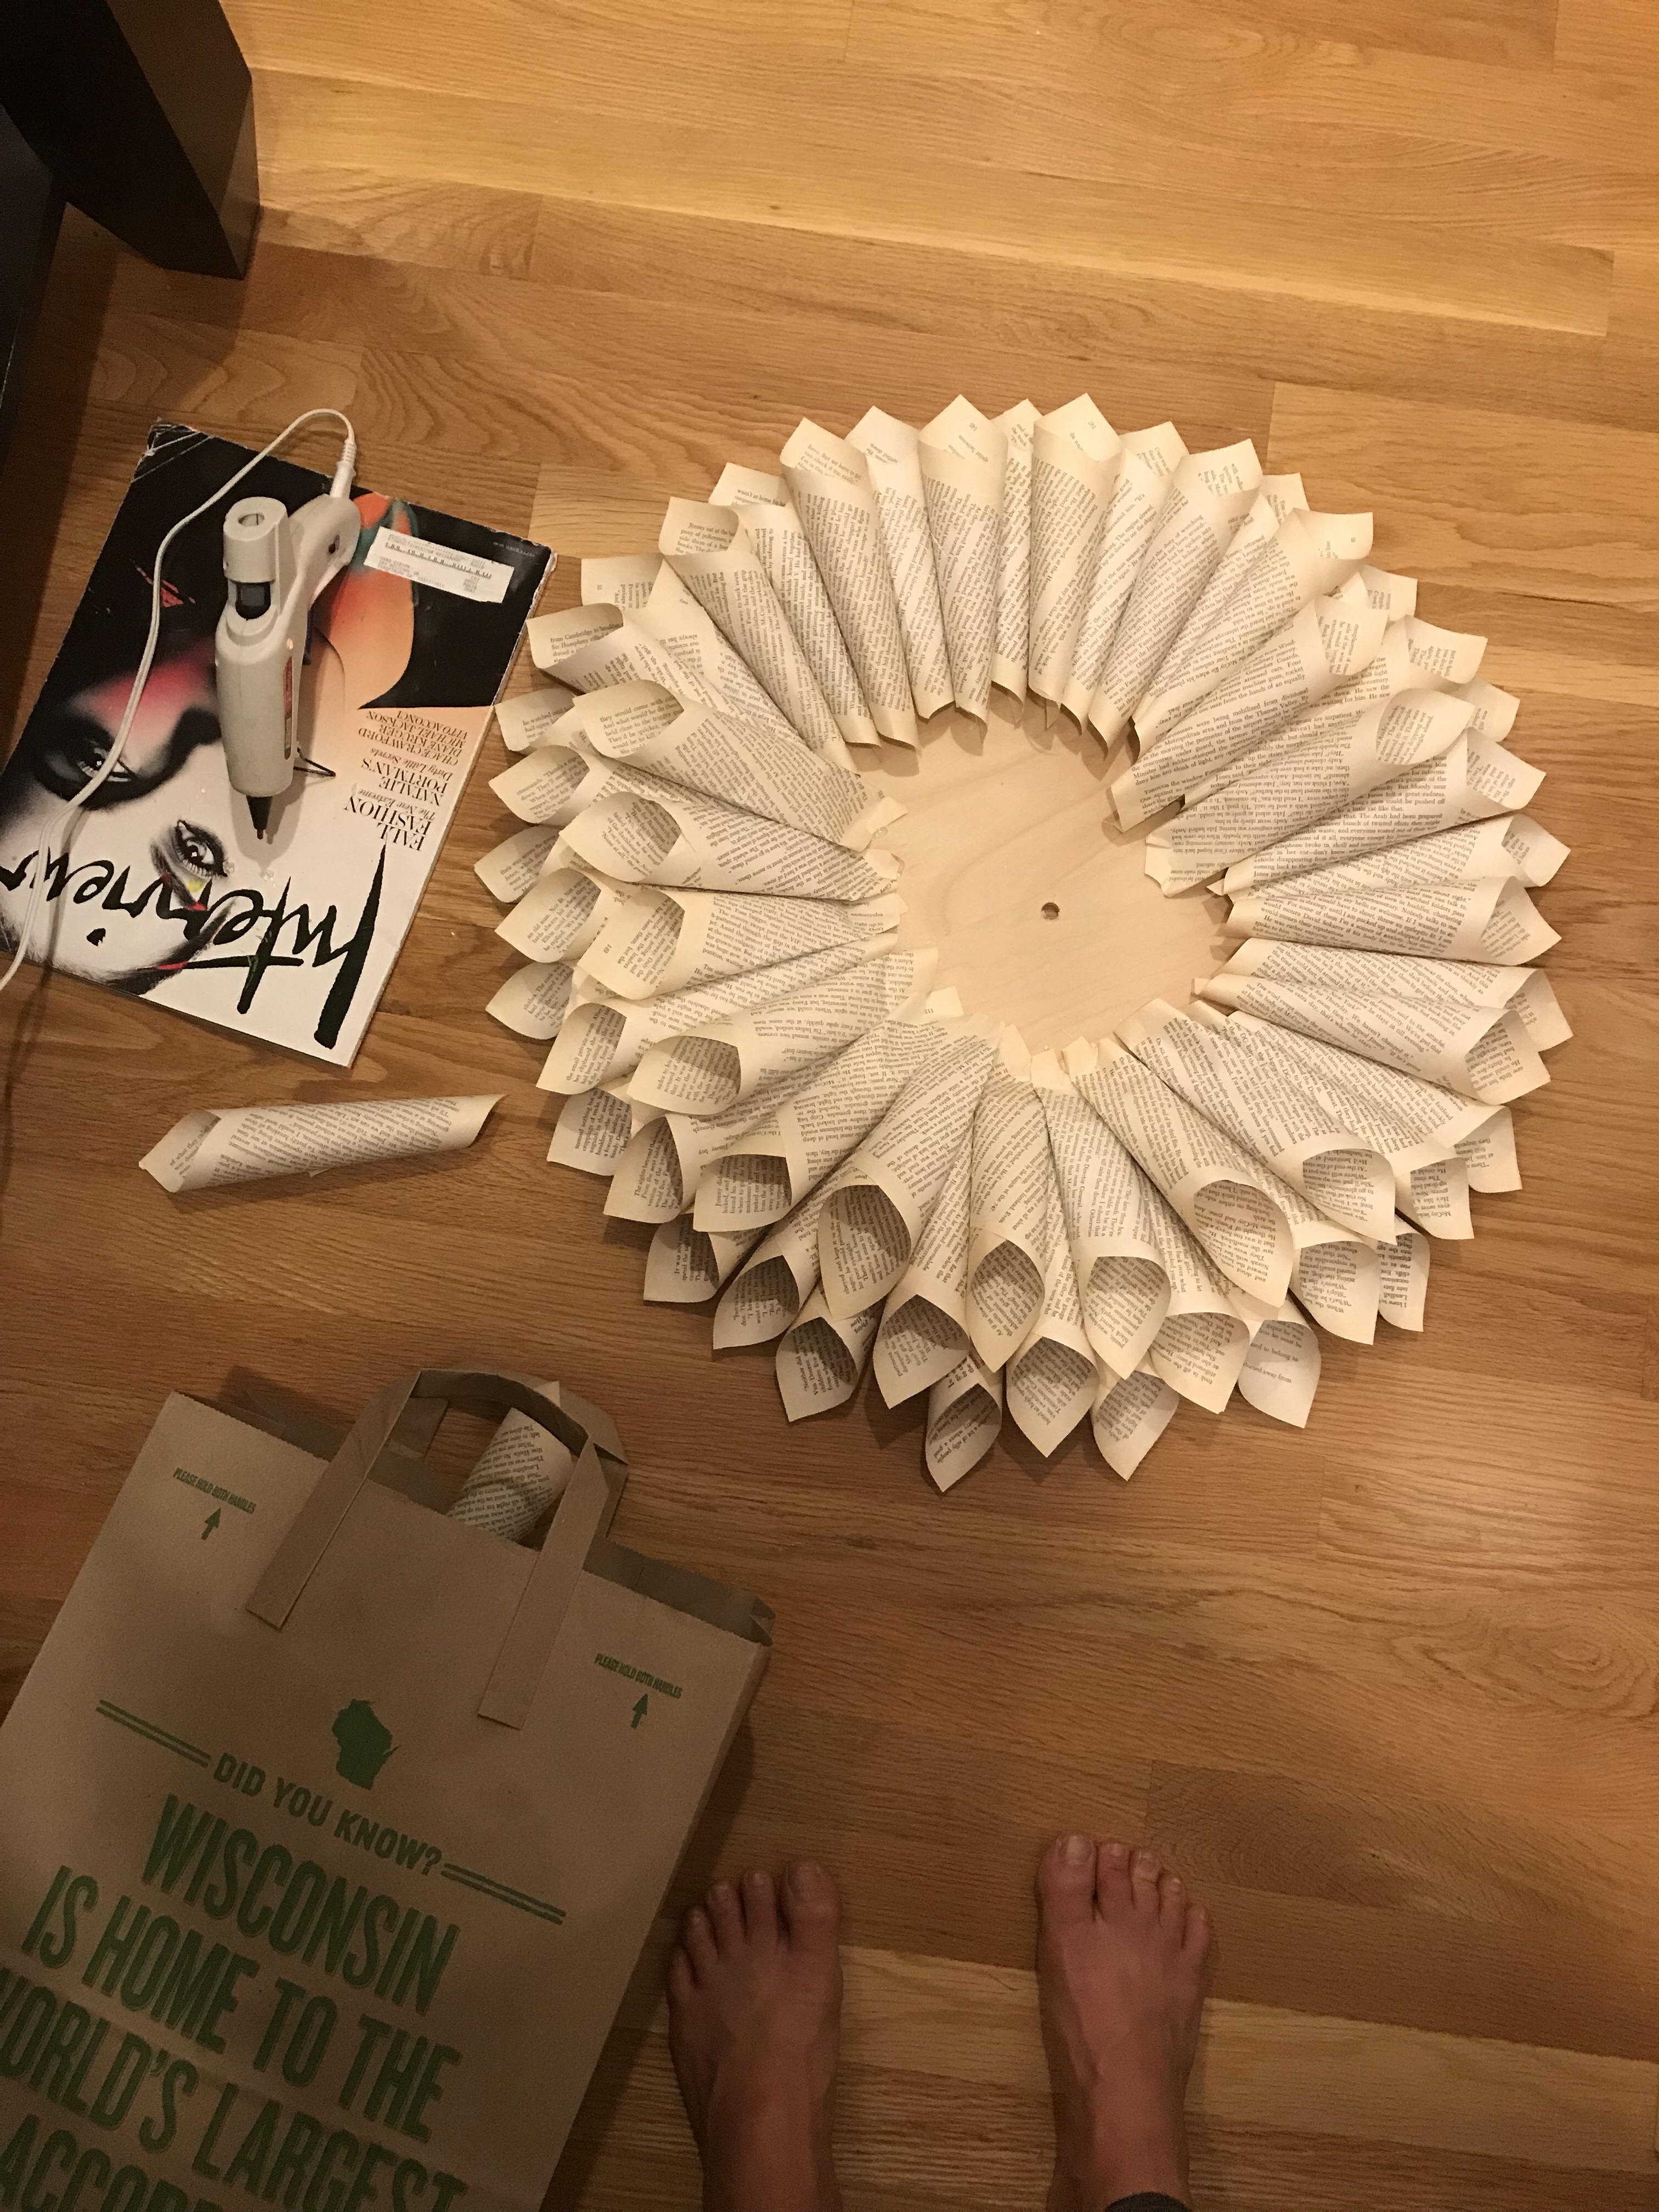
I started about 3 inches from the edge, and spaced the cones out so I could fit another layer of cones in between them for the second round. Here’s the completion of layer 1:
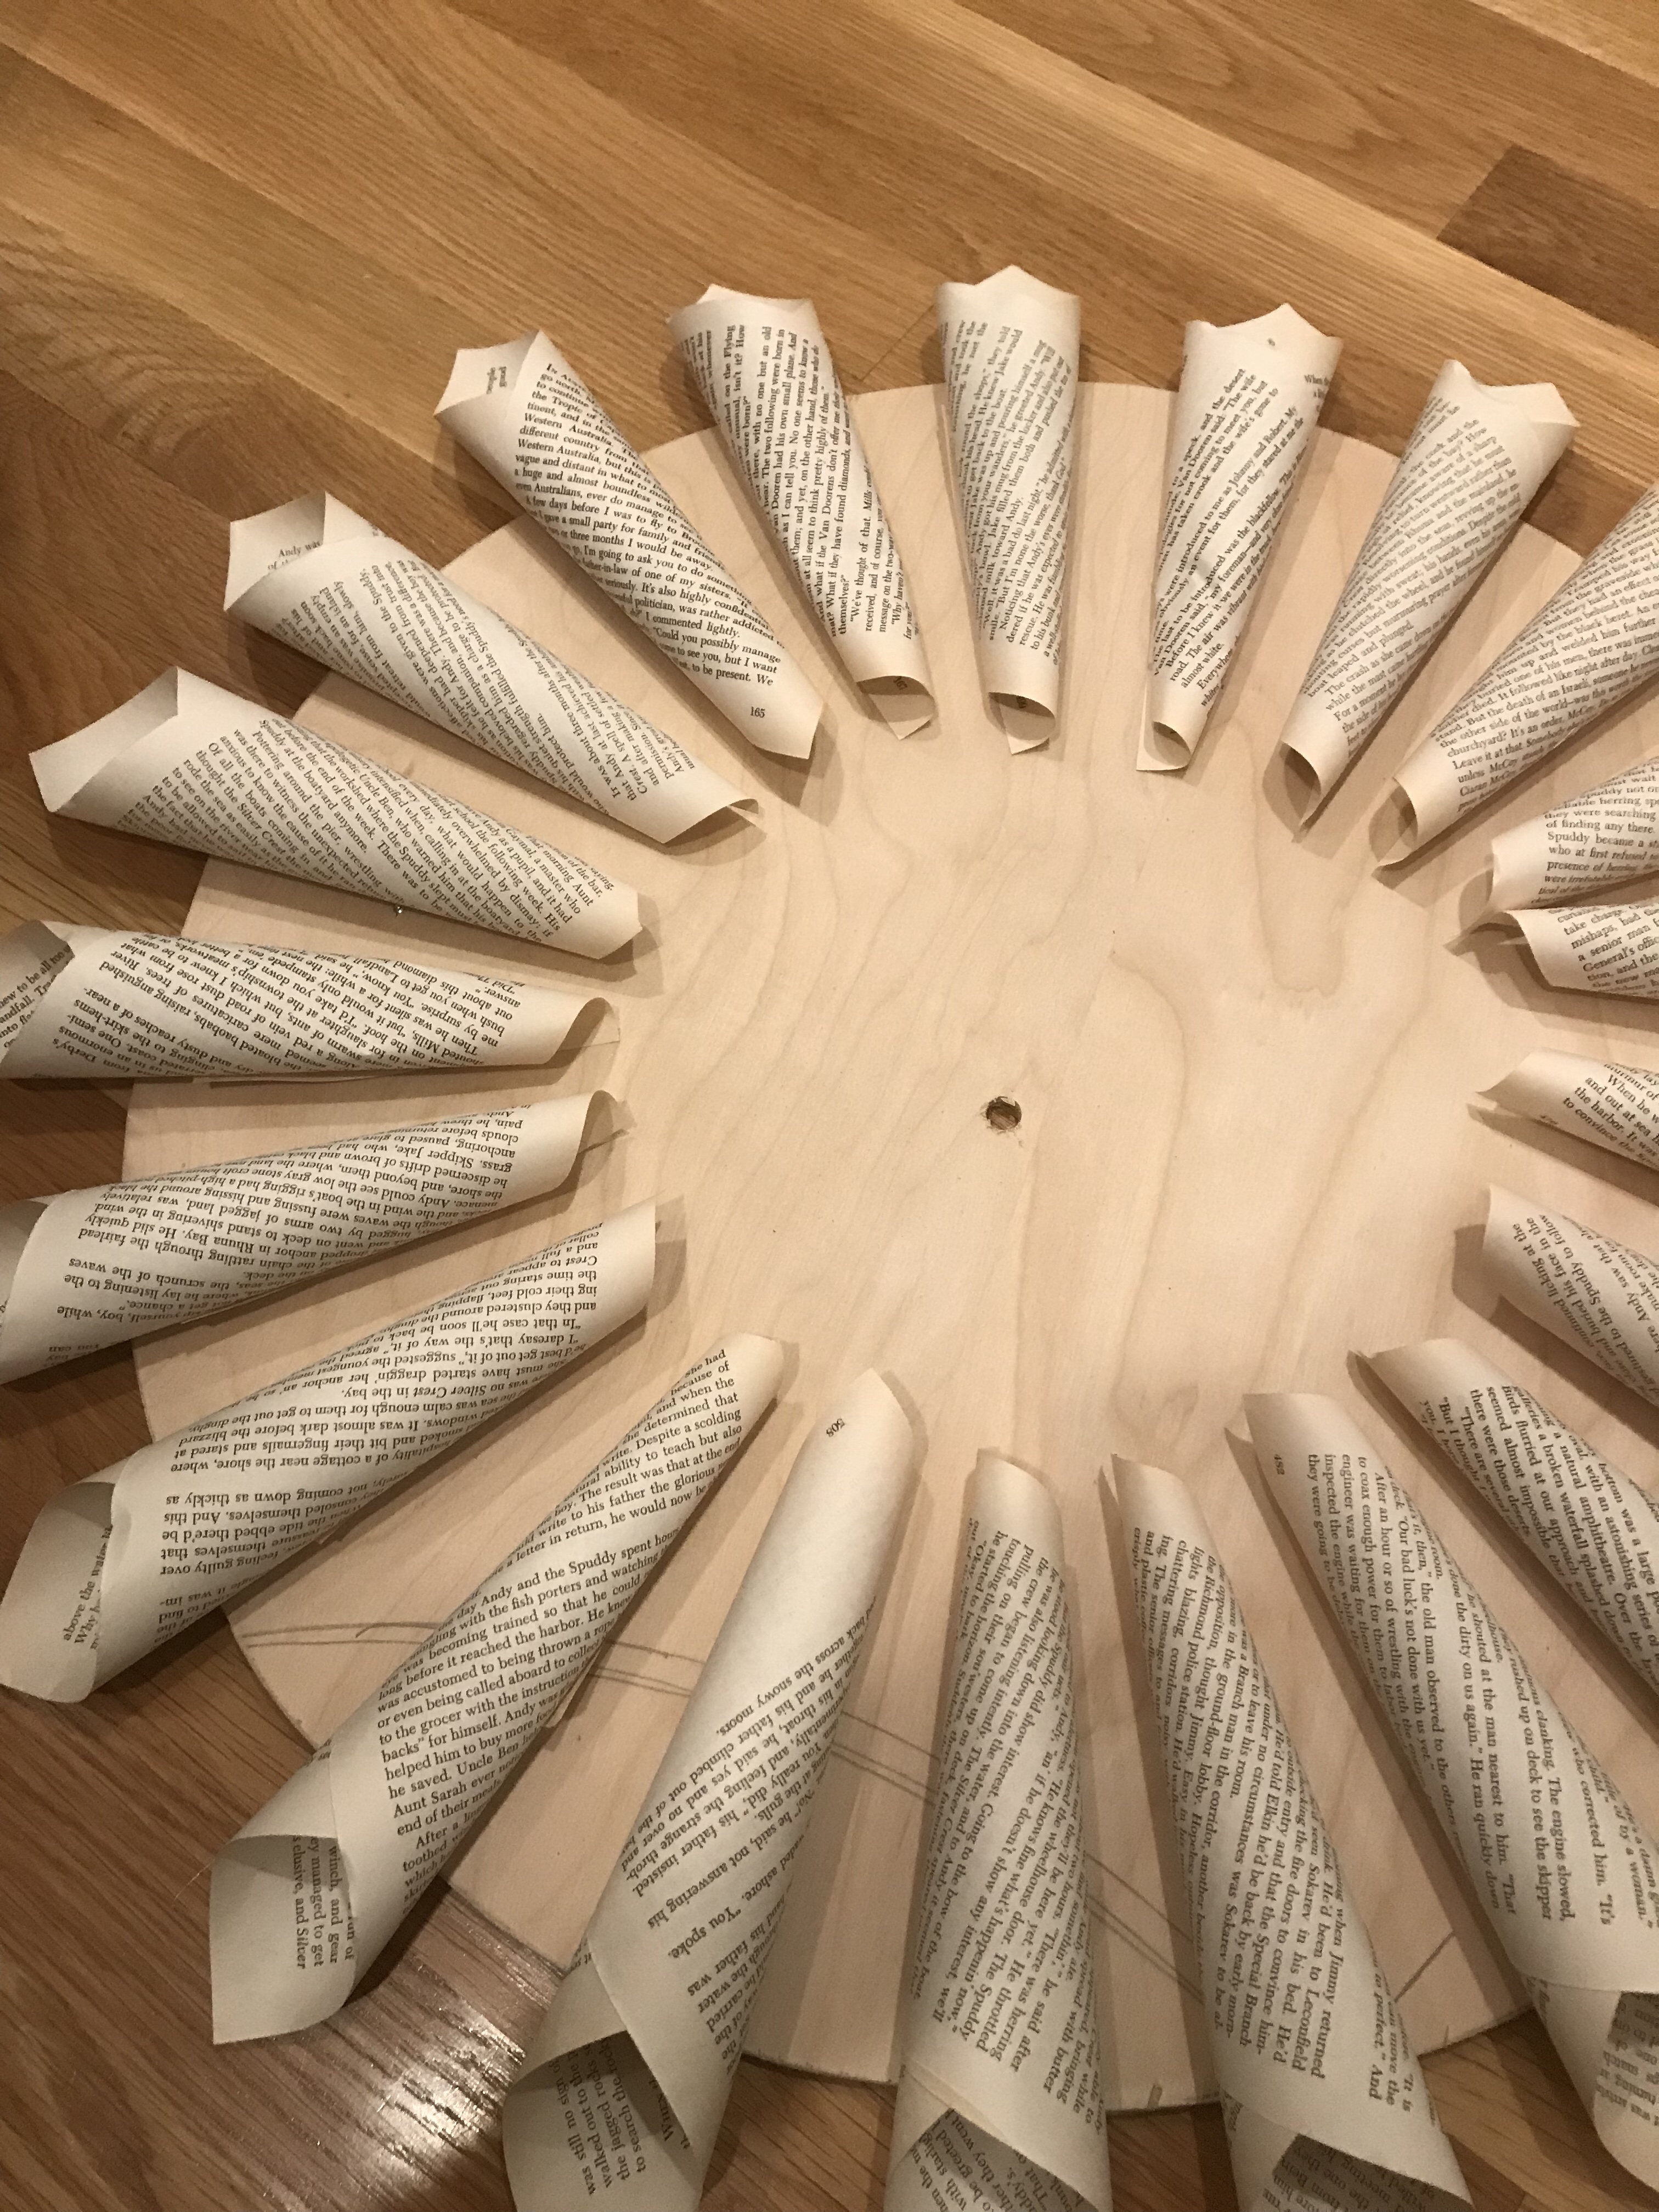
And here’s the next layer starting to take shape. I started each layer about an inch or so below the one before it.
TIP: I added glue to the sides of each cone that I was layering on top of to help secure the next one. Just remember, this isn’t a science, but you do want to make sure your piece is sturdy.
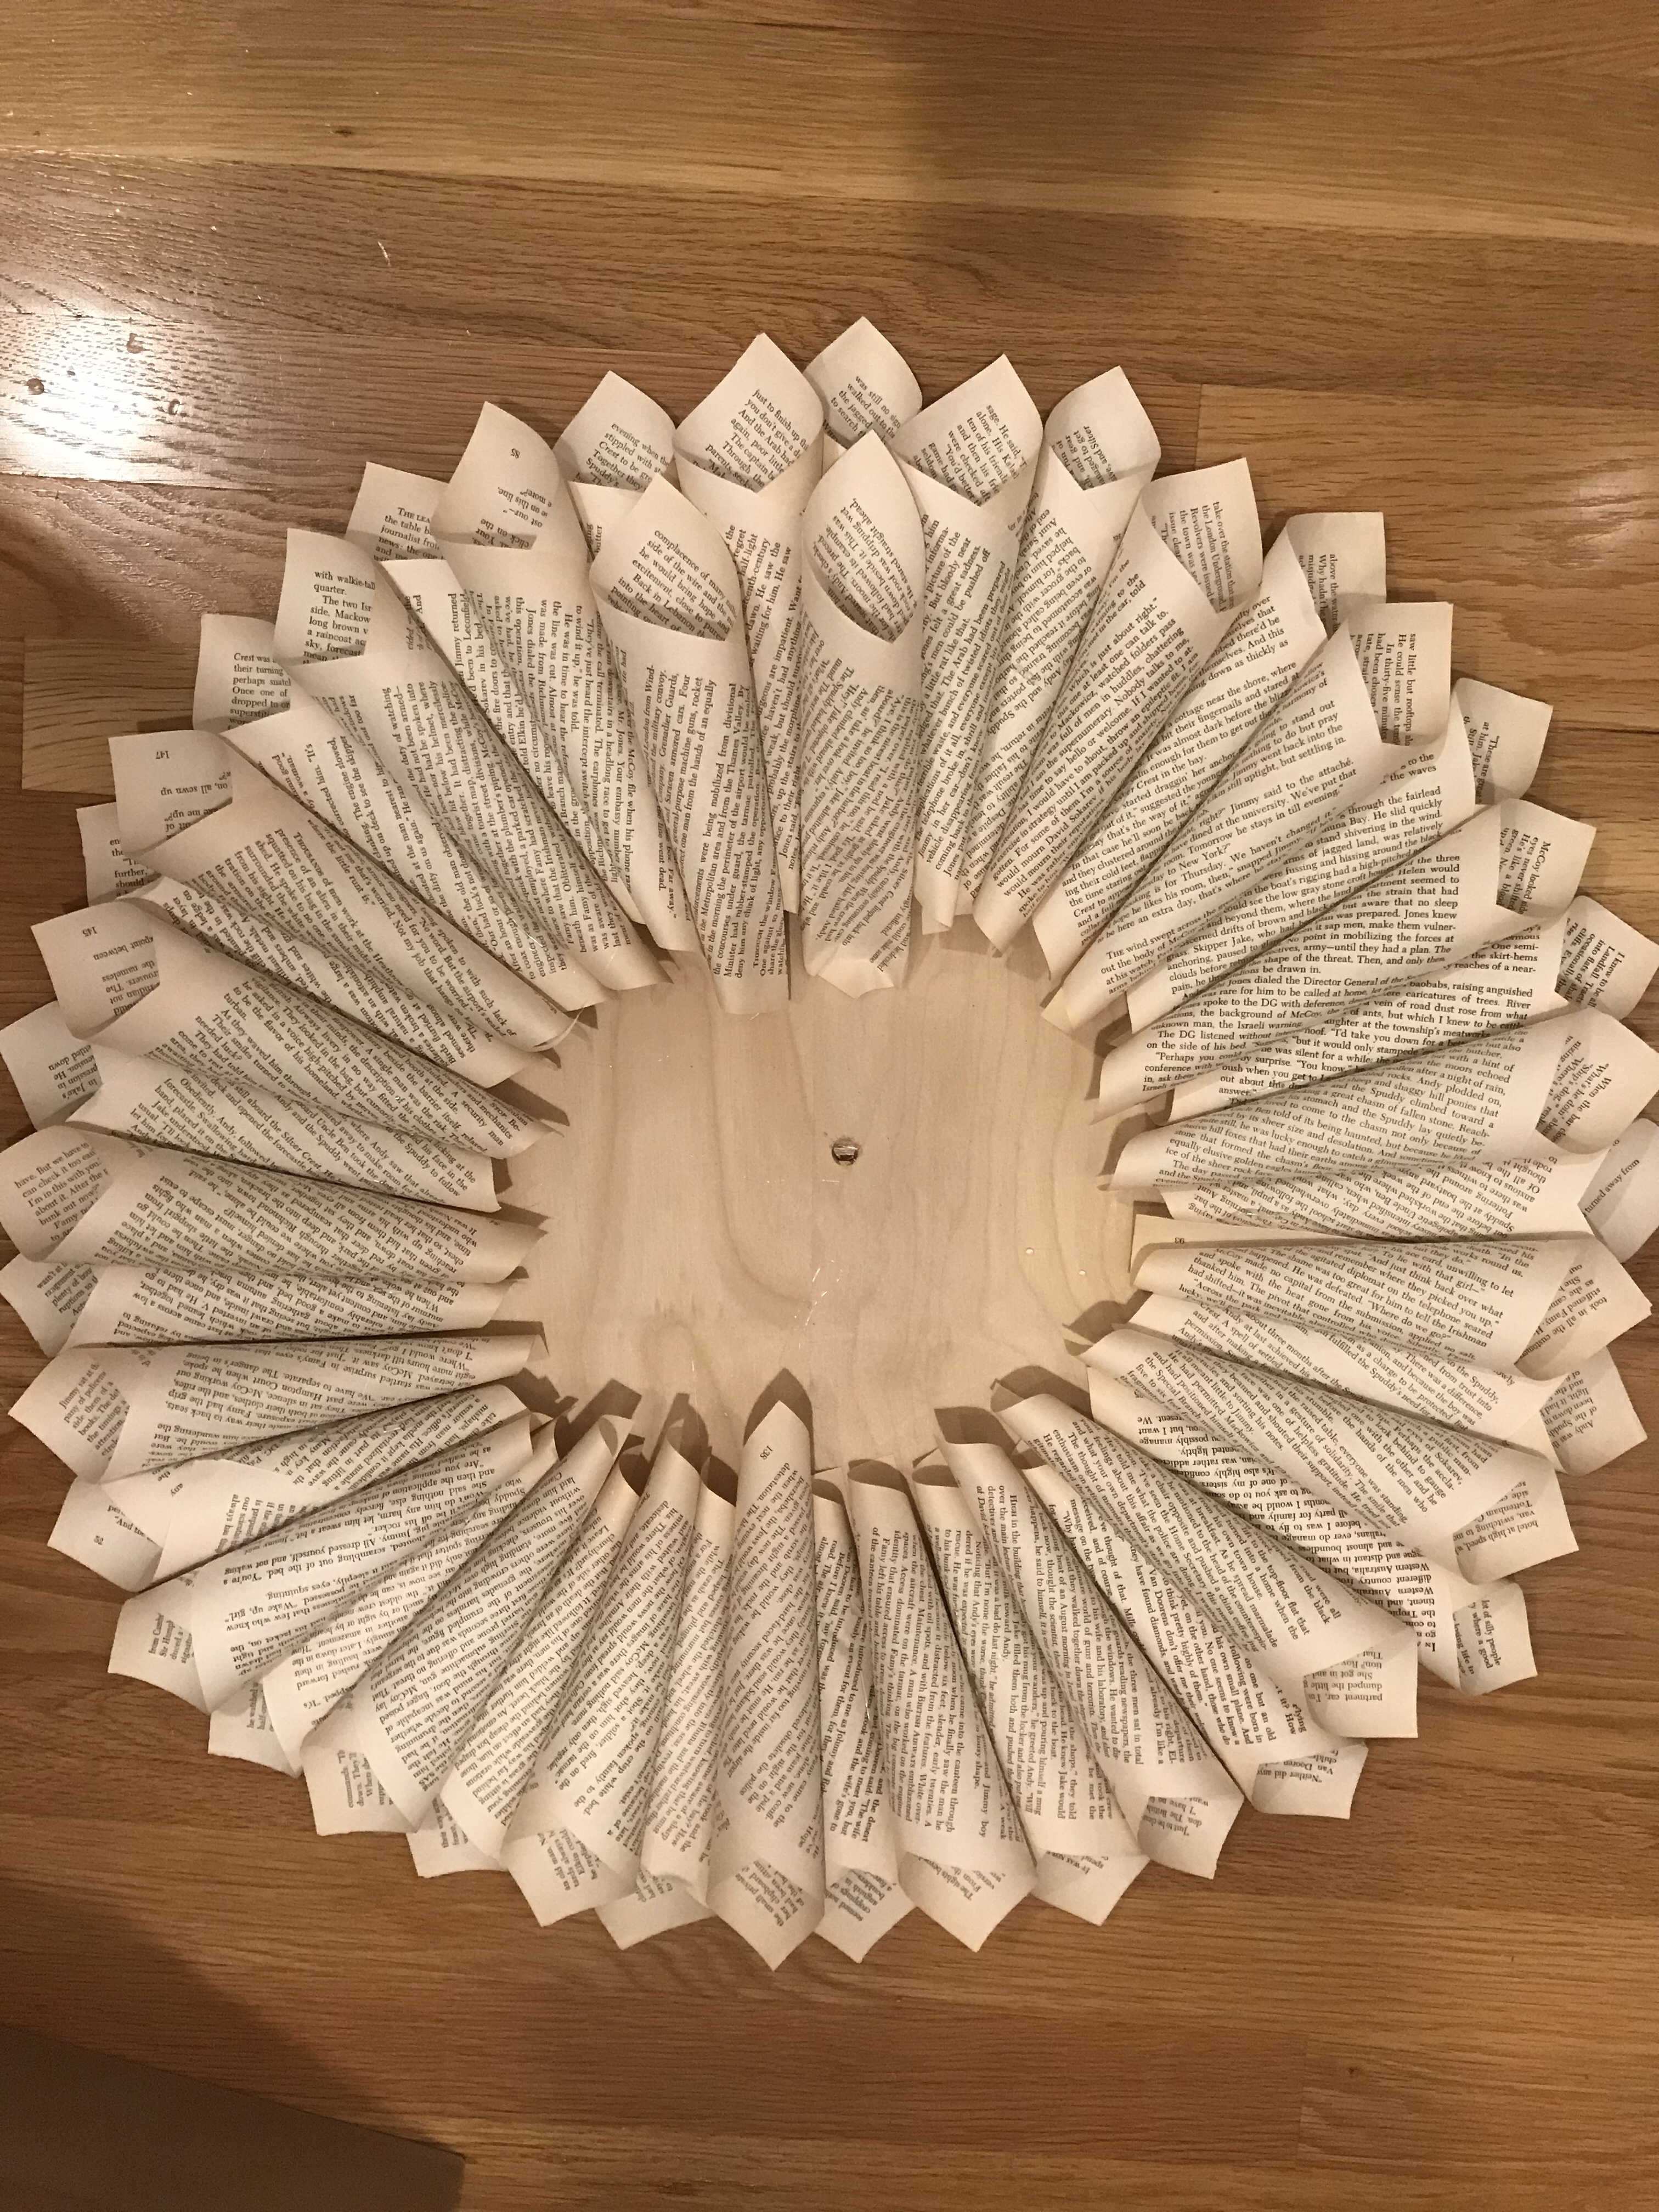
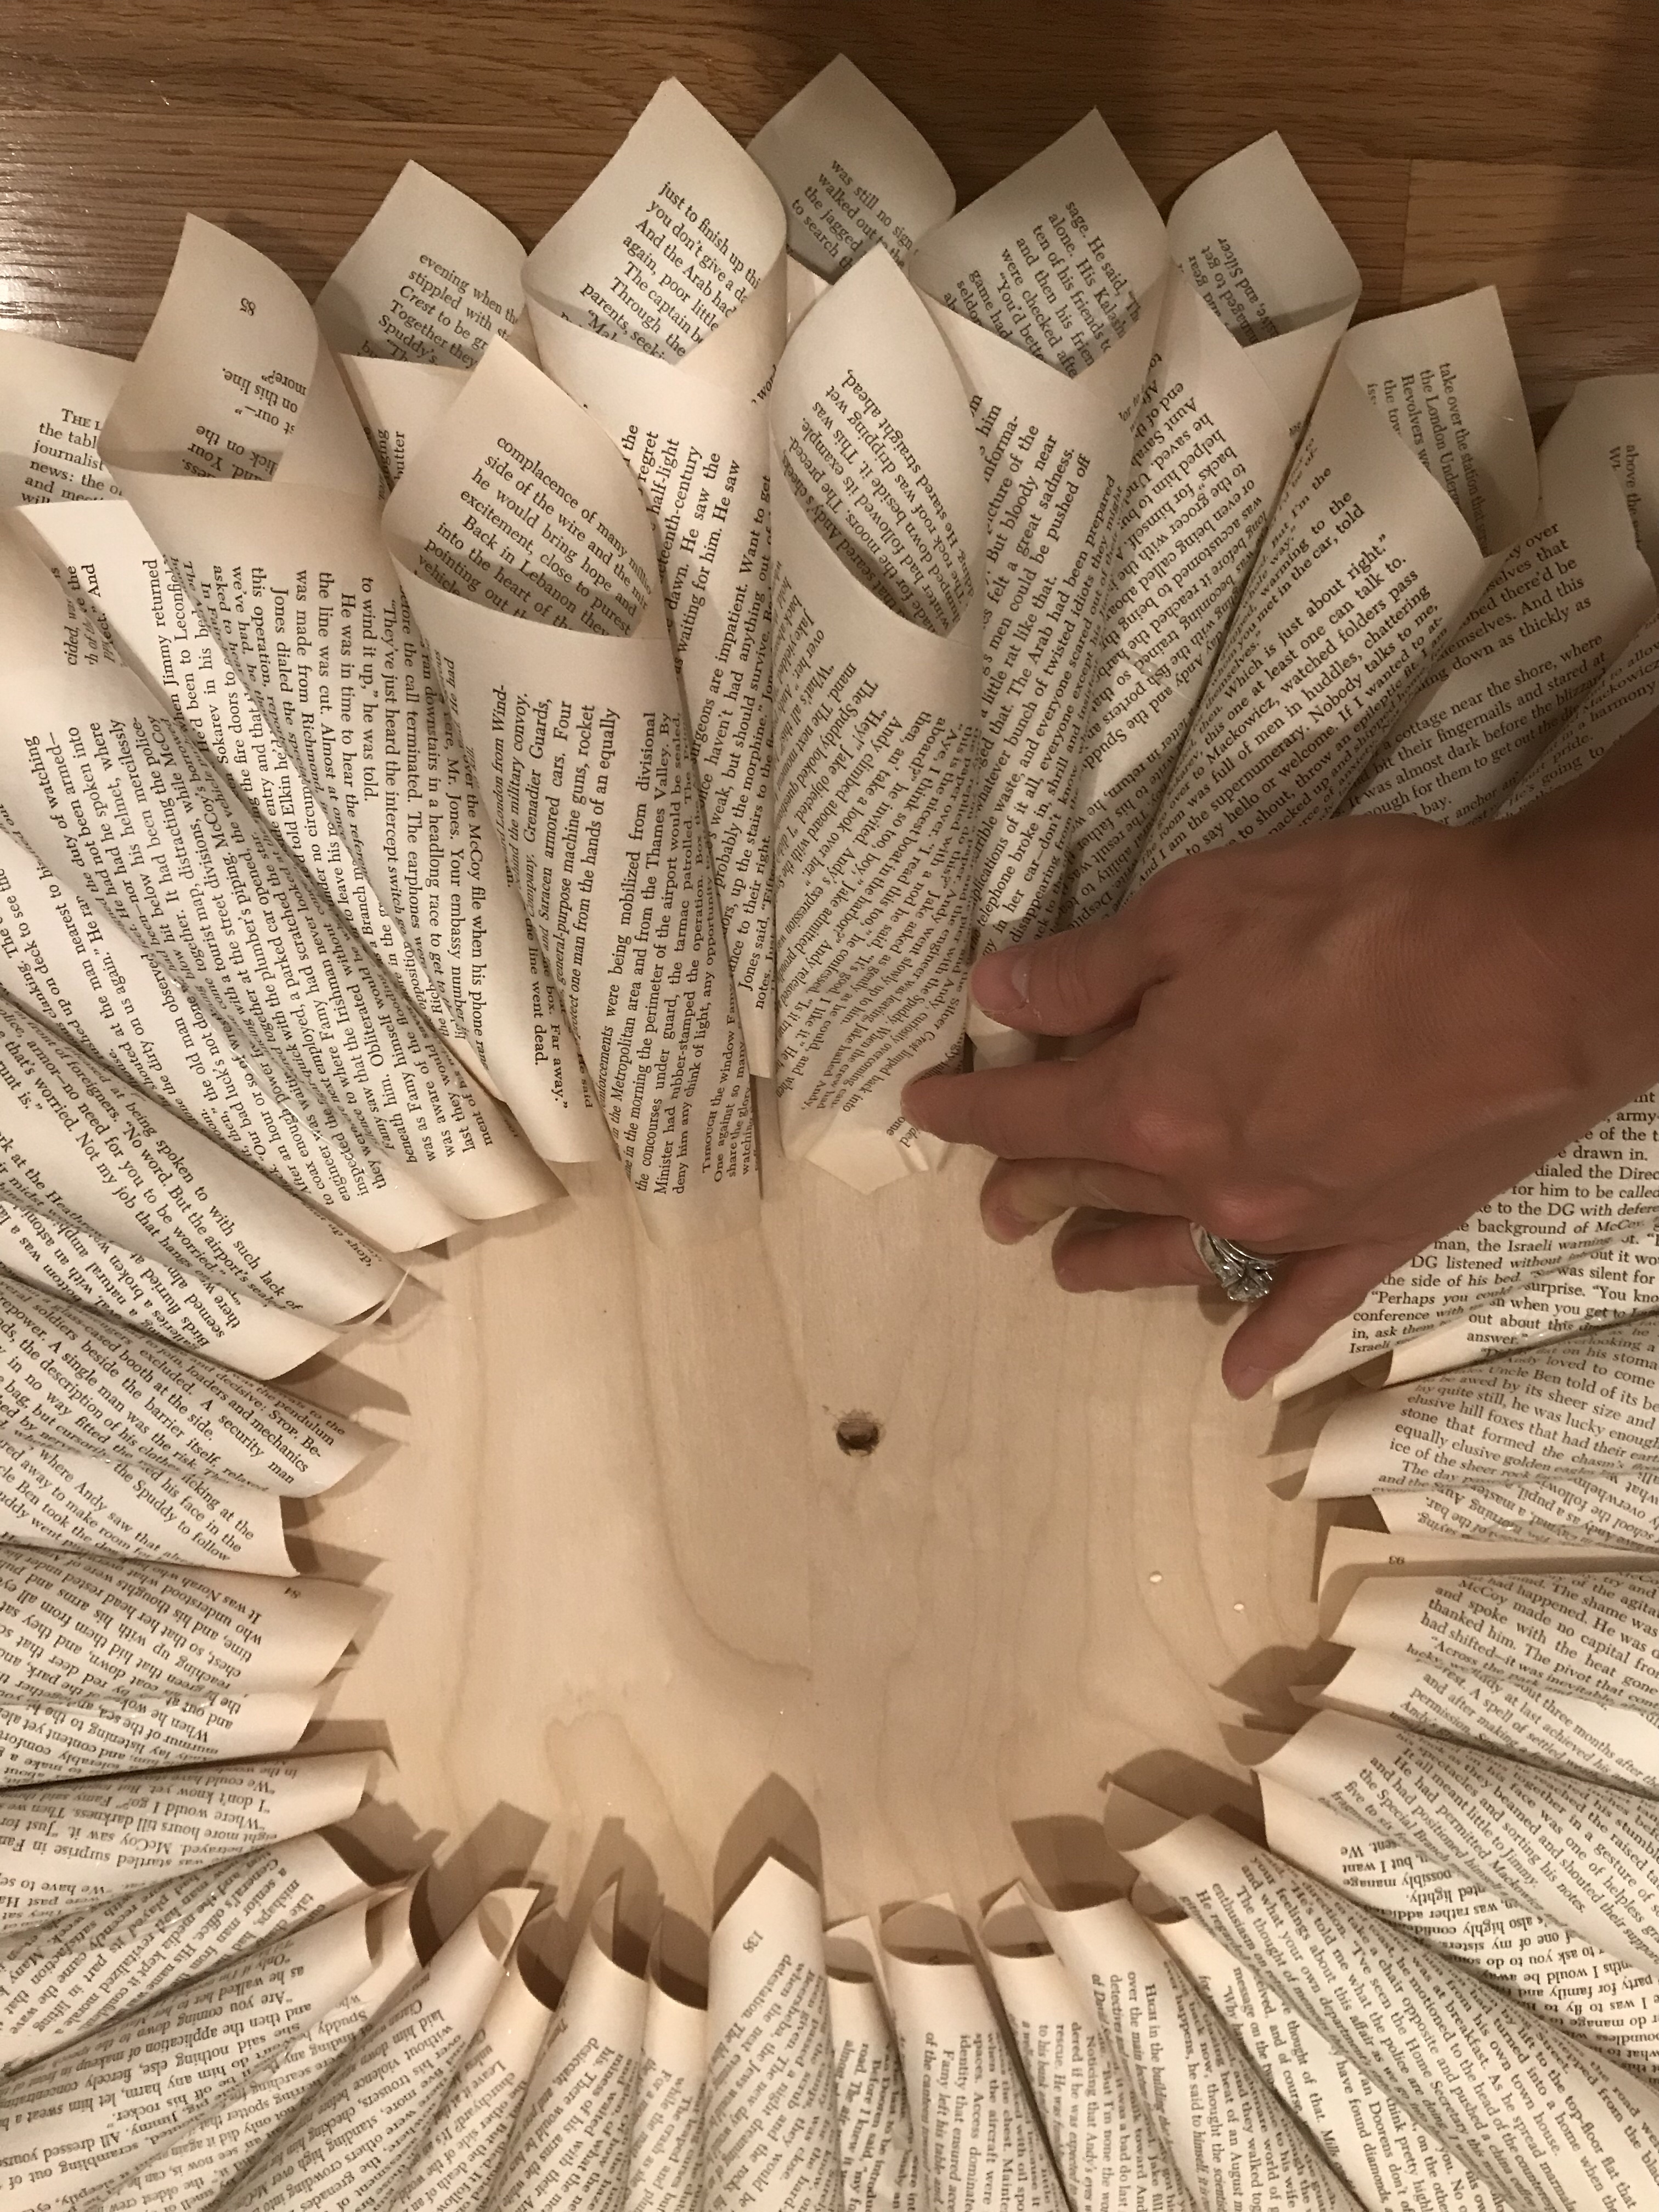
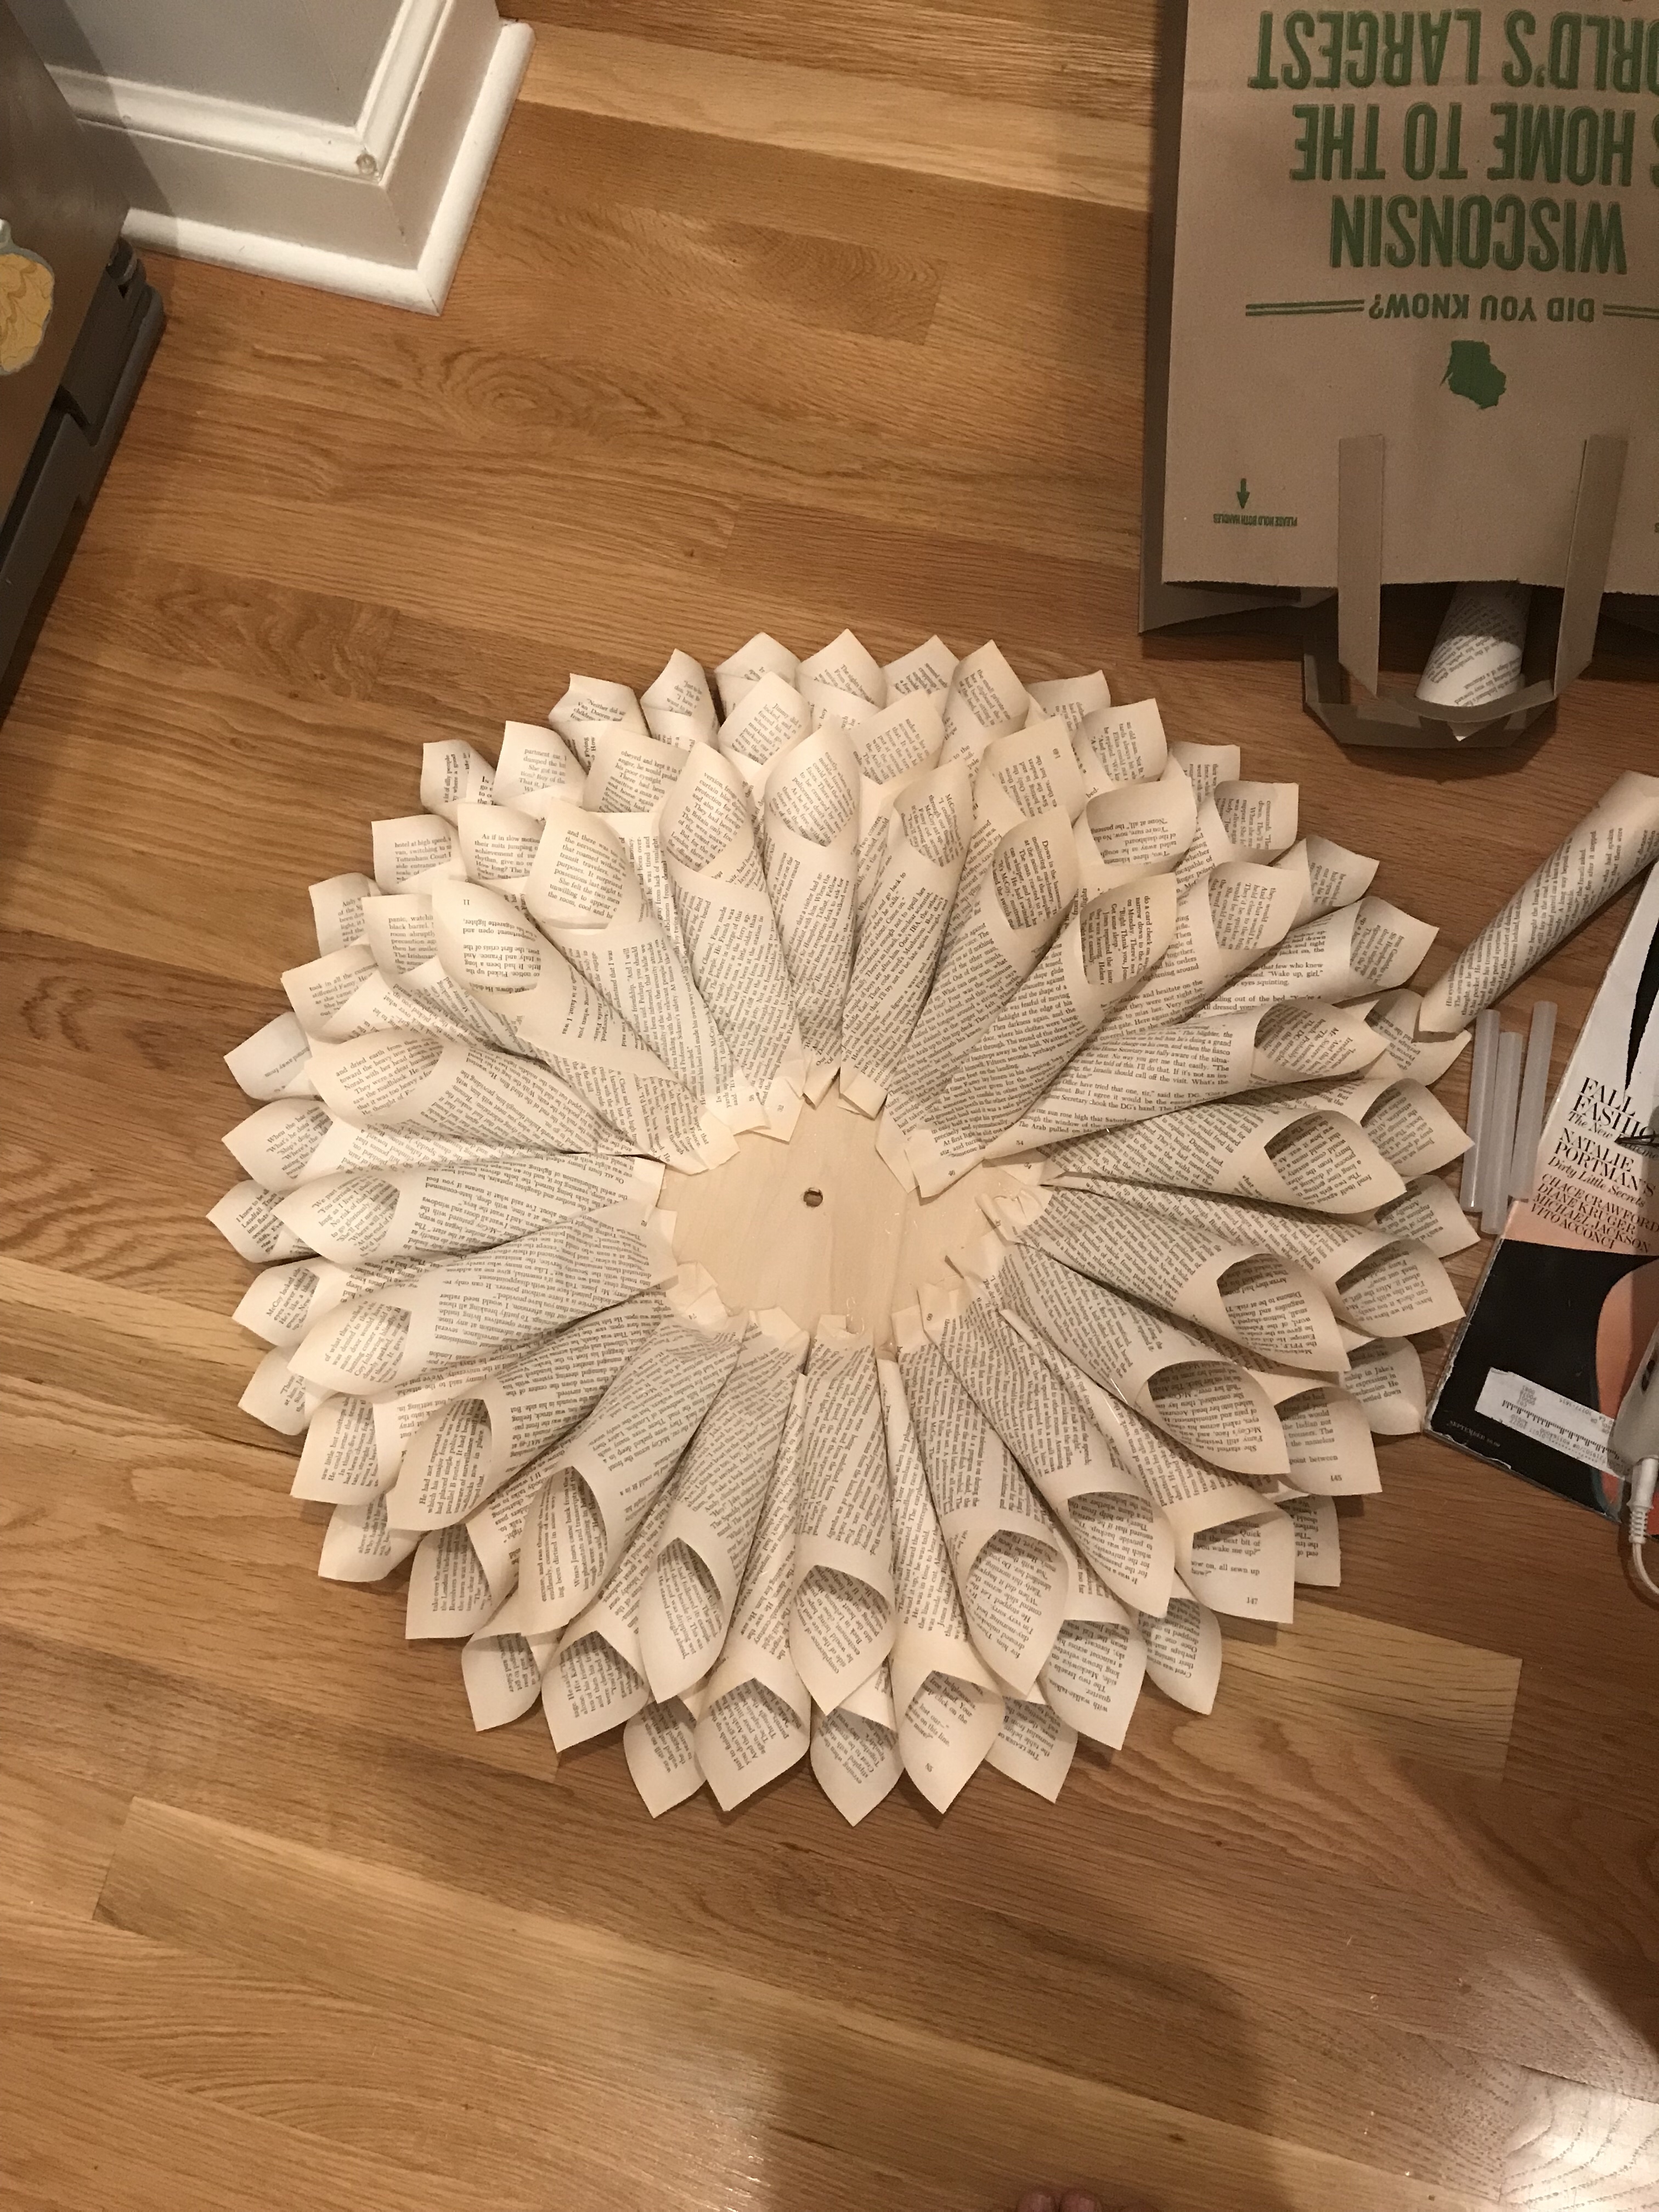
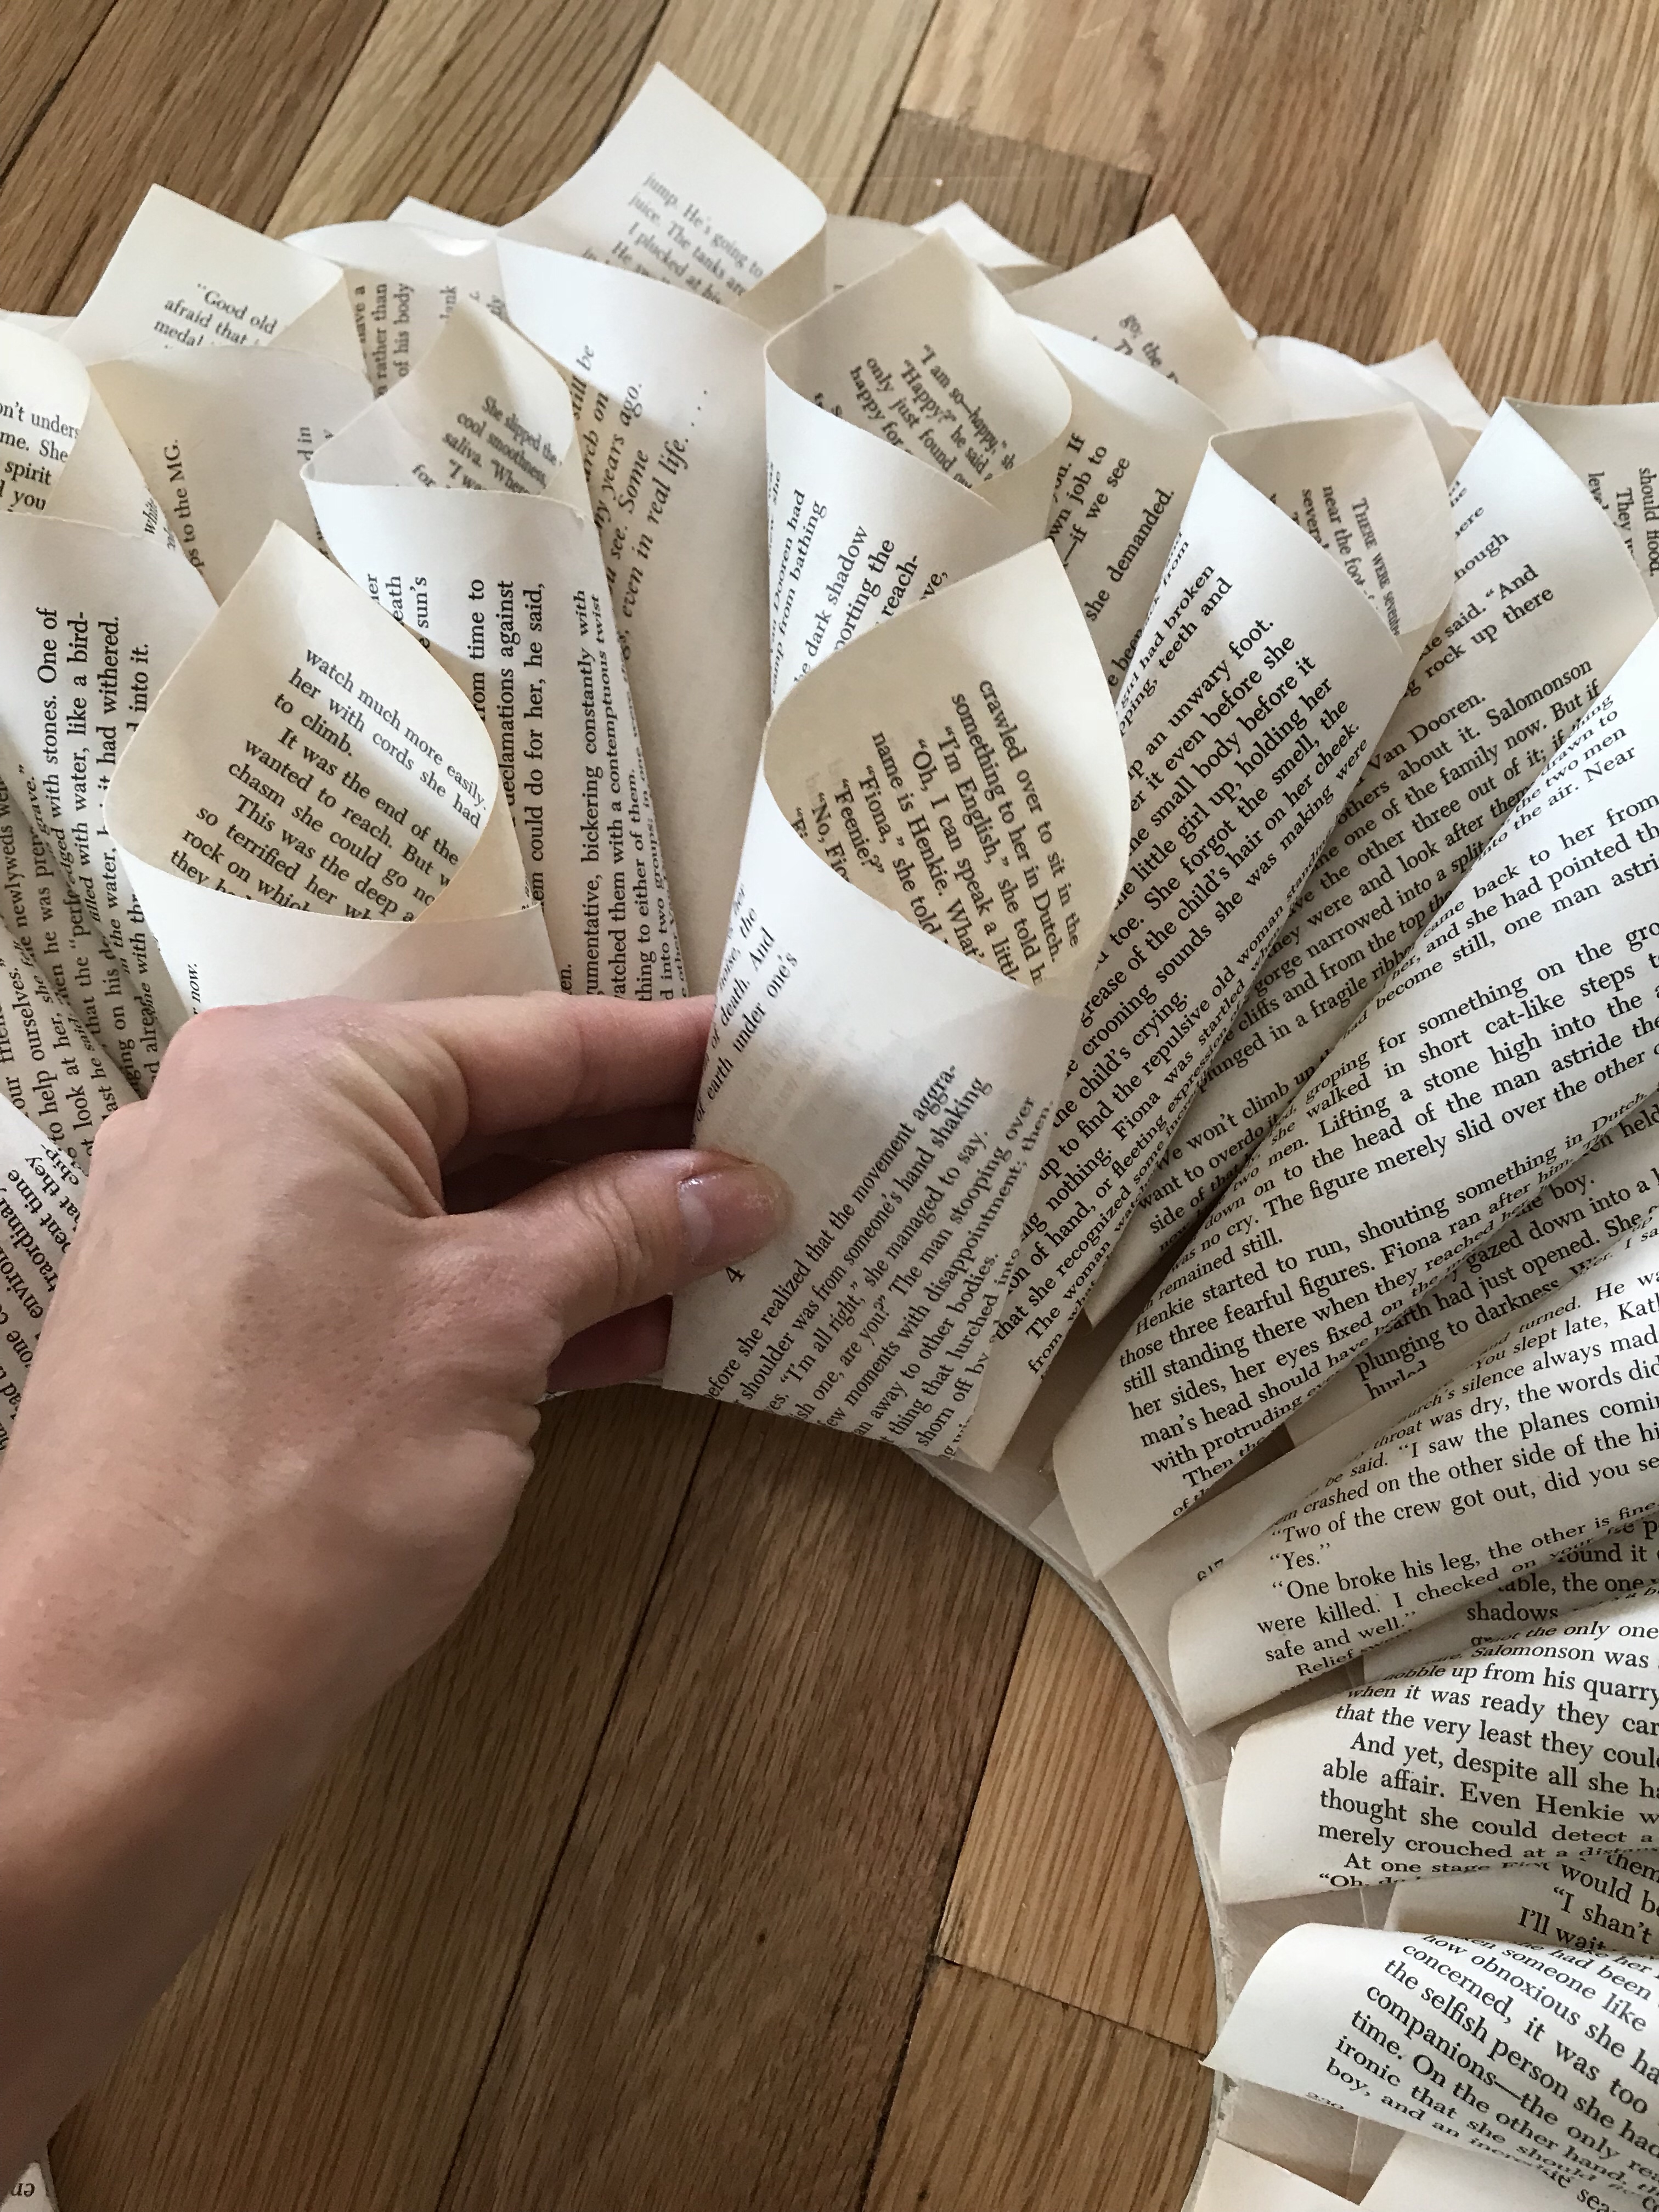
Keep repeating your layers until you reach the center point. Then, it gets a little trickier.
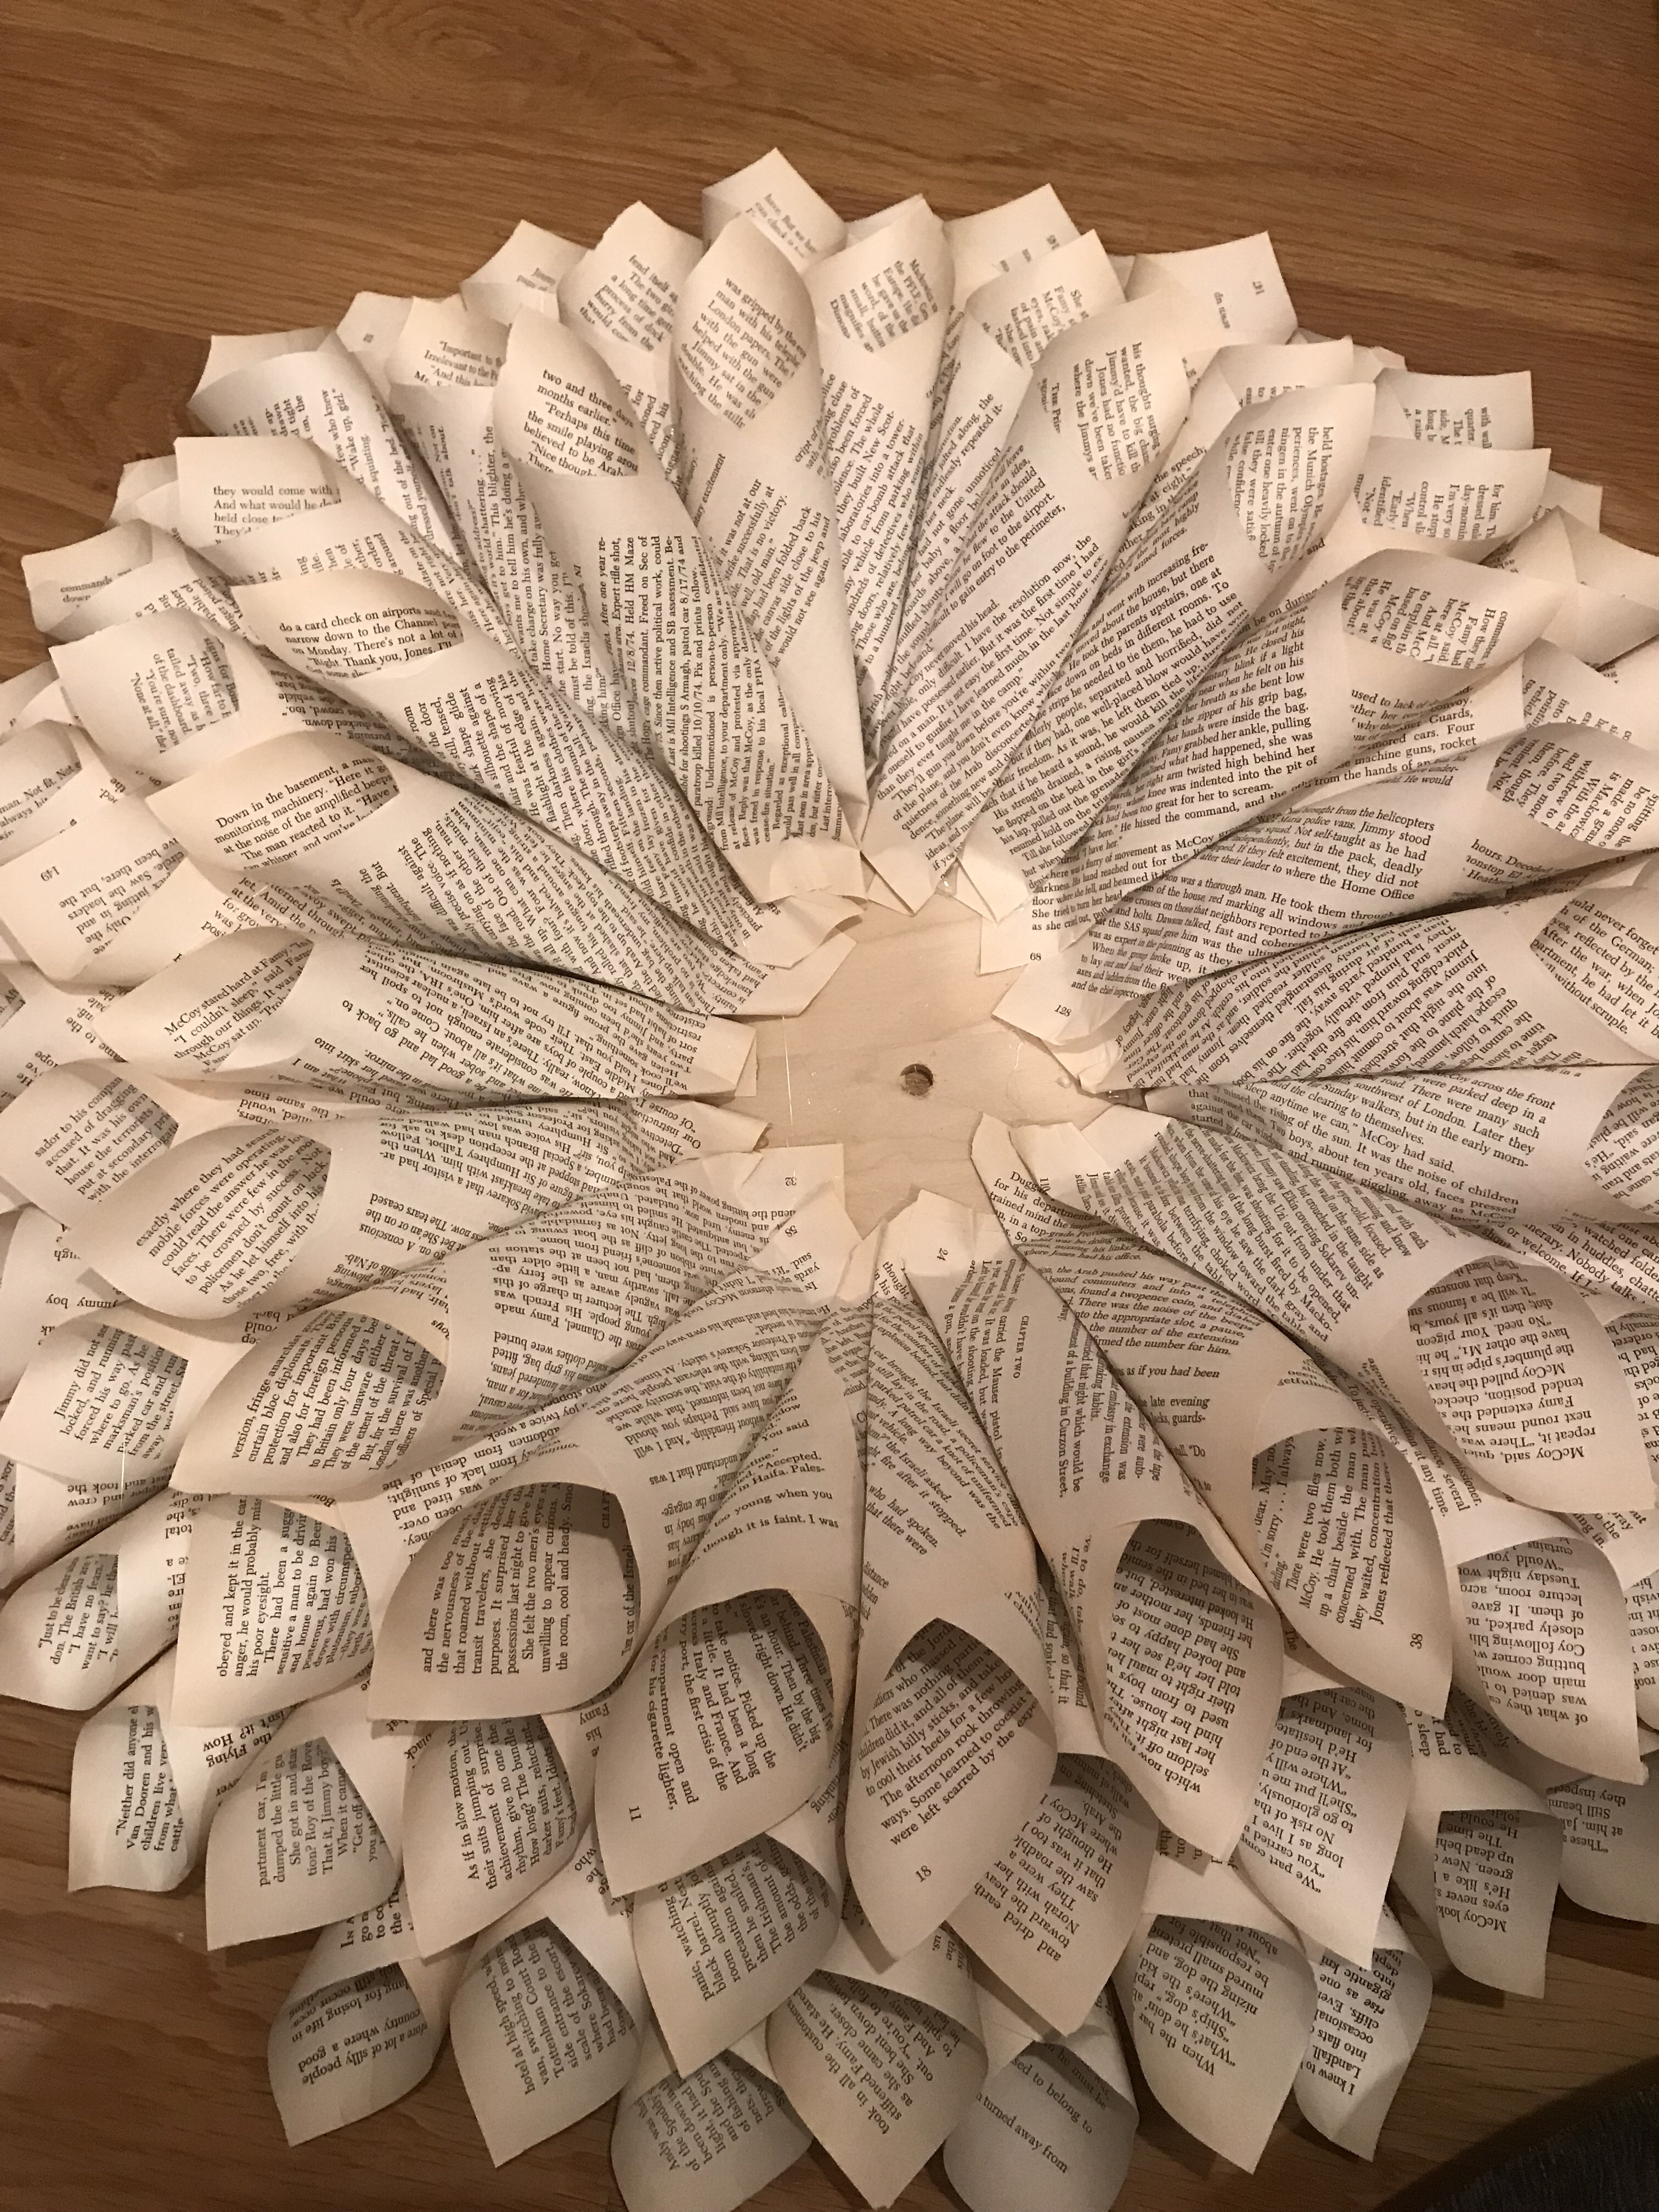
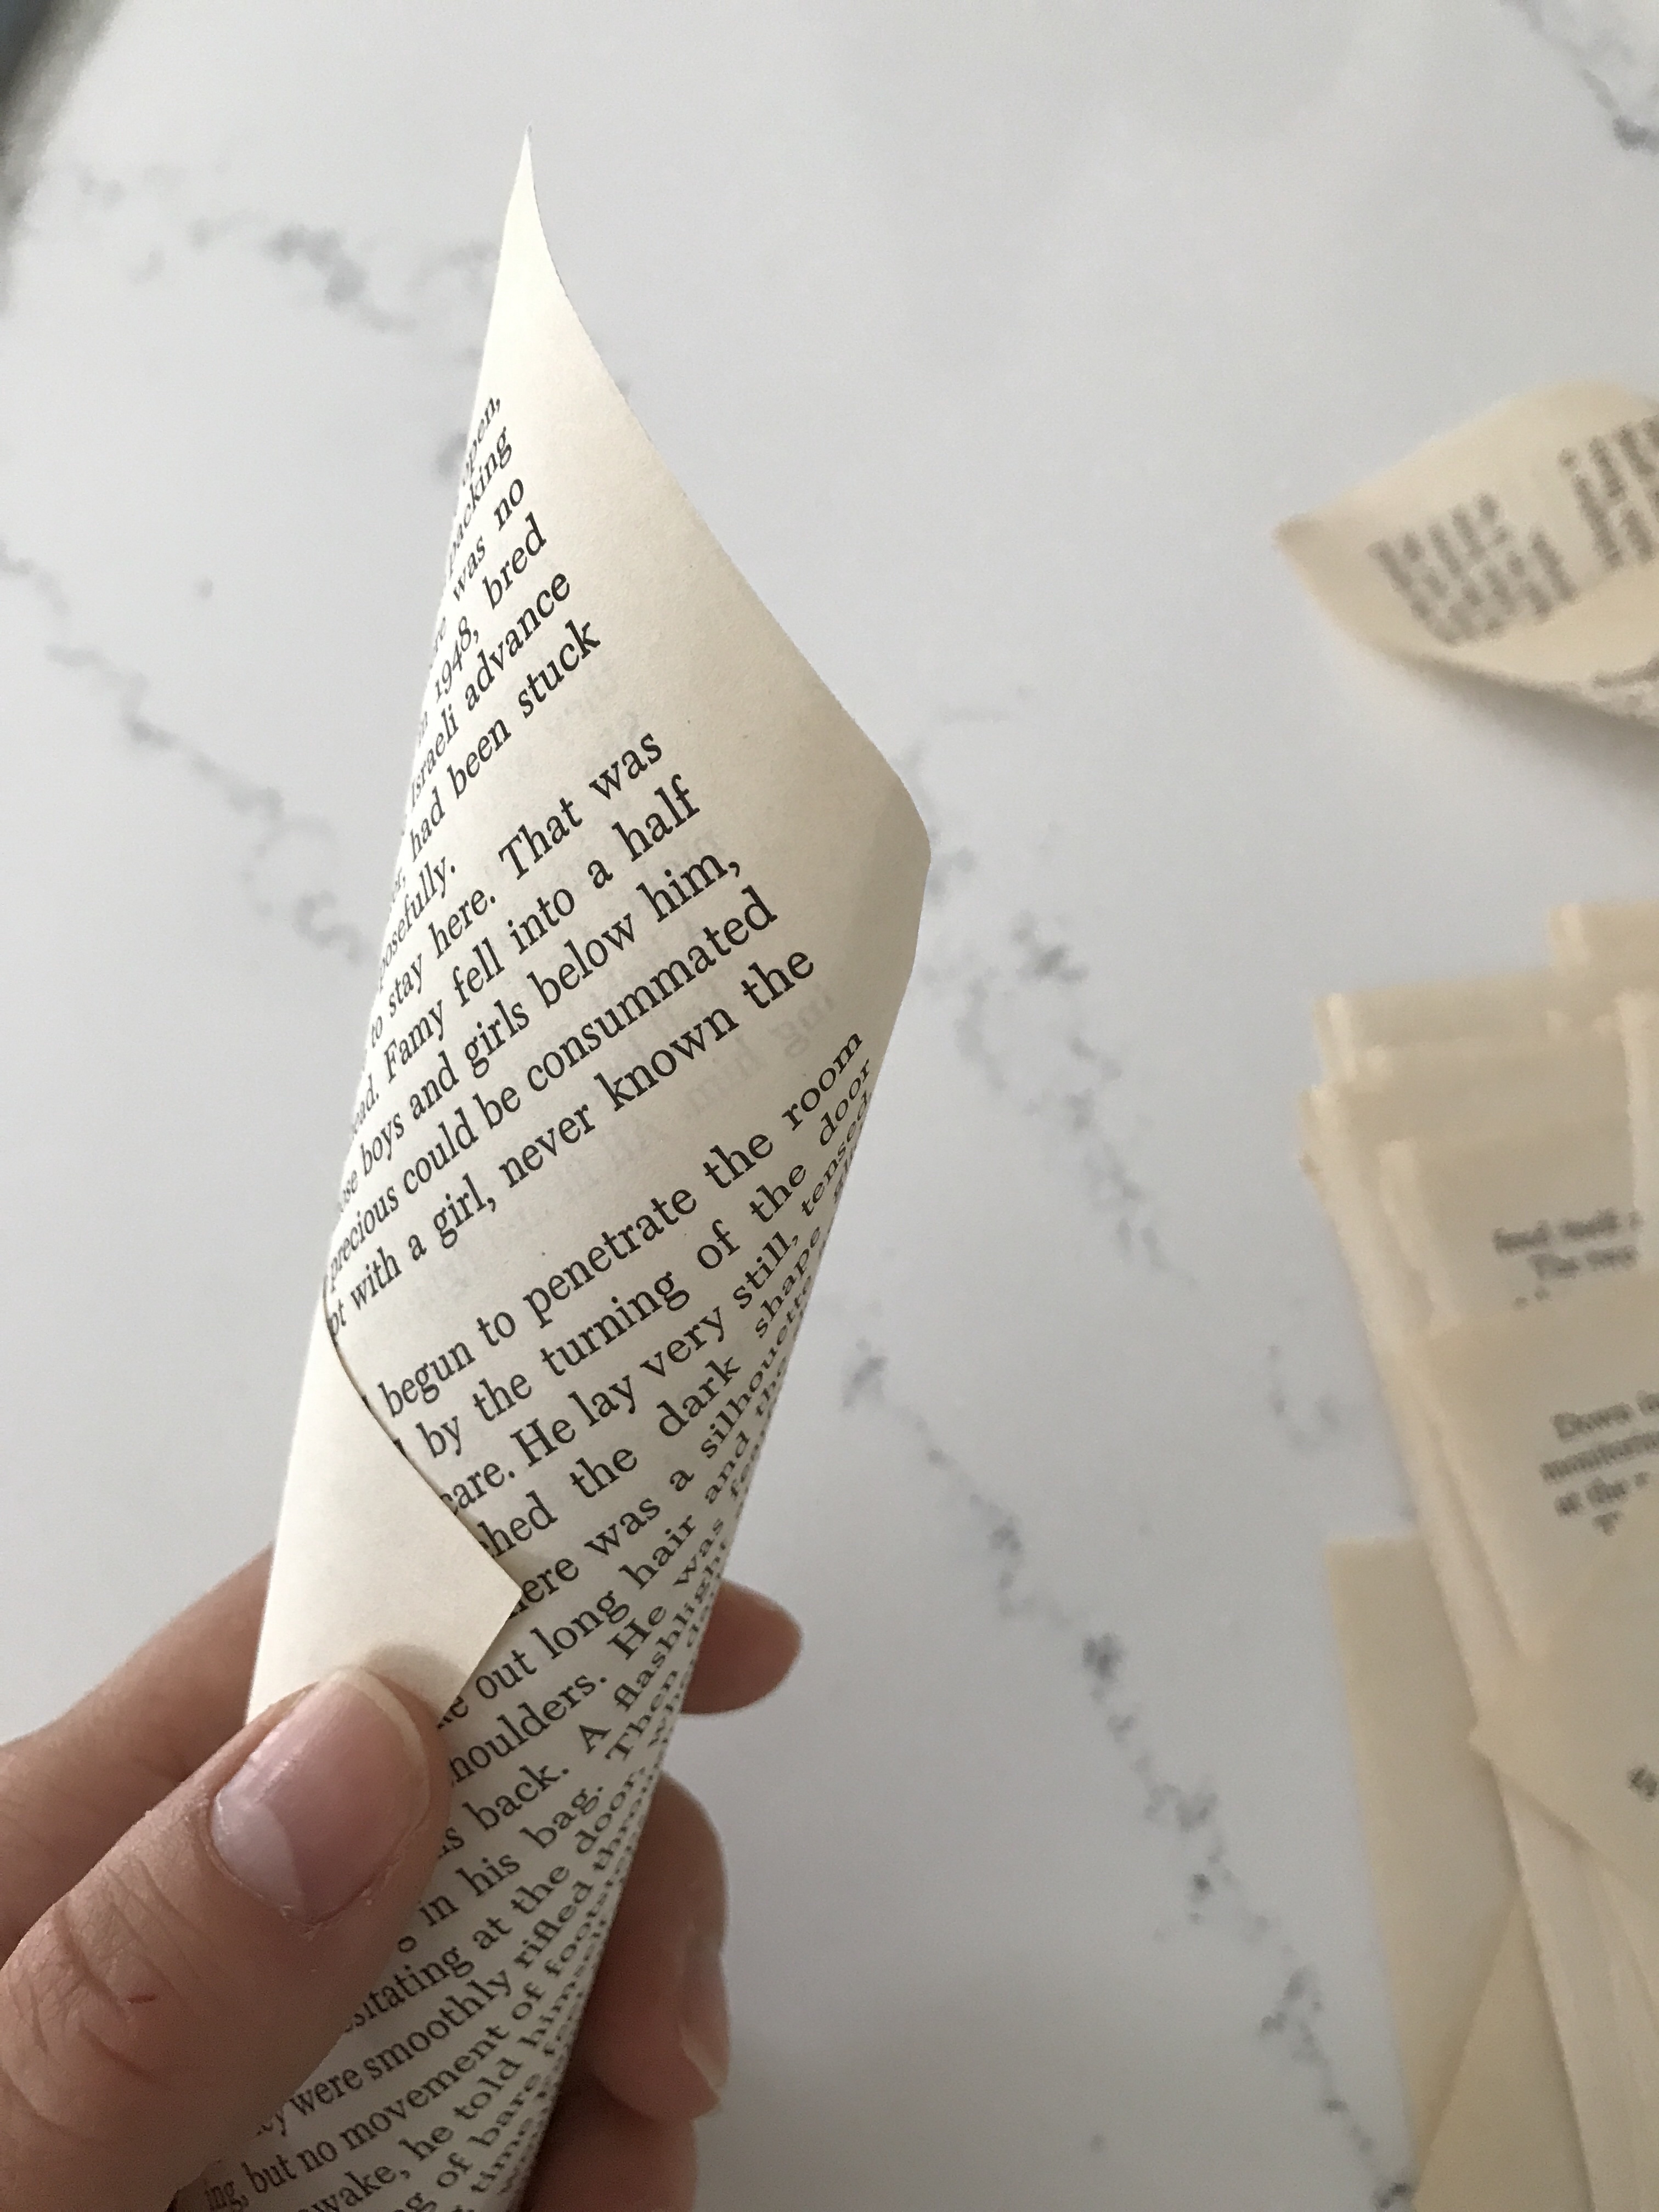
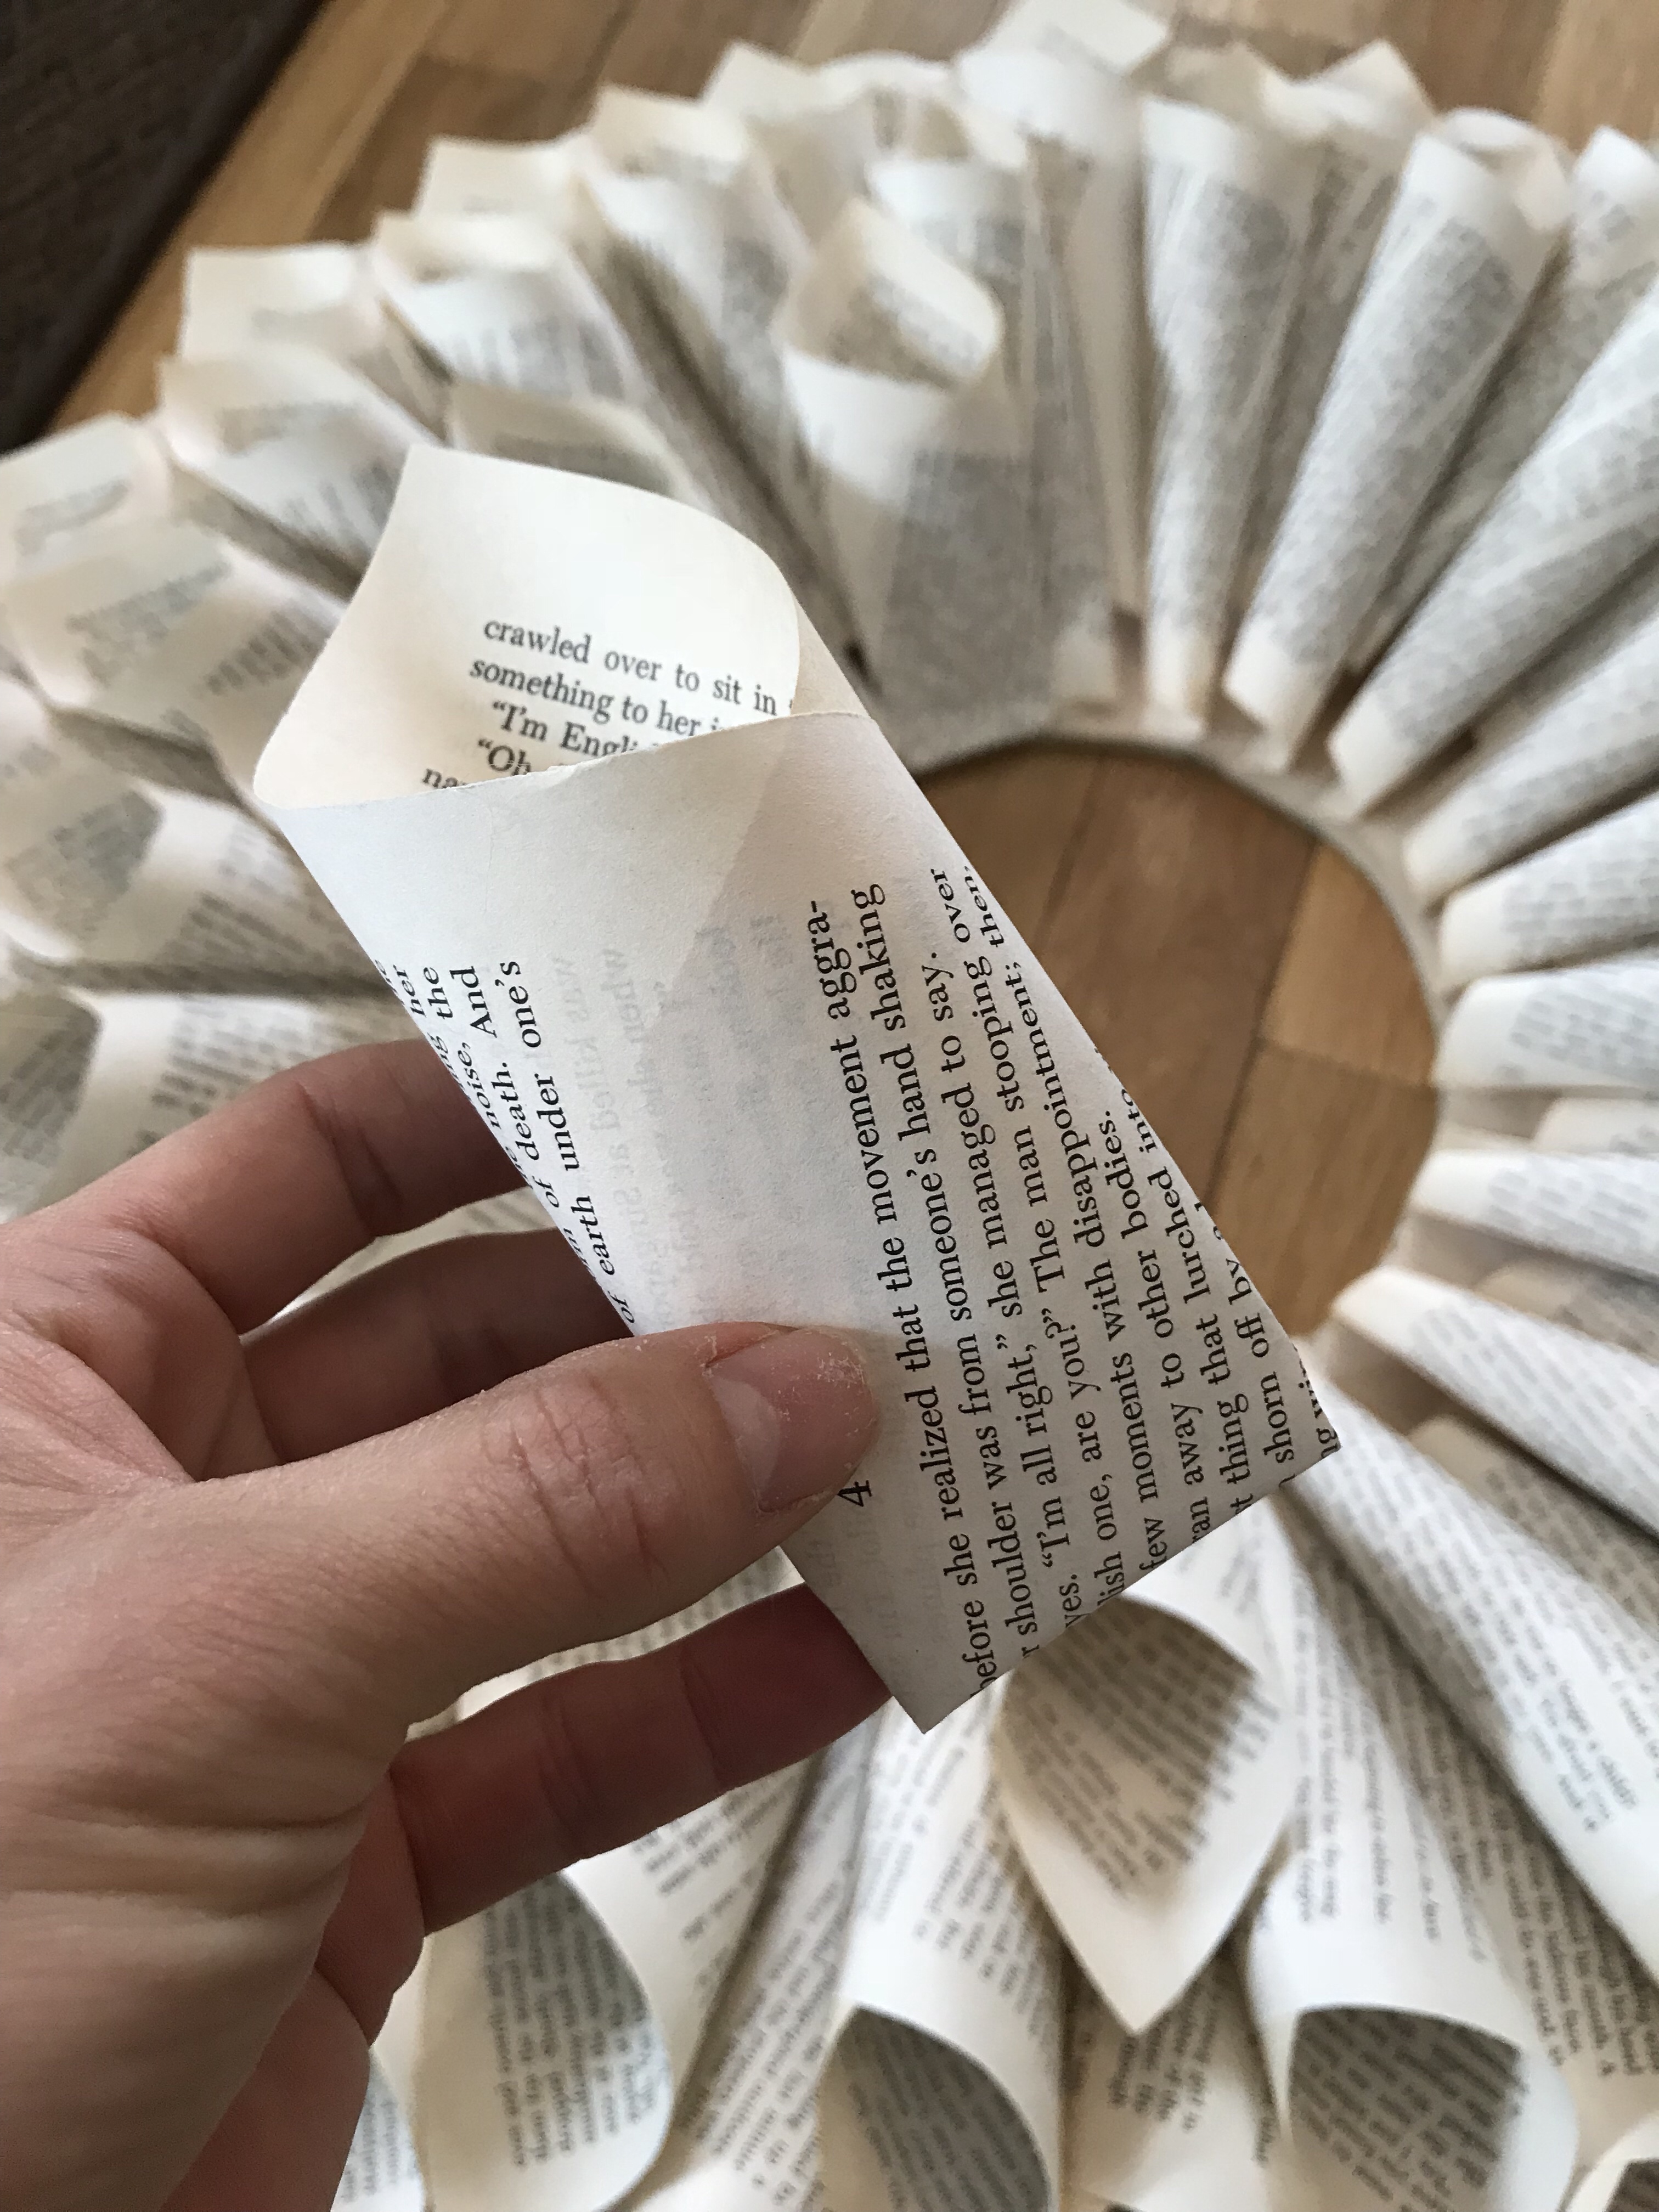
At this point, you can’t really fit another full-sized cone. So instead, I started folding them in half and gluing the bottom to the backside. Here’s a visual to help out (the next few images are a different wreath, but the step is exactly the same – fold cone in half, and glue):
On this hollow-center wreath, you will want to align the last layer of smaller cones with the edge of your plywood. But on the full-circle version, you simply repeat gluing until you cover the entire center.
This is not a difficult project, it’s just a tedious one. So take your time, make sure you focus on the details of the spacing and don’t be surprised when you end up using hundreds and hundreds of pages. No joke. You don’t even want to know how many this took. Enjoy!!!
Love love love your ideas. Hope Ivan do it!!


1 Comment