Previous post
Next post
too many ideas. too little time. (and far too much chai.)

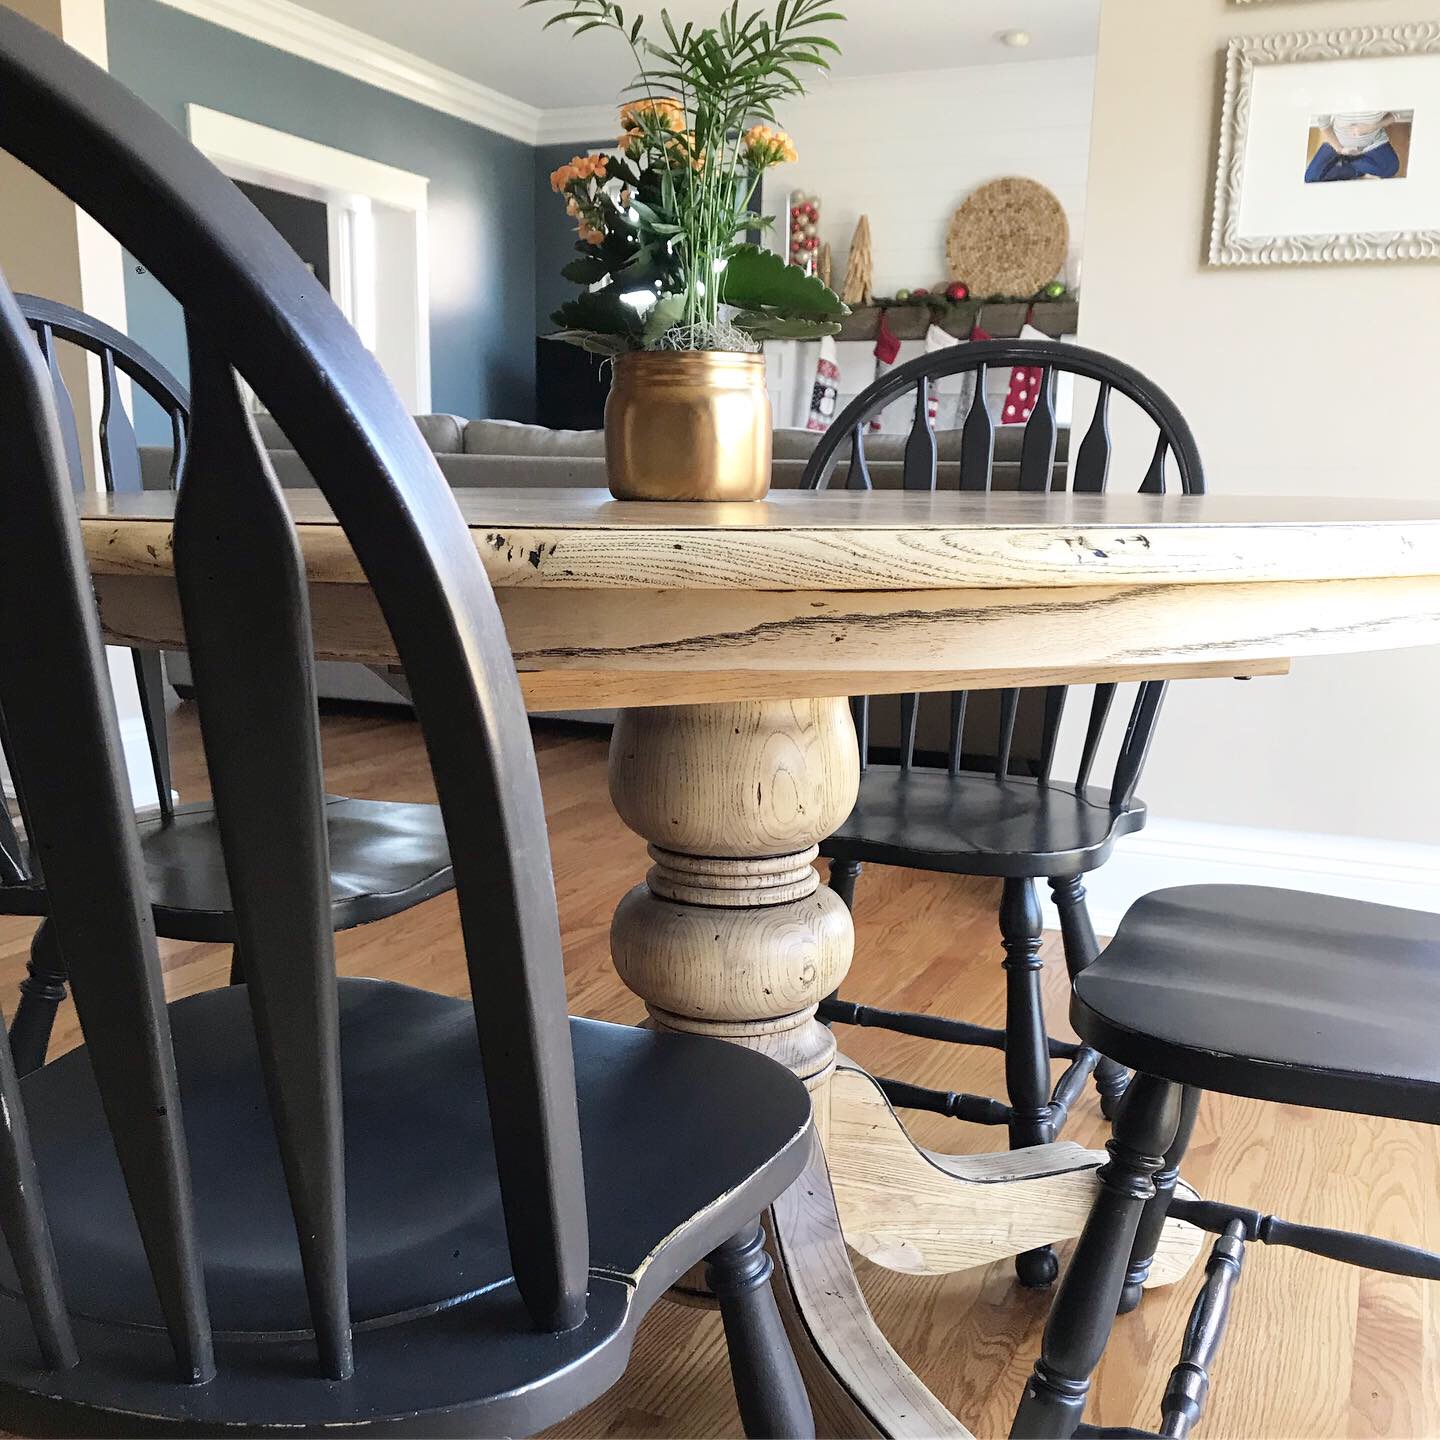
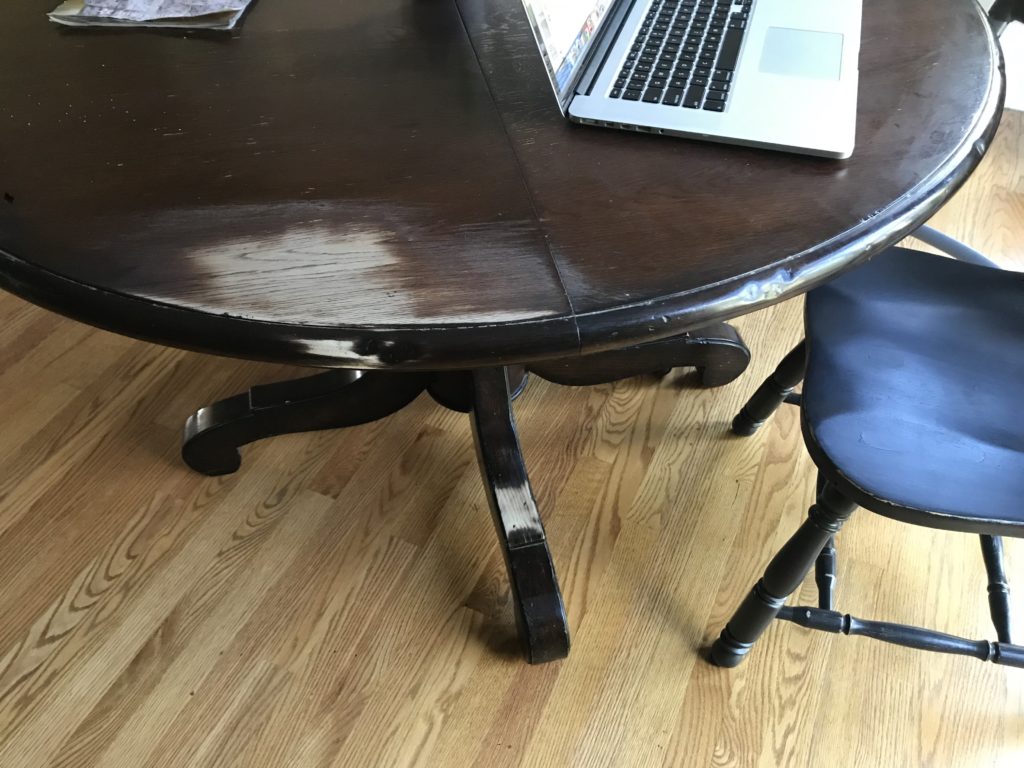
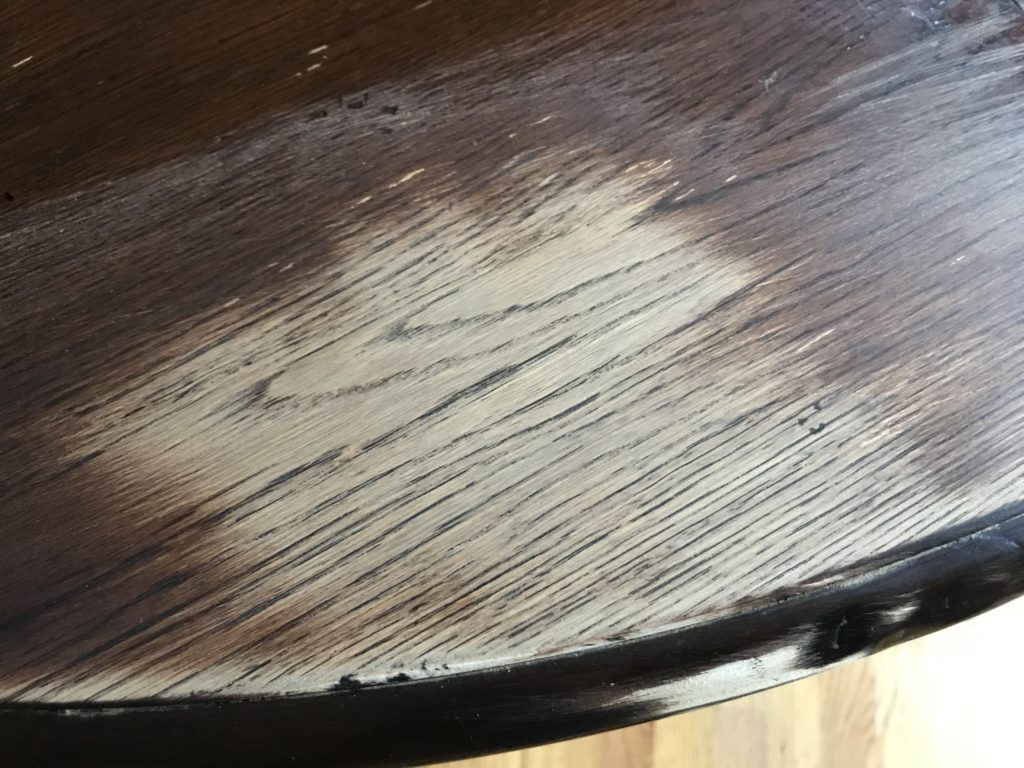
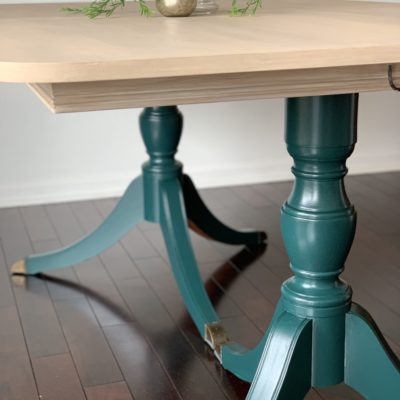
I got this table for $50. It is solid. Super heavy, solid wood with an amazing pedestal base. The only problem? I didn’t love the dark espresso finish, but it didn’t really matter because the finish was starting to wear, so it needed a makeover either way.
Here’s a pic of what it looked like when I bought it:

I LOOOVEEEEED the raw wood look, but with a bit of stain still showing through in parts (like the cracks). So away I went with sanding. And honestly, that’s really all there is to this project: Sanding & sealing.
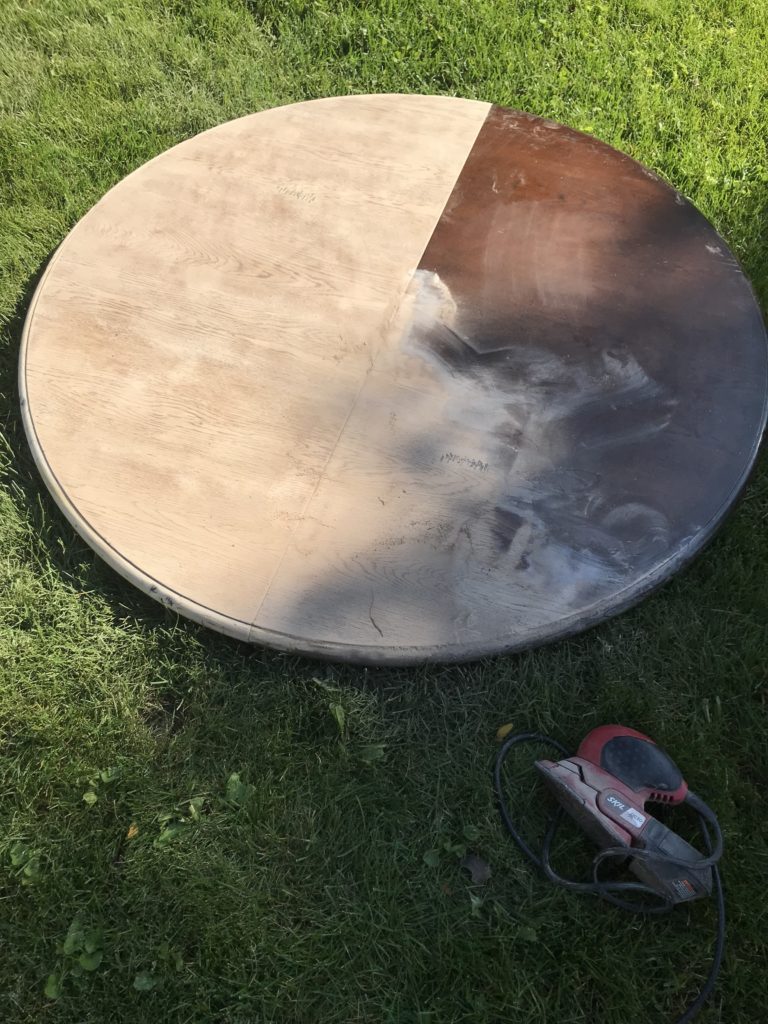
In hindsight, I could’ve made this DIY job a tad simpler. I could’ve stripped it instead of sanding it all by hand. I don’t love the chemicals associated with furniture stripping, but I could’ve used Citristrip, instead. Lesson learned.
Full disclosure: This took me hours upon hours to sand, but I didn’t mind because I loved it so much, and it was a nice weather forecast. Had I to do it all over again though, I probably would’ve started with Citristrip, and then moved on from there.
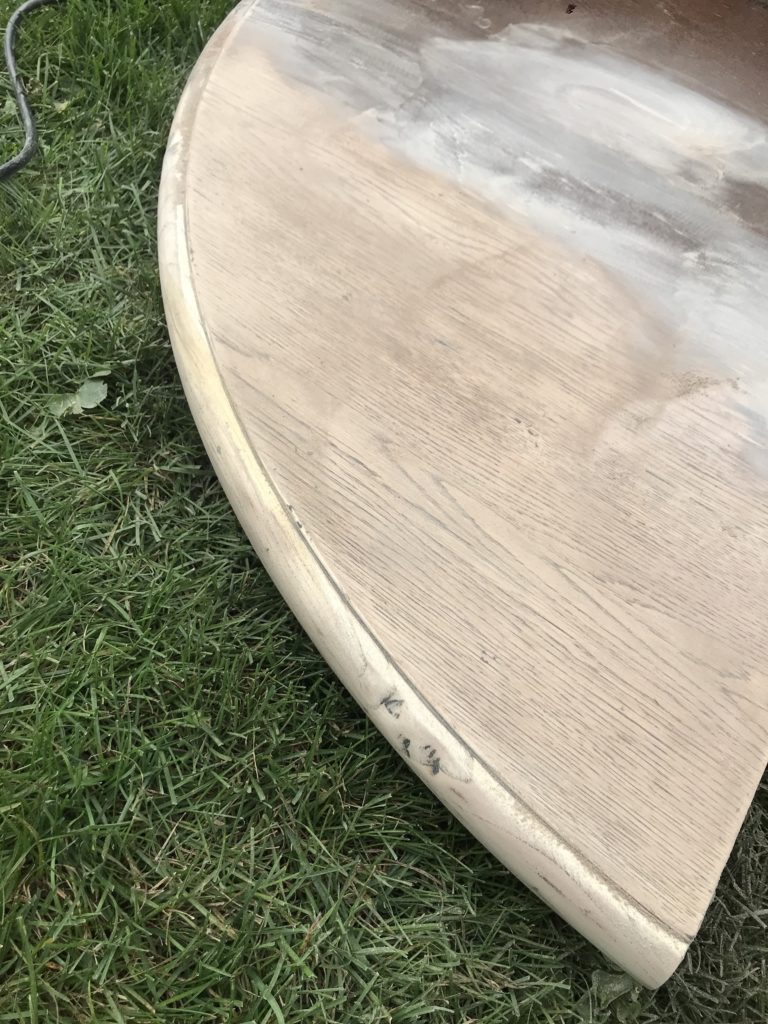
Now for step 2: SEALING. I used a water-based poly for this because it doesn’t yellow and it’s not smelly. Big bonuses in my opinion.
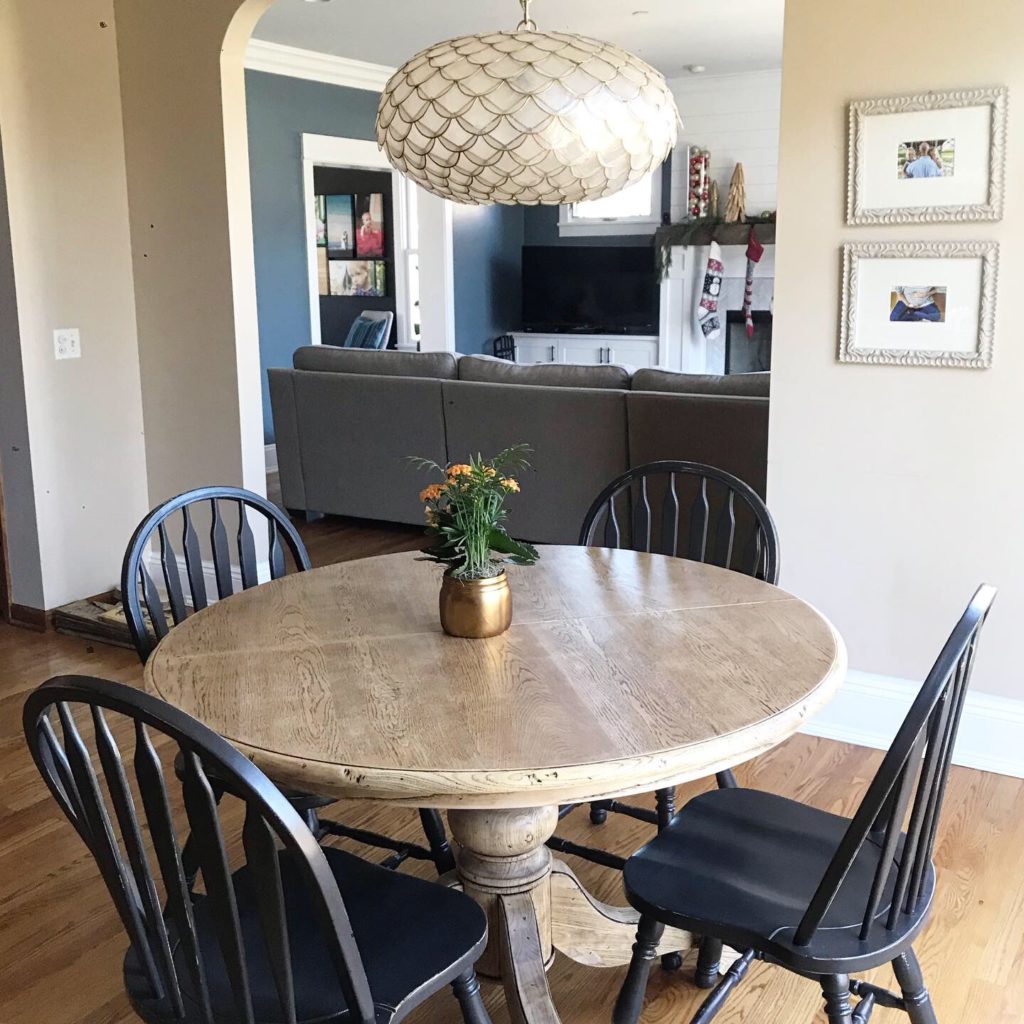
I did 2 coats on the majority, but 3 for the top since this is the table my 3 girls eat breakfast at (and it generally takes a beating on the daily).
That’s it! Simple project (but long-ish timeline due to sanding) complete!


Happy DIY-ing!!!!
Hello, the table looks beautiful. I am curious what you used to paint the chairs?
Was it a matte or satin chalk paint?
Love this whole look!!
Love it! I have the same exact table I am about to redo. Did you sand the chairs before spray painting?
Hey, I’m currently refinishing our dining room table and chairs and am curious what sealer you used exactly? Thanks.
Did you sand the chairs before you painted them?
I didn’t!! Just a good scrubbing, but the spray paint was a chalk paint so I was distressing anyway.
Hi! I have almost the exact same table and am about to embark on sanding it! I’m getting a DeWalt power sander, but I was curious about the sandpaper grit you would suggest. Thanks!
Would suggest a v. low grit so as not to really dig into the natural wood. But tough to give much advice without seeing the piece.
Hi there! I love this table and am about to embark on this journey for myself. I am curious what sealer you used and in what finish? Thank you!
Hi! Sorry for late response. I used a water-based poly (Miniwax, polycrylic) – matte finish.
What color did you paint the chairs. Great job looks great.

18 Comments