Previous post
too many ideas. too little time. (and far too much chai.)

It’s that time of year again (insert joyous “Hallelujah” chants & child-ish jubilations), and this year, I am DETERMINED to update my holiday decor. What better way to do that than to do it YO-self?!
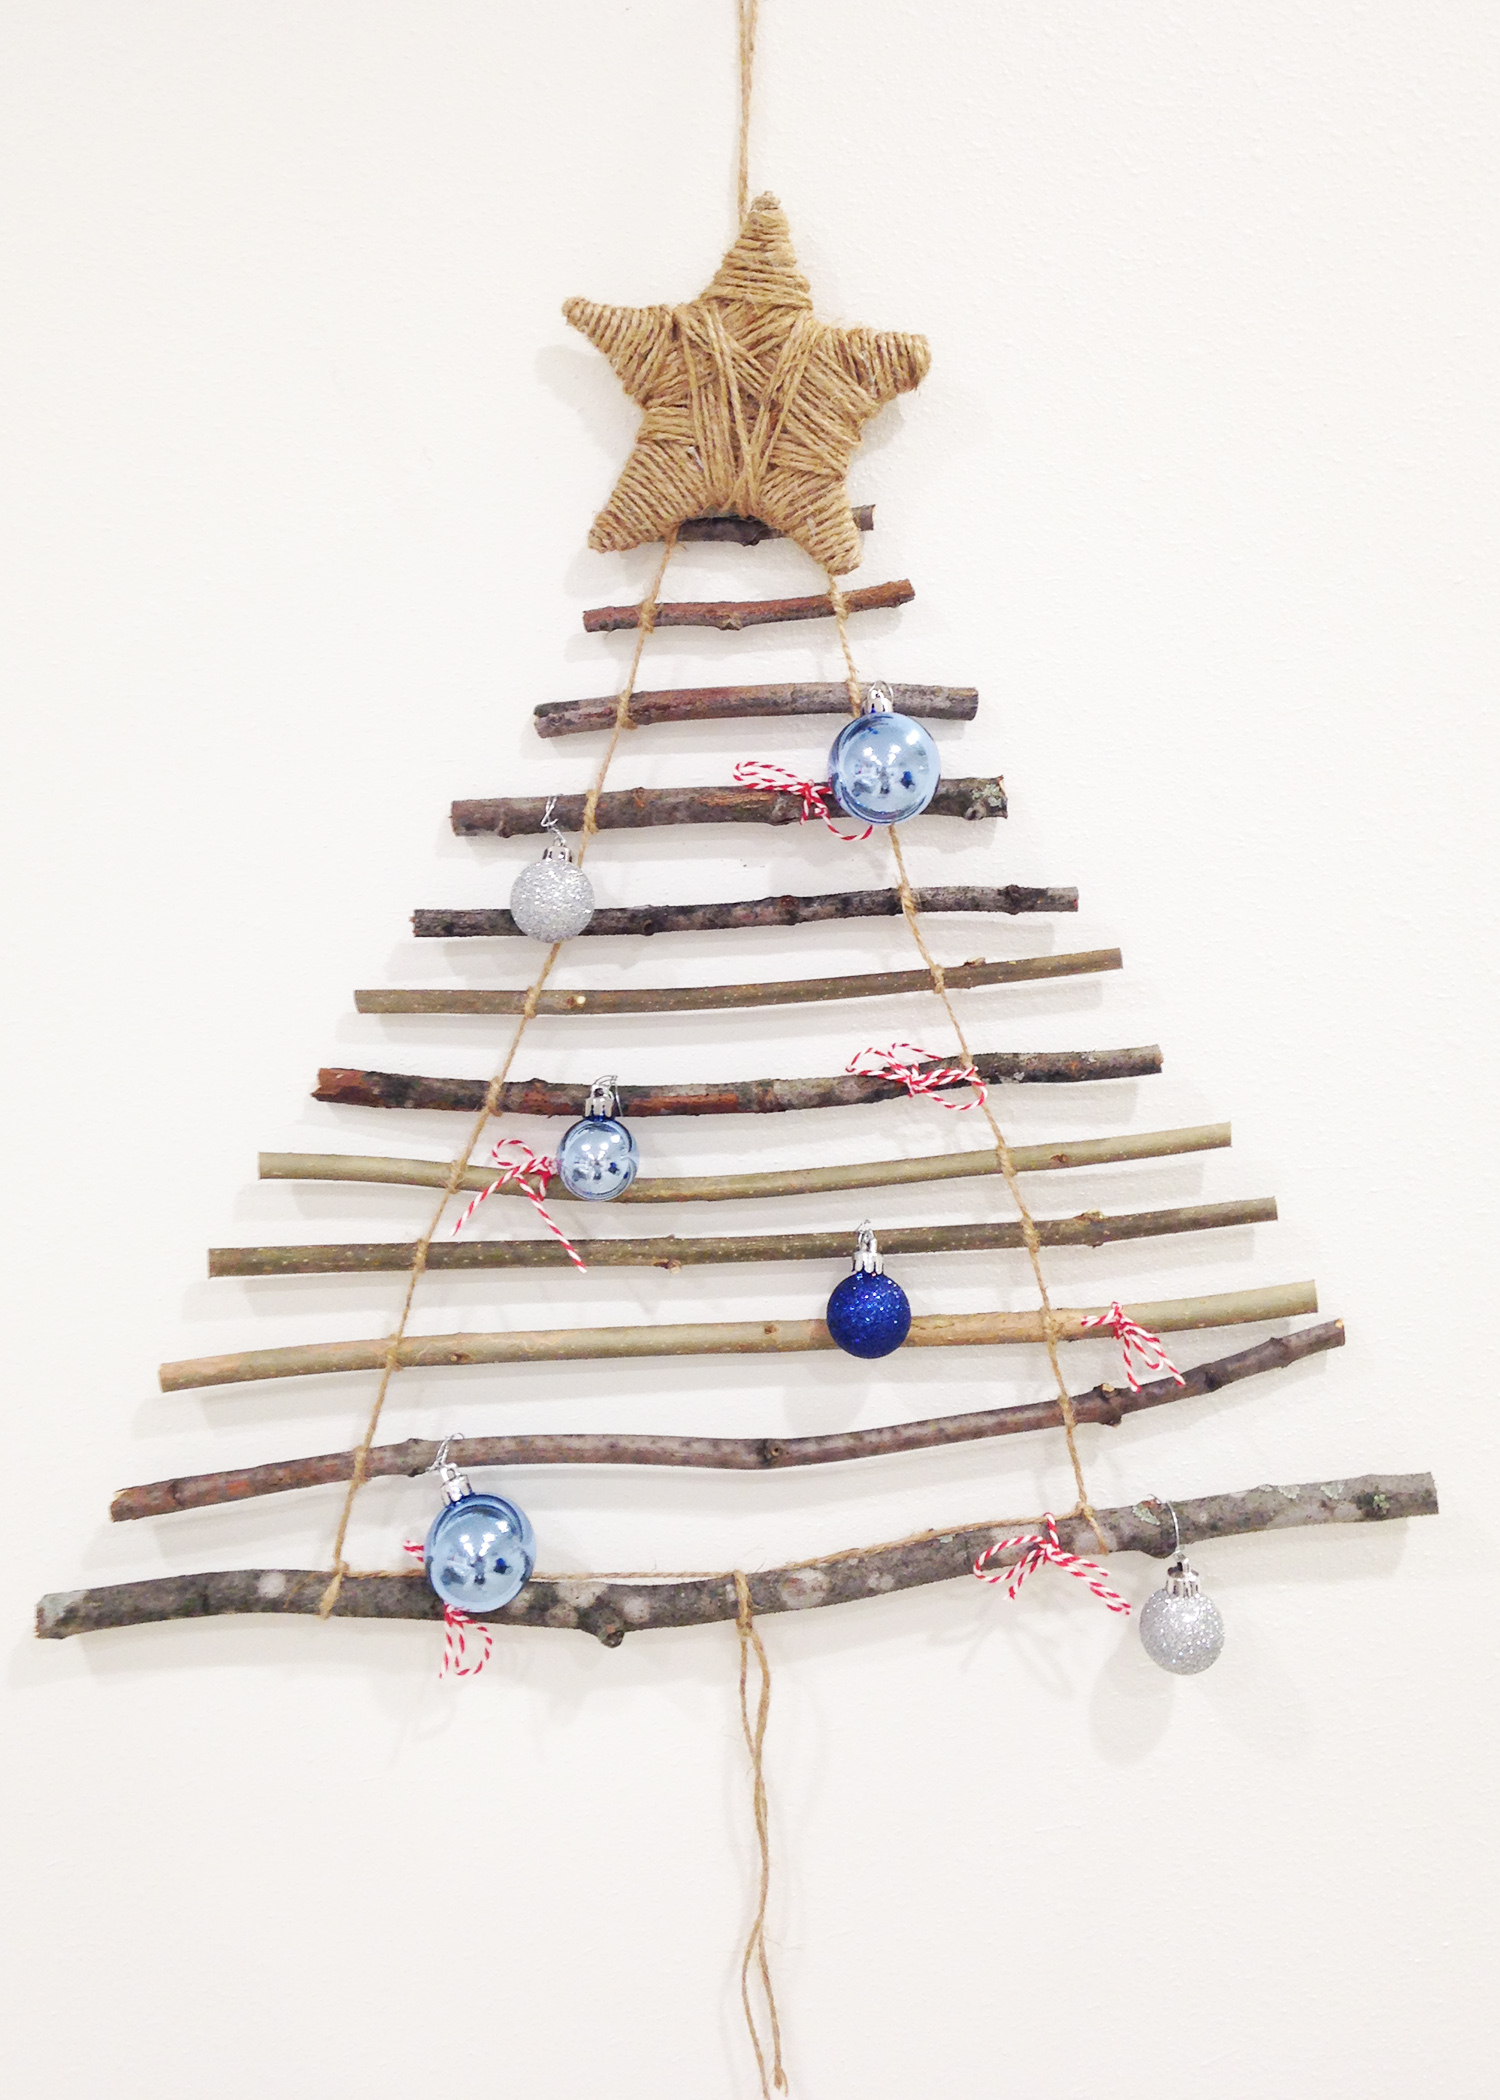
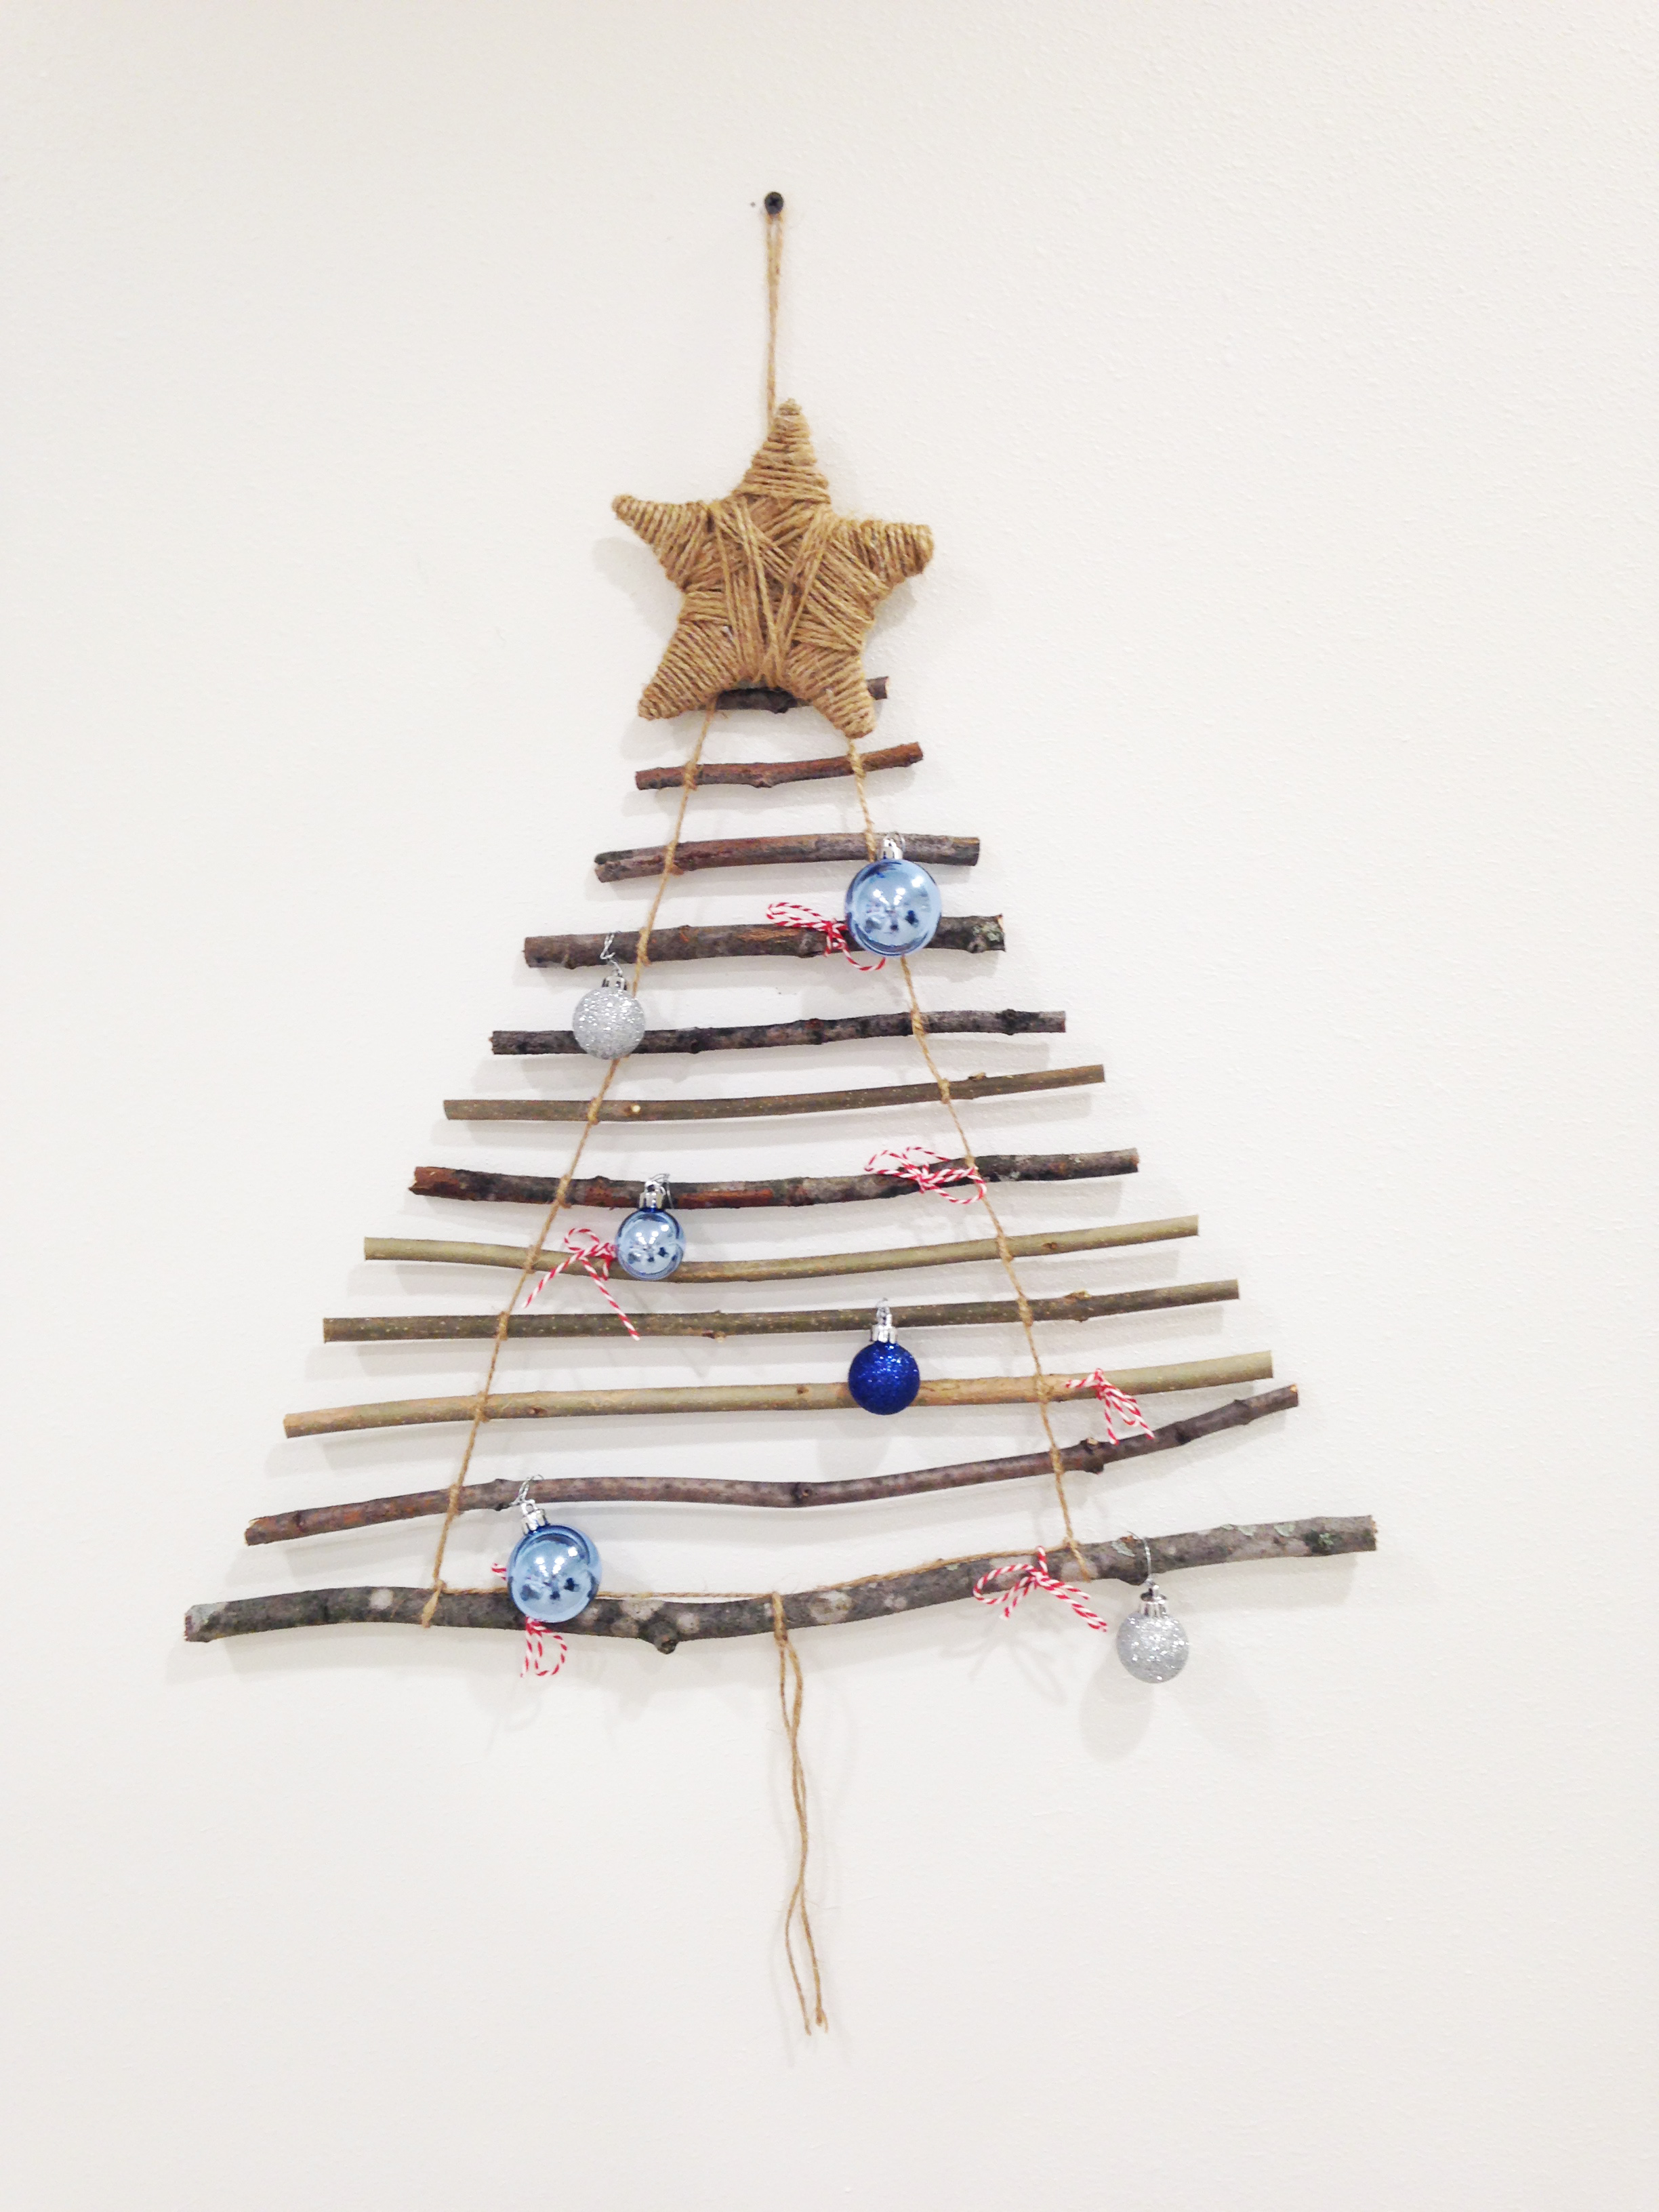
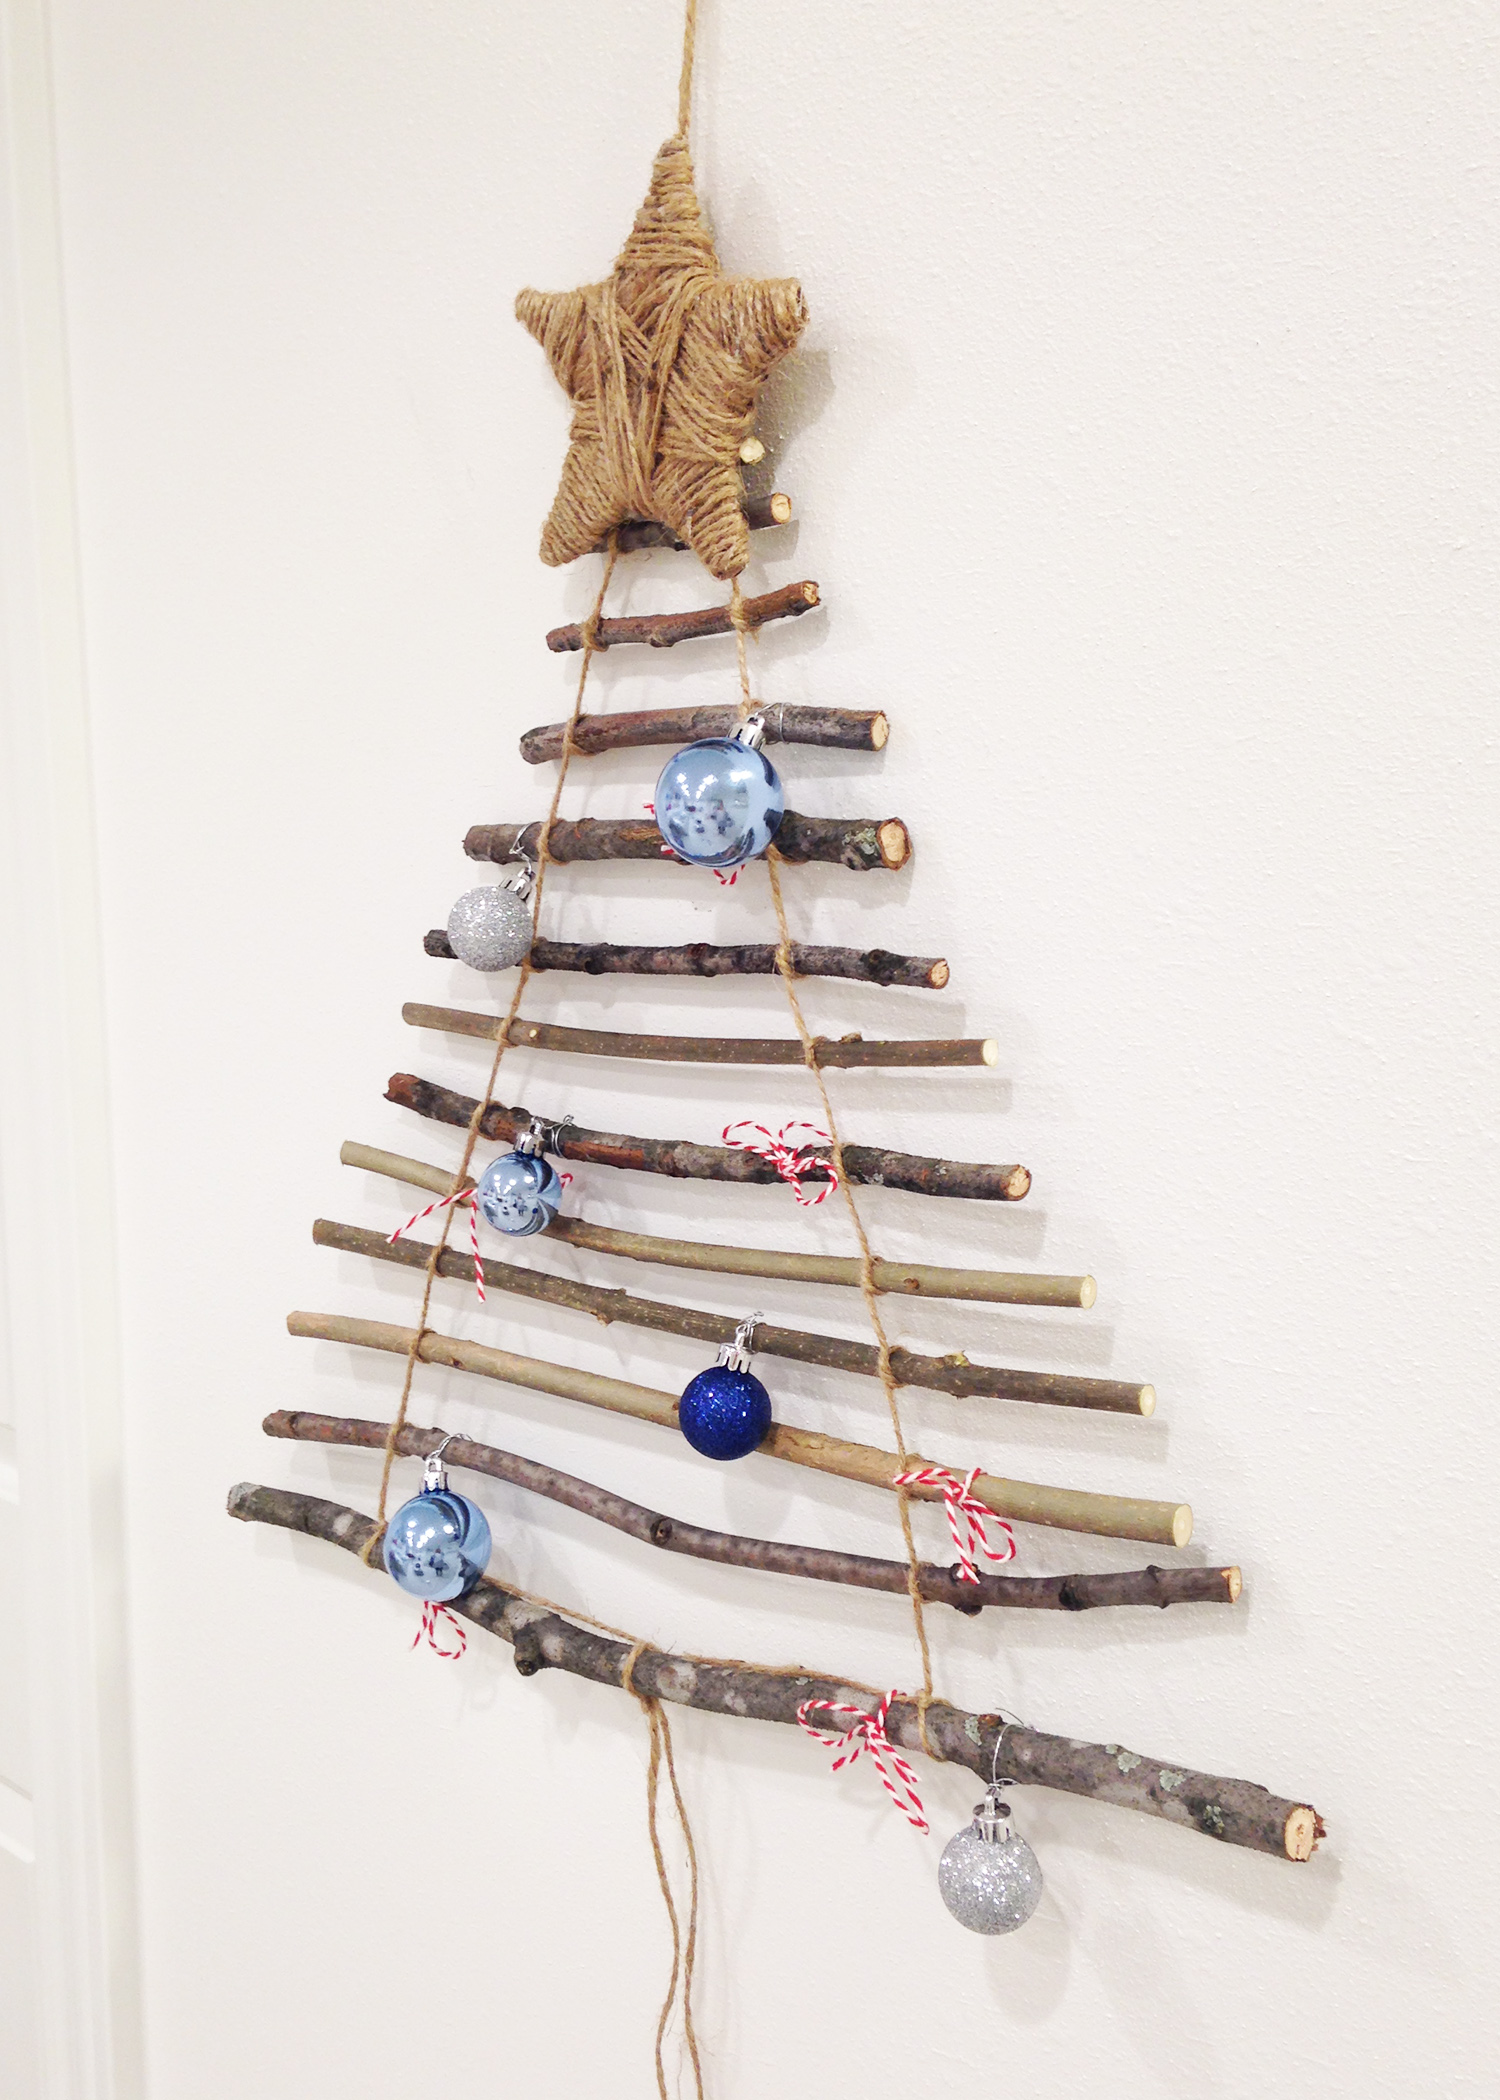
I saw this tree on a fellow blogger’s site (German blogger, Uberall & Nirgendwo, mind you, so I have no idea what she had to say about it – all I know is that her pictures were adorable, so I had to try it for myself):

Basically, if you can collect dead branches from your yard, and you know how to tie a half knot, you can make this tree. I promise : ) Plus, what I especially love about this project is that it doesn’t have to be perfect. In fact, I think much of this tree’s beauty is in its imperfections.
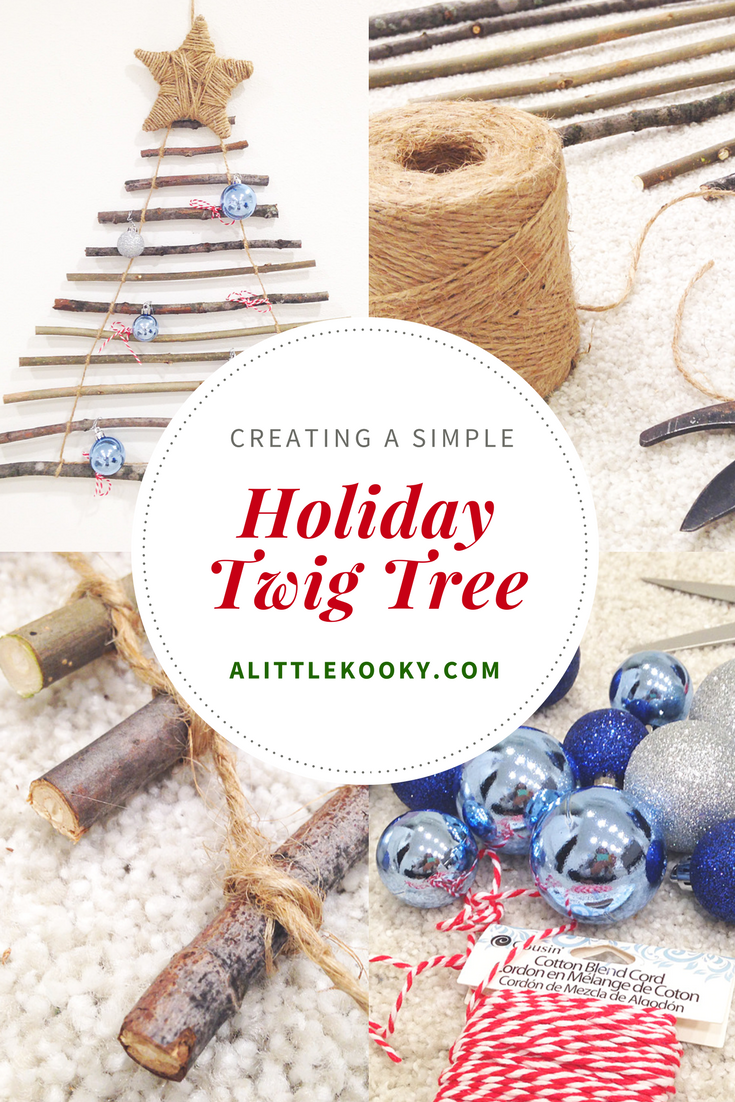
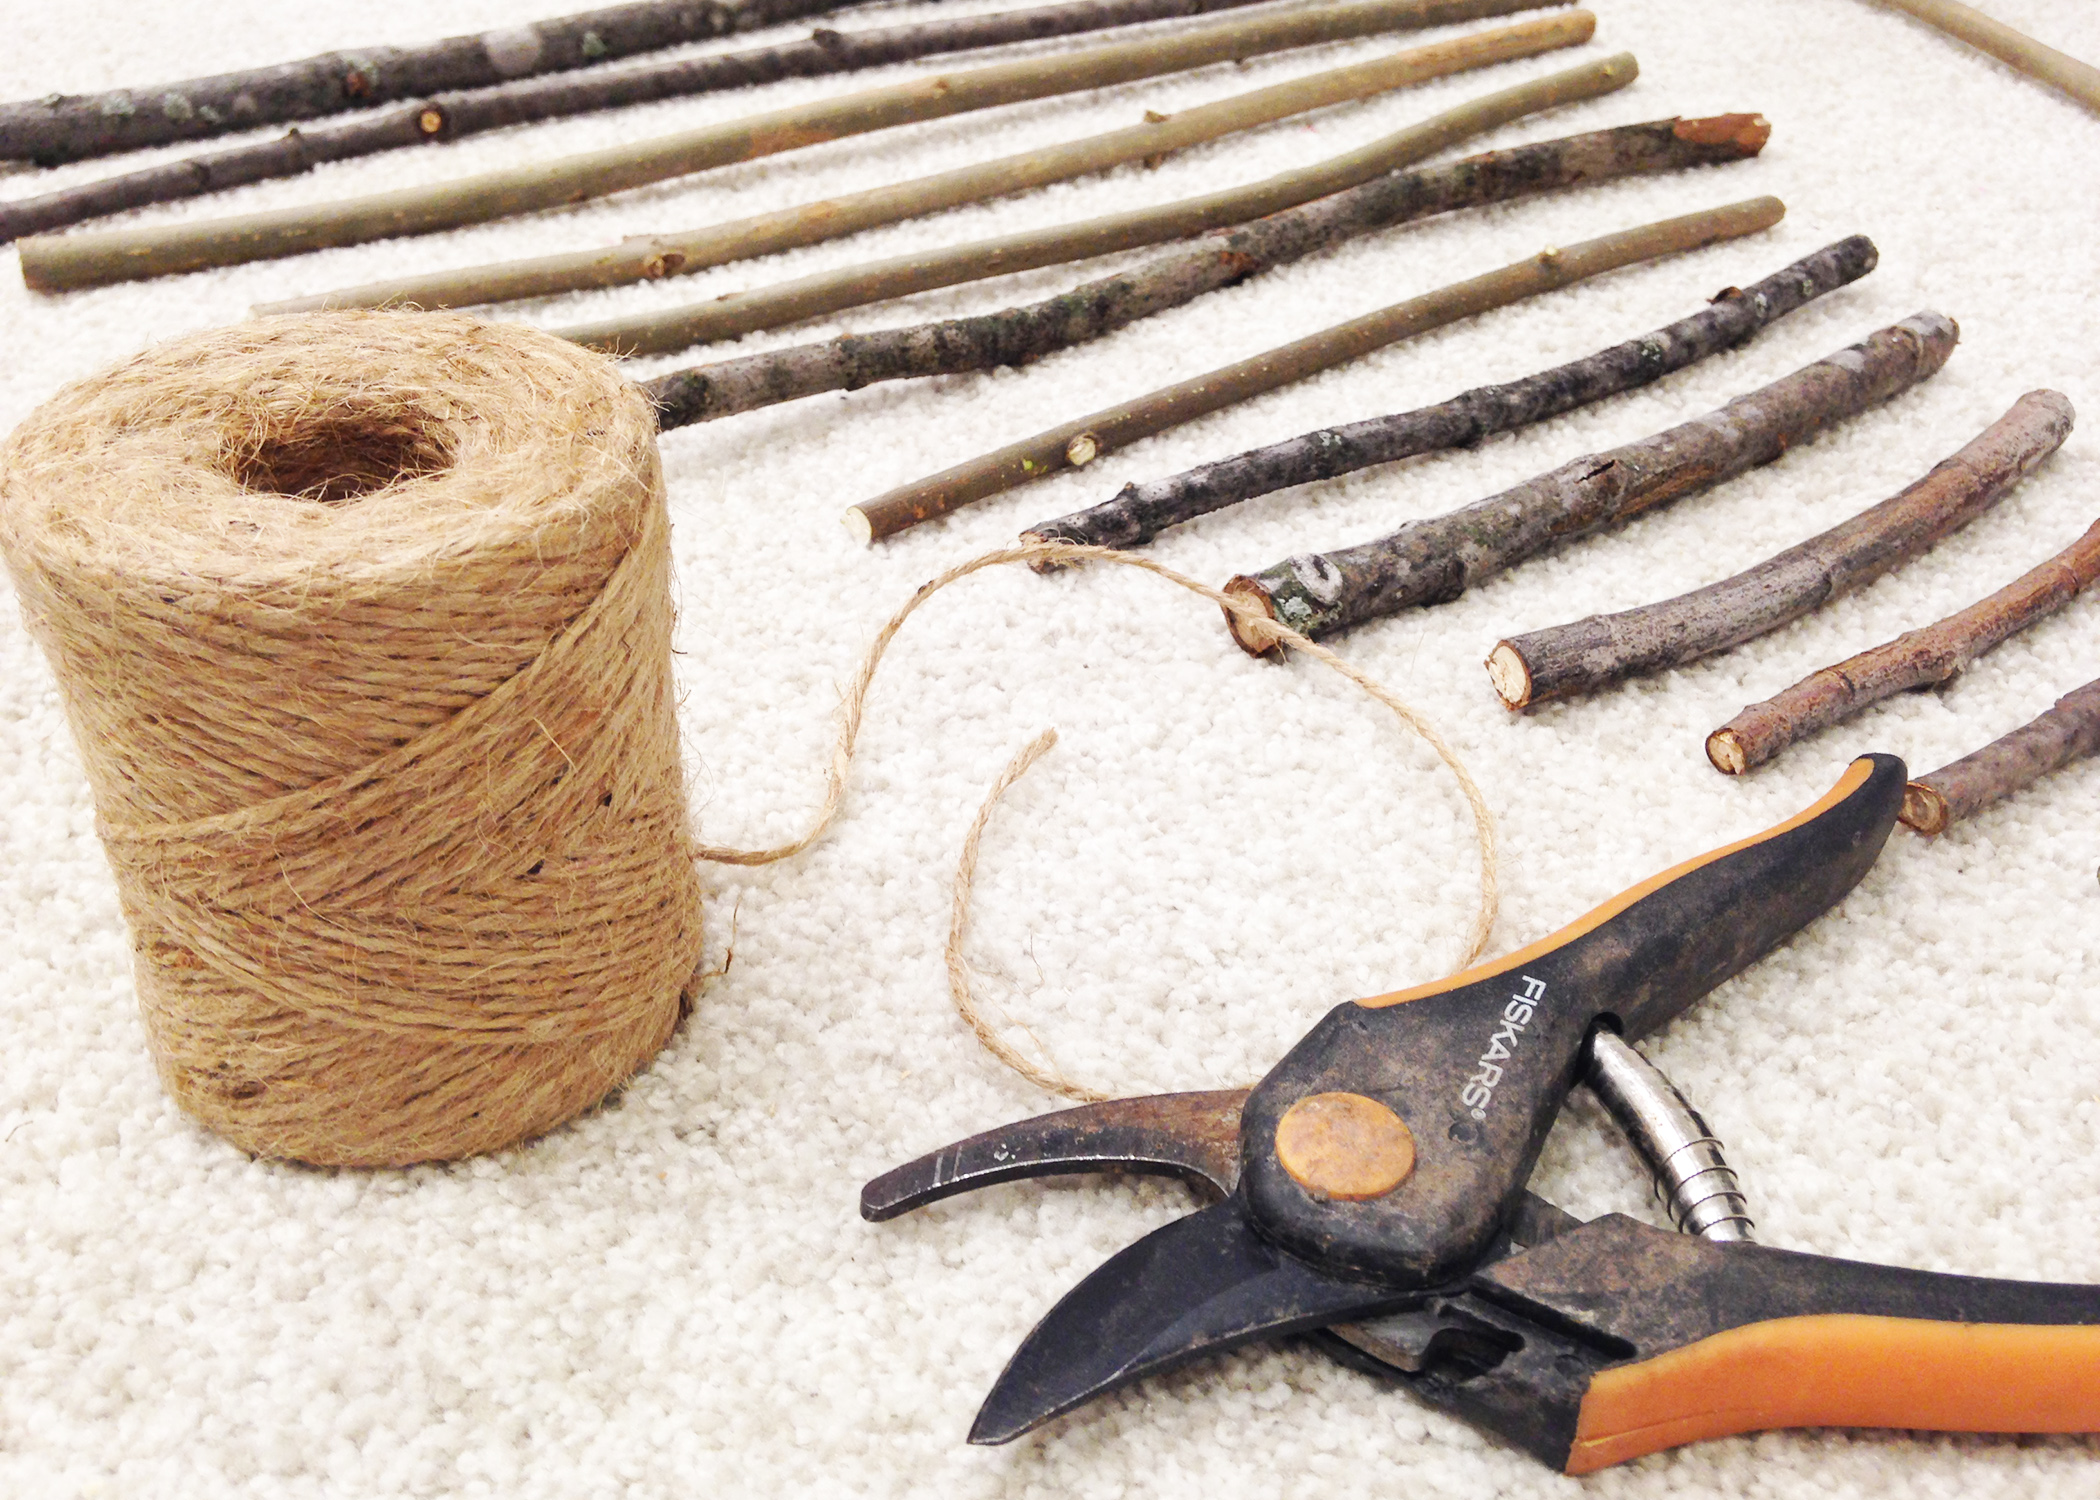
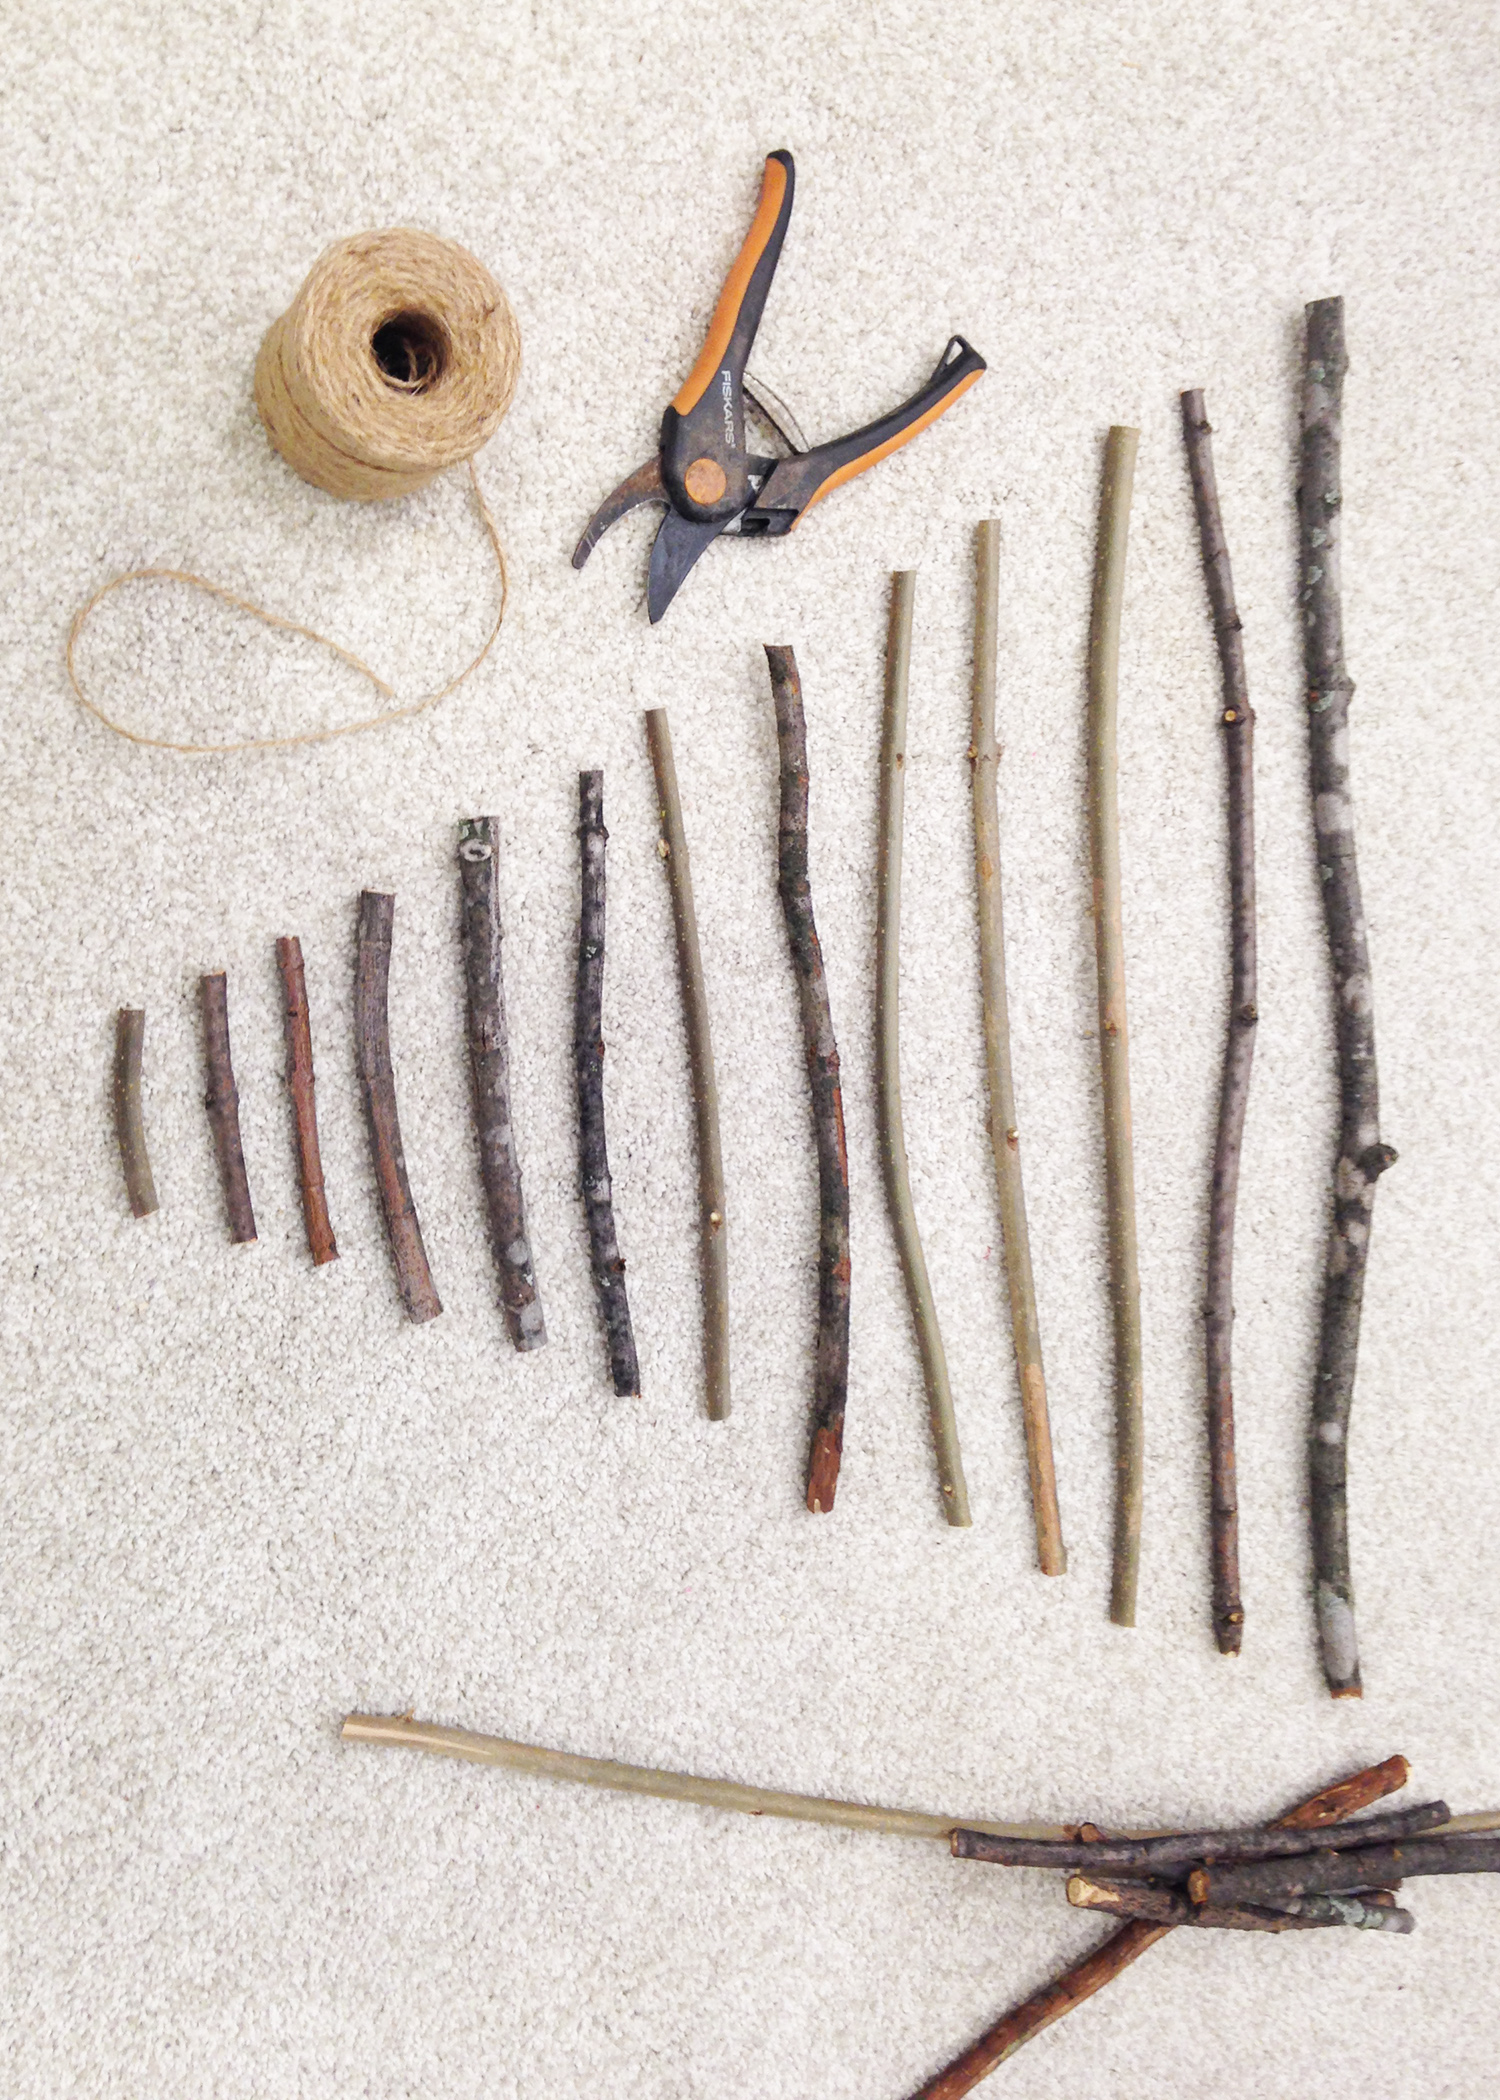
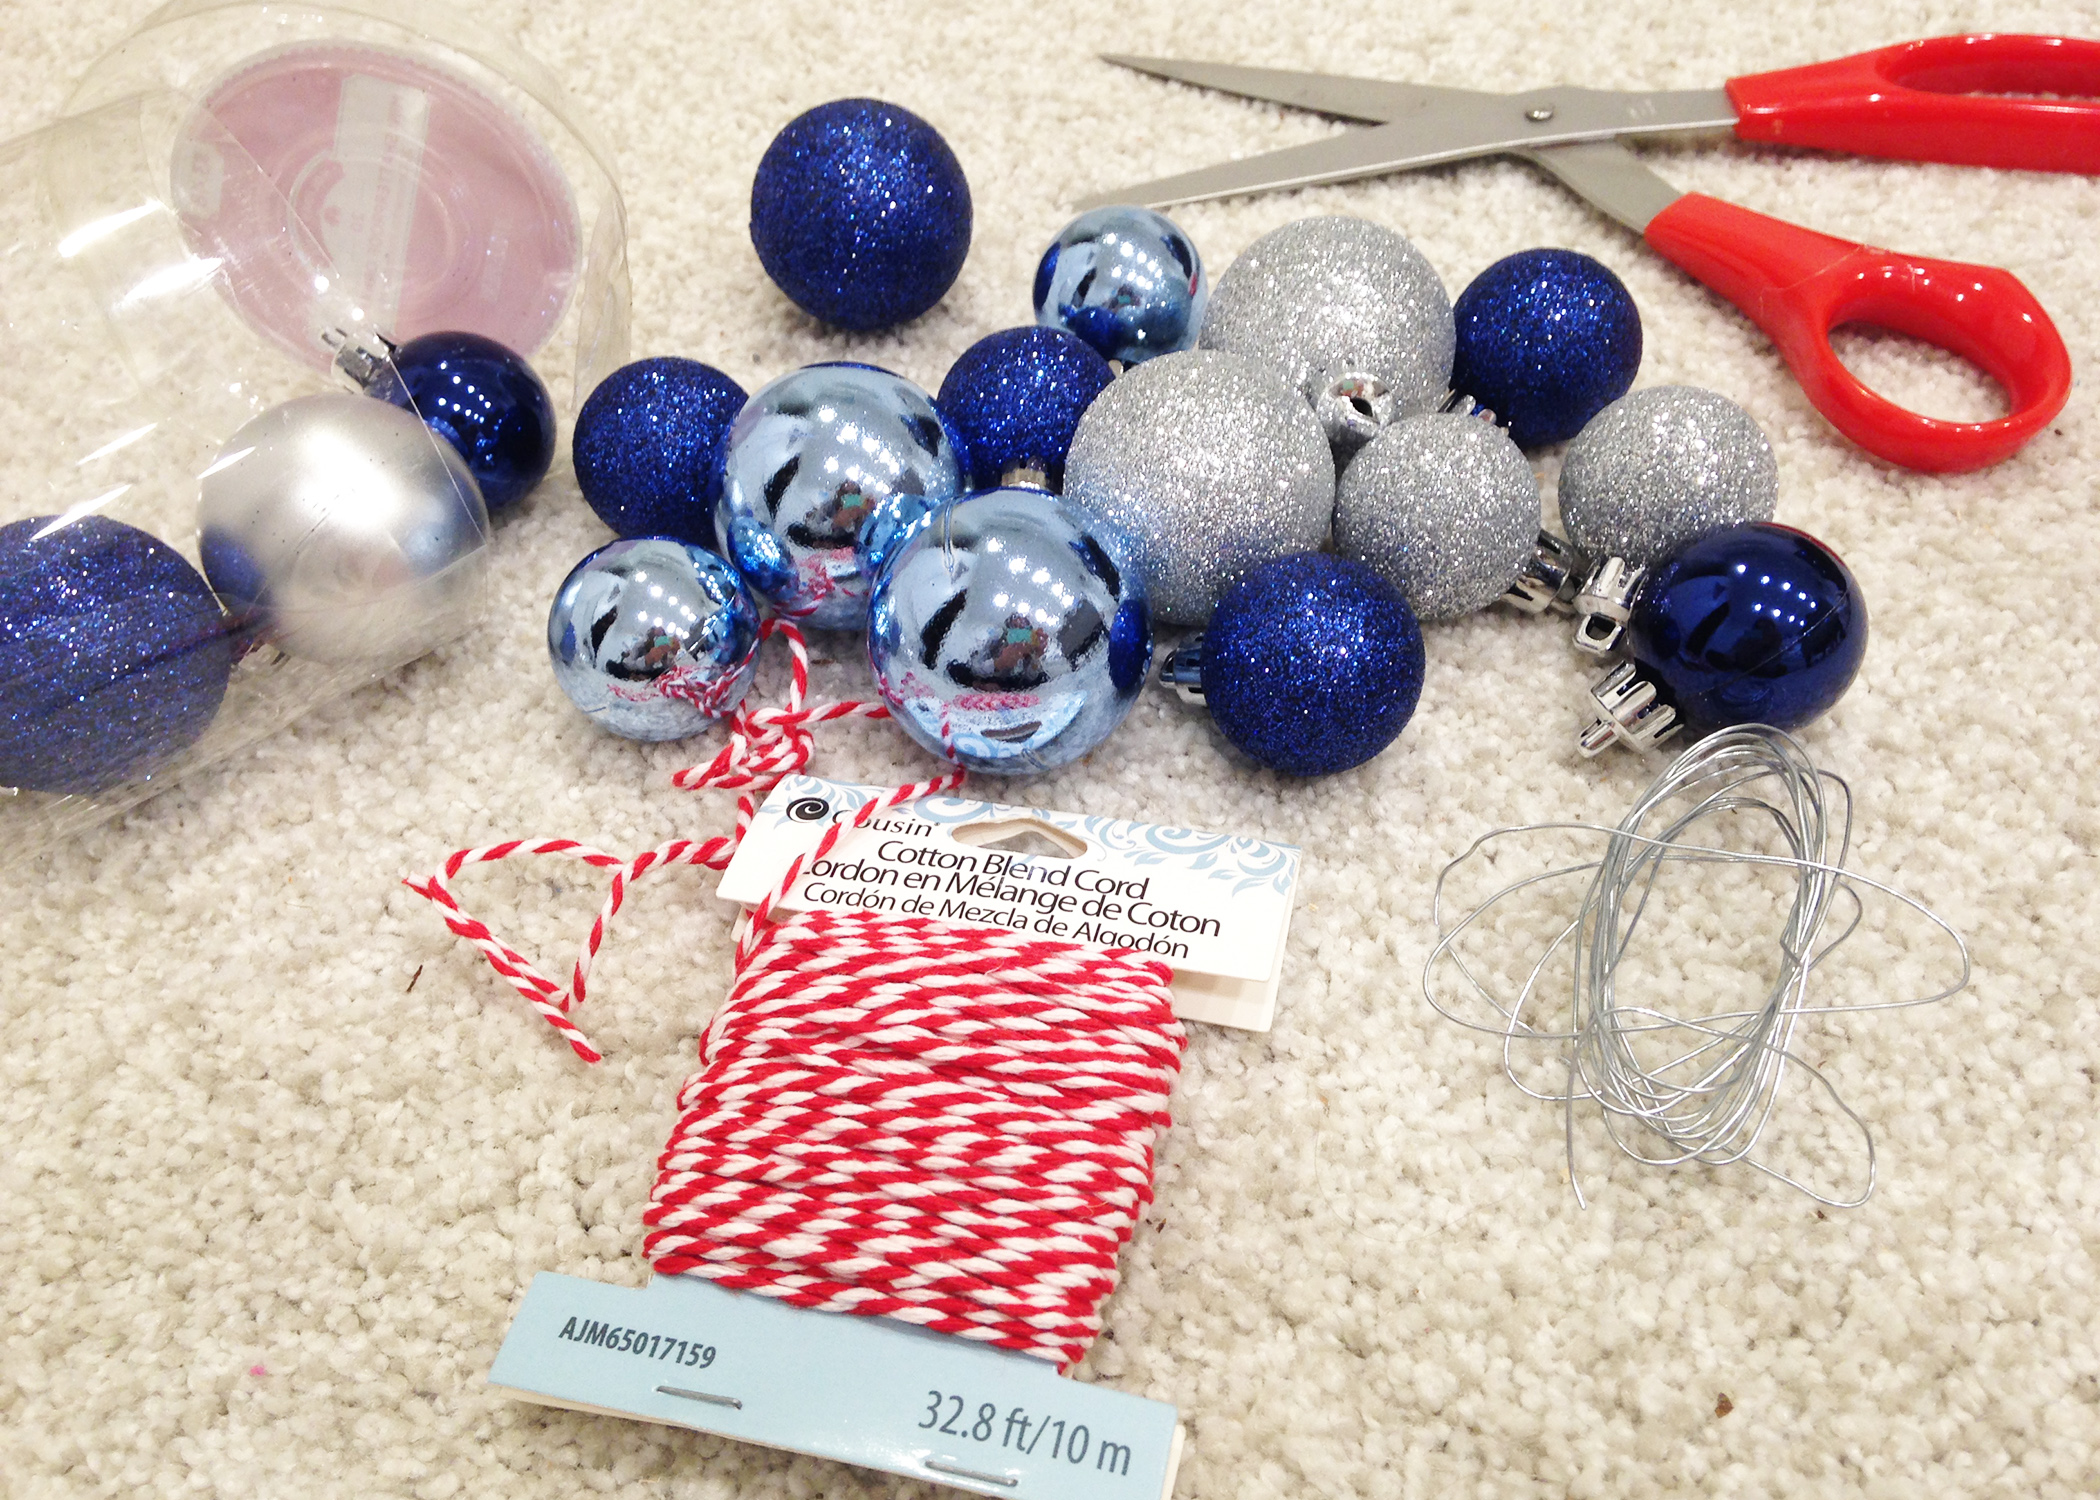
Branches/twigs
Garden shears
Twine
Scissors
Ornaments
Craft wire
Ribbon, string or other embellishments
Star for top of tree (I made mine w/ cardboard, twine & hot glue)
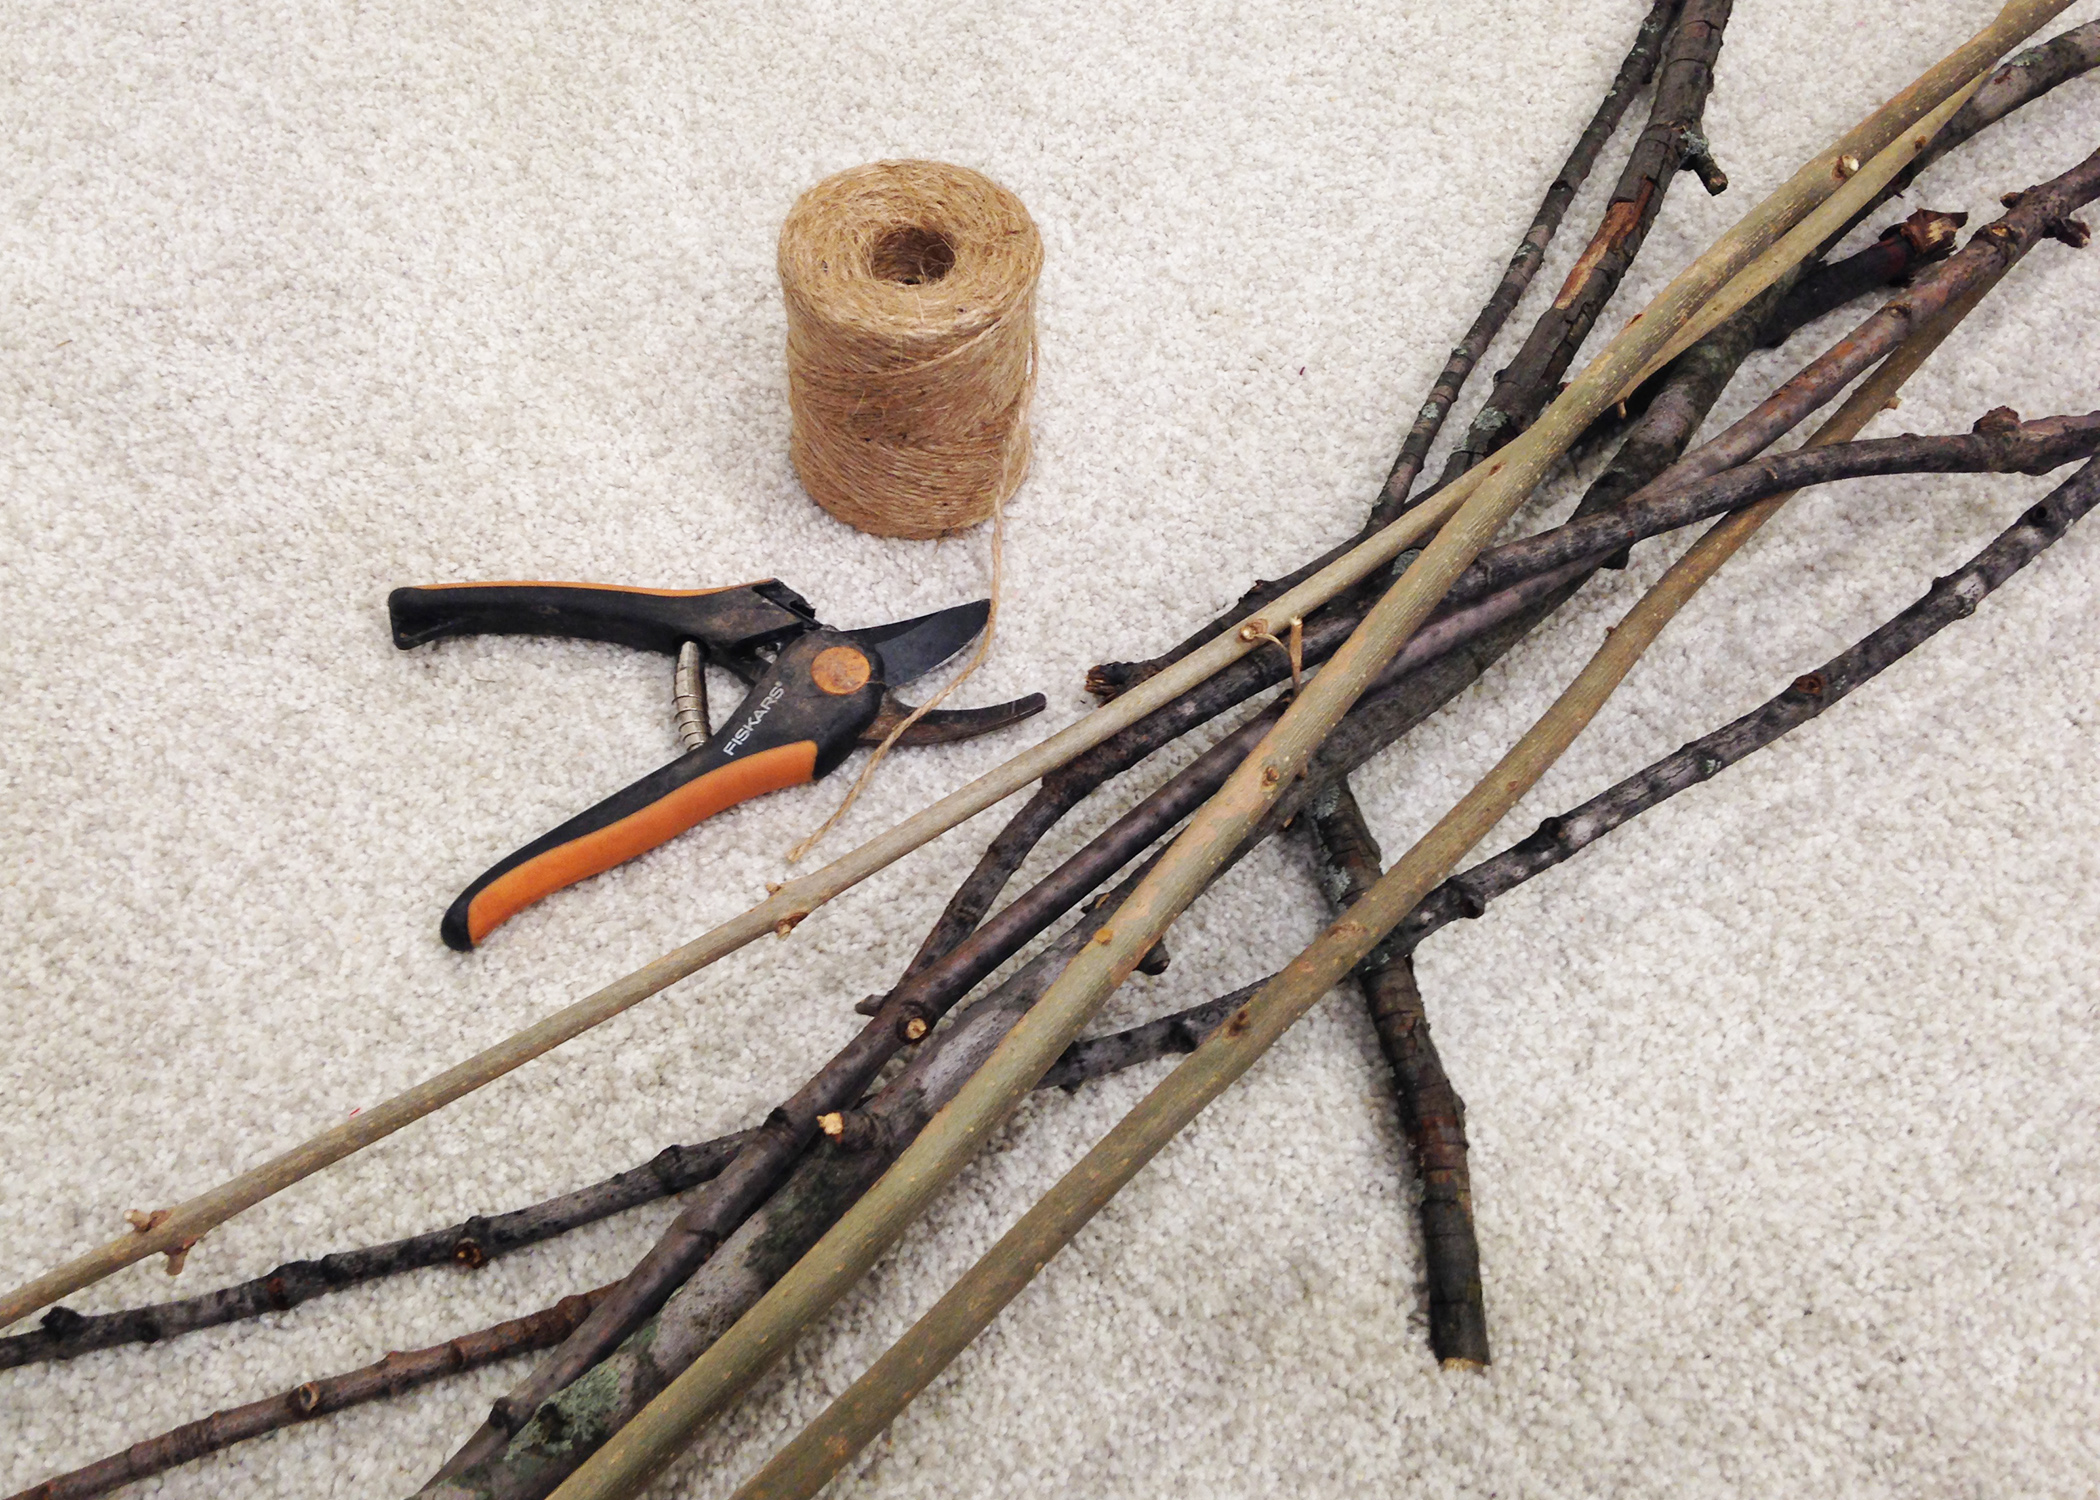
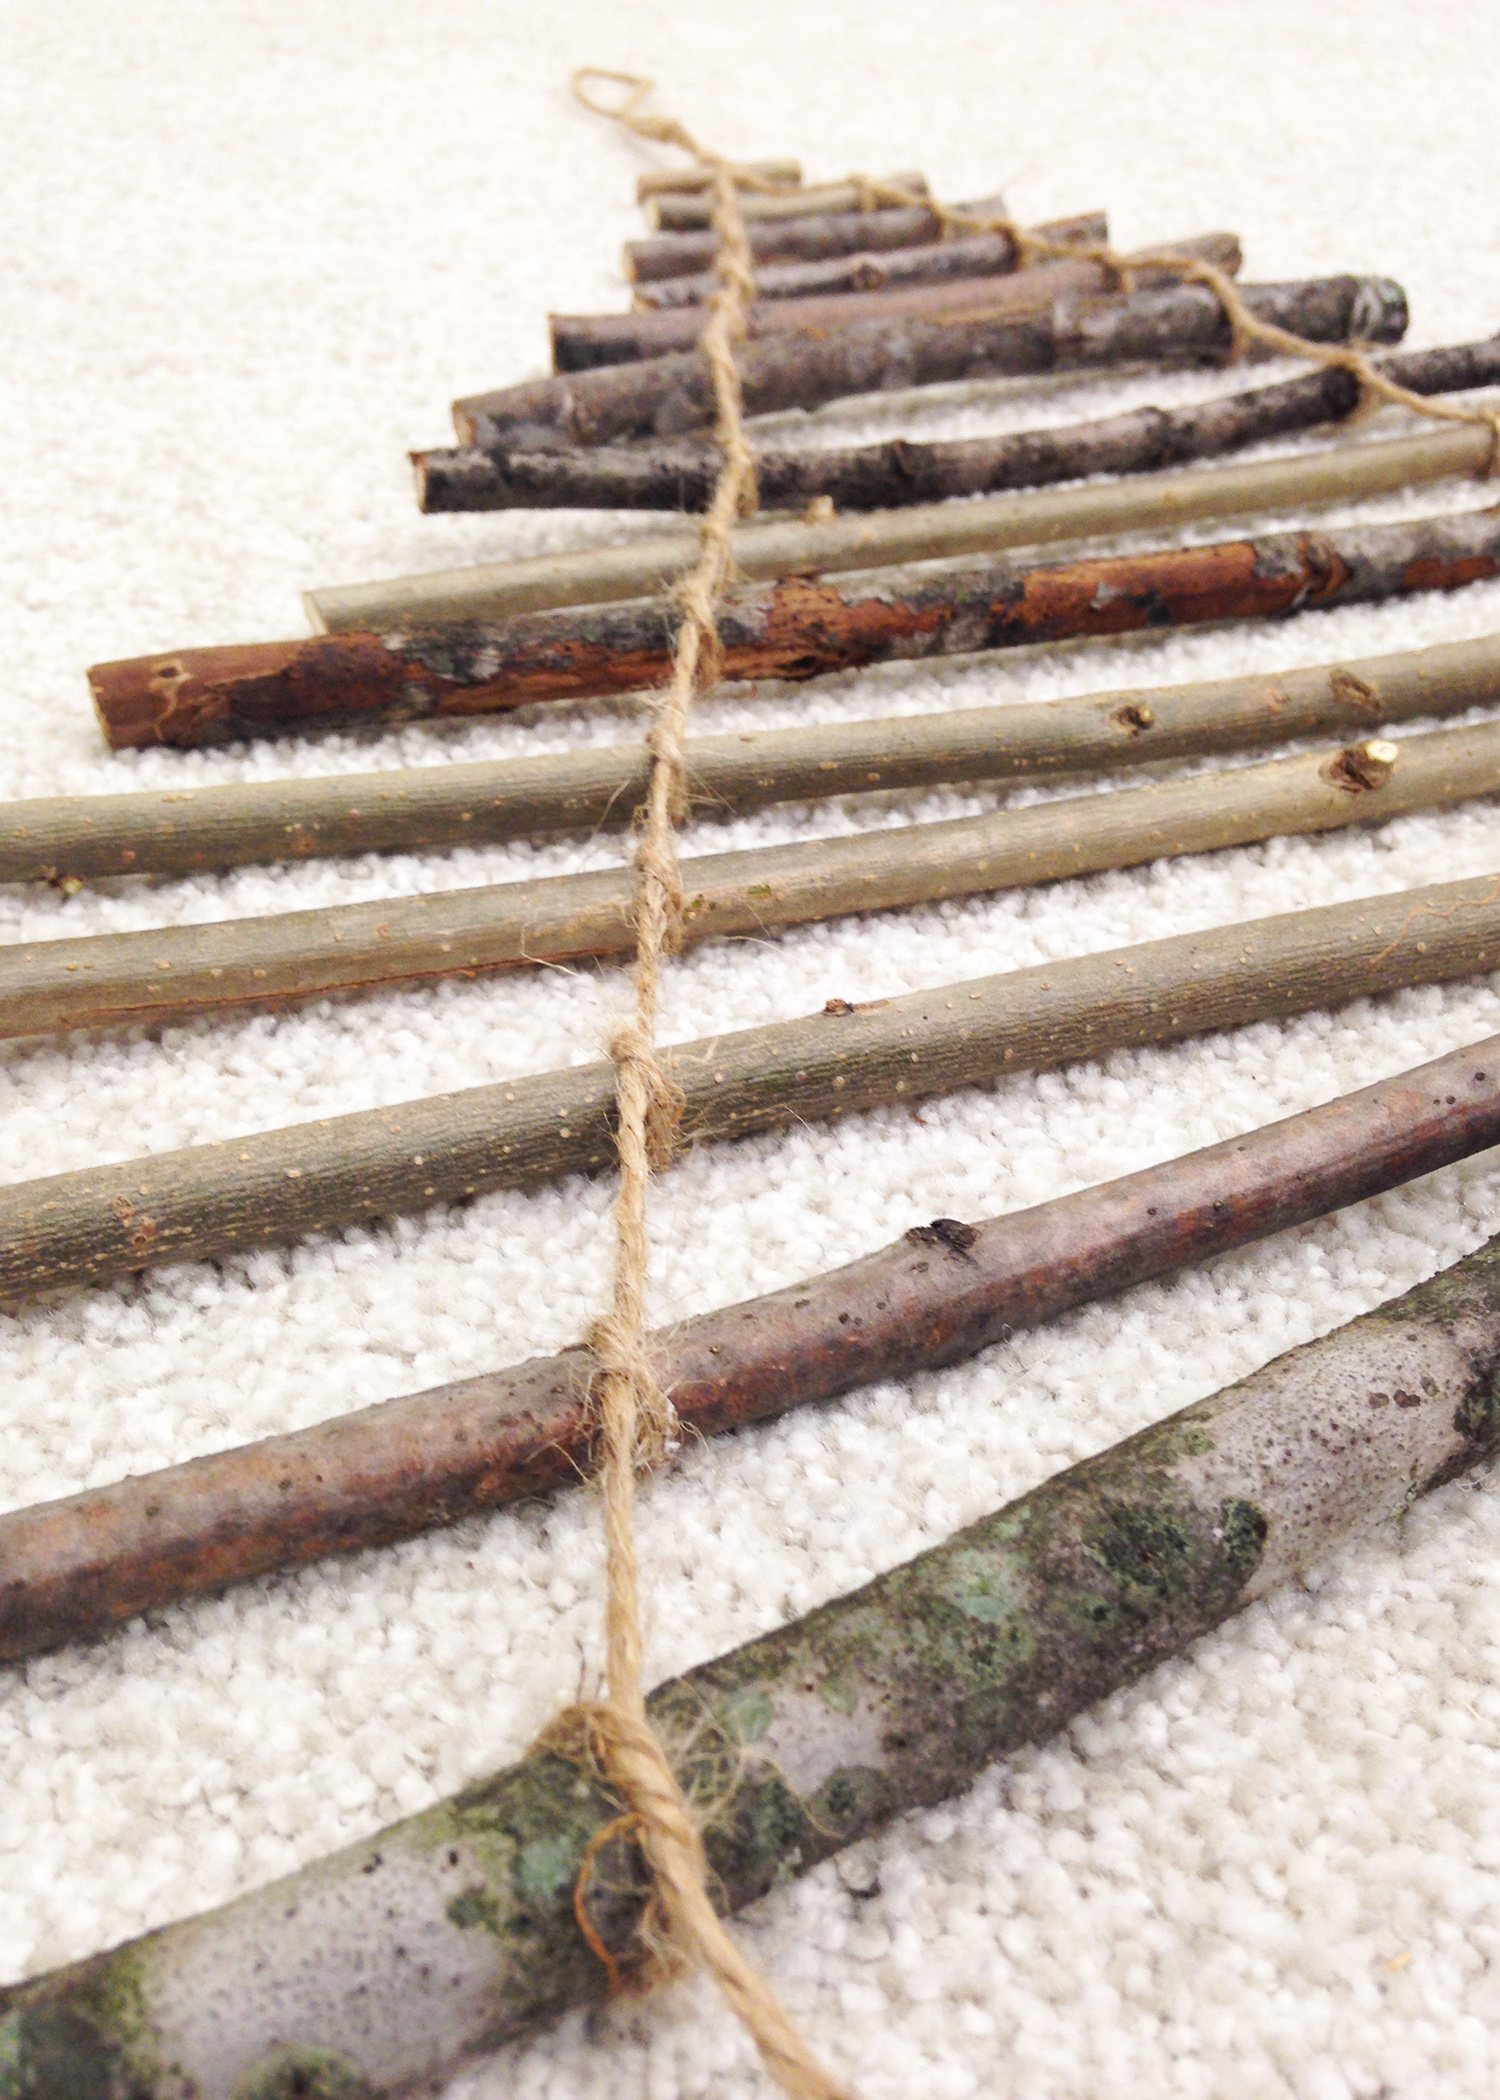
It’s simple really. Cut your branches to whatever size you feel will be appropriate for your tree. I knew exactly where I wanted the finished project to hang, so for me, it was easy. NOTE: Once I collected my branches, I left them in my basement to dry out for a few days. That way, I was able to pull off any loose bark fairly easily.

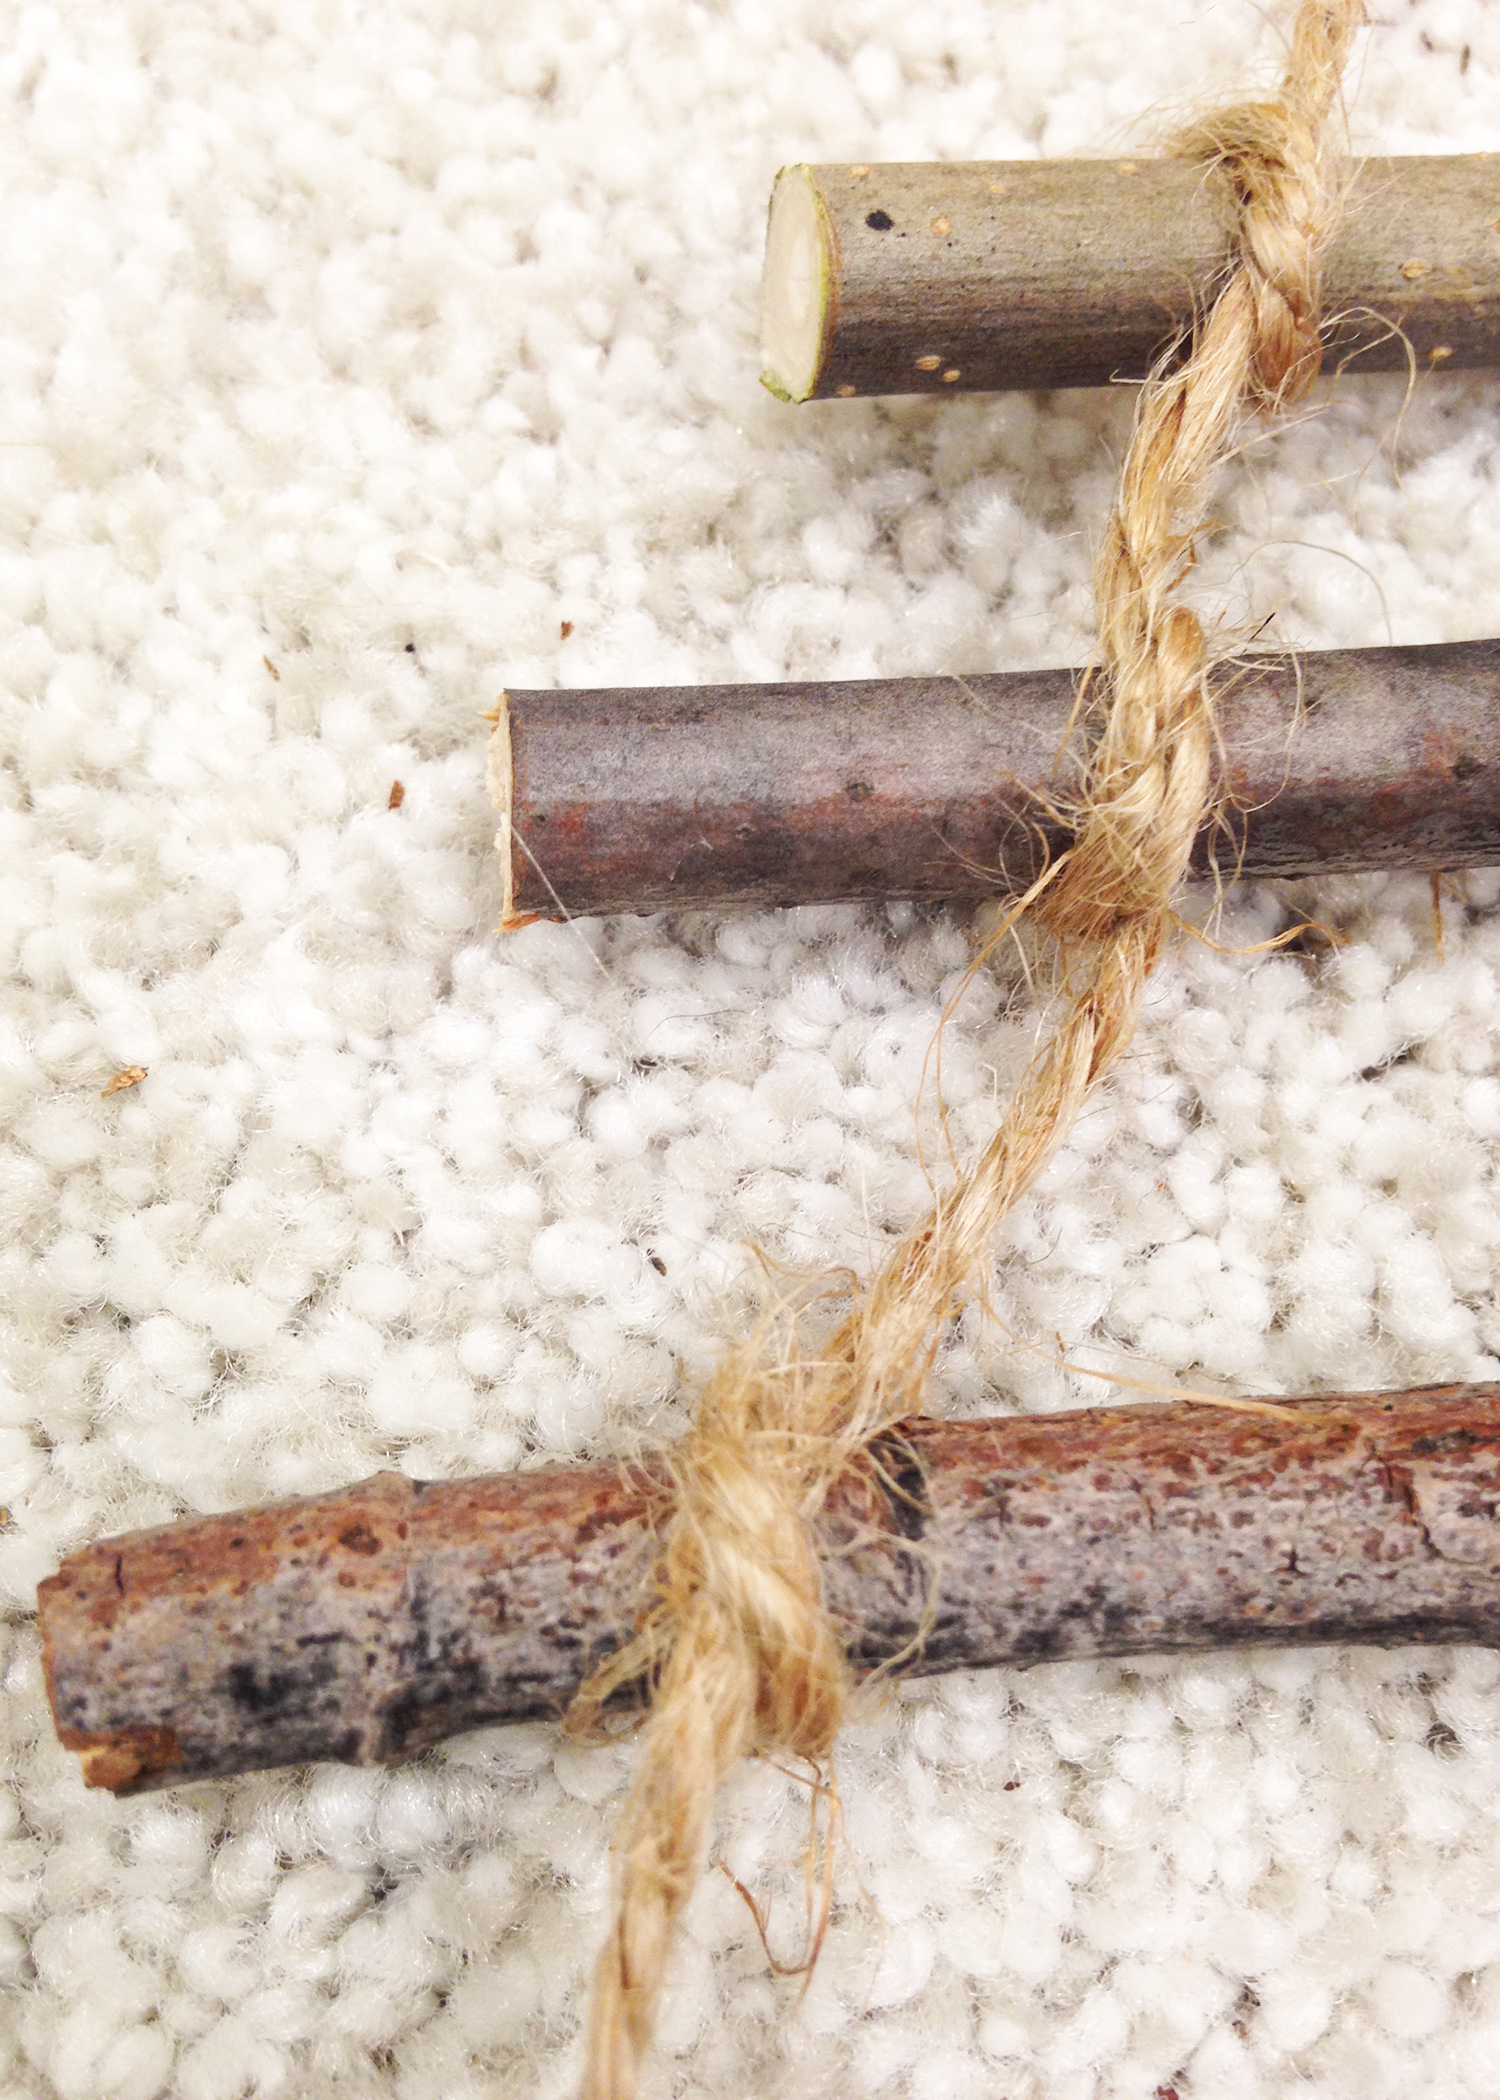
Now it’s time to start assembling. I used twine (because I always have it on hand), but you could use all sorts of string or ribbon. Make sure before you start, you measure out enough twine to be able to loop each branch. My motto: measure out far too much, so you’re not left with far too little. I started at the top with a loop and a simple knot, and then worked my way down each side.

As you can see, all you need is a half knot on each end, and the weight of the piece will keep it tight and together.
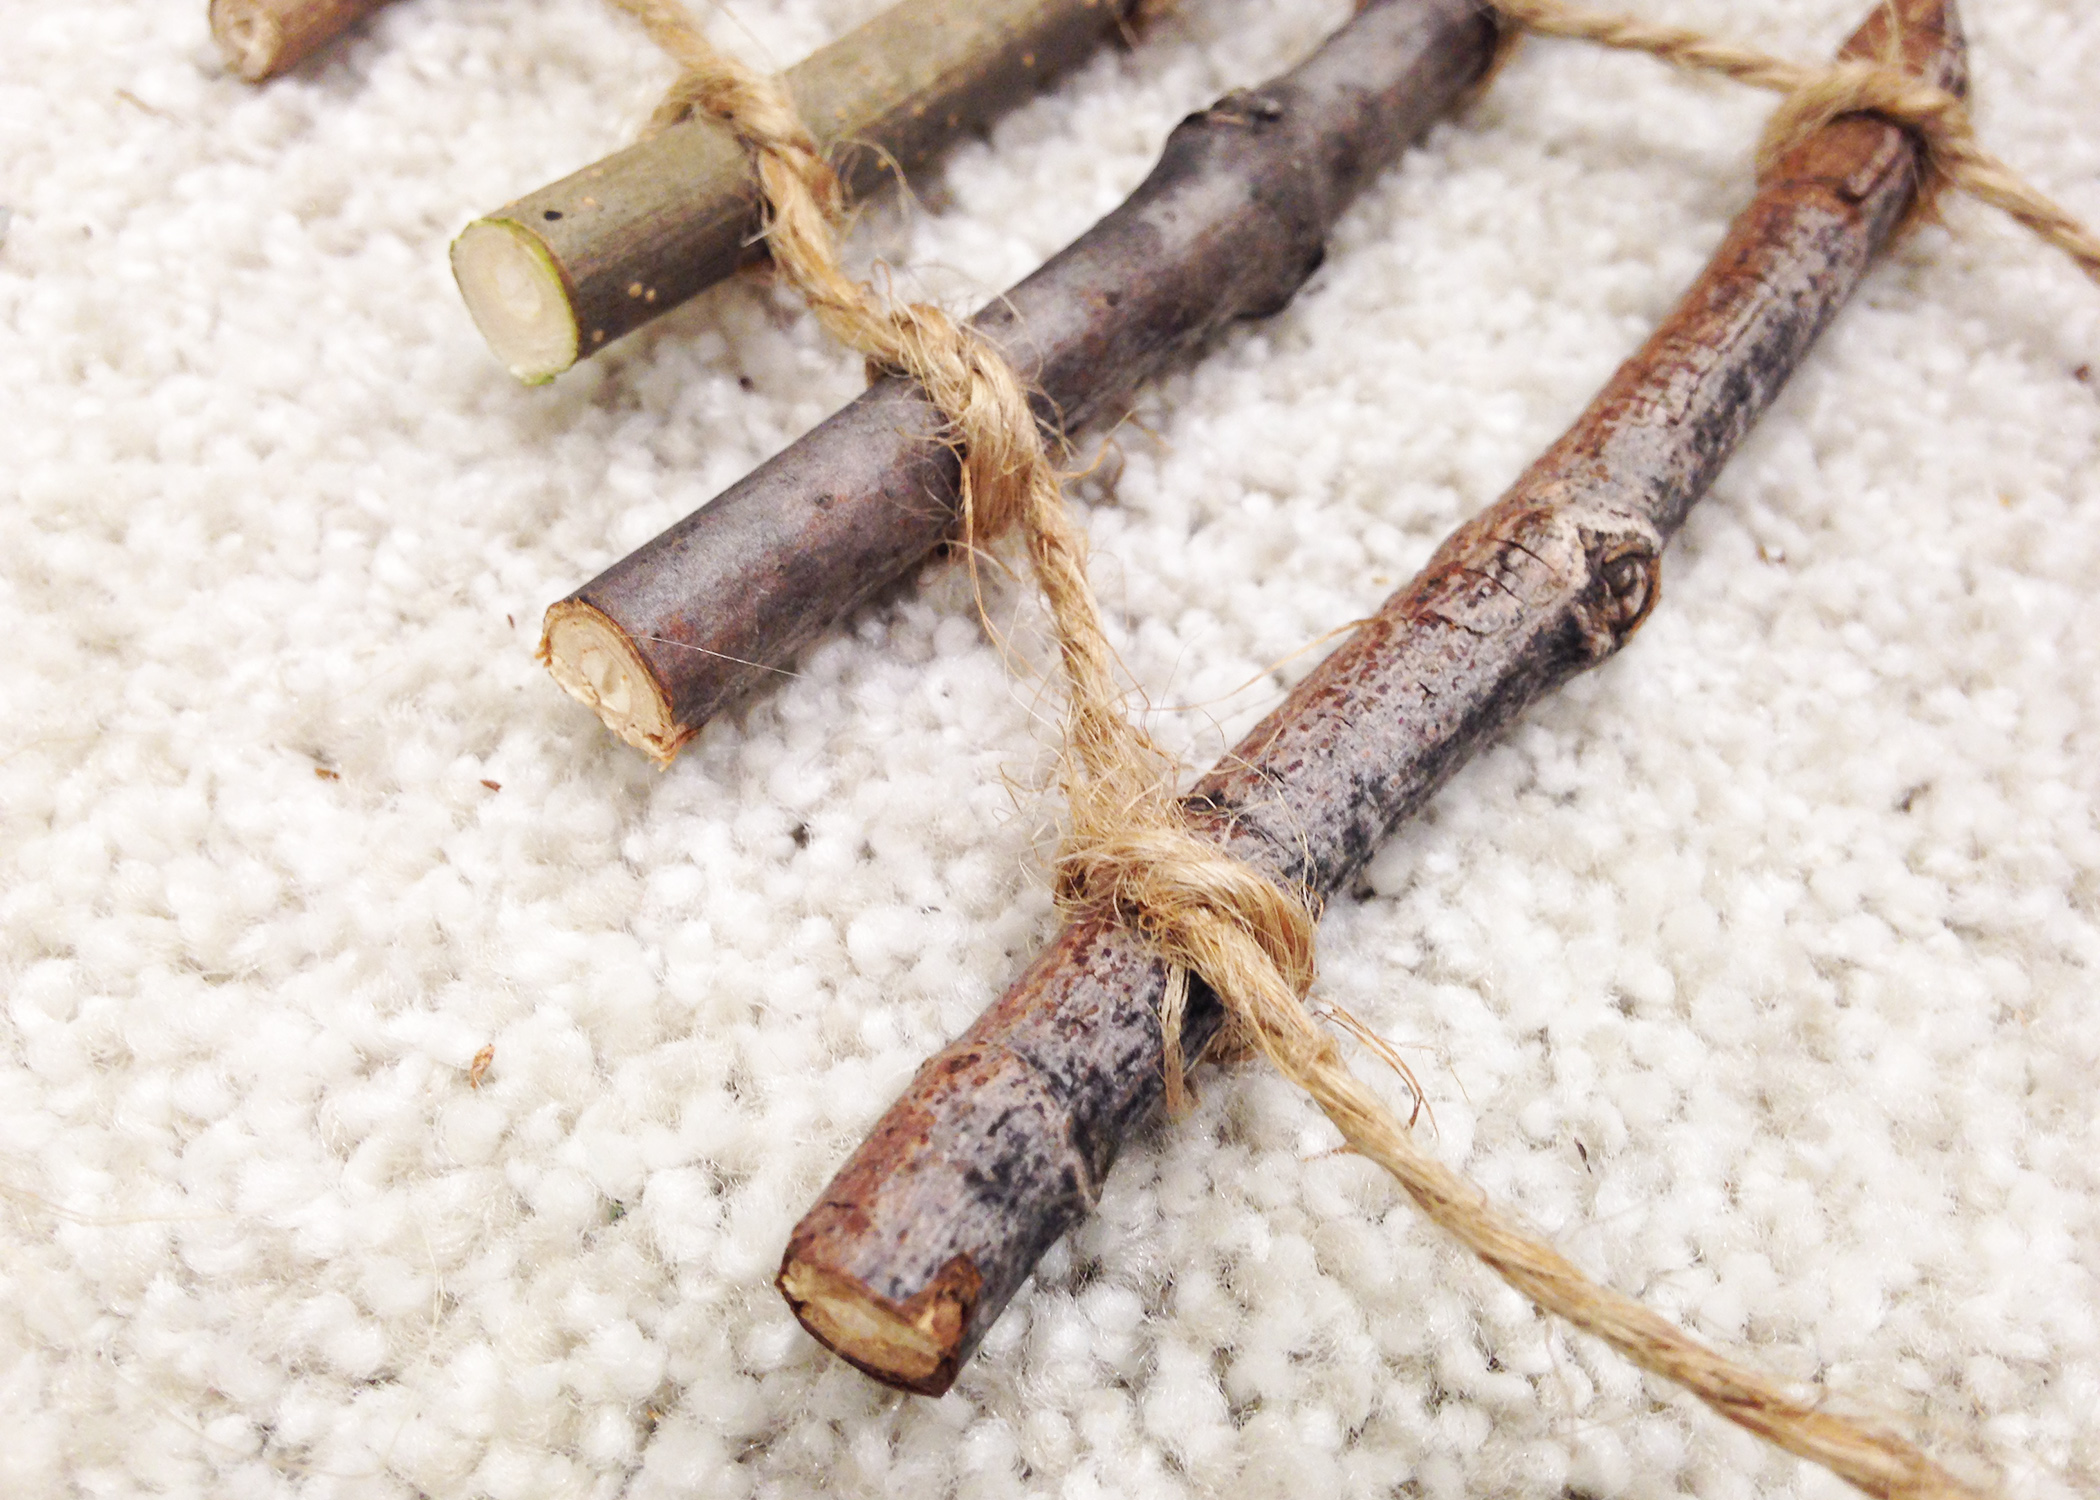
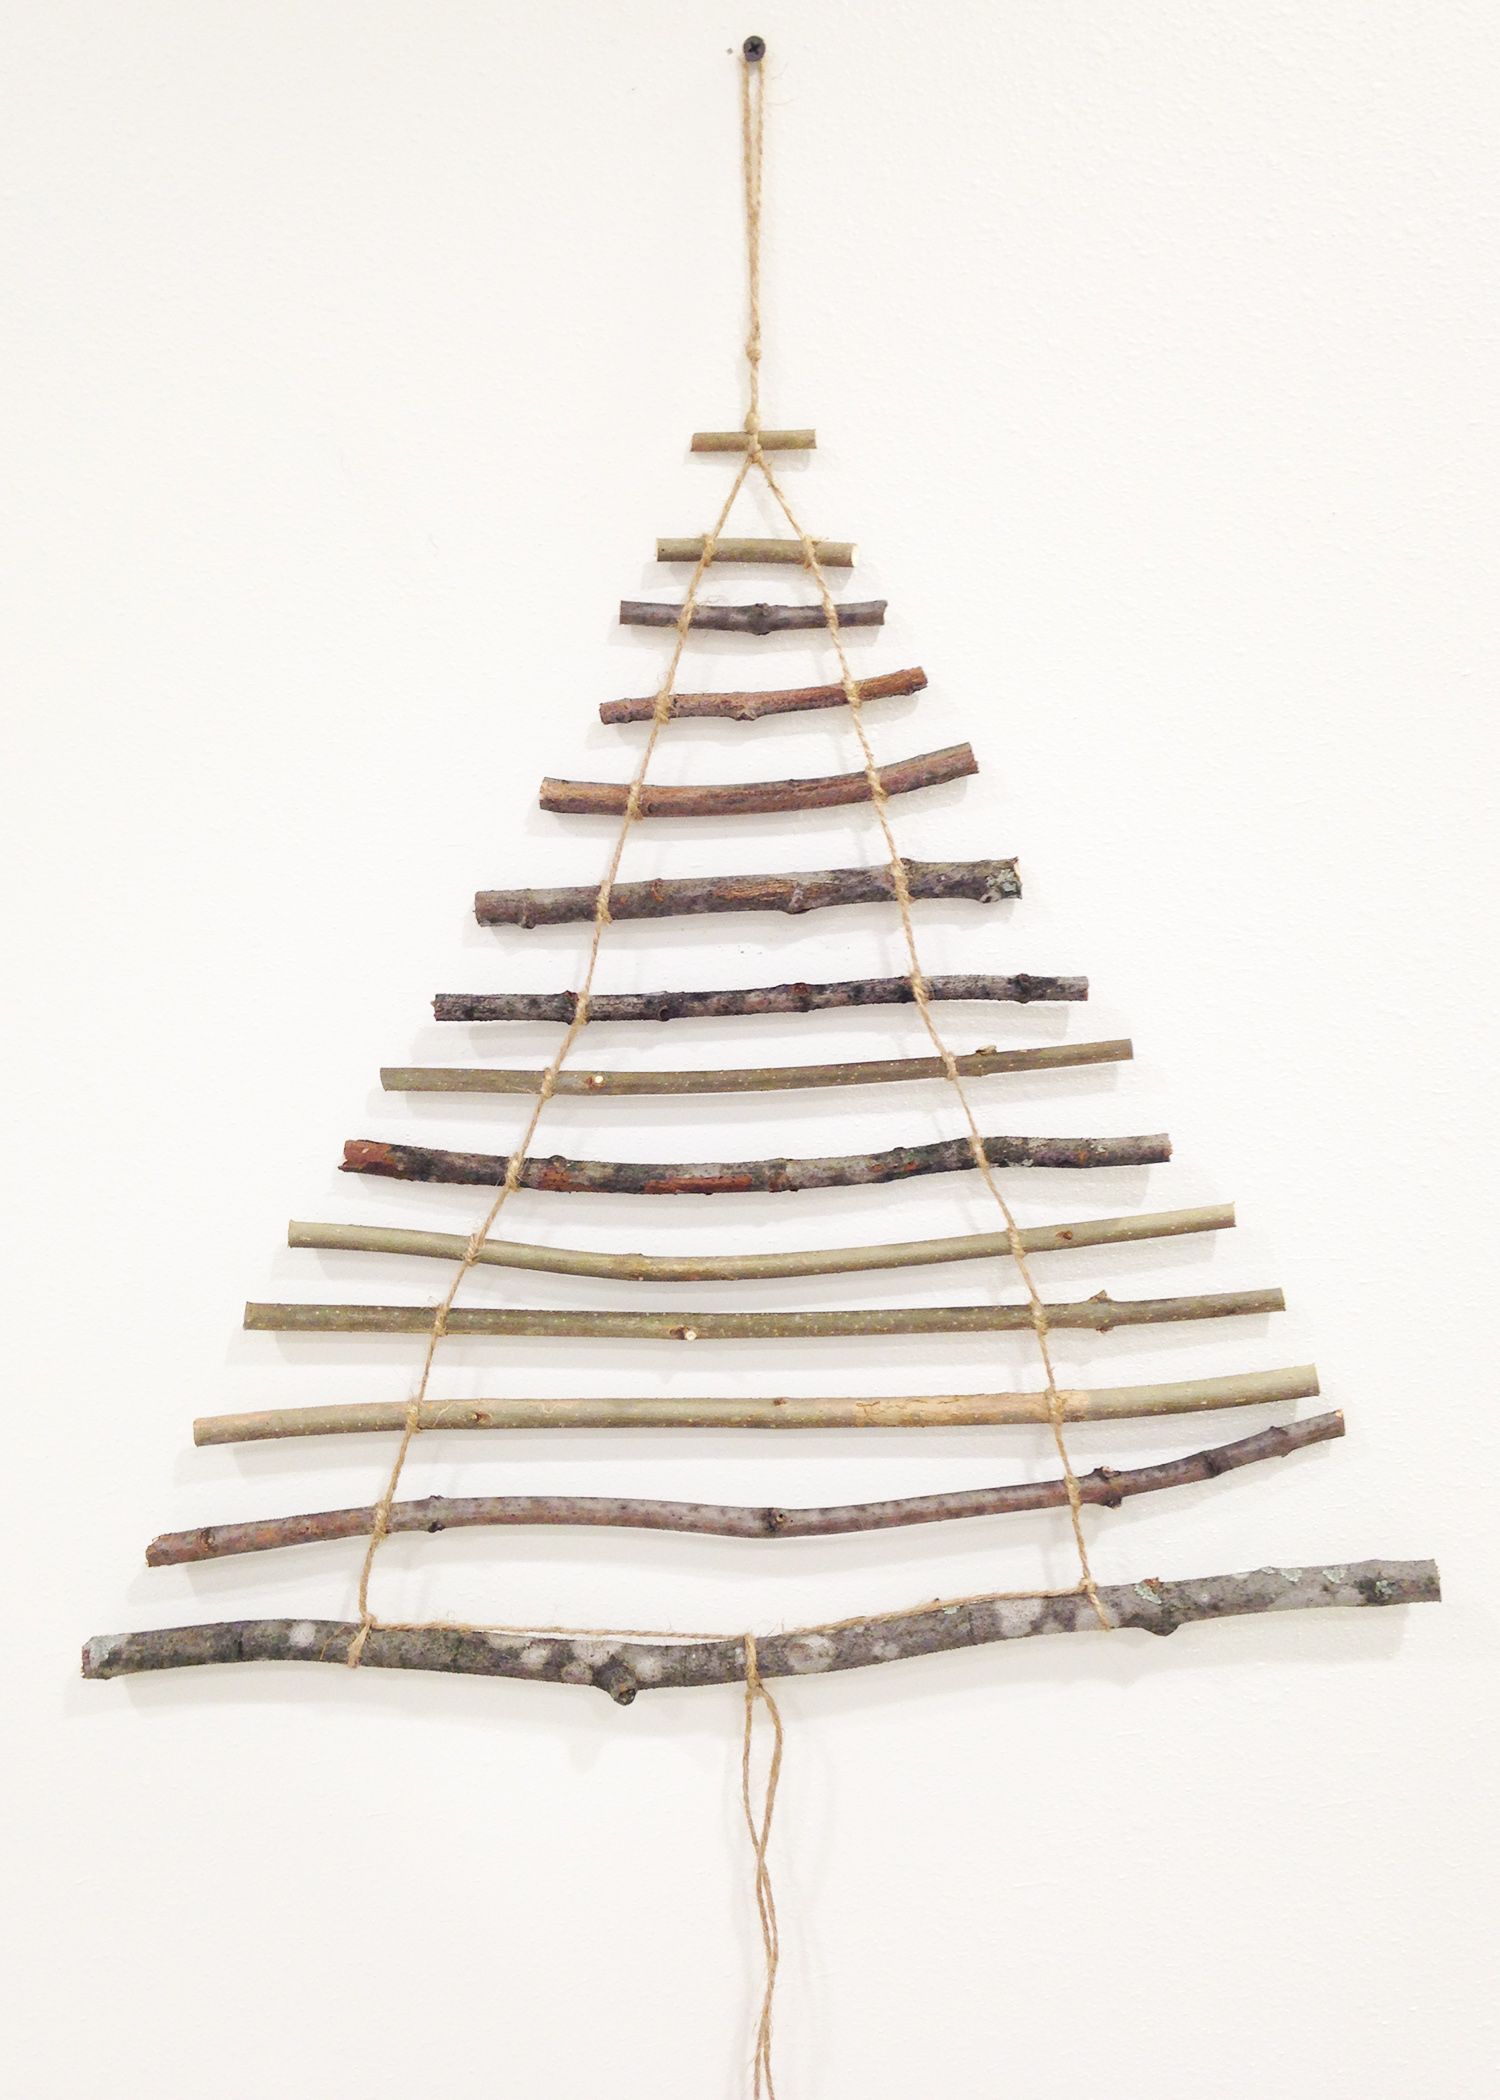
Once you have both sides complete, secure the ends. I opted to let some twine hang loose down the middle of my tree, but you could also trim it close to the last branch. Up to you.
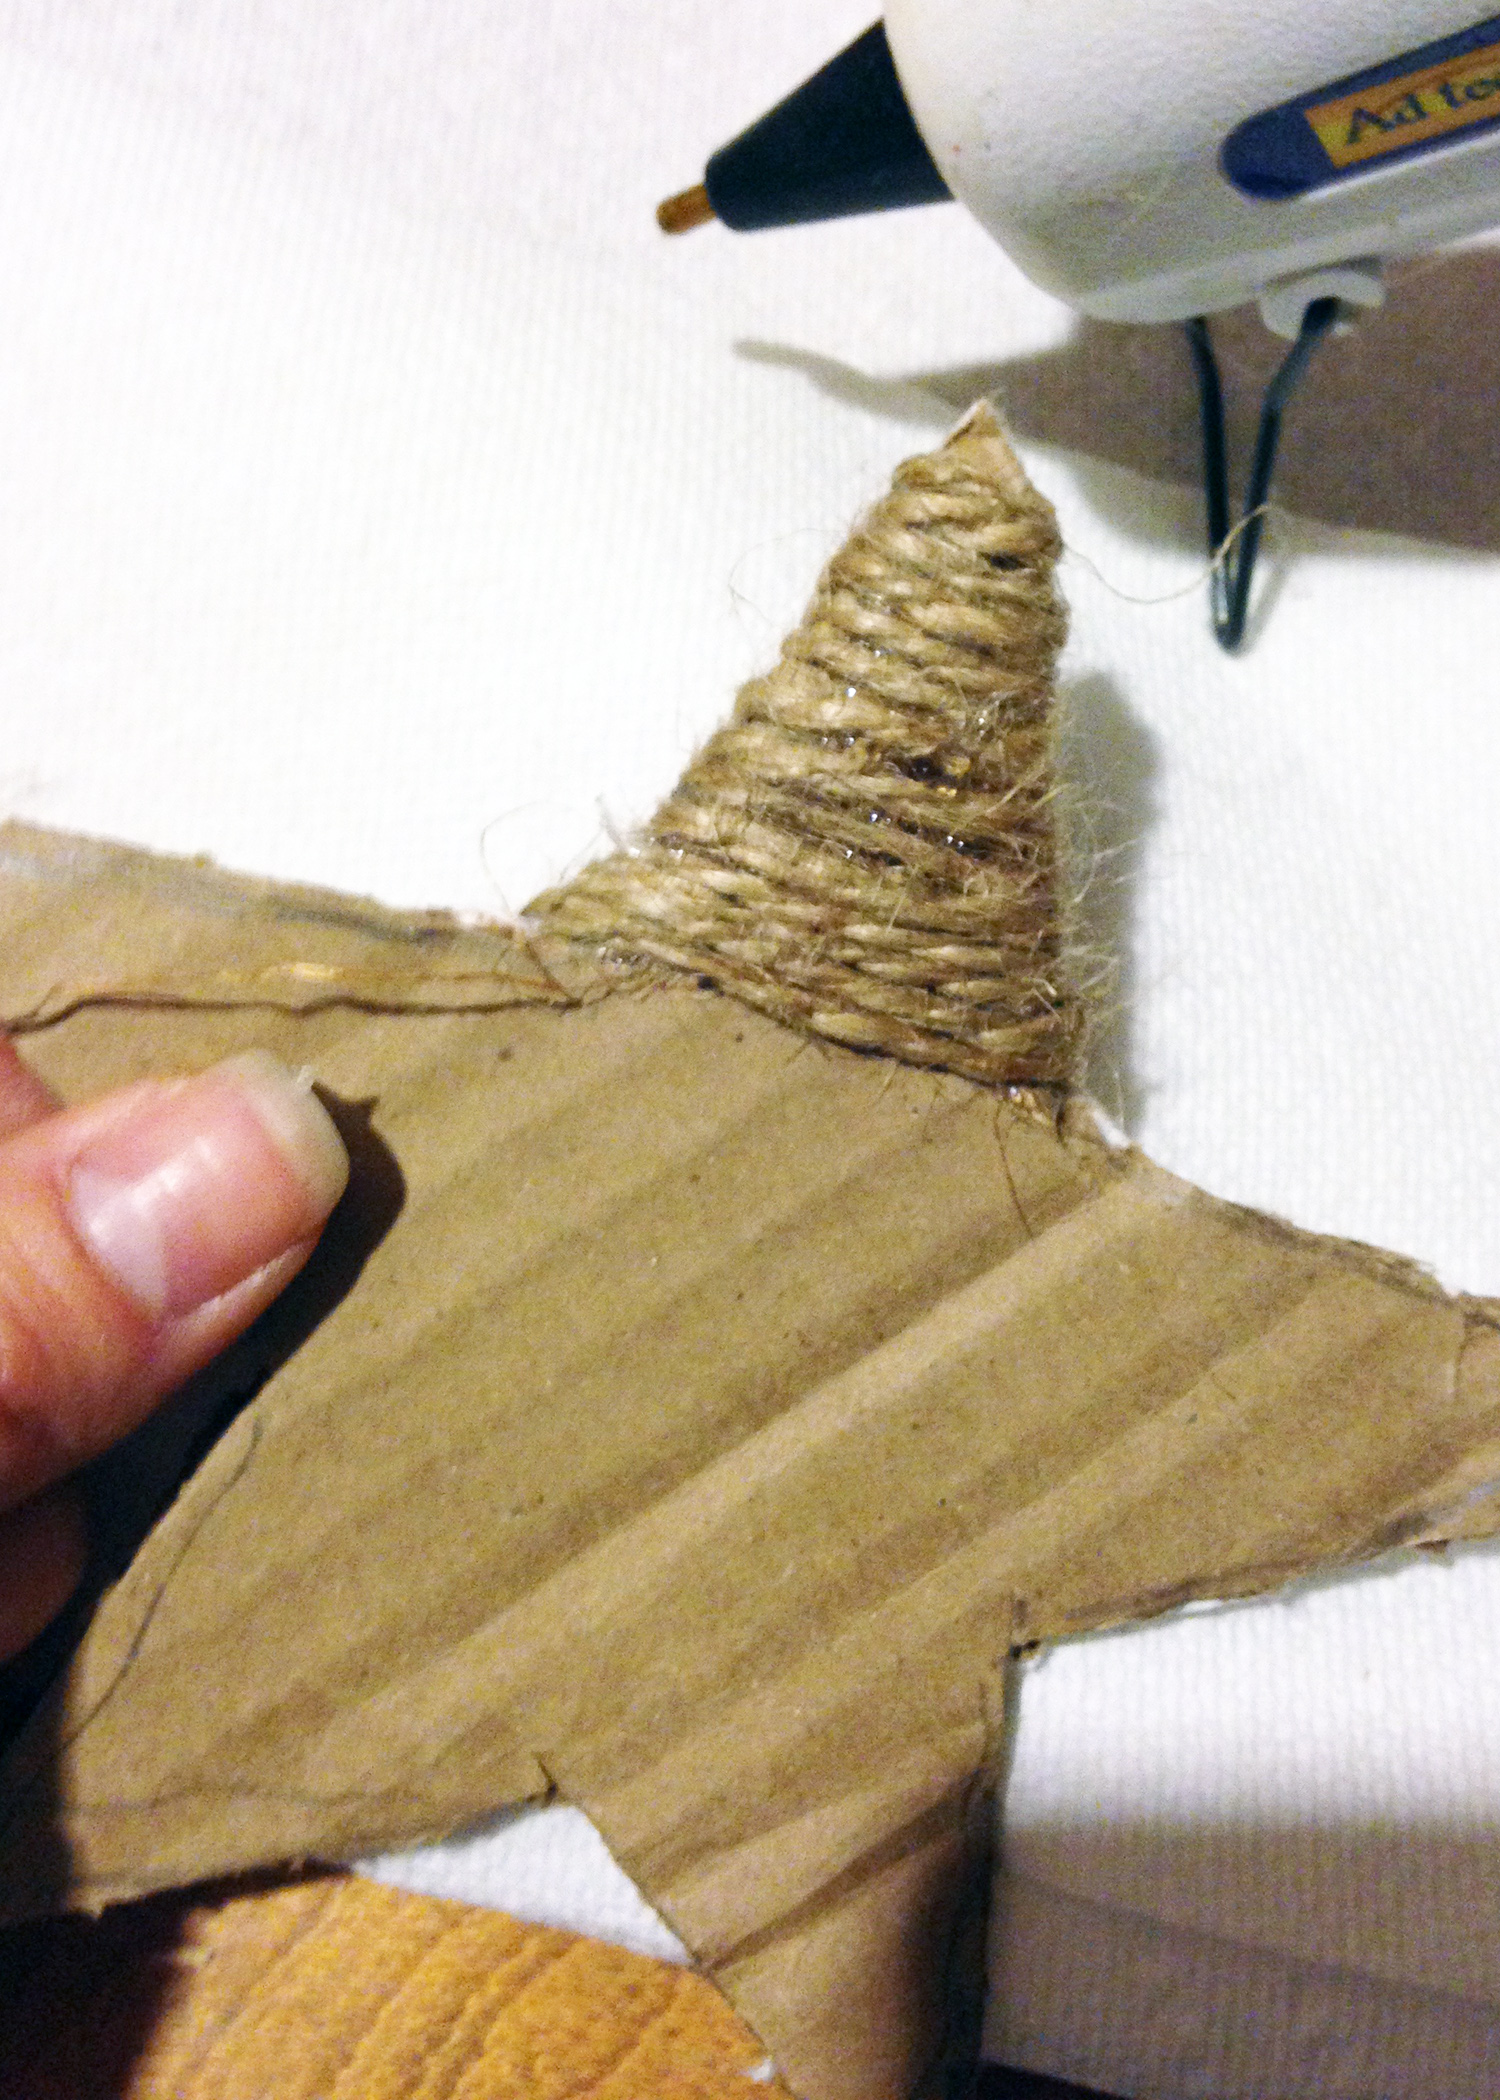
Now that the hard part is complete, it’s time for the fun stuff: THE BLING. I started with a simple, natural star for the top. I used a piece of cardboard from a diaper box (what can I say, I’m cheap), drew a star, cut it out with an exacto, then used hot glue to wrap and secure some twine all the way around it. It’s not perfect, but again, it’s not supposed to be. “Charming” is the word I’m looking for : )
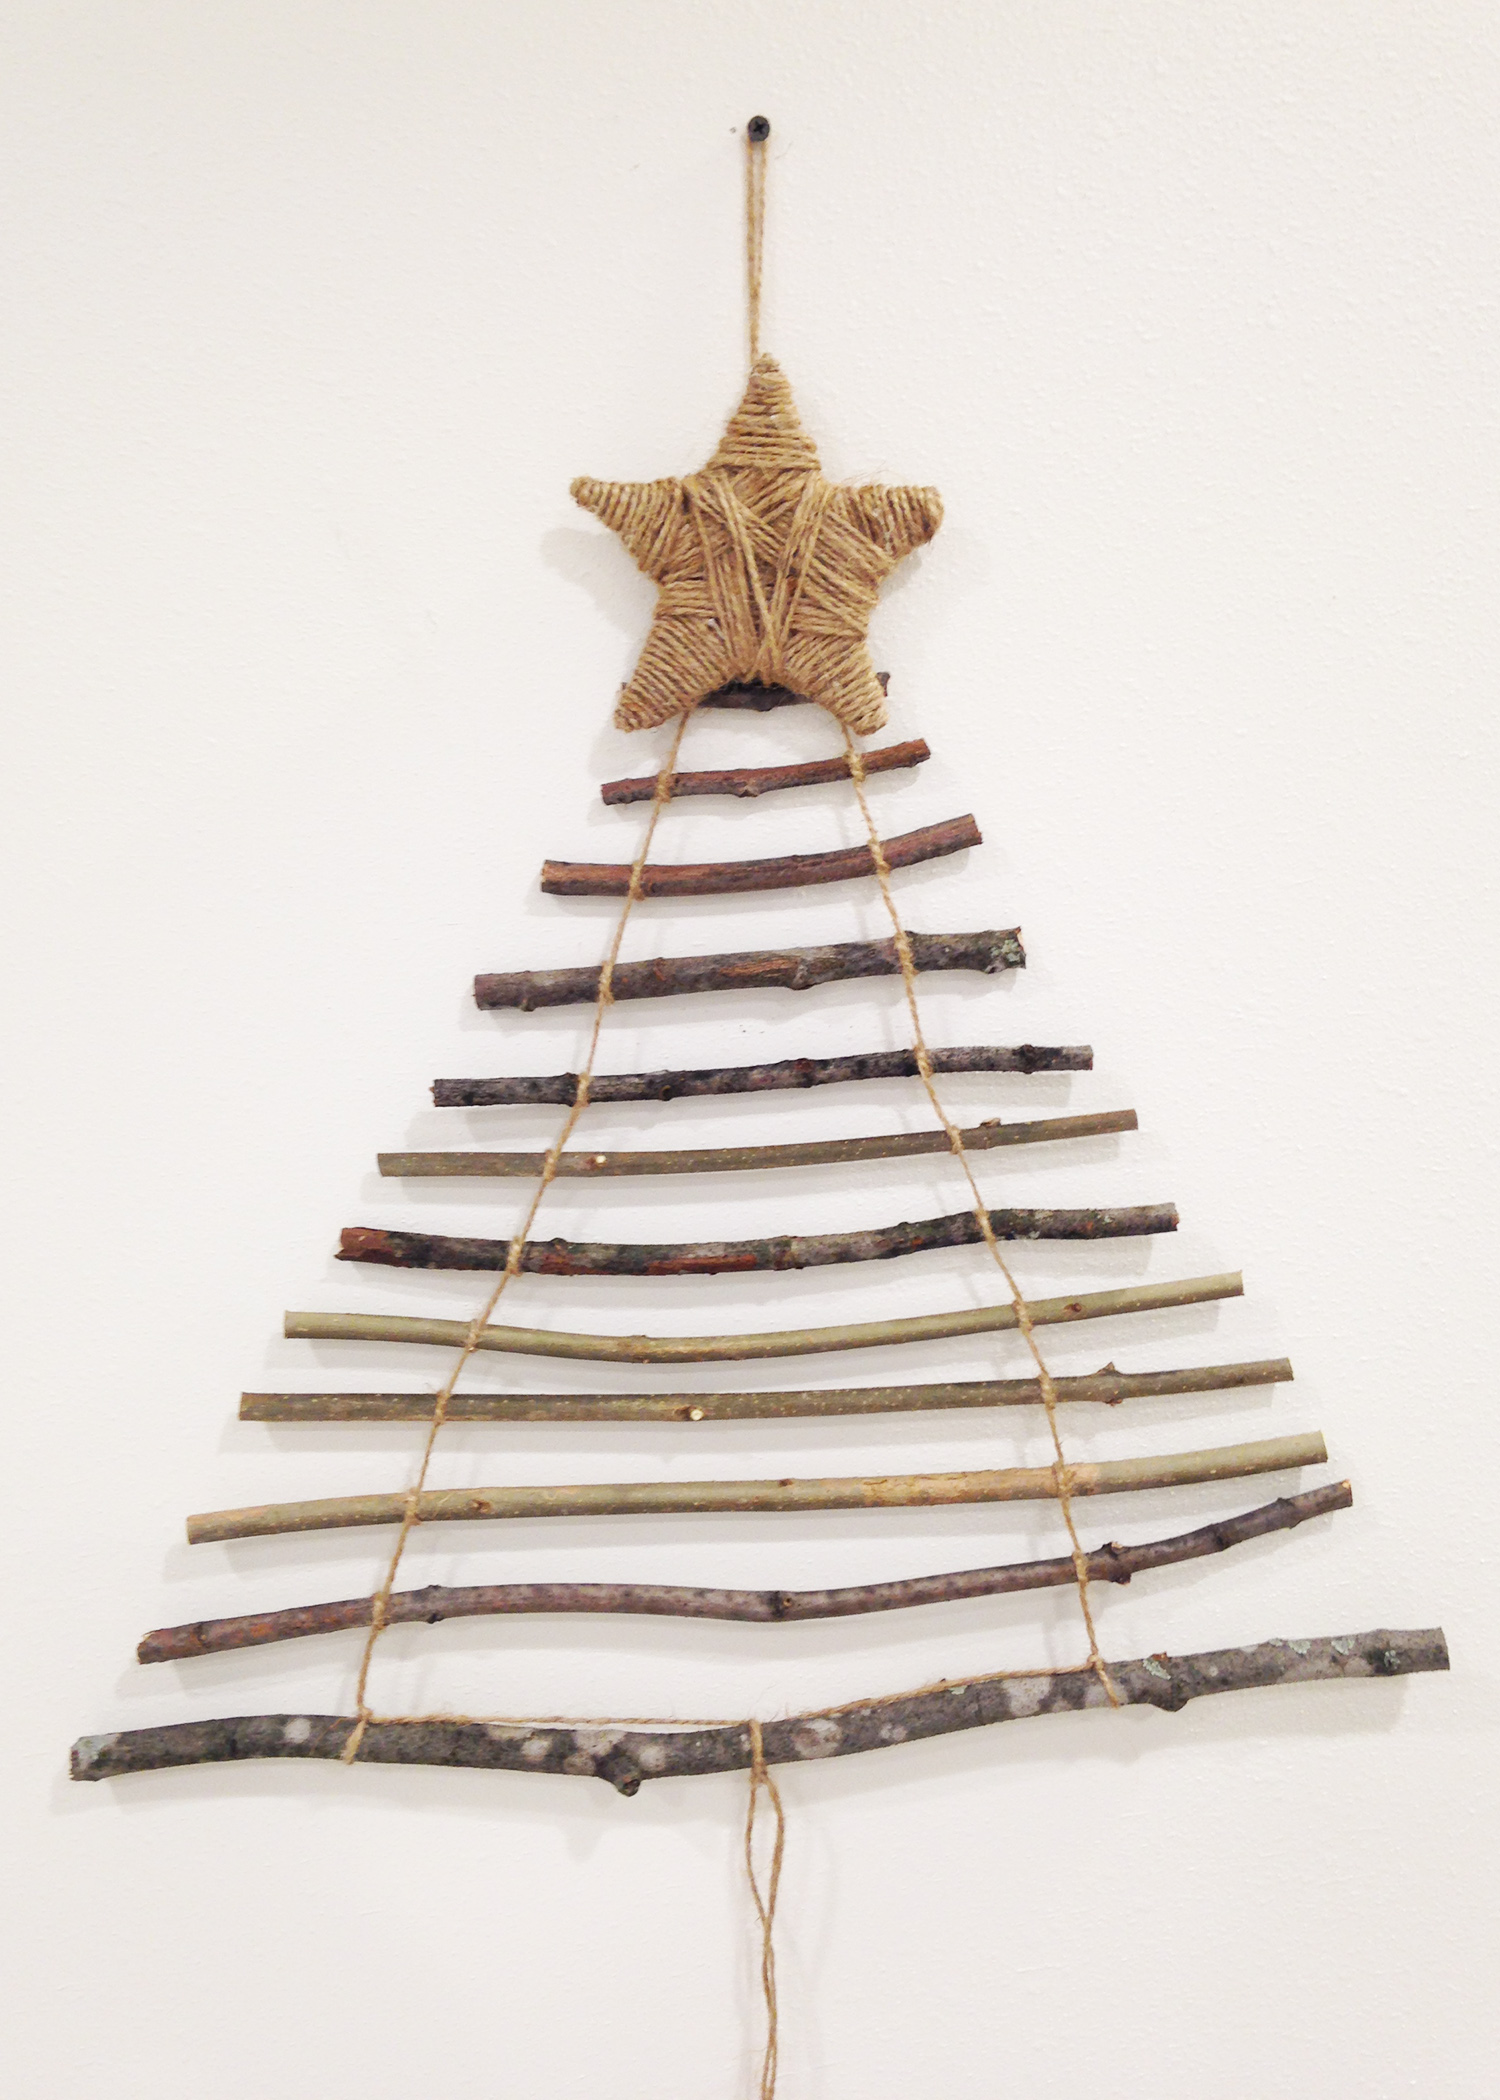
Once my star was glued to the top, I actually really liked the natural look of the whole piece. You could leave your tree as is, or add a few more embellishments. Since this is going in my rec room, I thought ornaments would be more fun for my kids. All I used to secure them to my tree was craft wire. You could also reinforce them with a dab of hot glue if you’re so inclined.

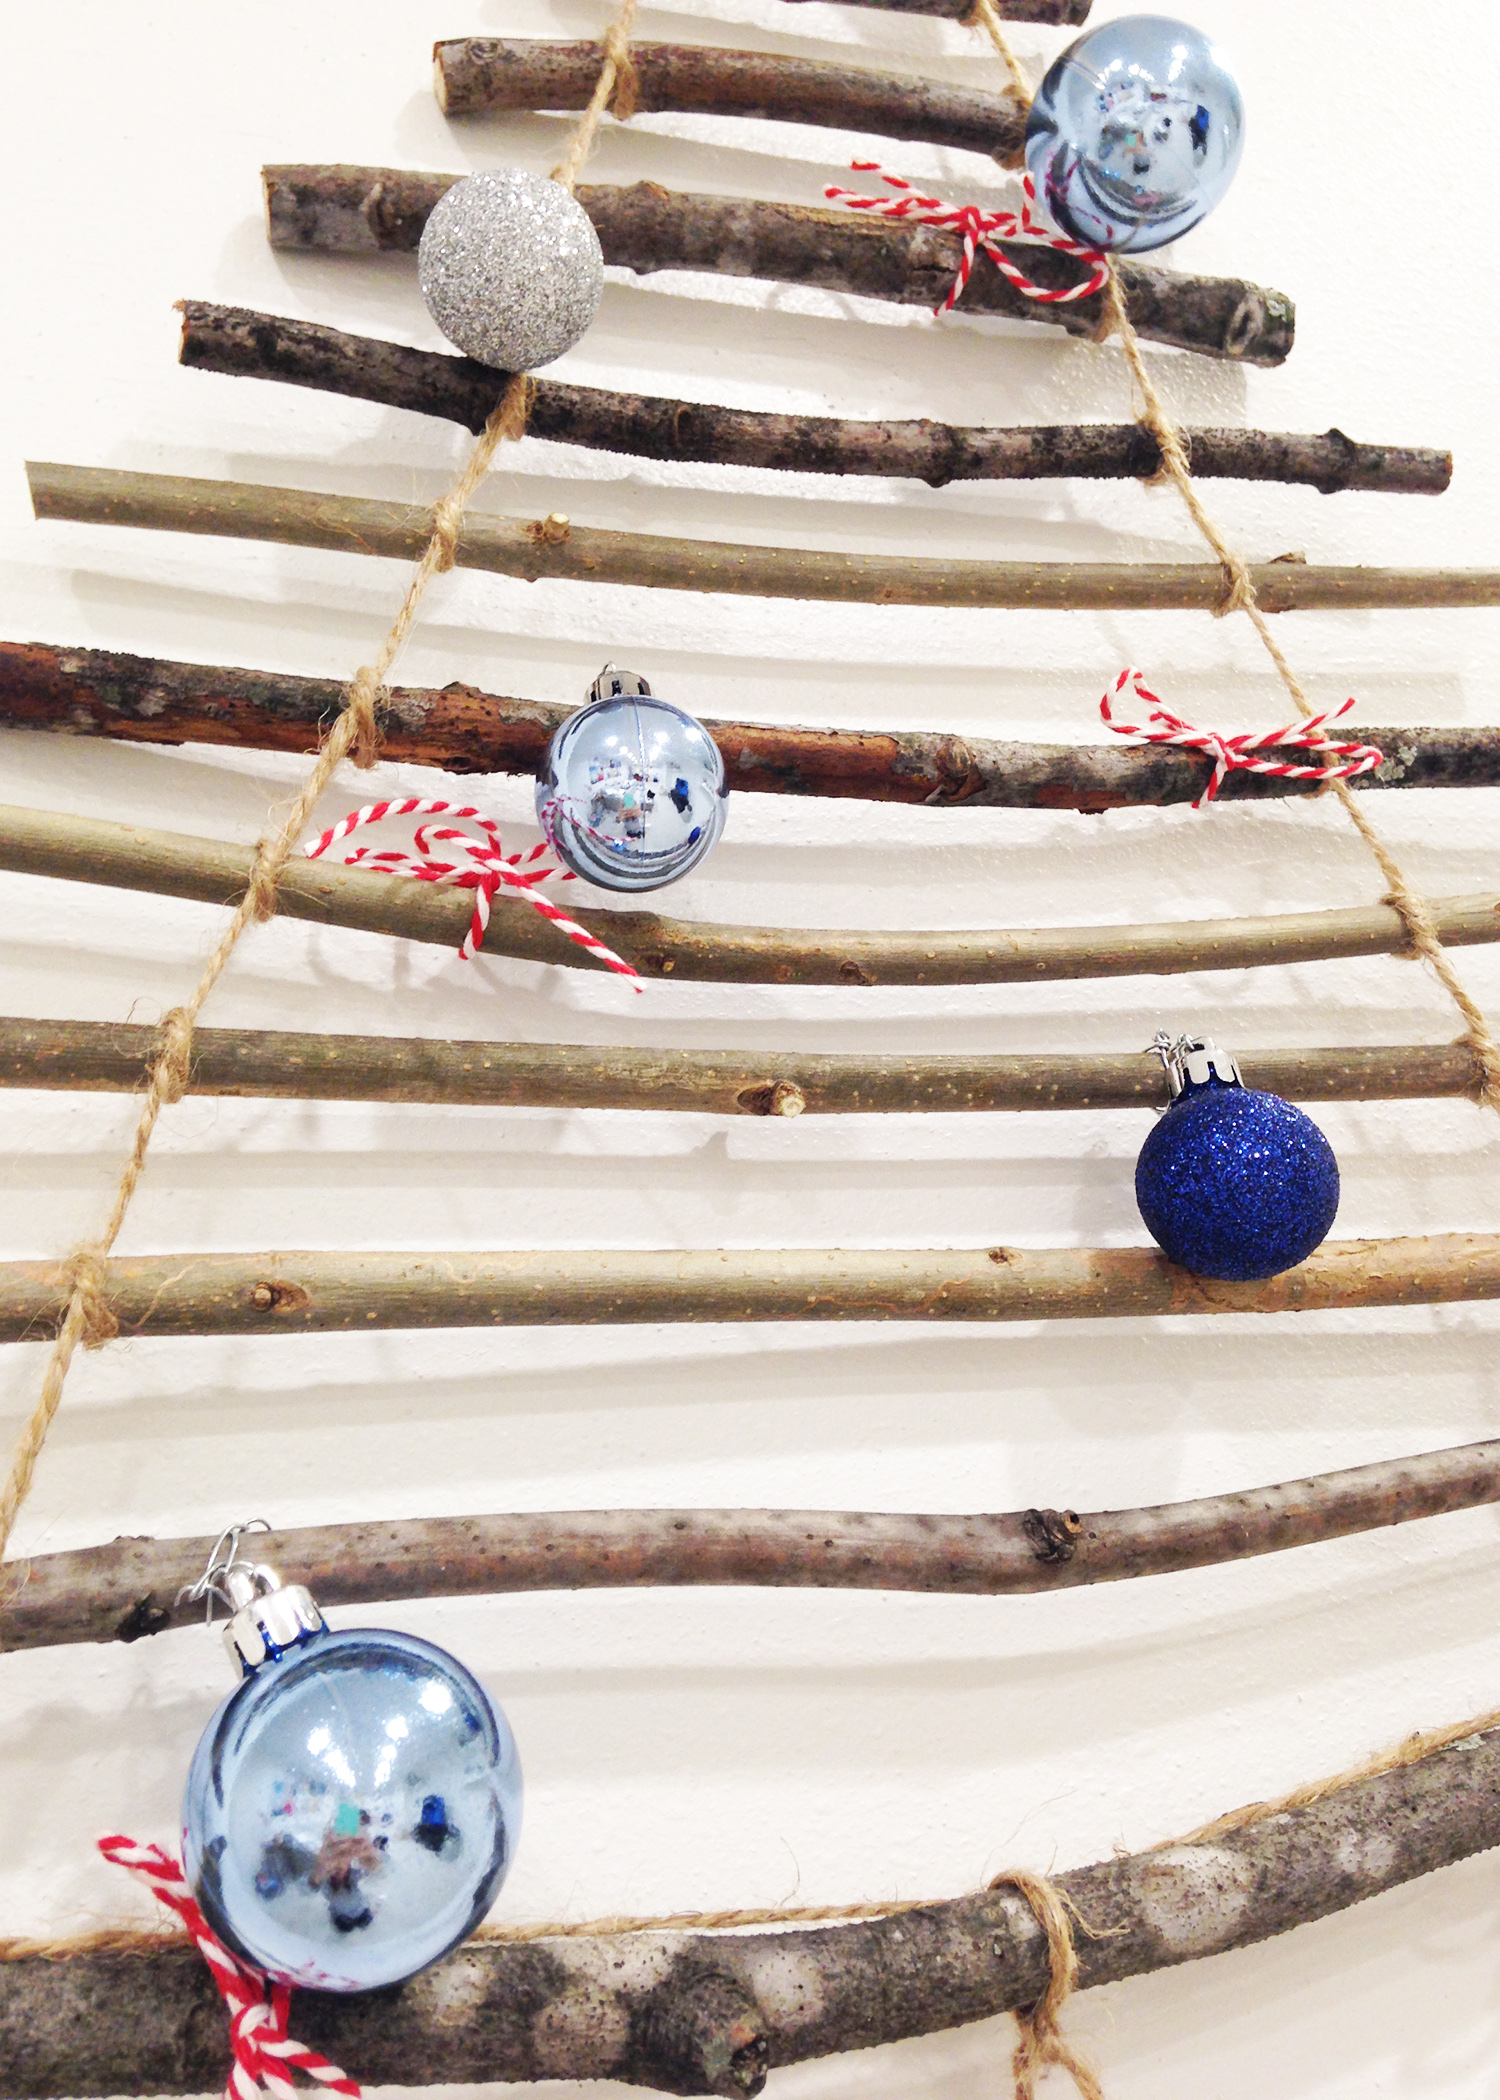
As you can see, I also took a cue from our German blogger friend, and tied some simple red and white string around a few of the branches. But that’s about it. I may add more ornaments in the future, but for now, I’m digging the simplicity. And what’s better, I completed this ENTIRE project in one evening. Hallelujah, and happy holiday DIY-ing!


Leave a Reply