Previous post
too many ideas. too little time. (and far too much chai.)


Now before any of you book lovers out there freak out, just know that no new books were harmed in the making of this book pumpkin : ) I’m a book lover myself, so the thought of mutilating a precious hardcover gives me the shivers. Luckily, my mom gave me a stash of vintage Reader’s Digest books that were destined for a landfill, so they were the perfect subjects for this project.
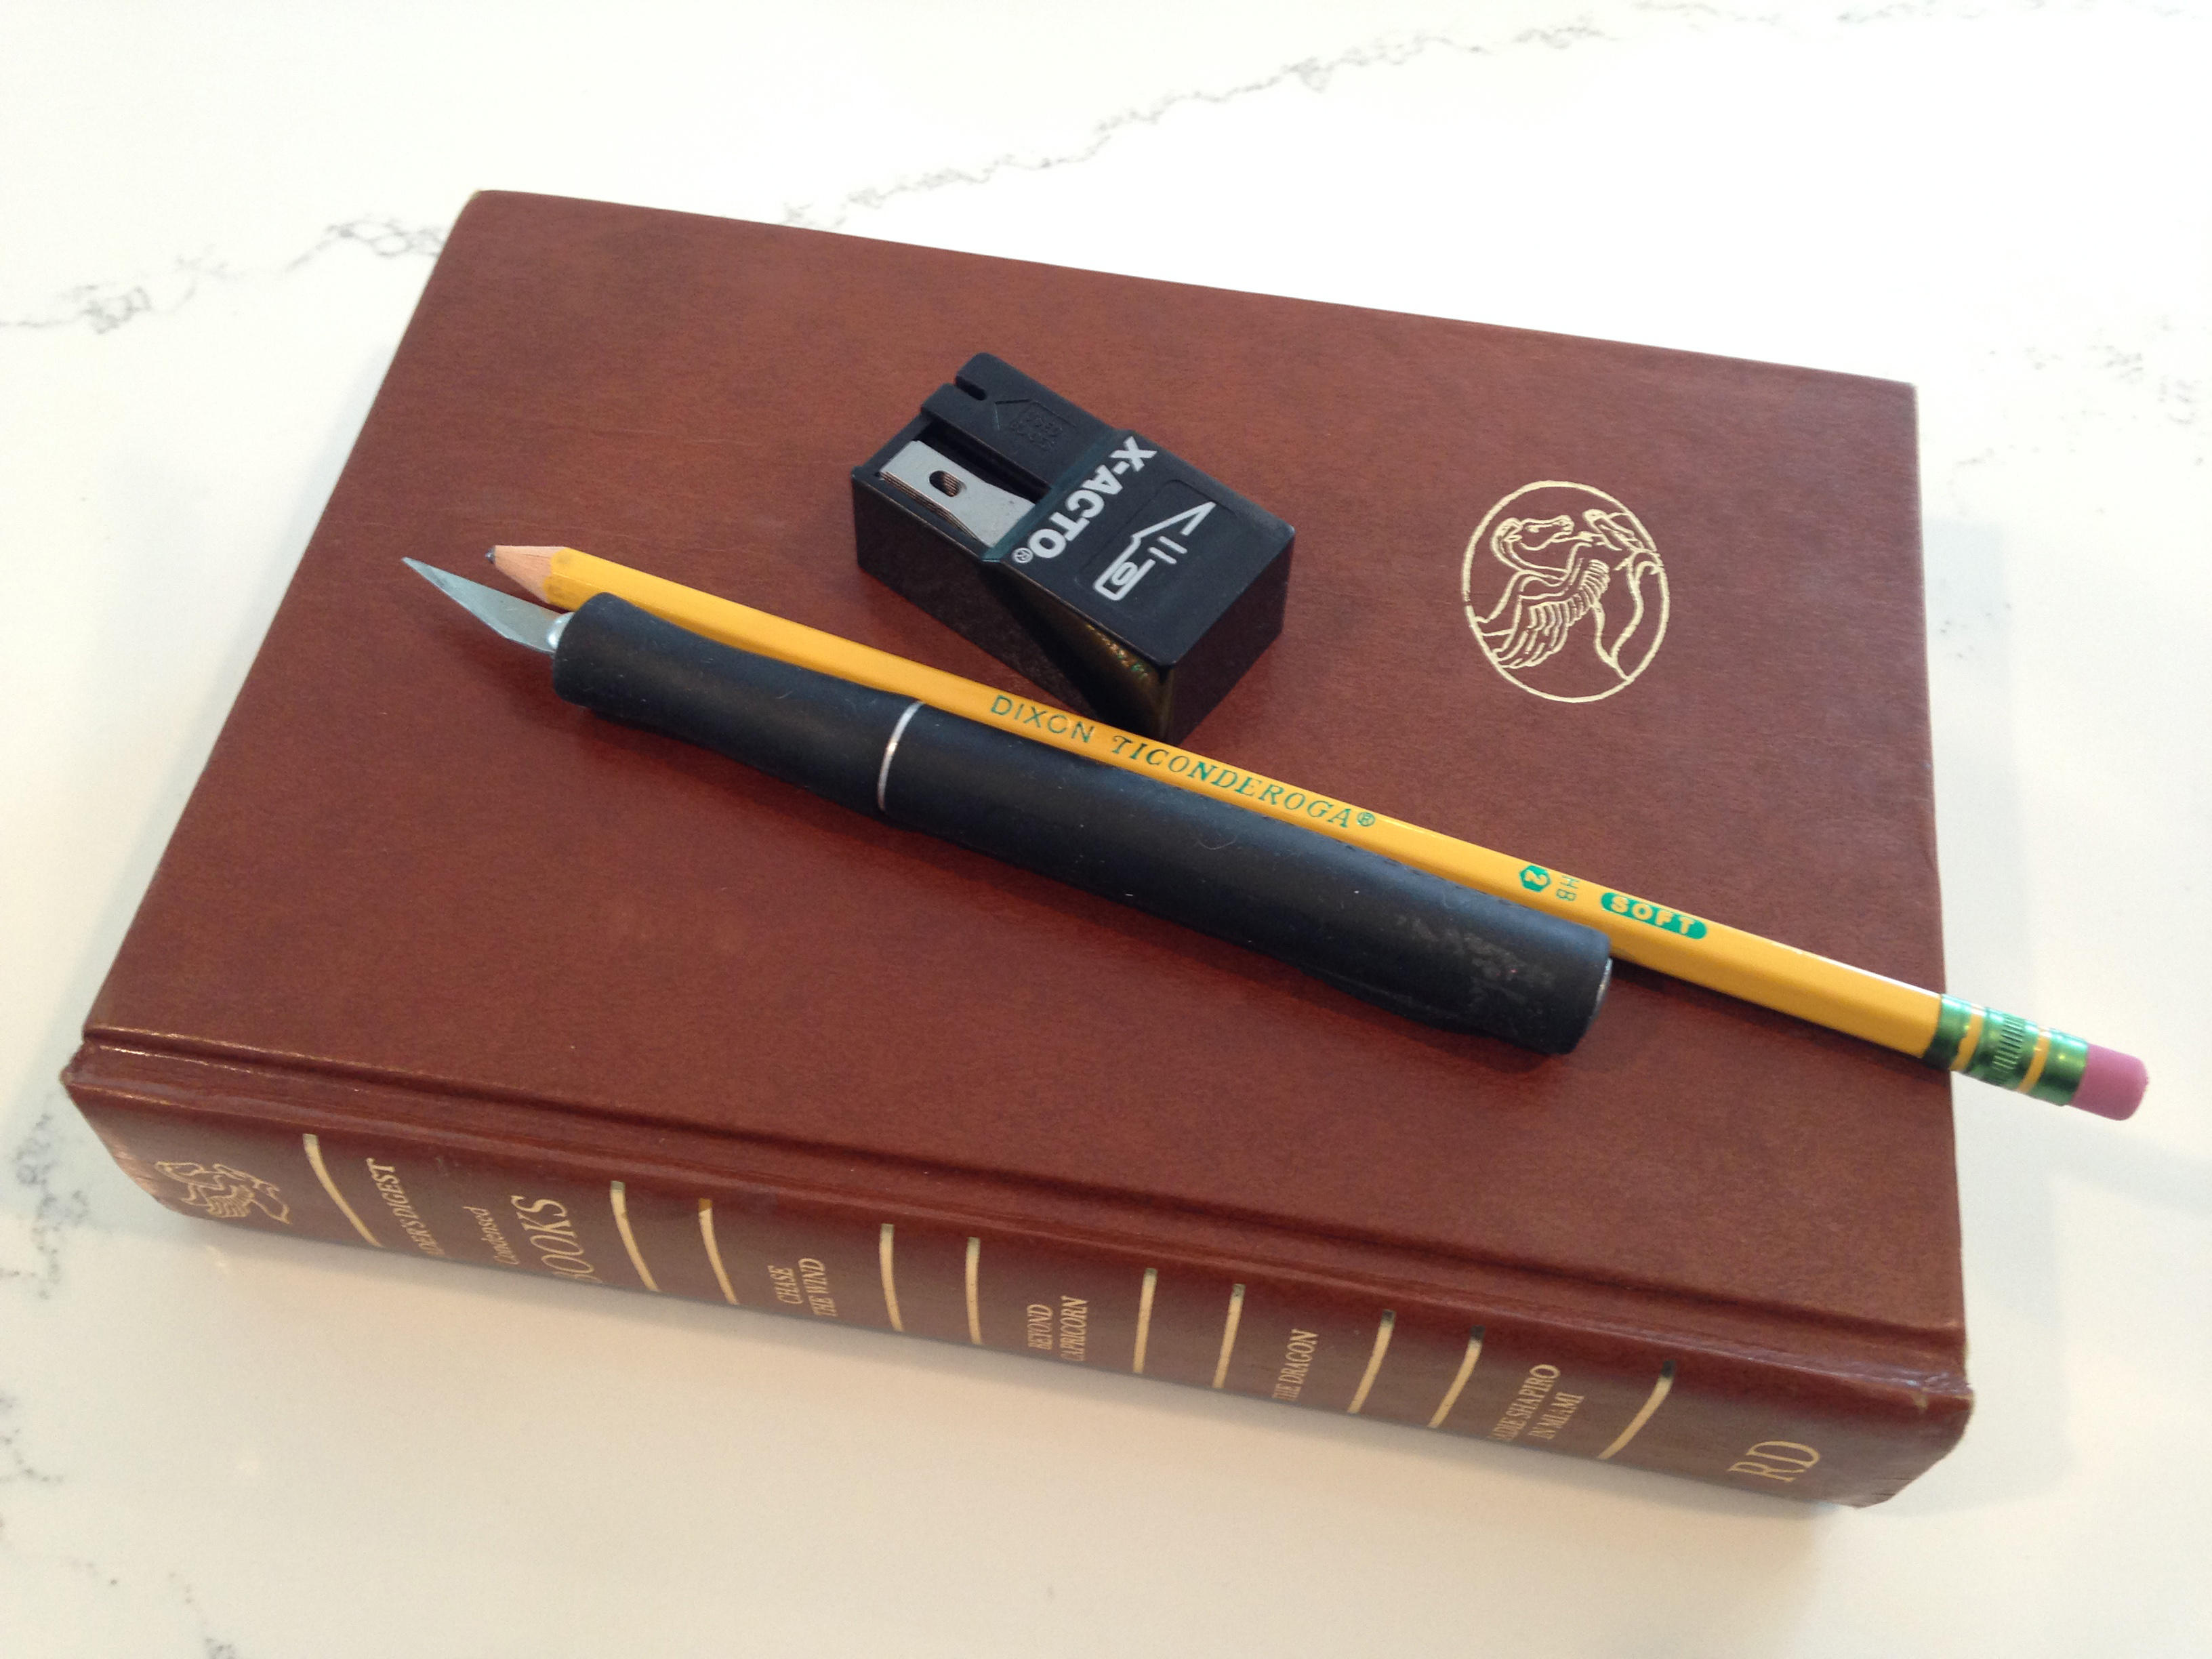
Start by cutting the cover off. I used my exacto, and it was quick and easy.
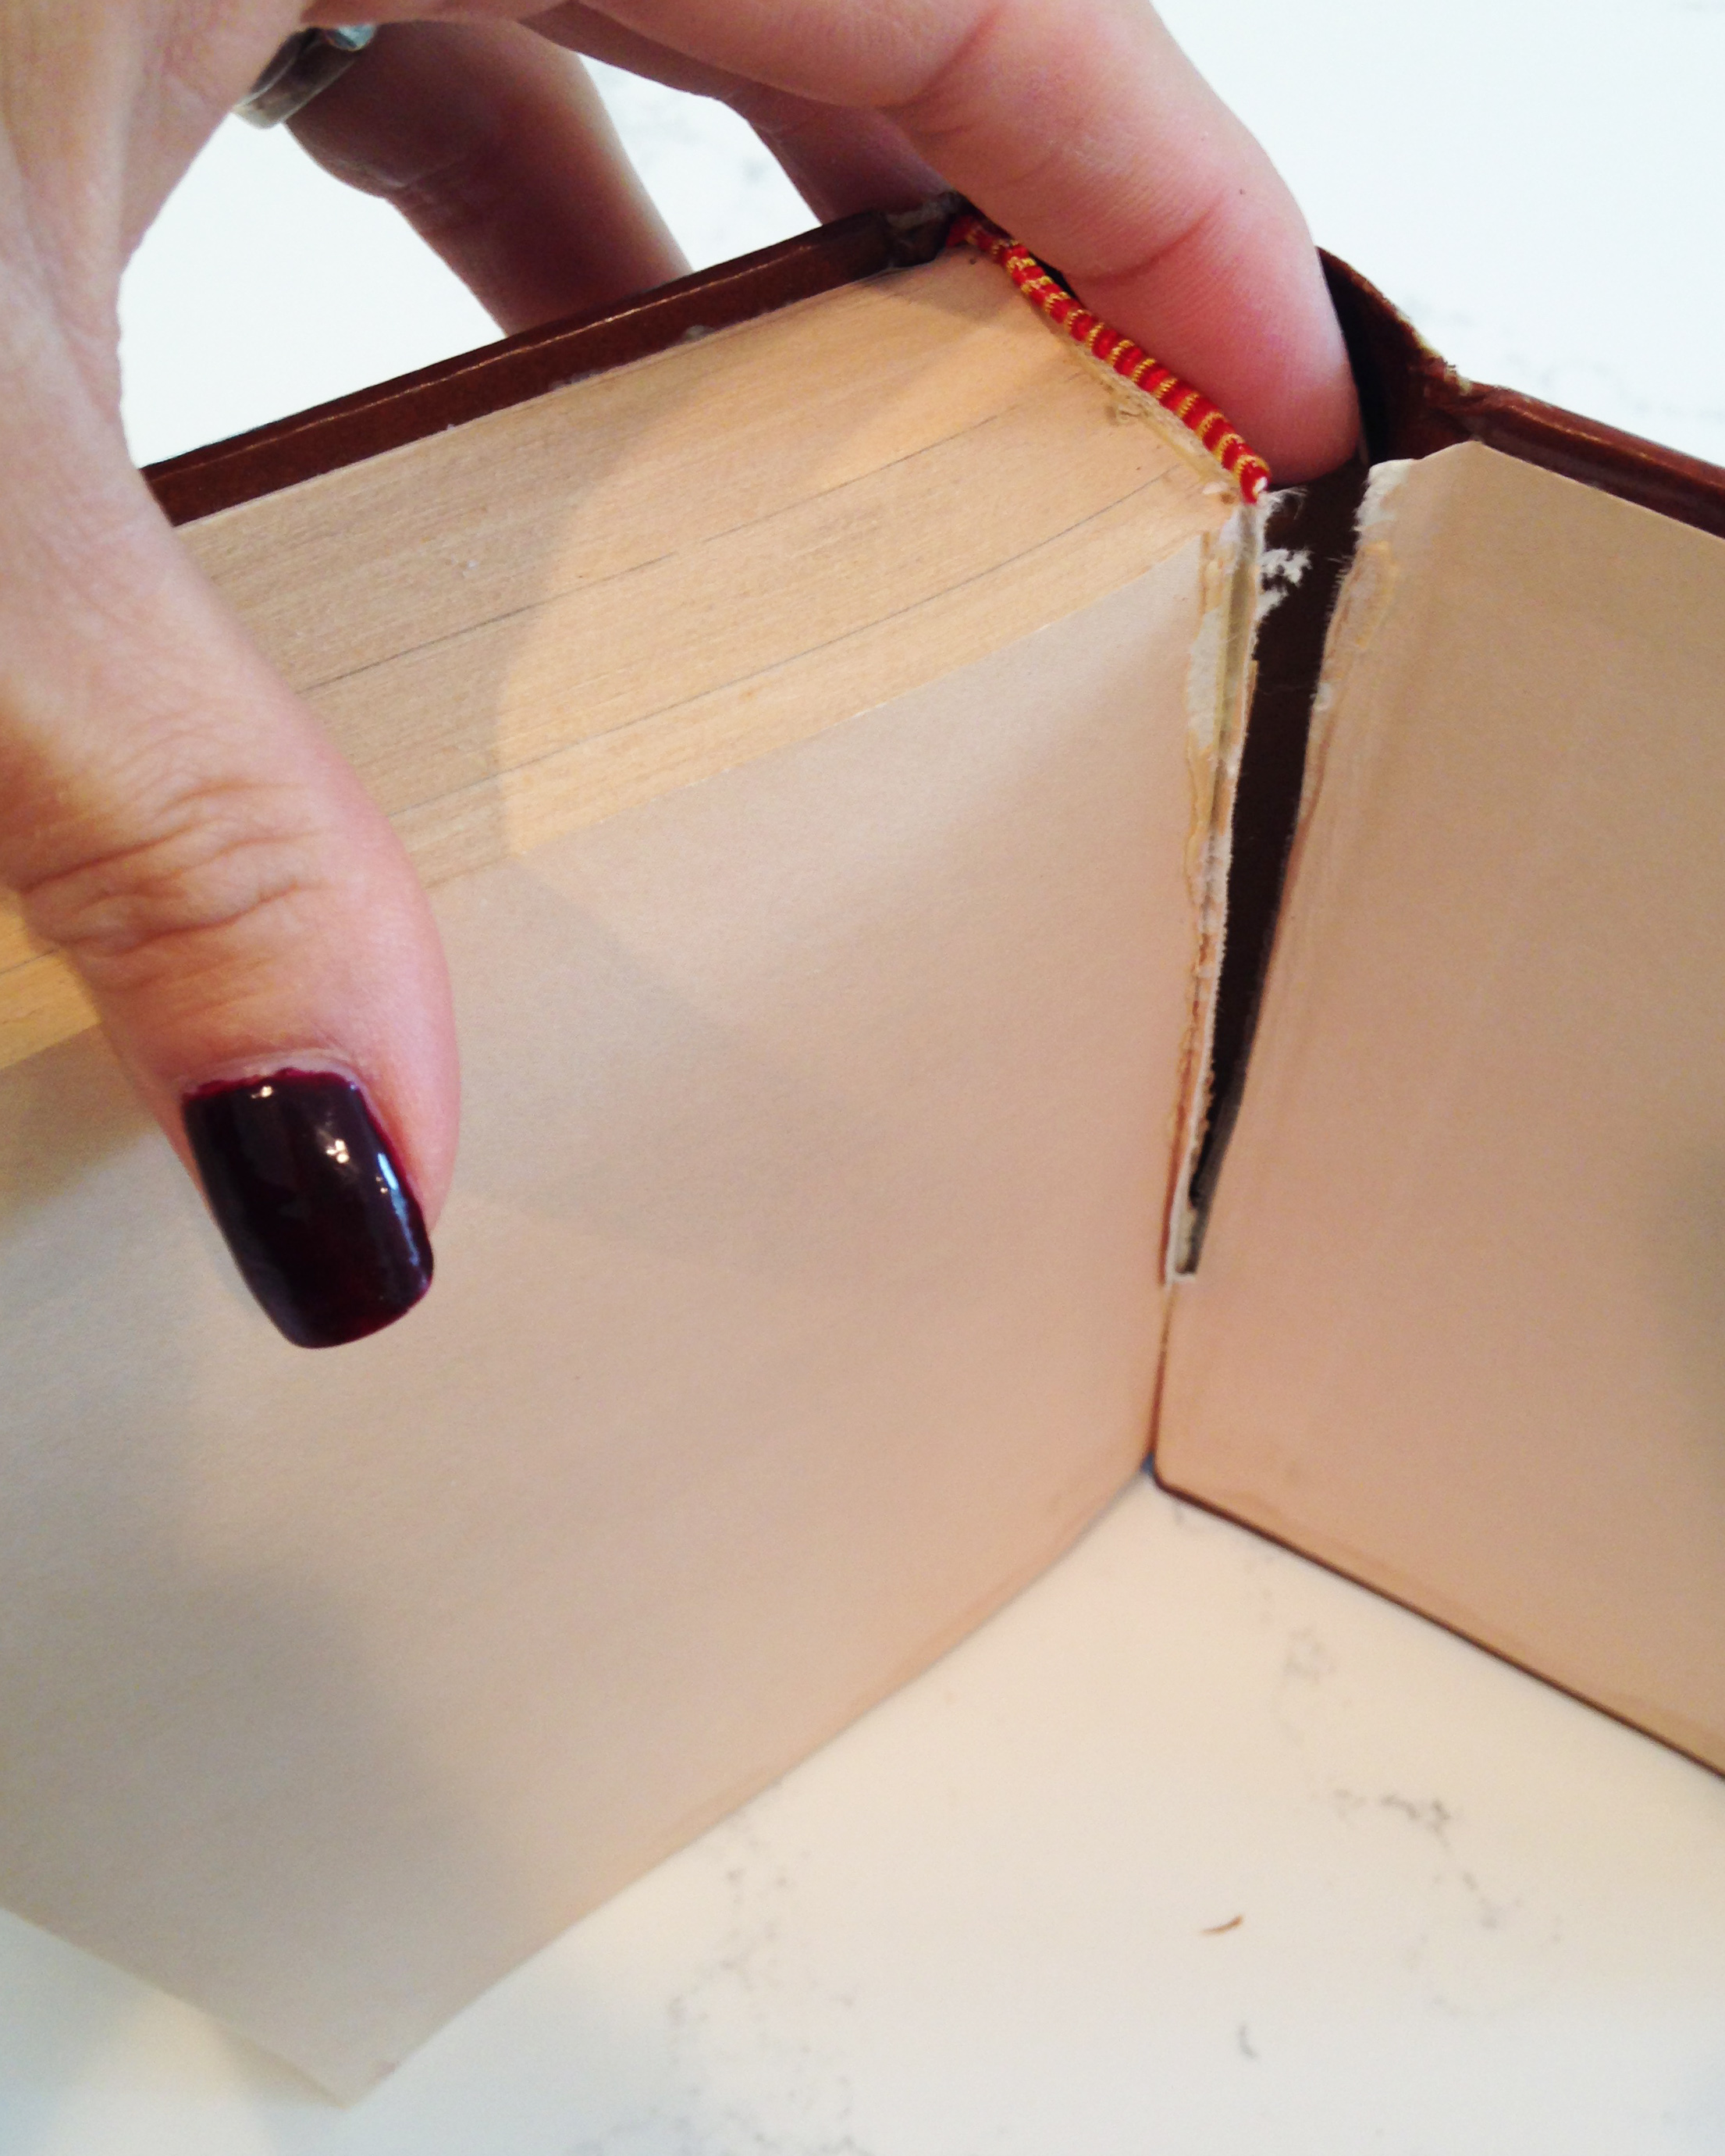
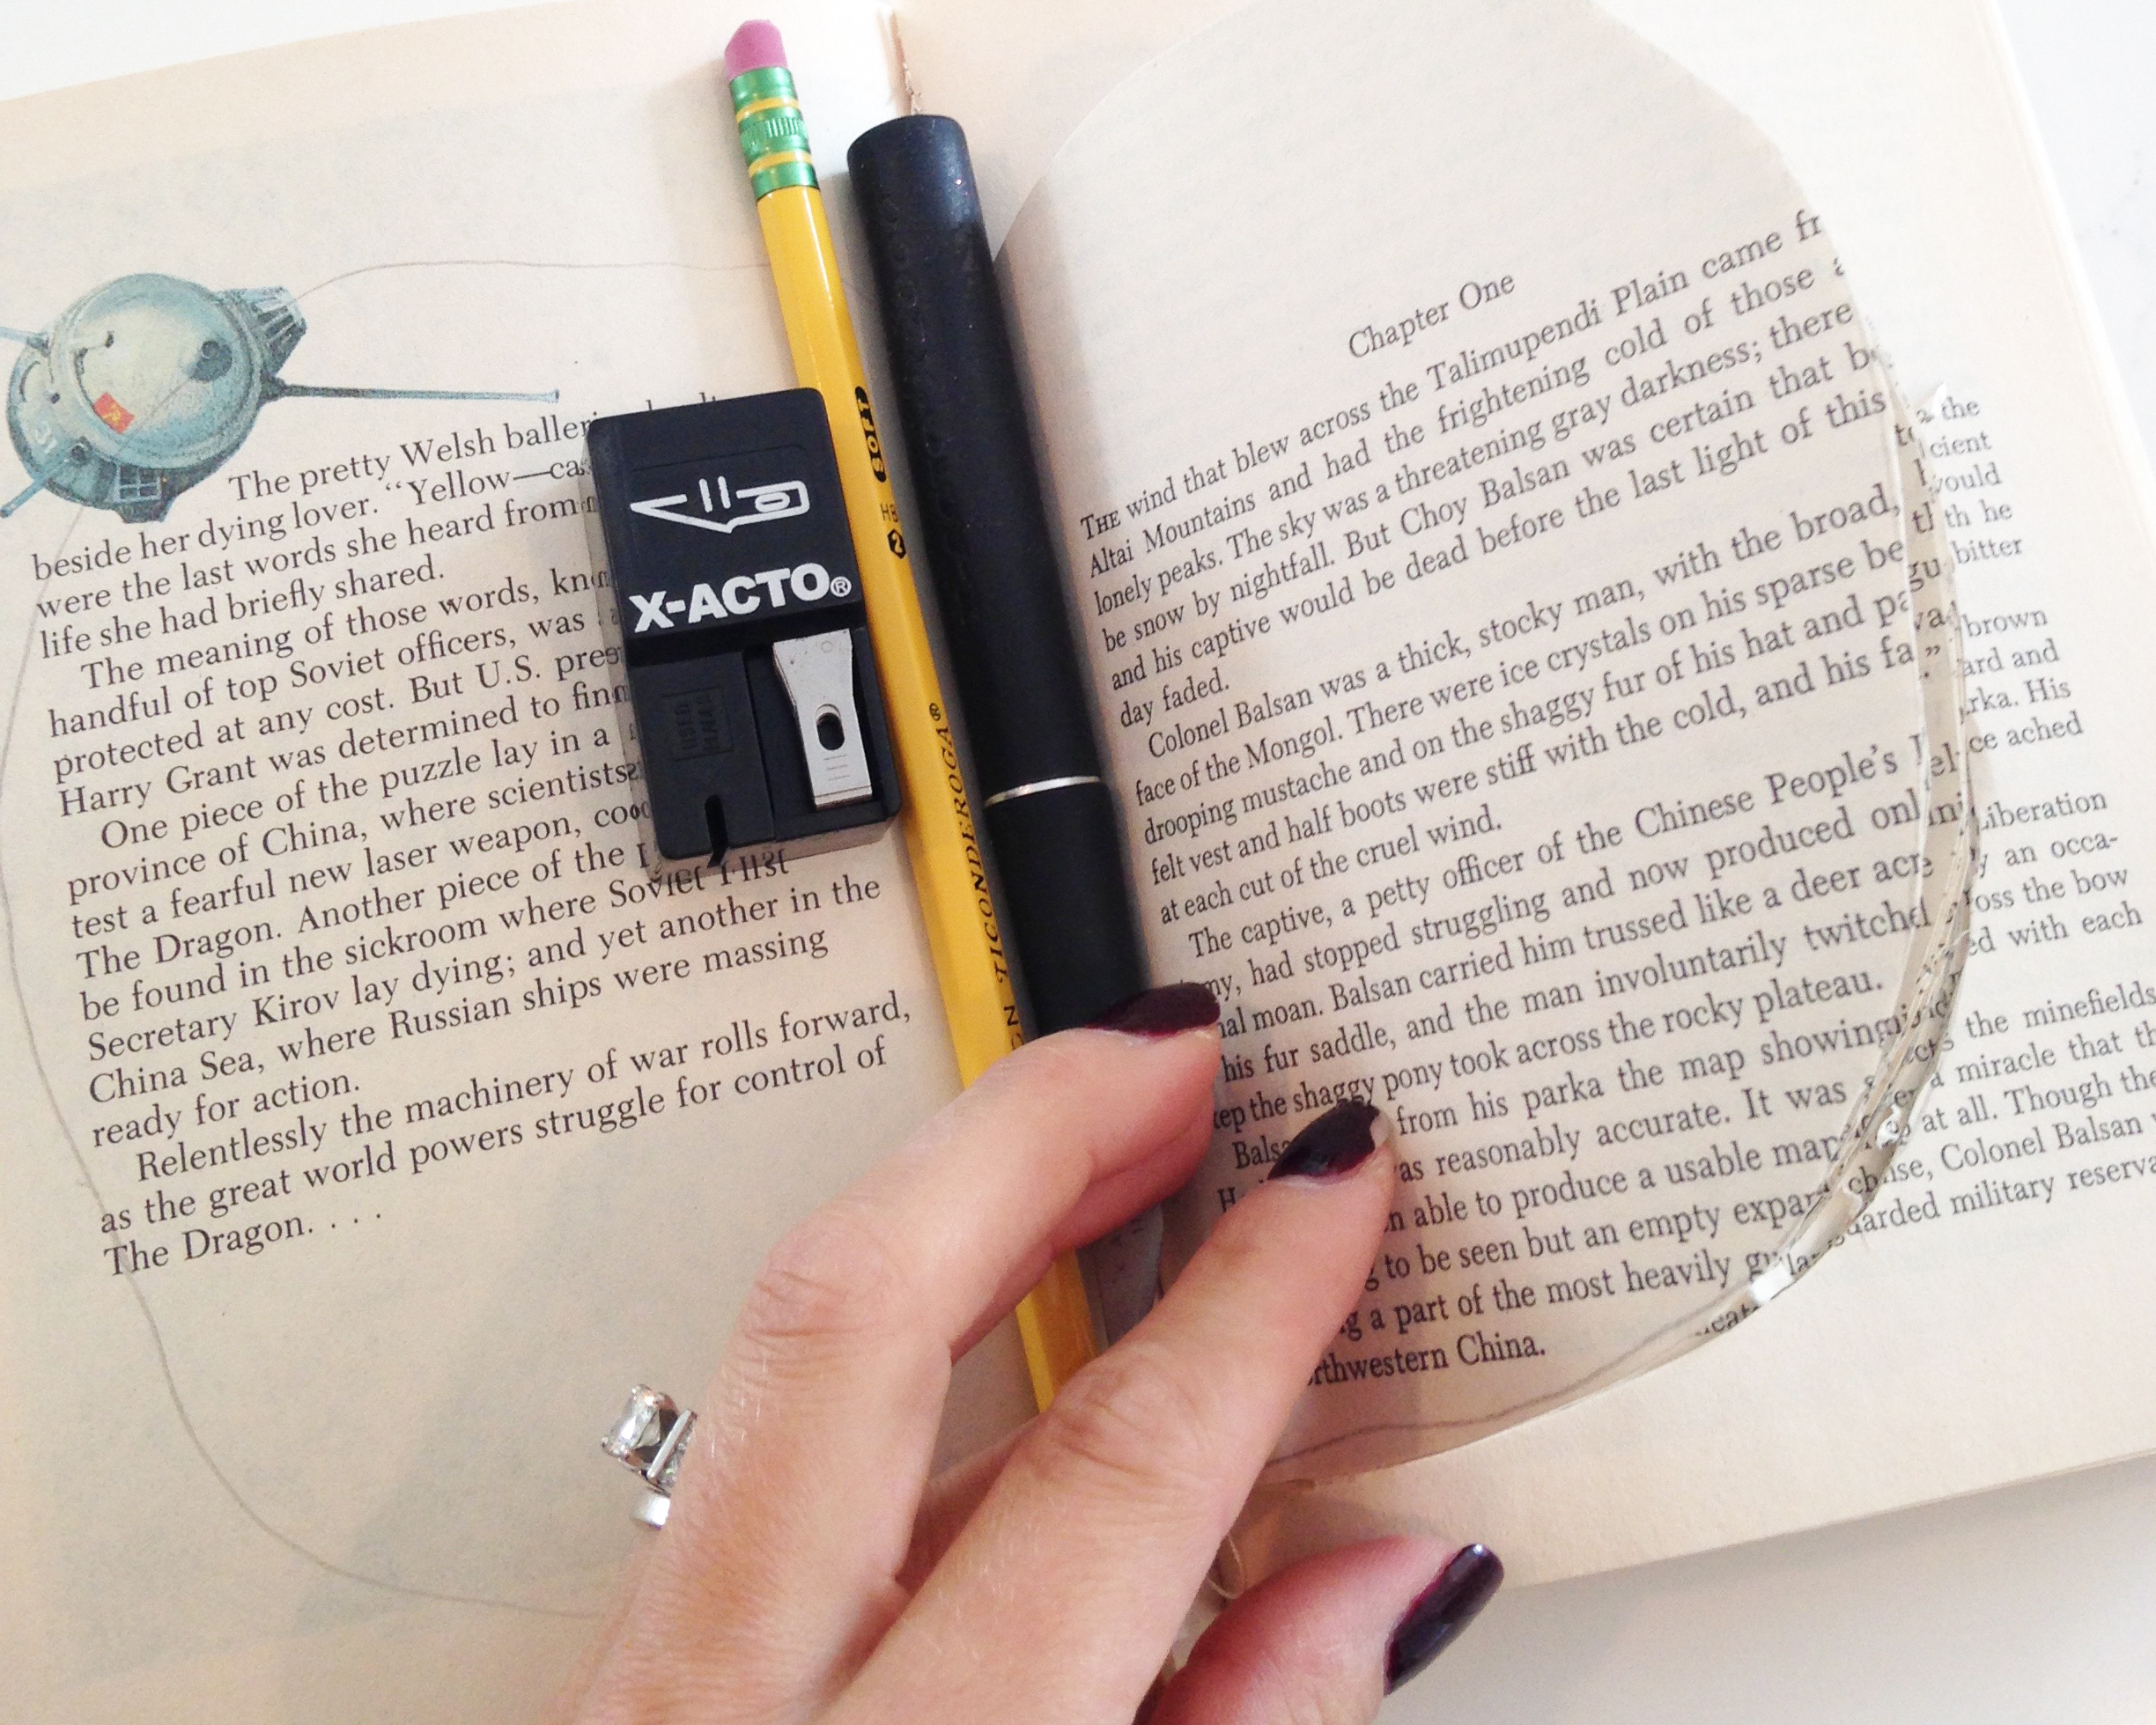
Next, open your book to the halfway point. Lay it flat, and trace your pumpkin shape onto the spread, like so:
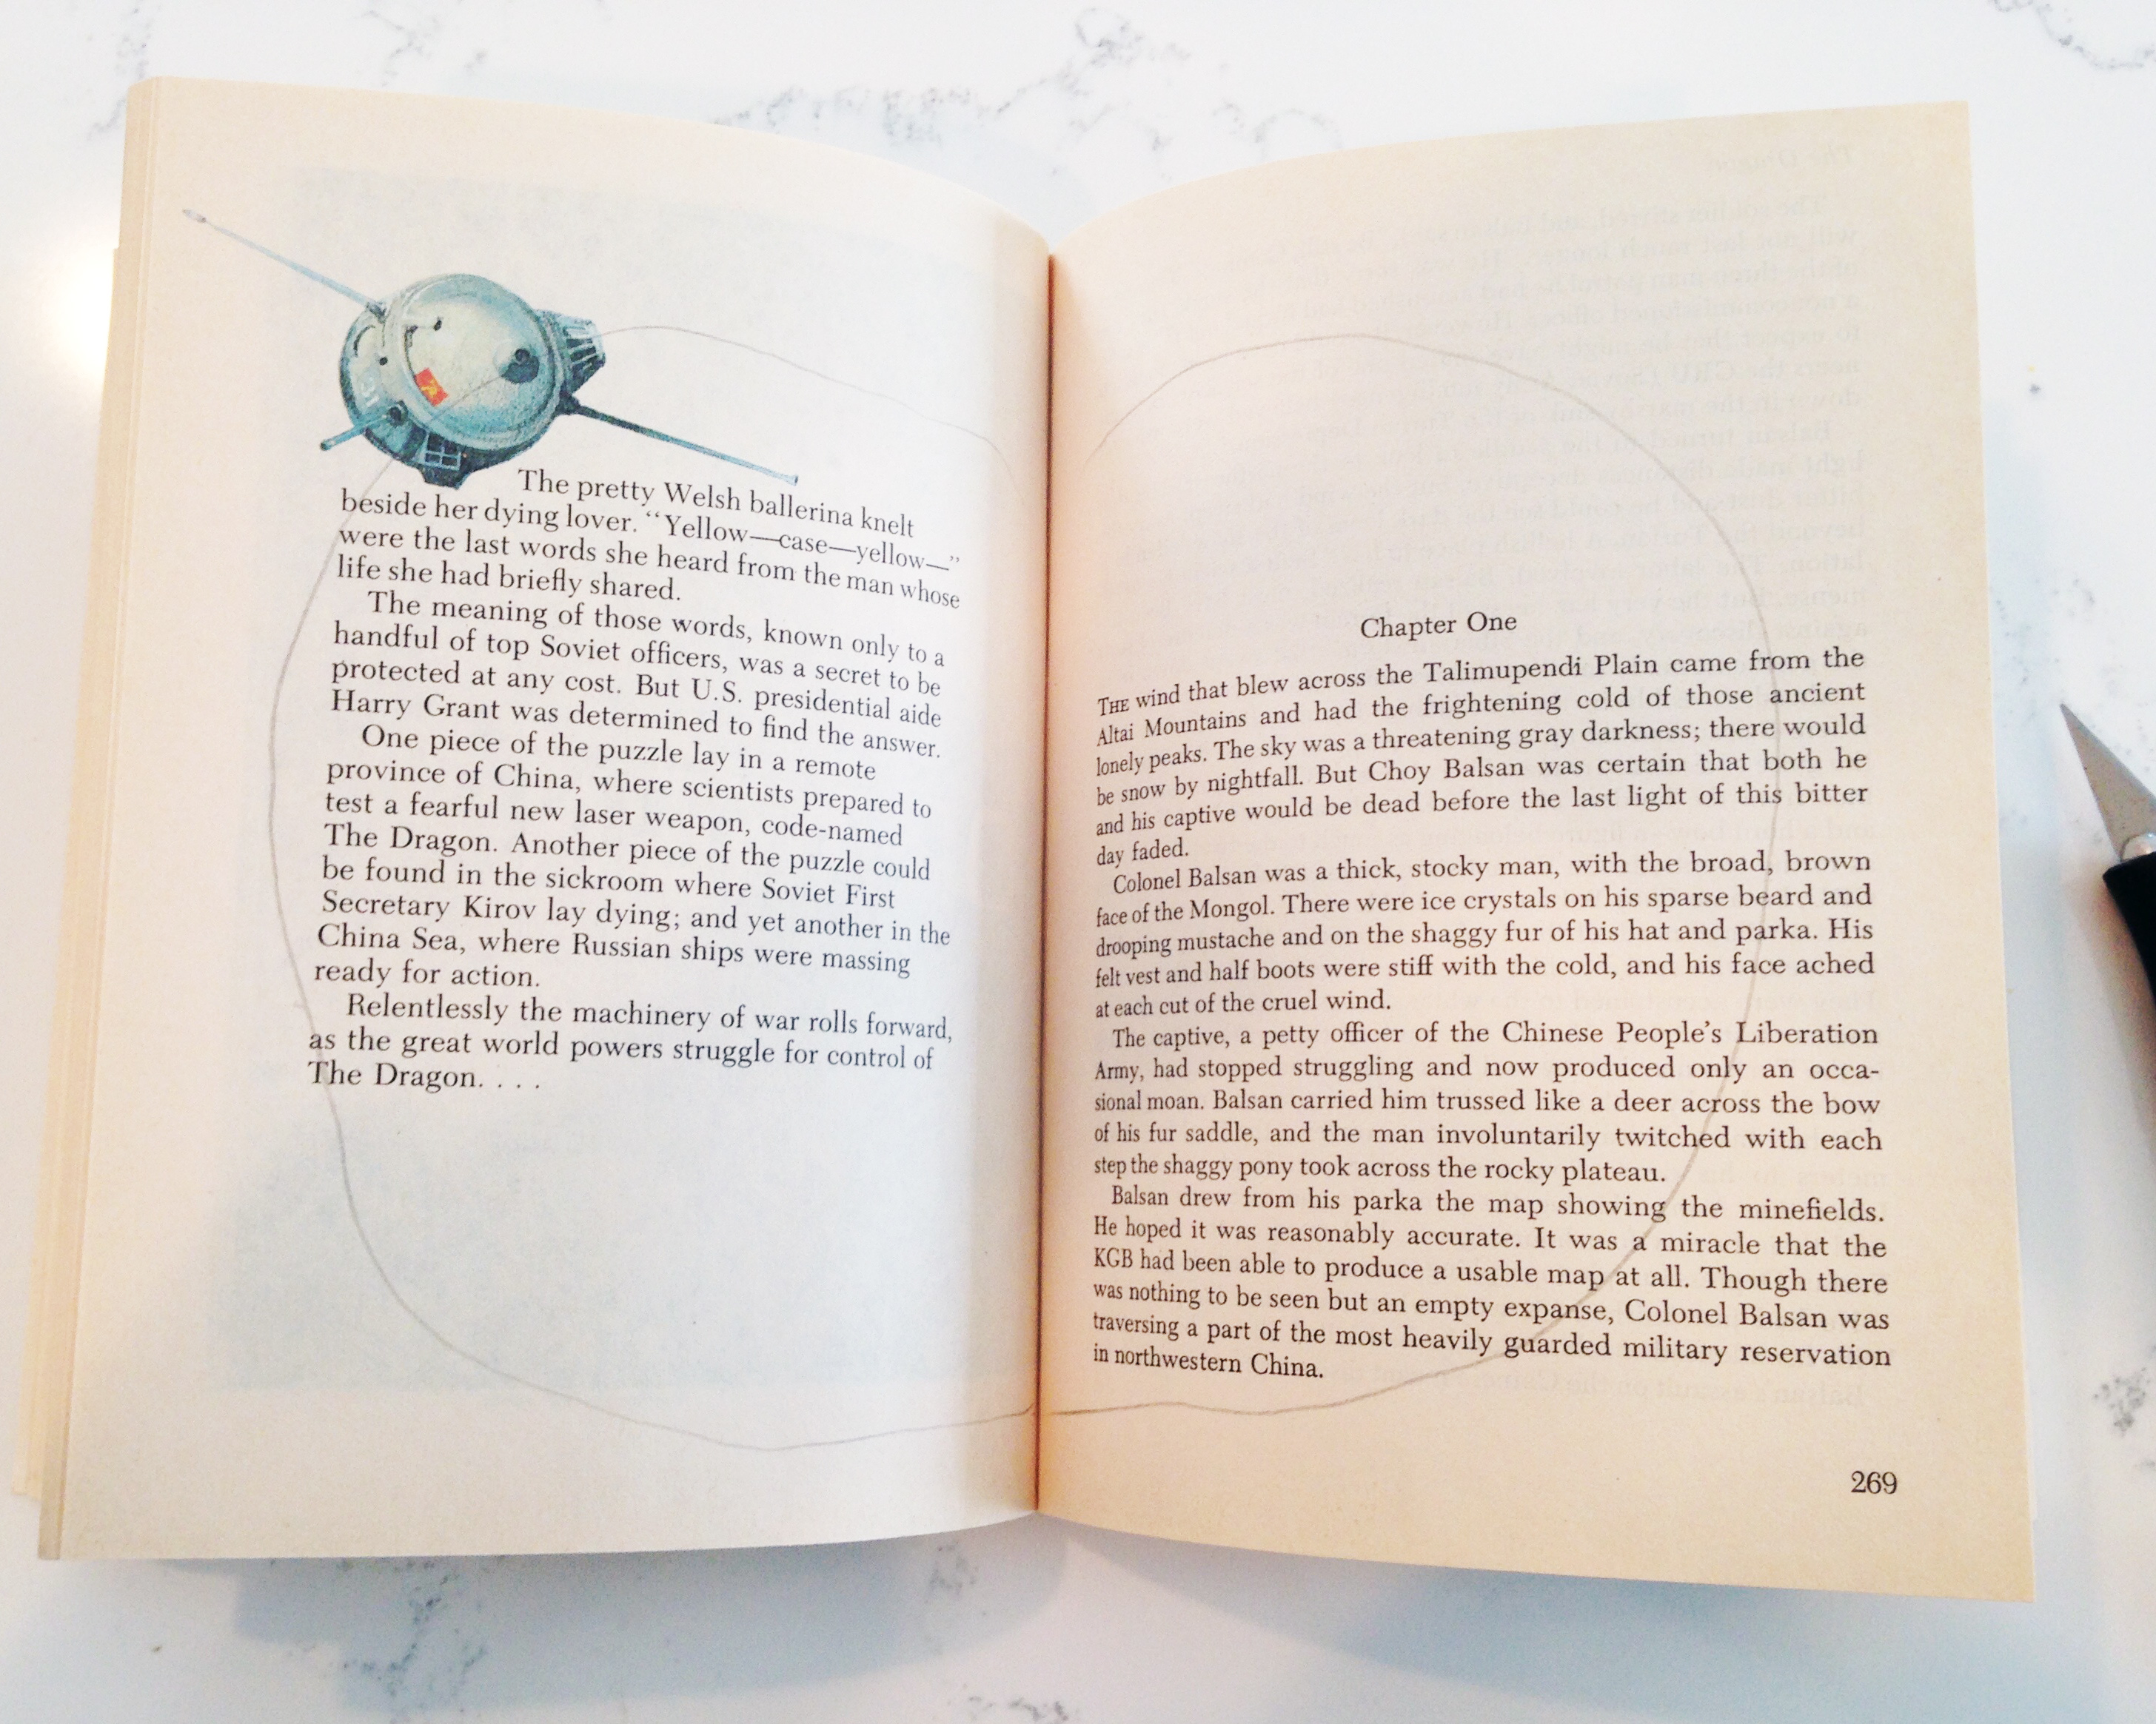
FULL DISCLOSURE: This is the first book pumpkin I’ve attempted, and I free-handed my shape. As you can see, each side is different. In hindsight, I would have traced my shape on a separate piece of paper (to act as a template), and then used that same shape for each side, so they’ve been totally symmetrical. Mine ended up a little lop-sided because I free-handed it, but at least it has character.
The other thing I would’ve changed (it’s all about hindsight people) is the bottom of my pumpkin. Here’s the original shape again:
As you can see, the bottom has some curvature to it, so it doesn’t sit flat on a shelf—or rather, it has even MORE character : )
When I attempted my second pumpkin (which I will also share in this post), I made the bottom flat, so it would sit better once complete, and I also used a template. LESSONS, LESSONS!
Moving on… once you have your shape, you simply get to cuttin’ it out. Again, I used an exacto for this part. Since you can really only cut a few pages at a time, settle in, and get ready for some tedious crafting.
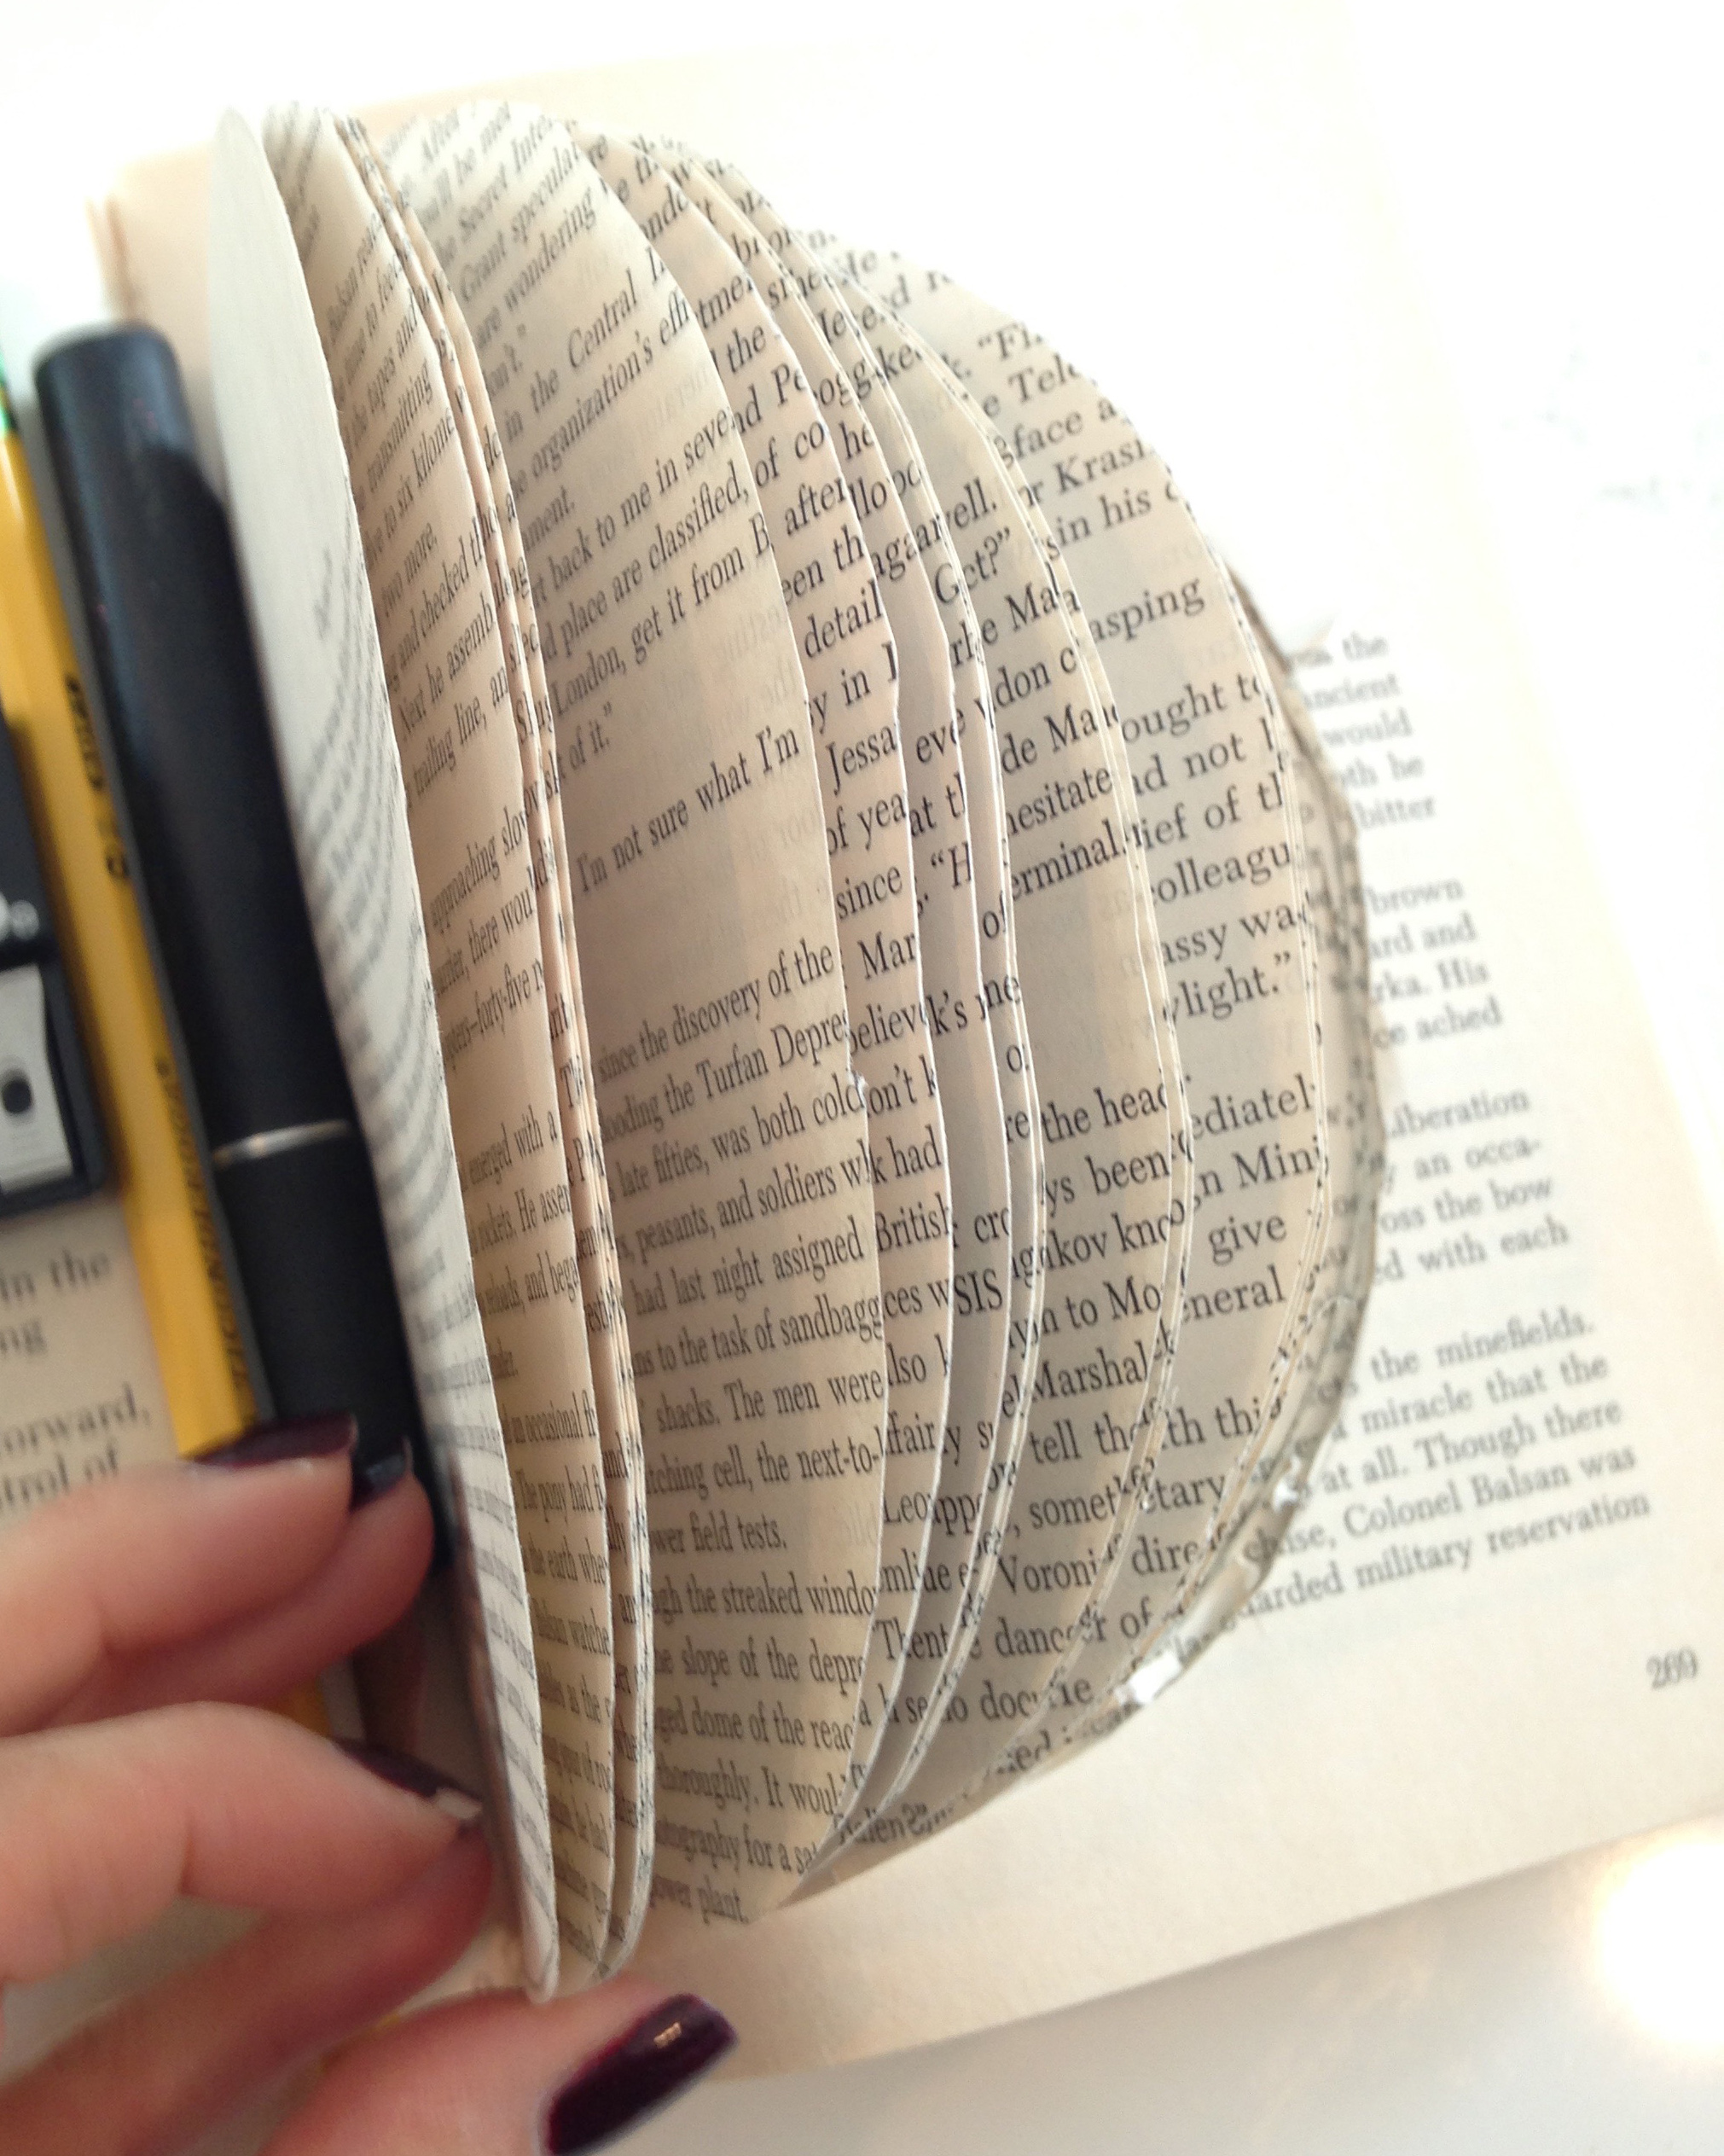
Once you’ve got the entire pumpkin cut out, you end up with something like this:
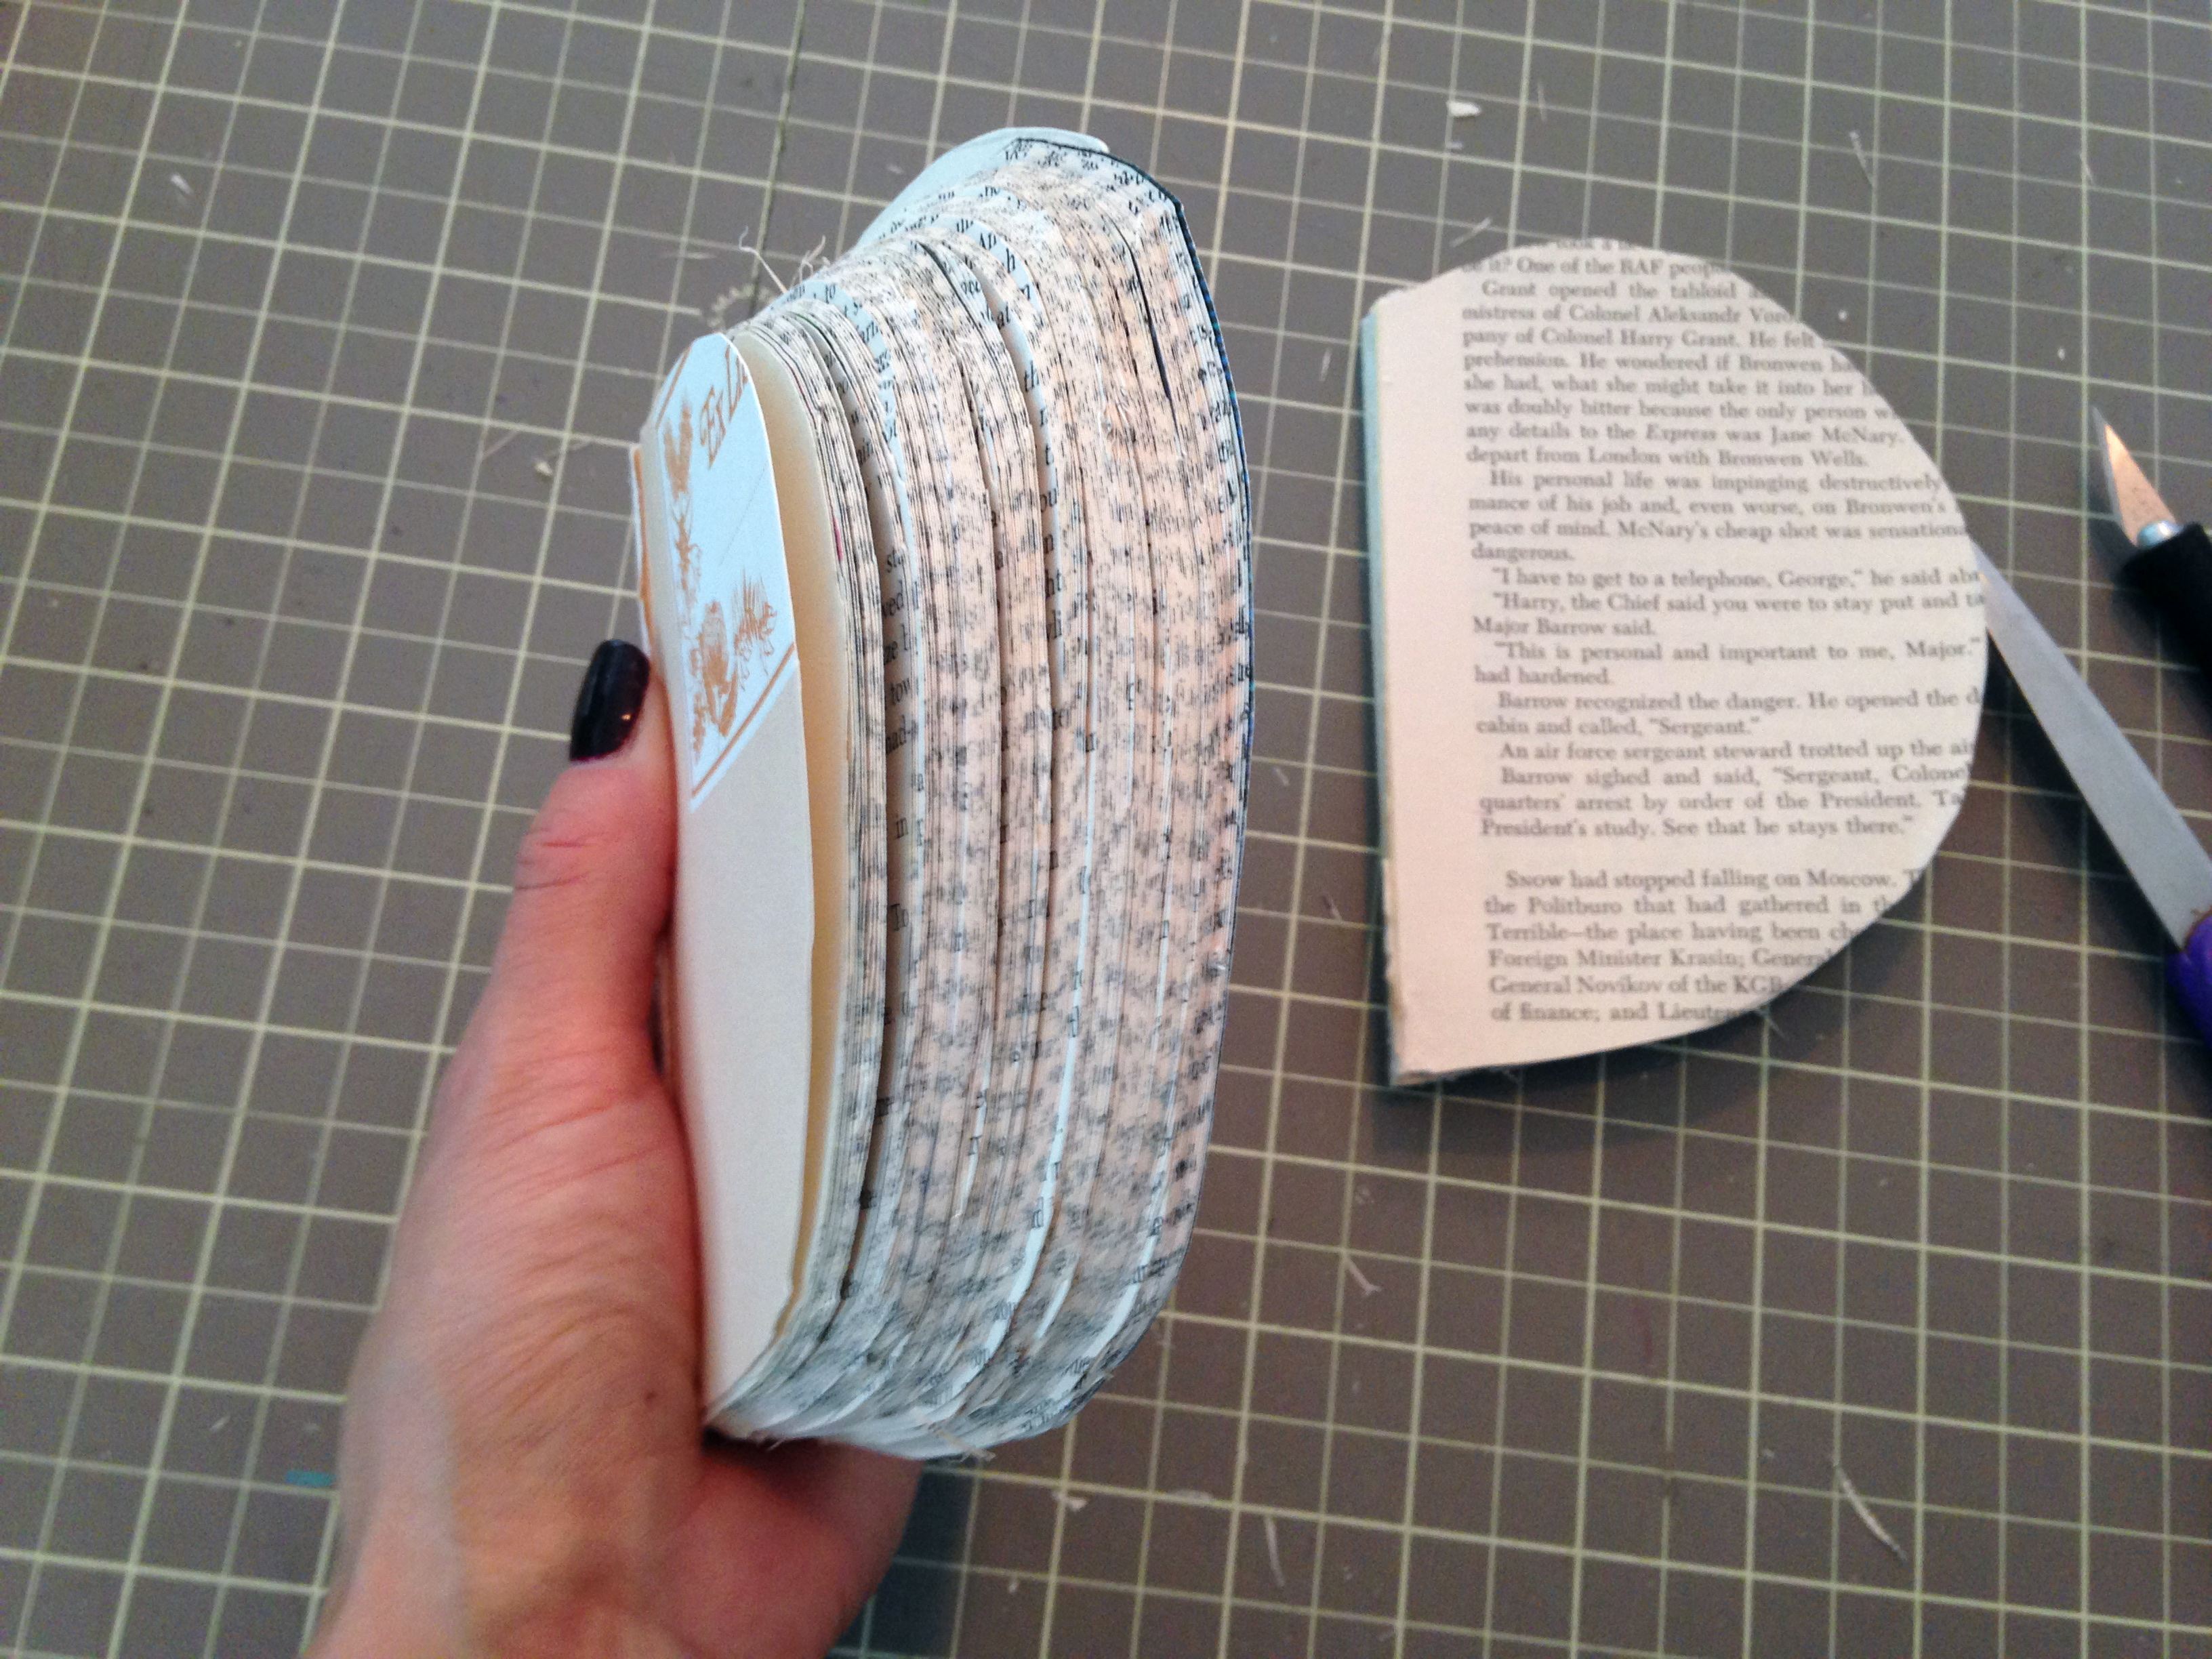
Then, it’s on to the shaping of your pumpkin. Take your hot glue gun and run a big ol’ bead of glue down the binding, gluing the edges together for that classic rounded shape:
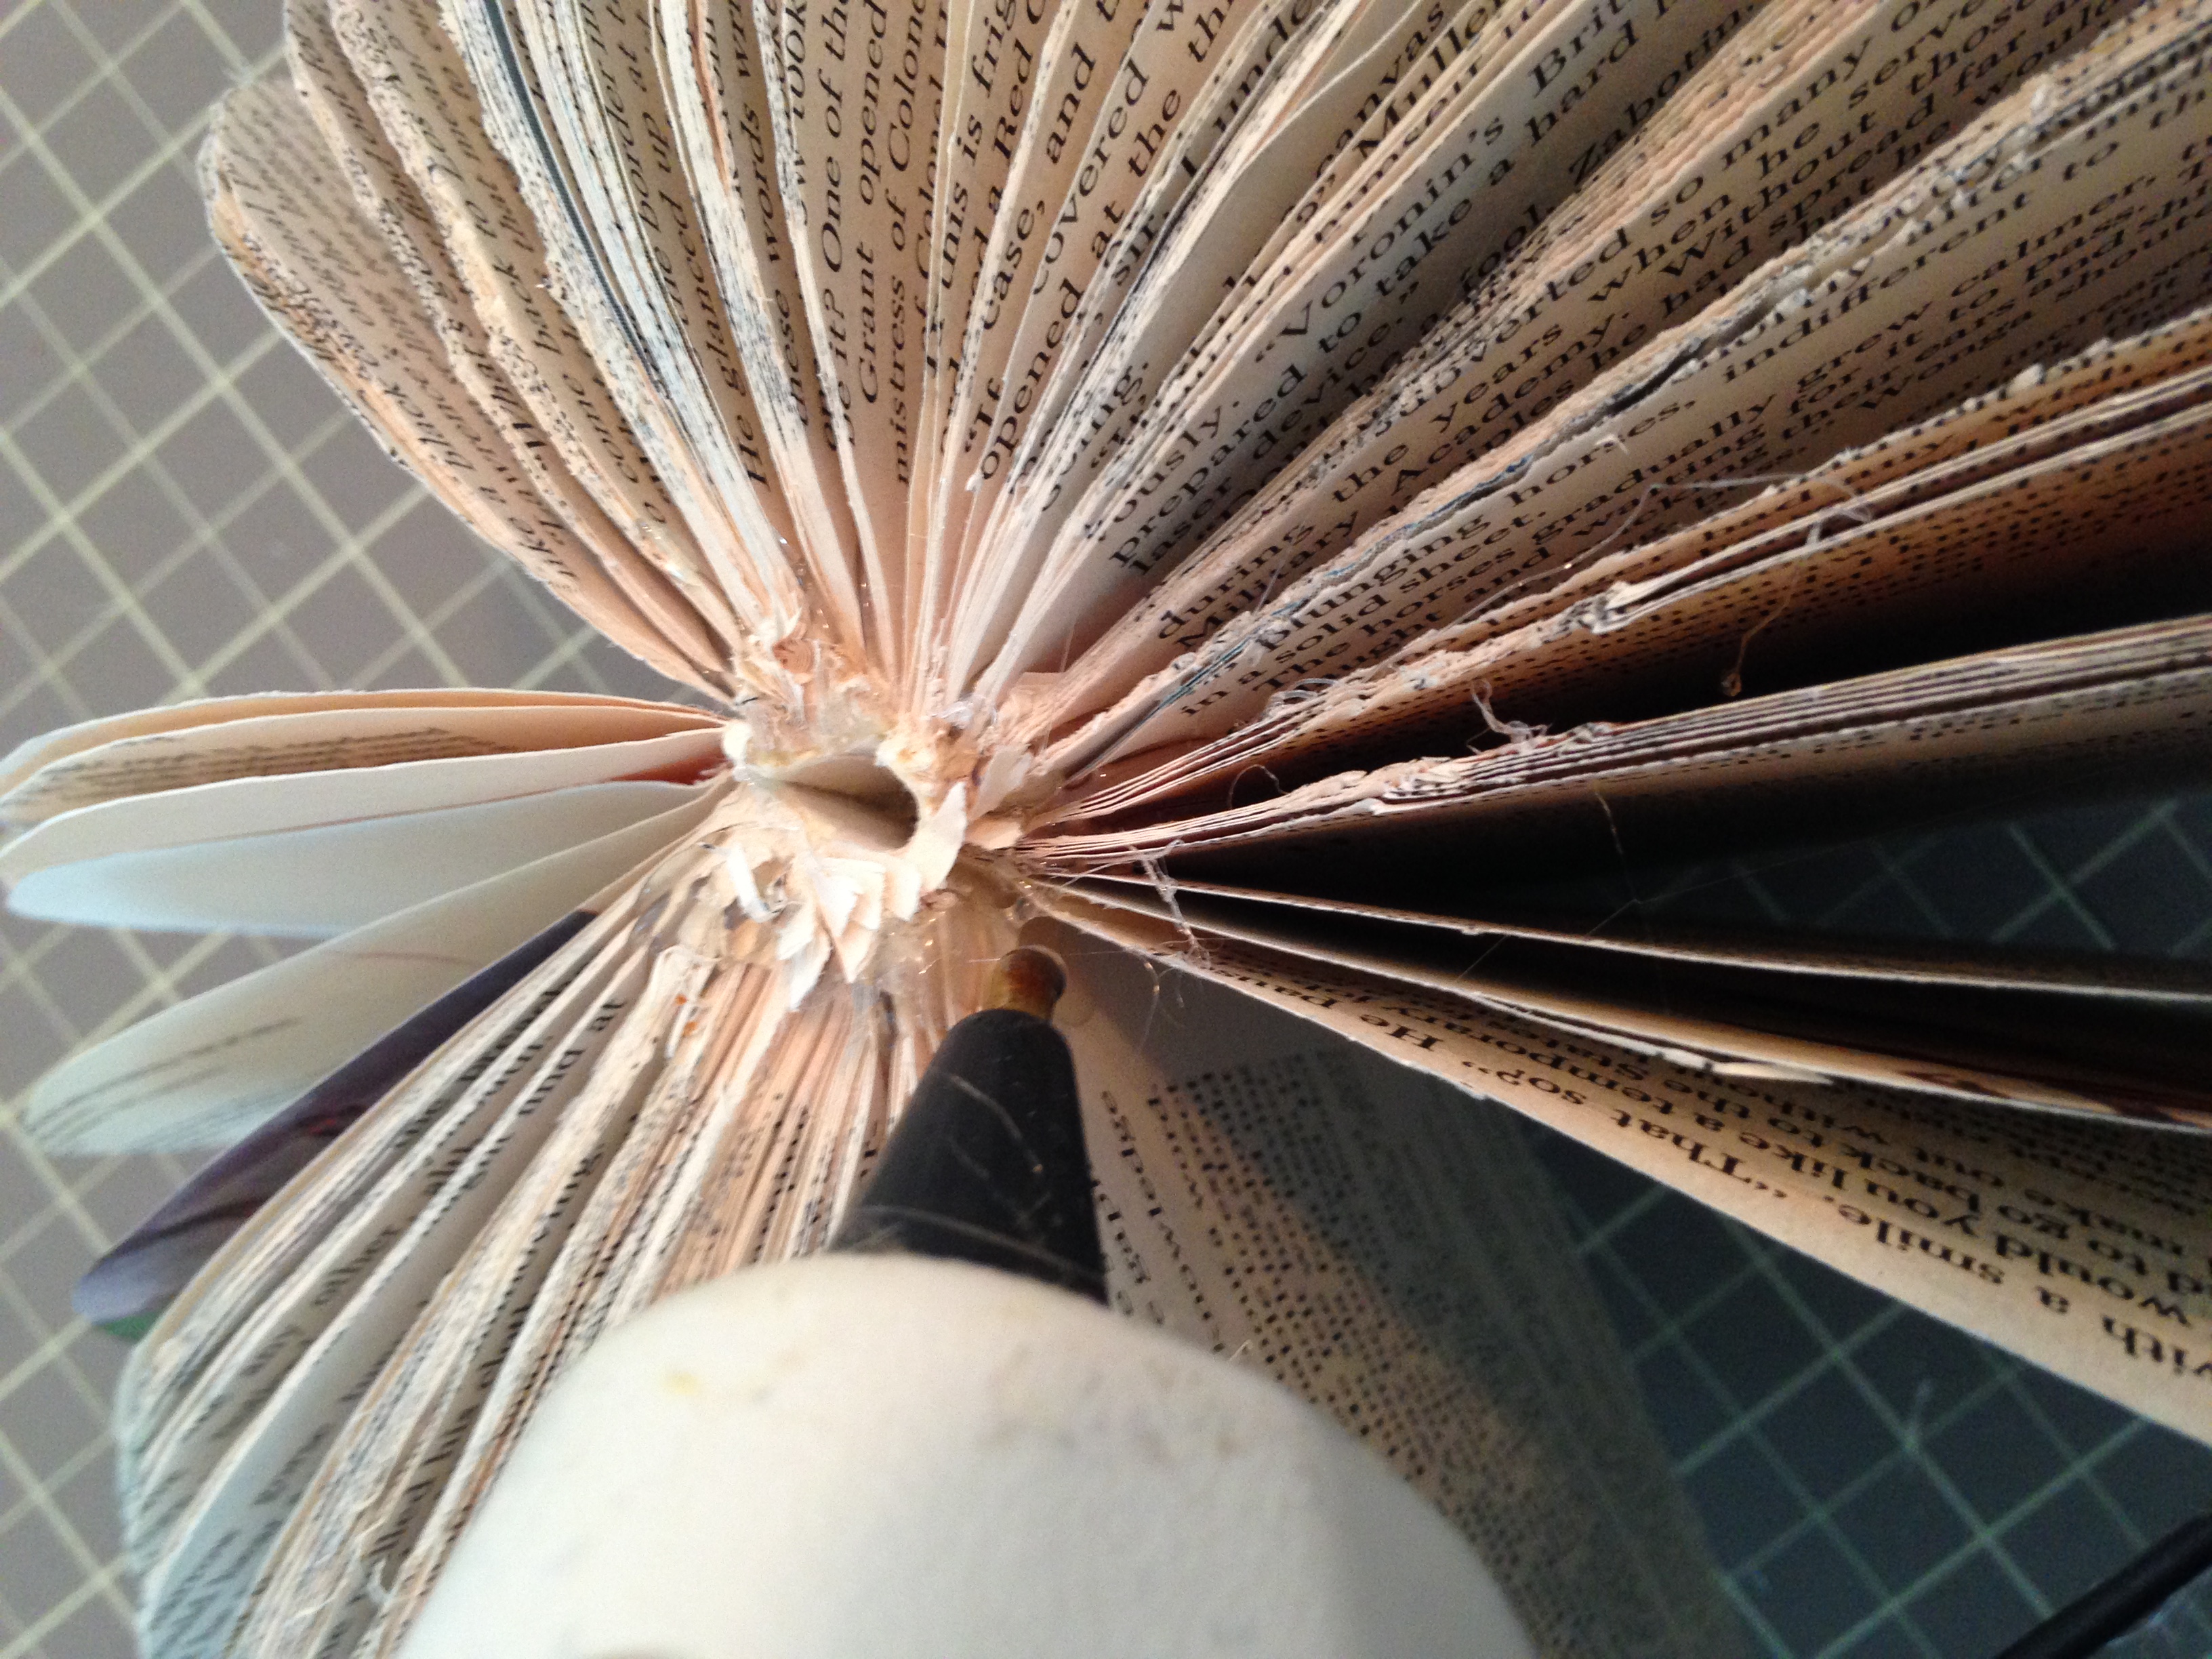
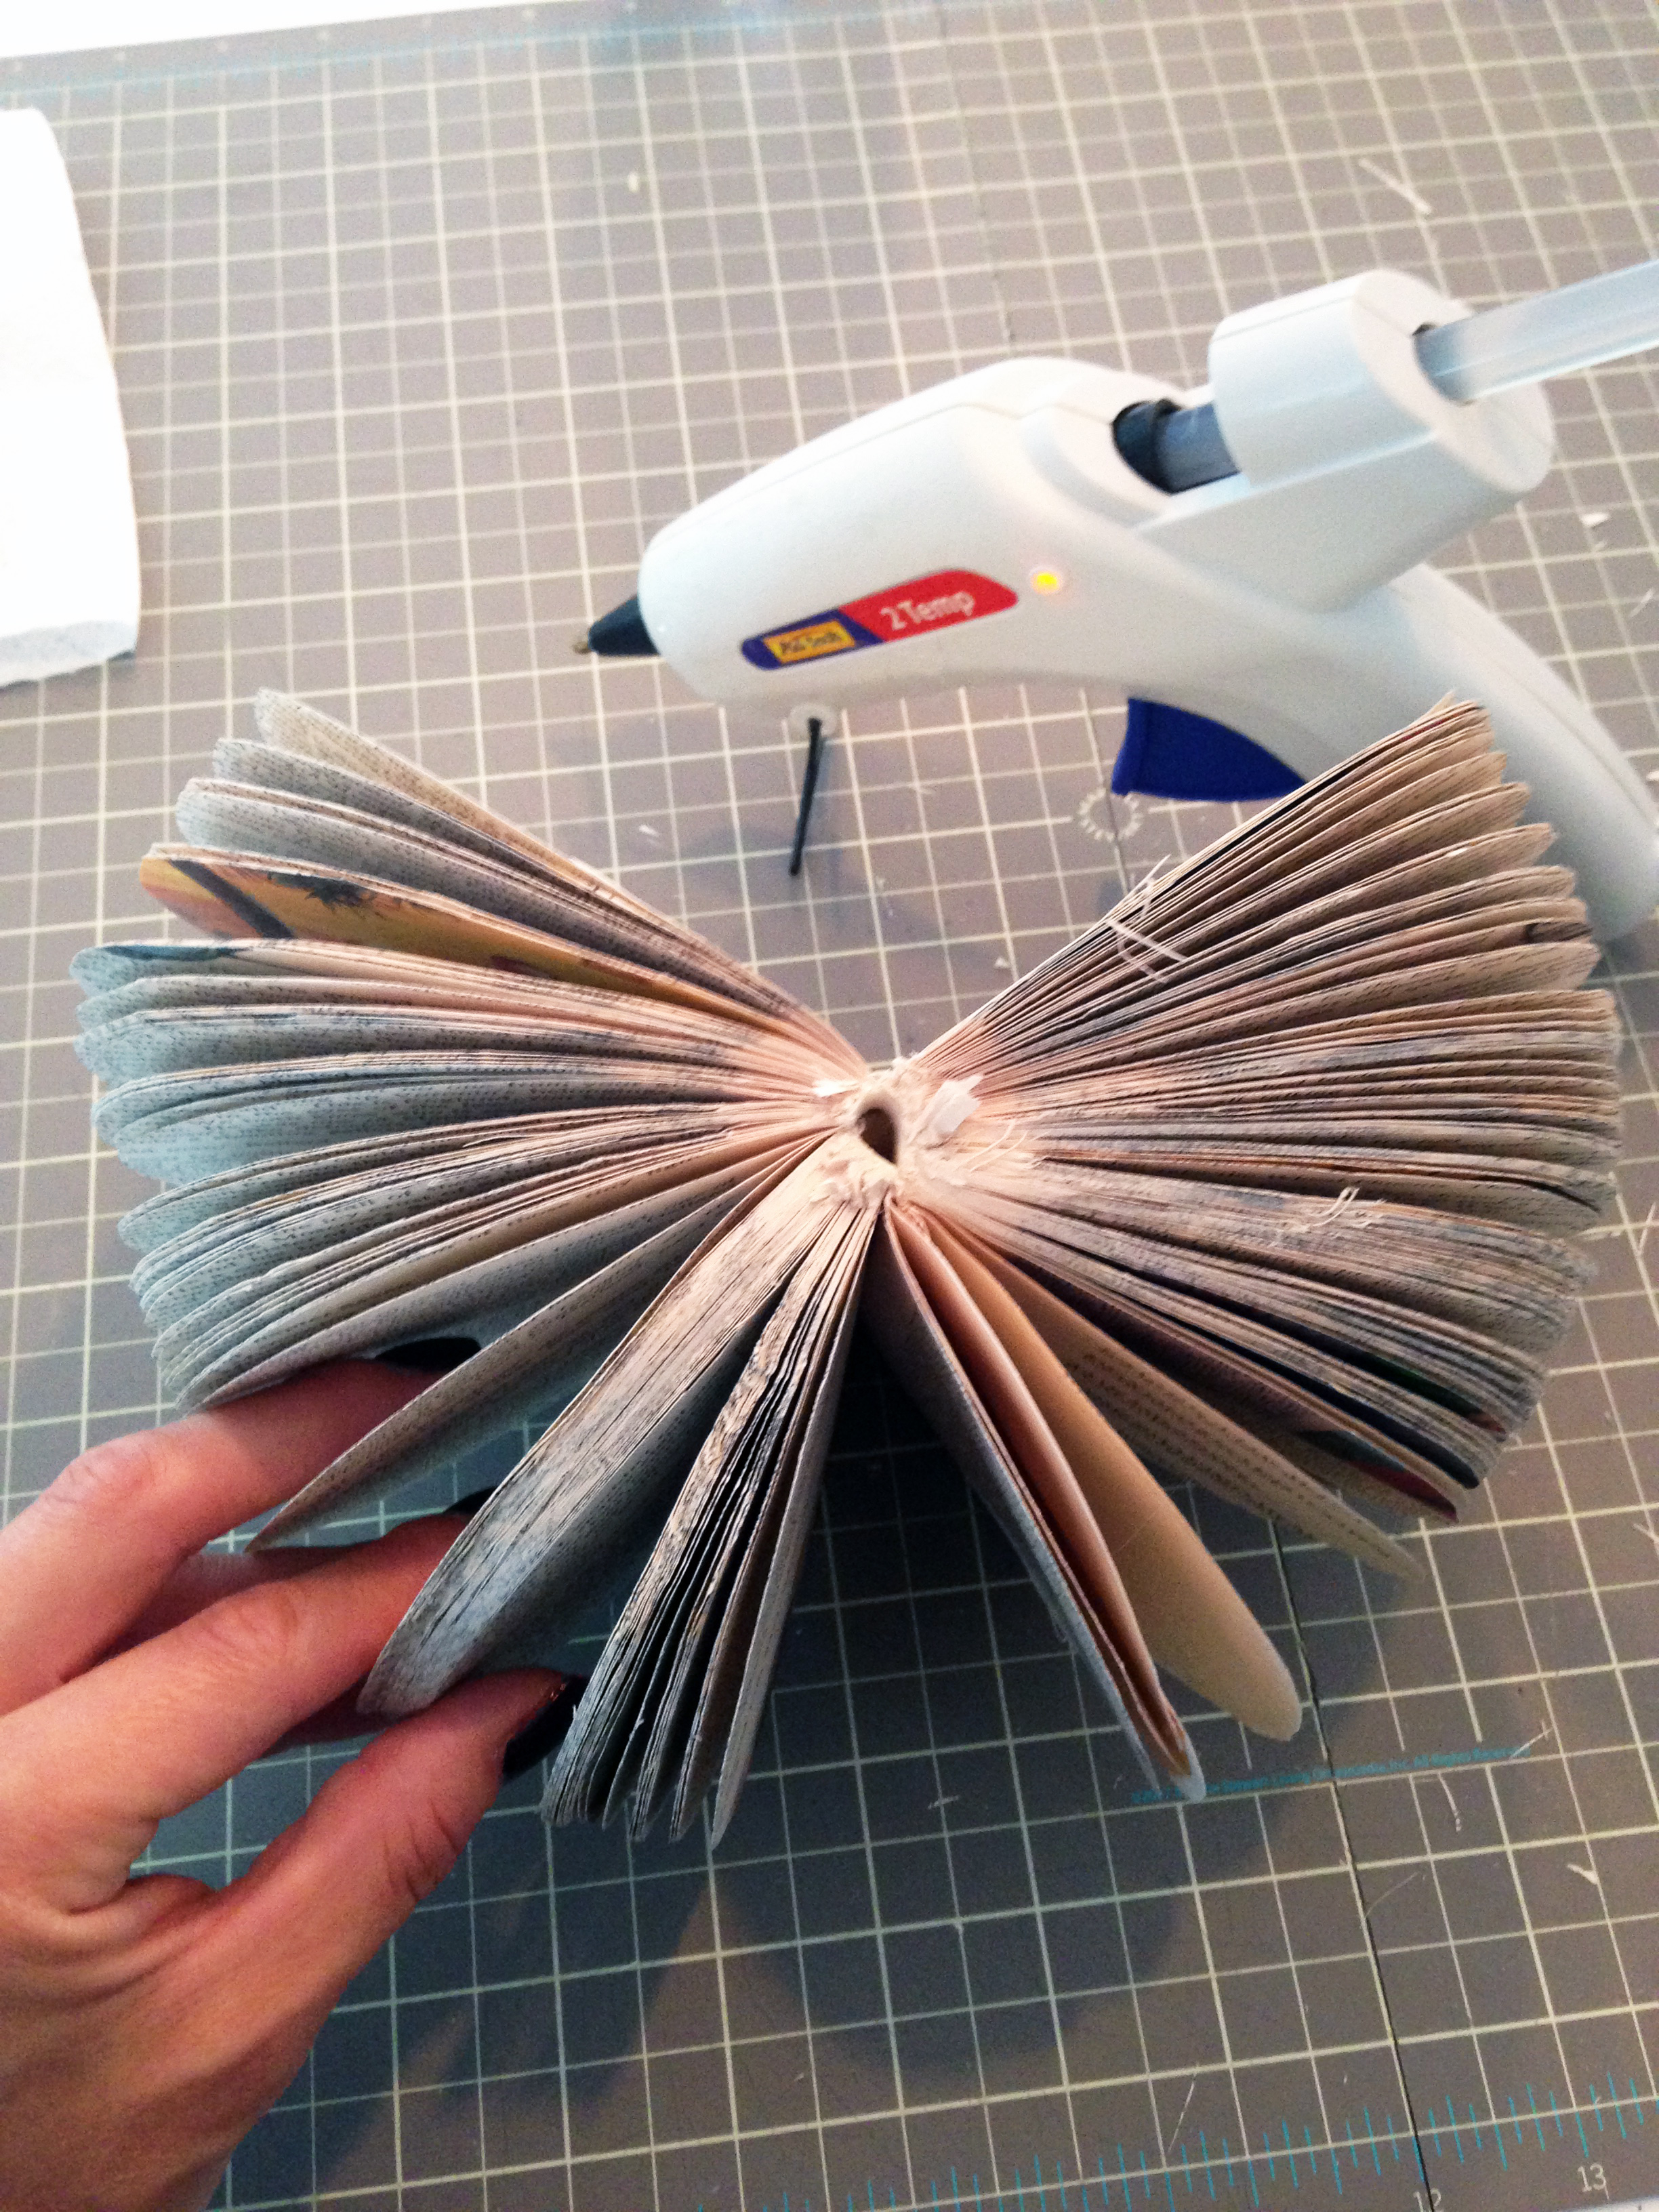

Since my book was in such rough shape, once I glued the binding, the “wear” of the book really started to show. Part of the binding was incredibly nimble, while some was super stiff. What that means in “book pumpkin world” is that it didn’t fan out perfectly.
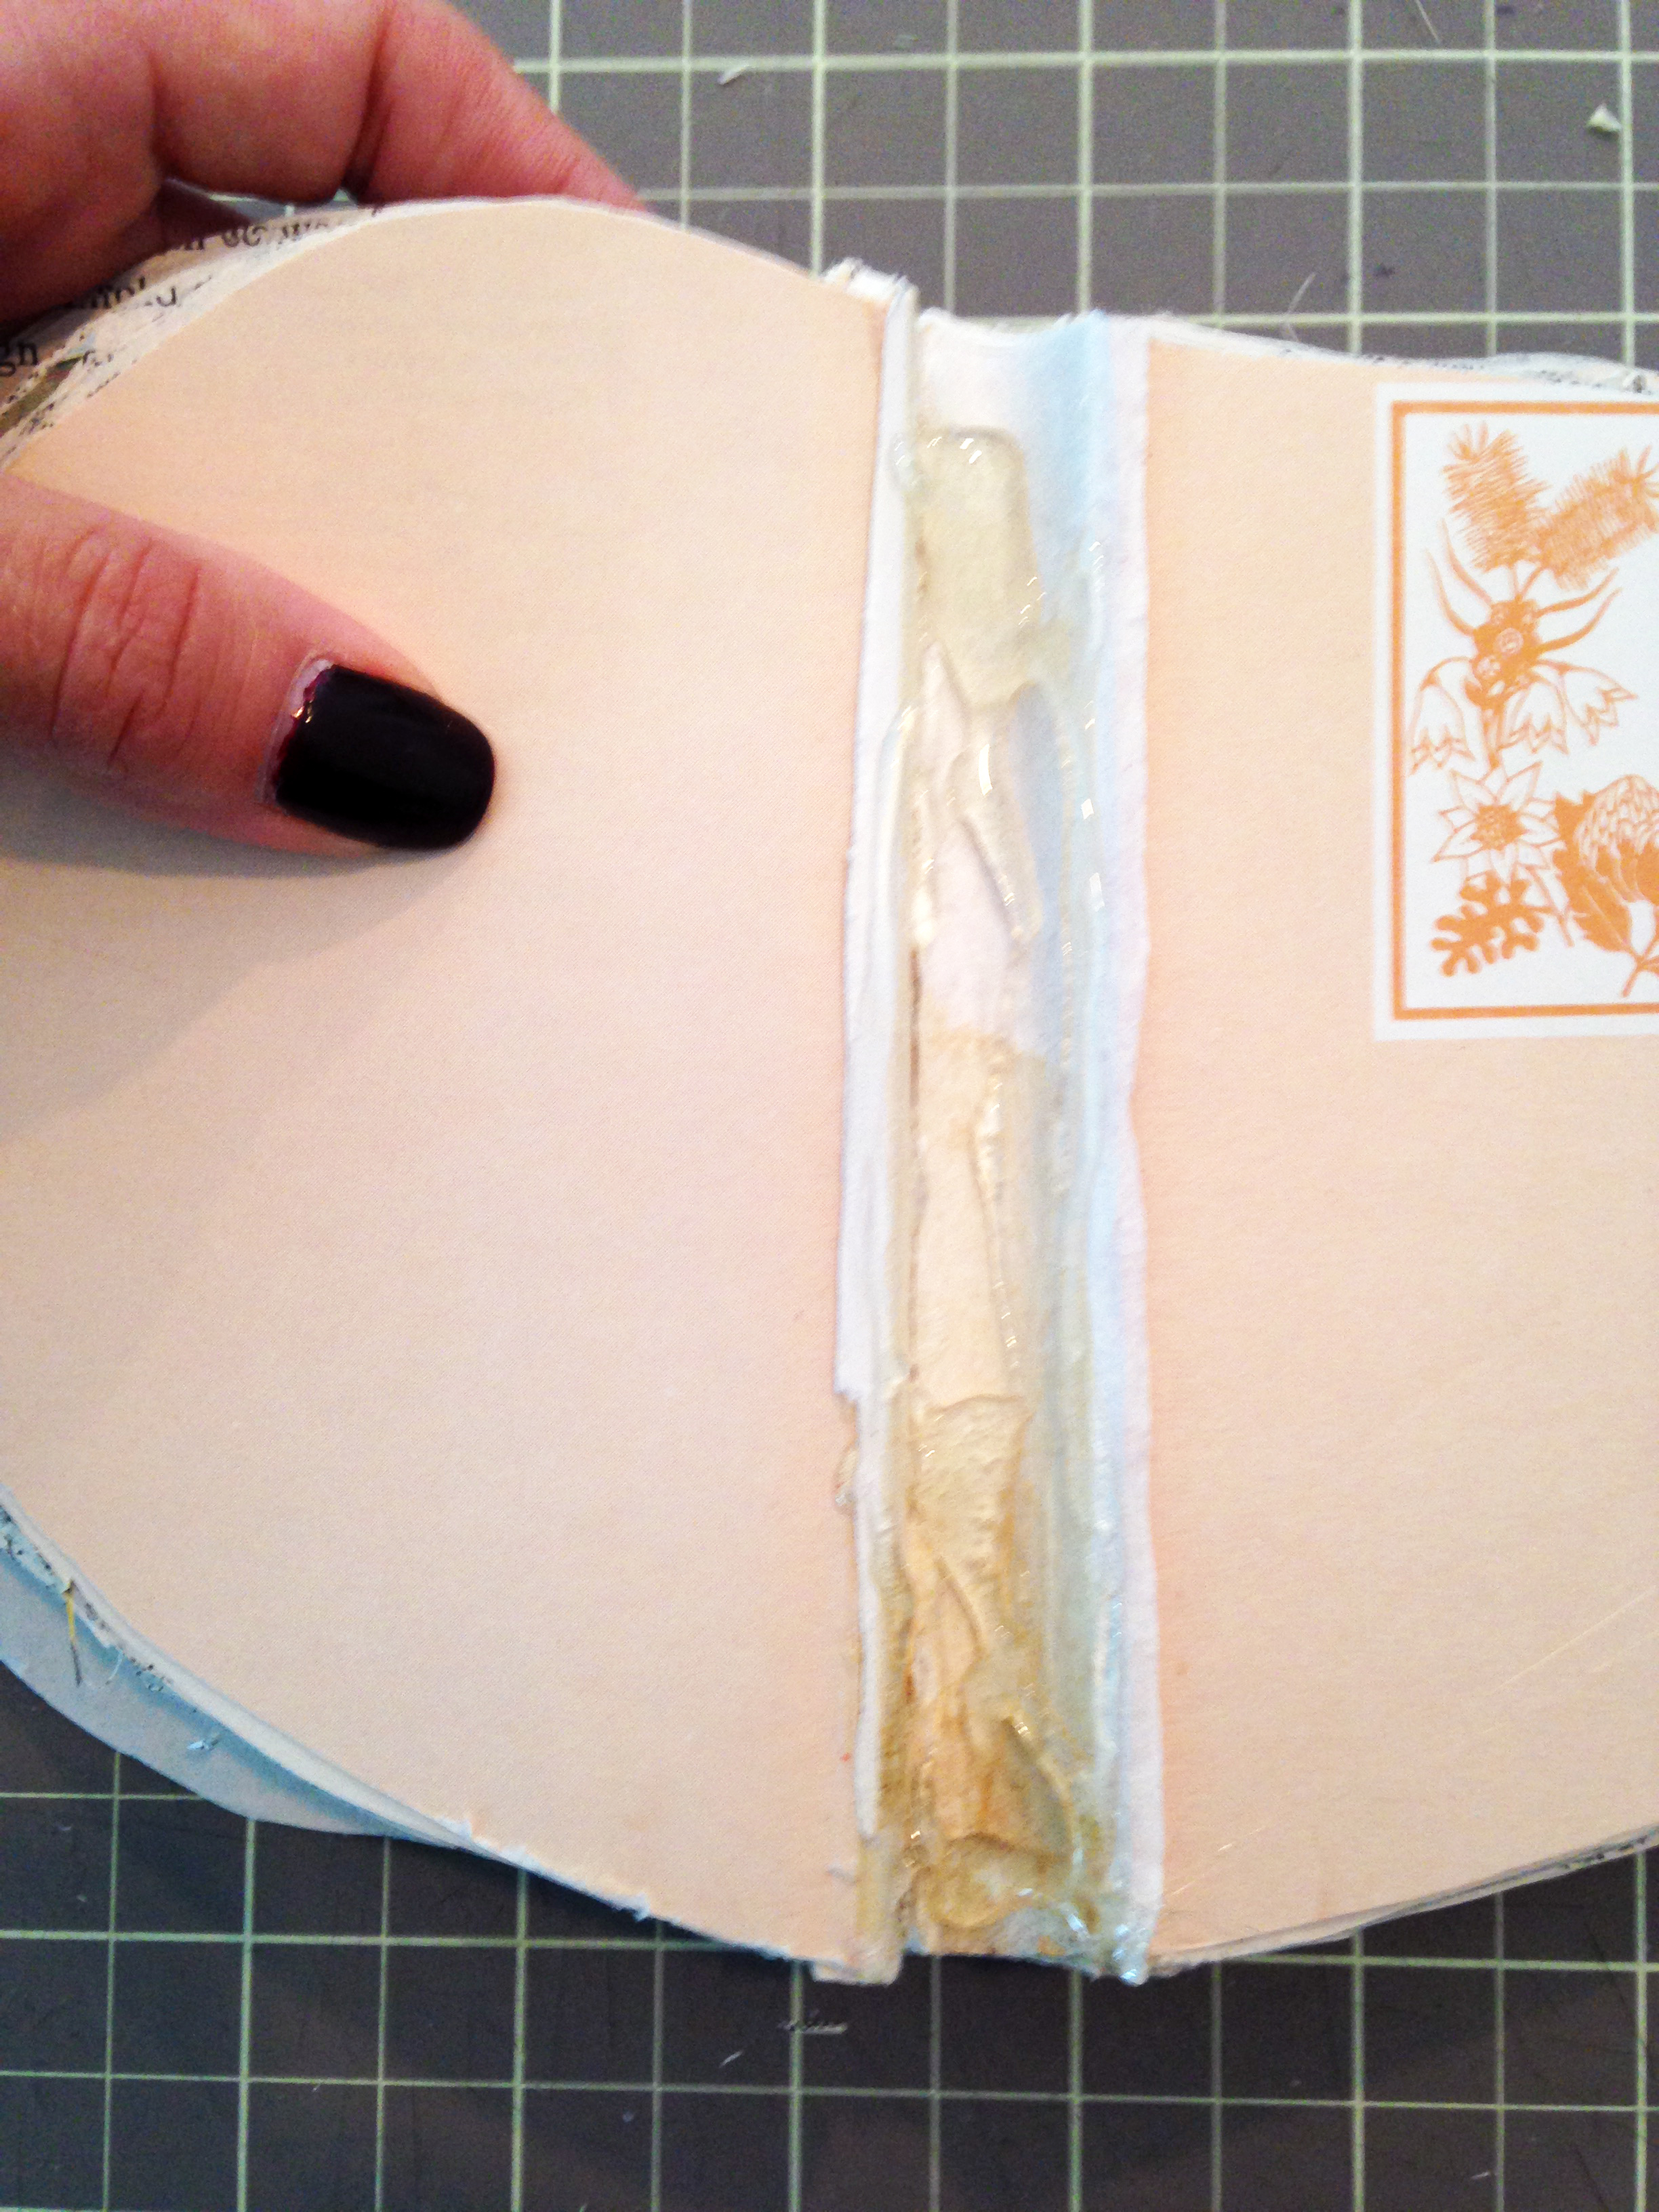
To remedy that, I tried taking a dab of hot glue and placing it in between each page (SUPER tedious, btw), but in the end, I stopped and decided that the imperfect look was charming. Plus, who’s got TIME FO THAT BIZ?!?! Not me 🙂
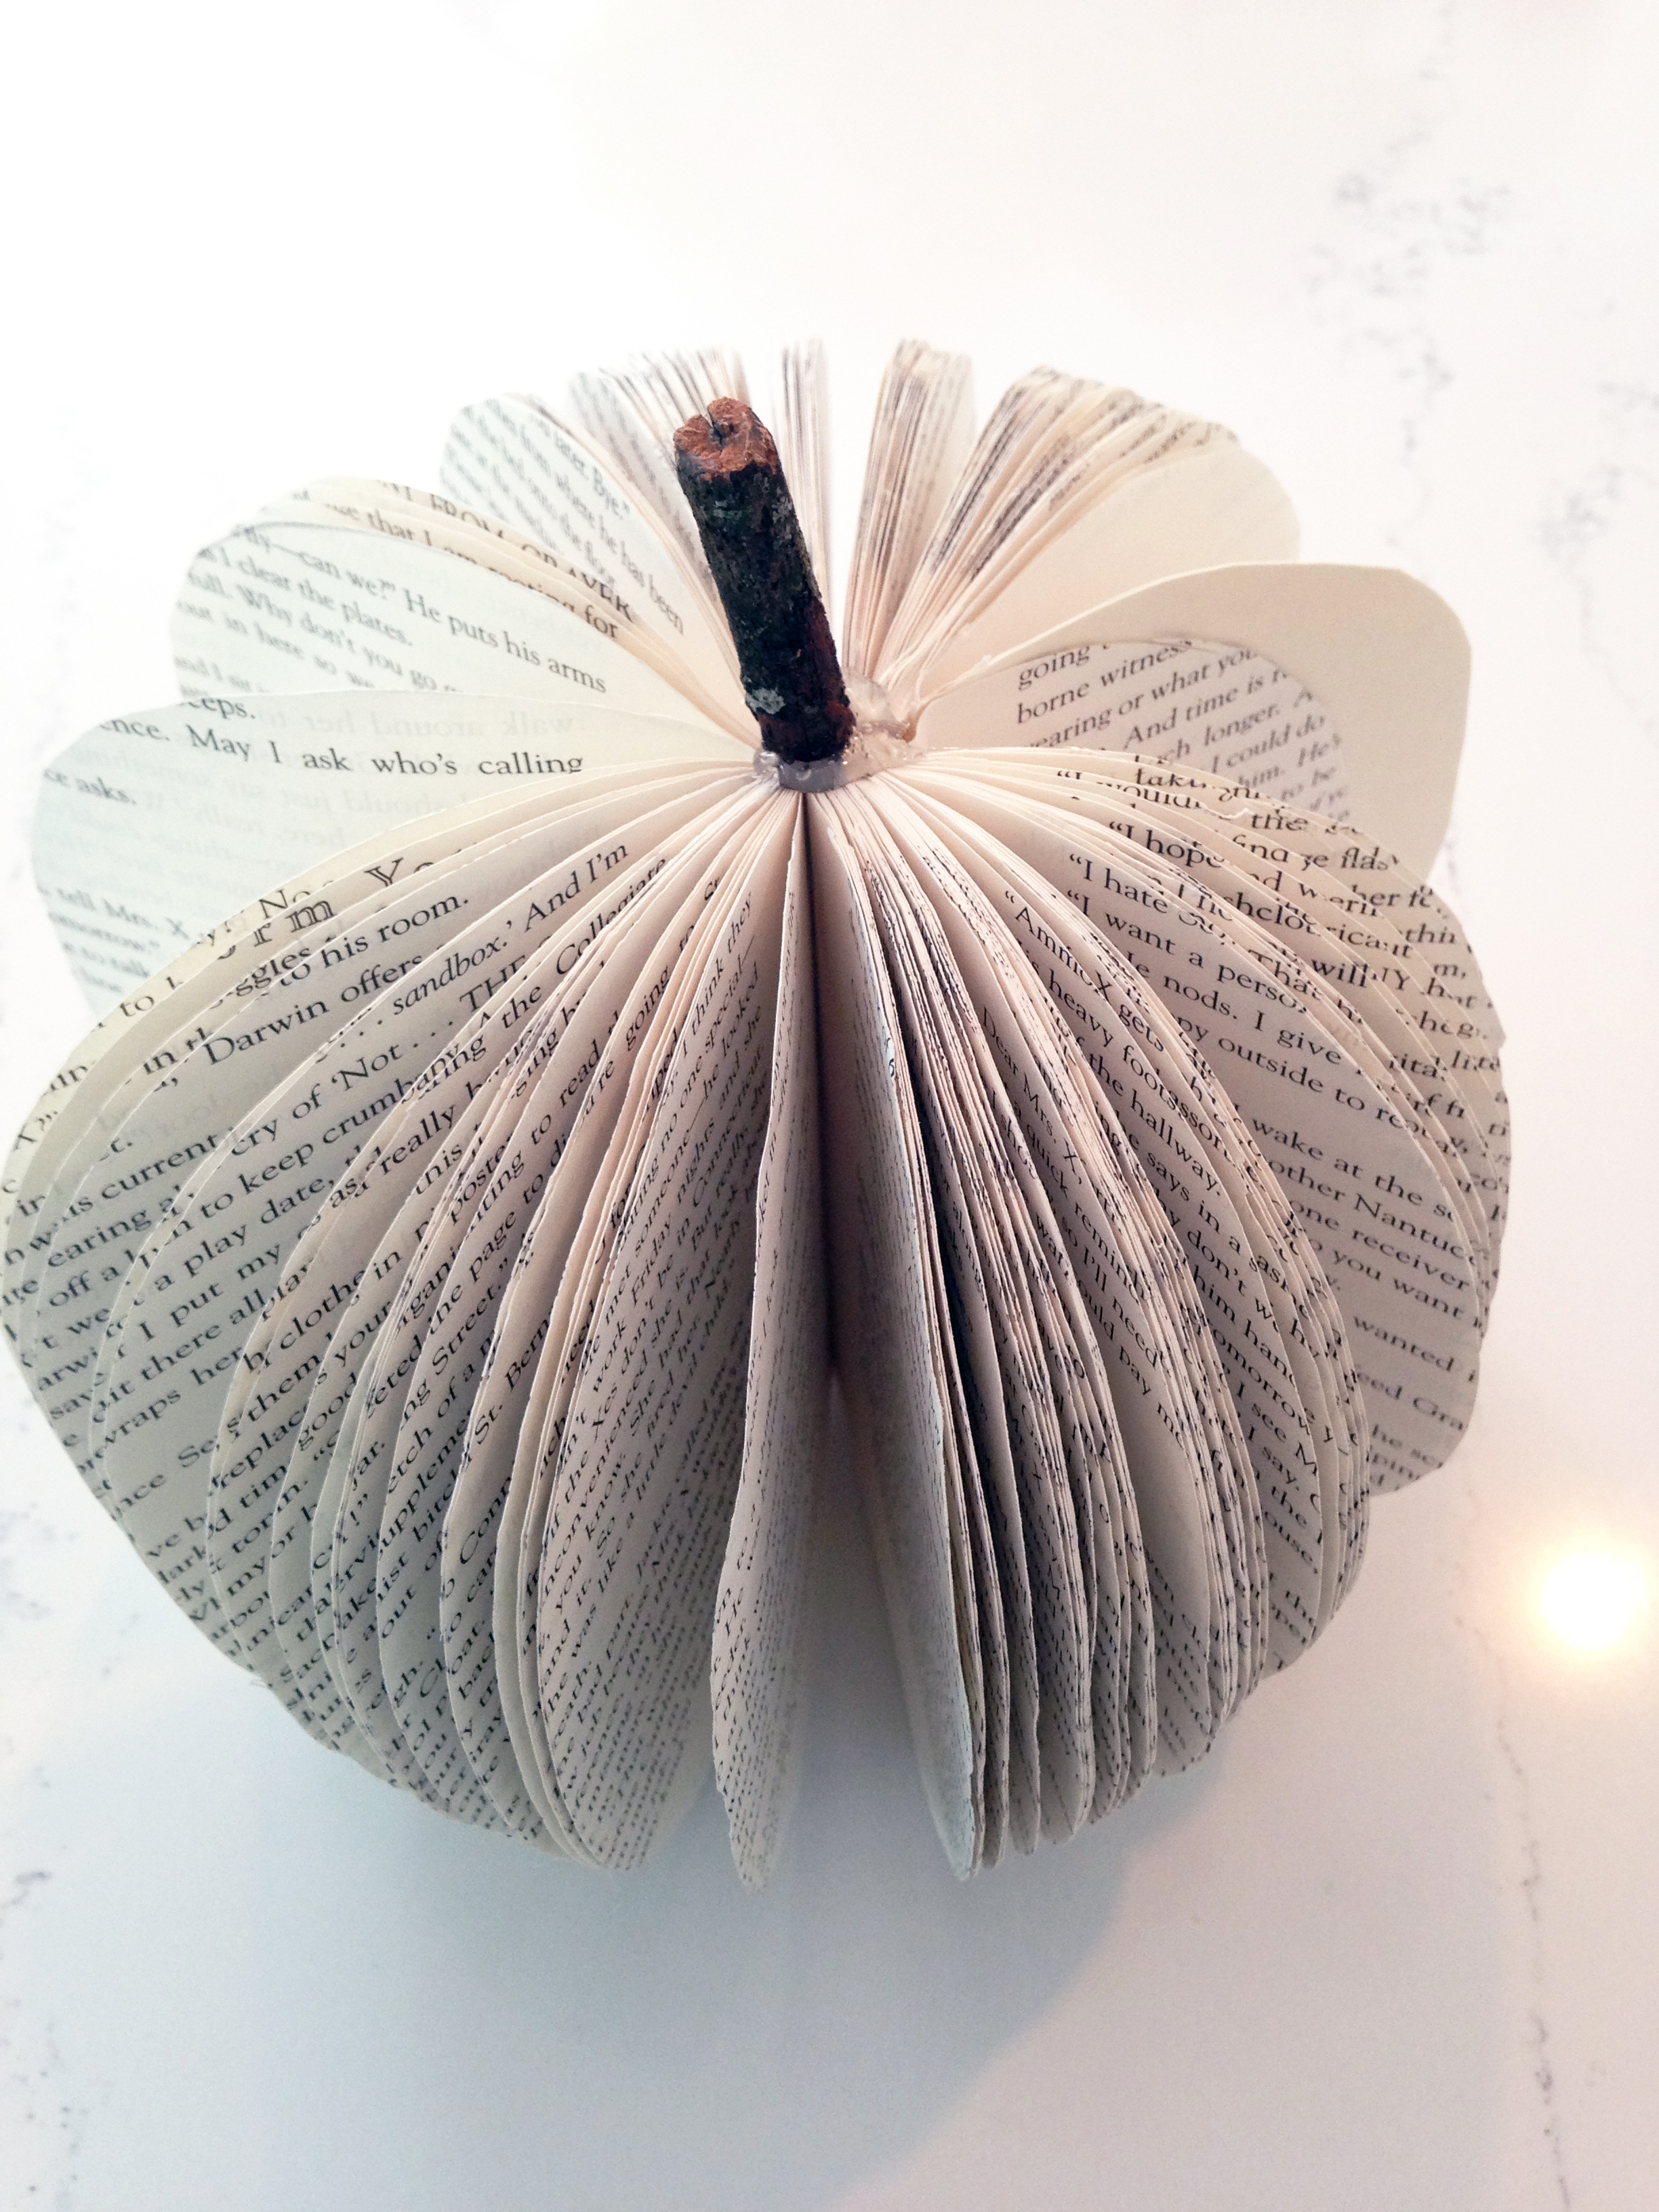
Once the shape is set, it’s time to deck out the top of your pumpkin, and that’s it. I used a real twig and some craft leaves for my first pumpkin, and opted for a simpler look on my second. The awesome part is, the possibilities are endless here, so have fun and enjoy your creative, cute handiwork.
Happy fall ya’ll 🙂


Leave a Reply