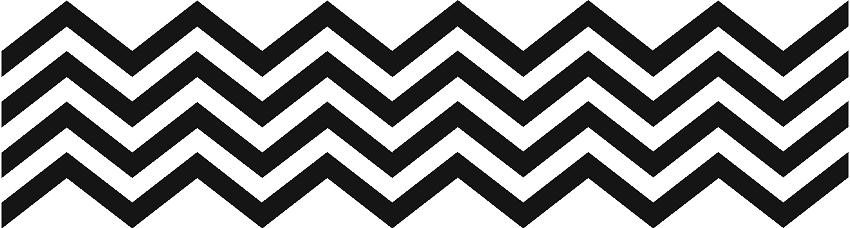
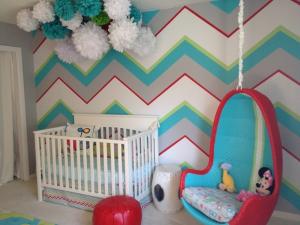
I’m sure many of you are like me. The more chevron, the better. And why stop at fabrics and artwork? When baby #2 was about to breakout, I got it into my head that #2’s nursery walls needed to be chevron stripes—specifically, grey and white ones. I know you’re all shocked. (Not.)
I’m saying it here, and I’m saying it everywhere: Grey is highly underrated. And I’m highly obsessed with using it. Everywhere.
So here’s the real deal about painting chevron stripes on a wall: It’s not easy. It takes a lot of planning. A lot of patience. And lots and lots of painter’s tape. Plus, there are so many detailed tutorials out there already (think DIY Network & Home Depot), that it’s easy to get caught up in information overload.
That said, this post is about breaking it down my way = a less daunting way. So hopefully, you can at least learn a few tips I found valuable.
DISCLAIMER: There are many ways to achieve chevron stripes (as far as measuring and taping goes), so it’s important to decide on your method first. One method requires less taping. But I believe less tape = more risky. In the end, mistakes are more likely, which will overshadow any original time saved.
Backing up, with the less-taping-method, you essentially (measure and) tape the “v’s” of your chevron, without taping your horizontal & vertical guide lines. Think about that for a minute.
If you rely on the accuracy of your “v” measurement, without having guide lines as a double check, who’s to say if you mess up along the way? No one, that’s who. That’s why I suggest taping both horizontal and vertical lines as your “guides,” just like I did.
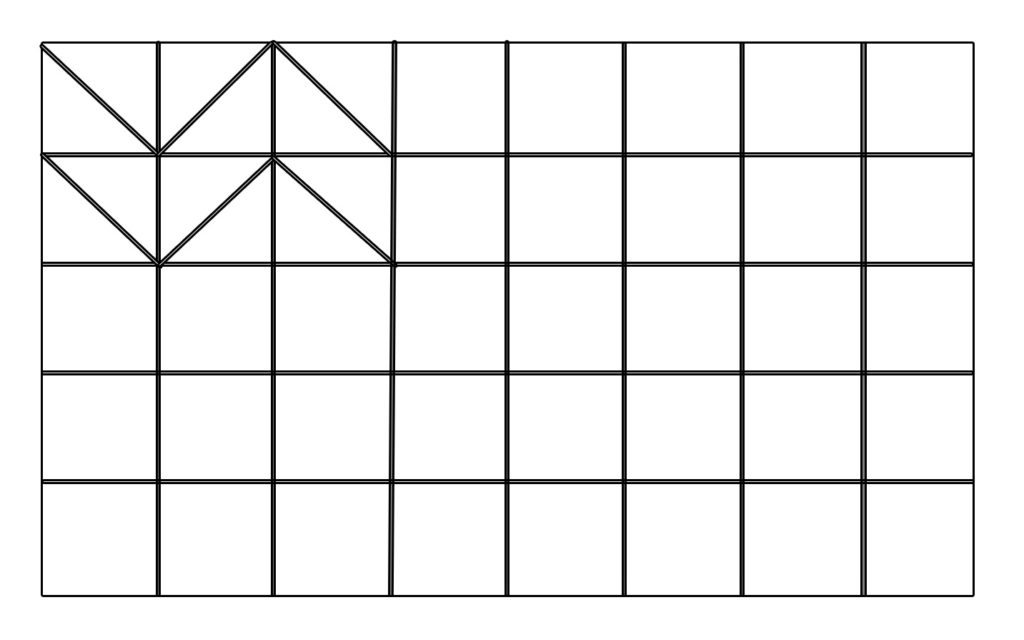
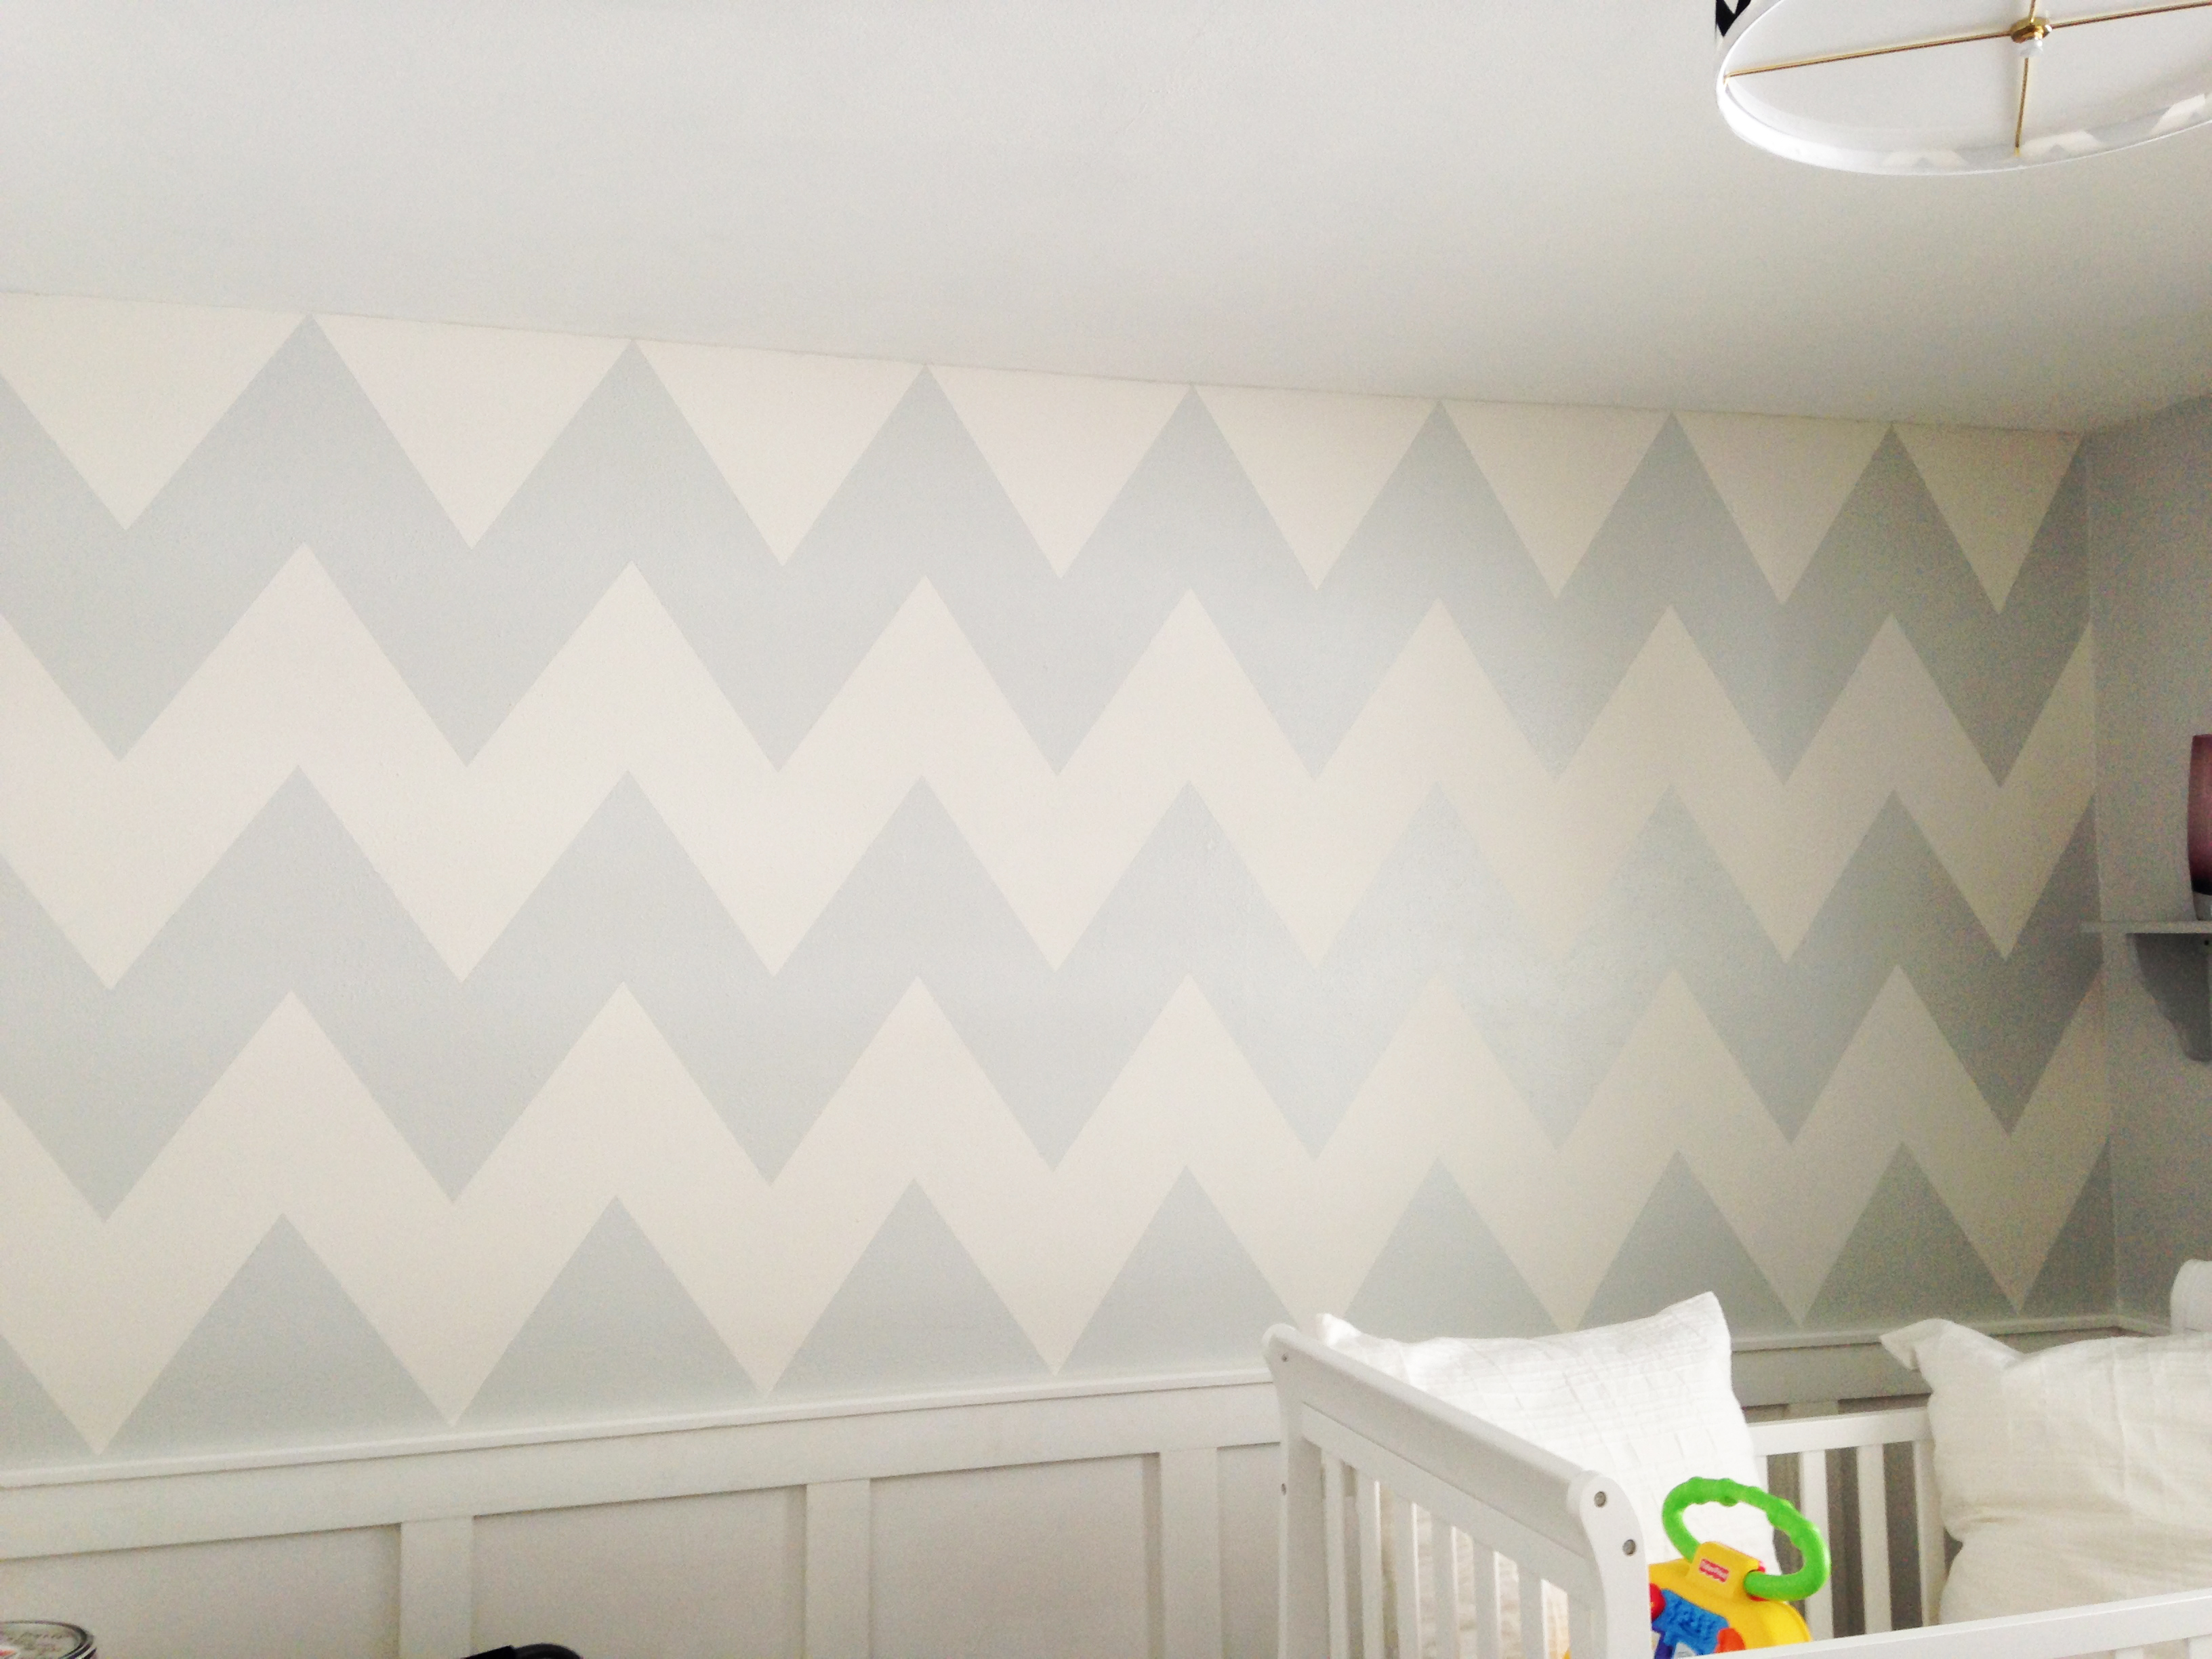
Visuals help, so this is essentially how your wall will look once you have your guide lines taped, and your “v’s” started.
STEPS:
- Decide on your aesthetic. How do you want your chevrons (or “v’s”) to look? Skinny and tall? Wide and short? Your preference is important because it will determine your measurements.

There are also lots of options for the end result, so make sure you know exactly what you want before you begin. Thank you, Google.
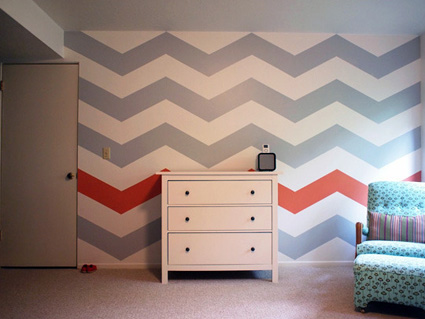 In my case, it was simple. I wanted 2 colors, and I wanted uniform sizes. I was also dealing with only the top half of a wall (bottom half was molding), so the number of stripes was also important. I landed on 2 full chevron stripes of each color. So 2 (at least) in white, and equally, 2 (at least) in grey.
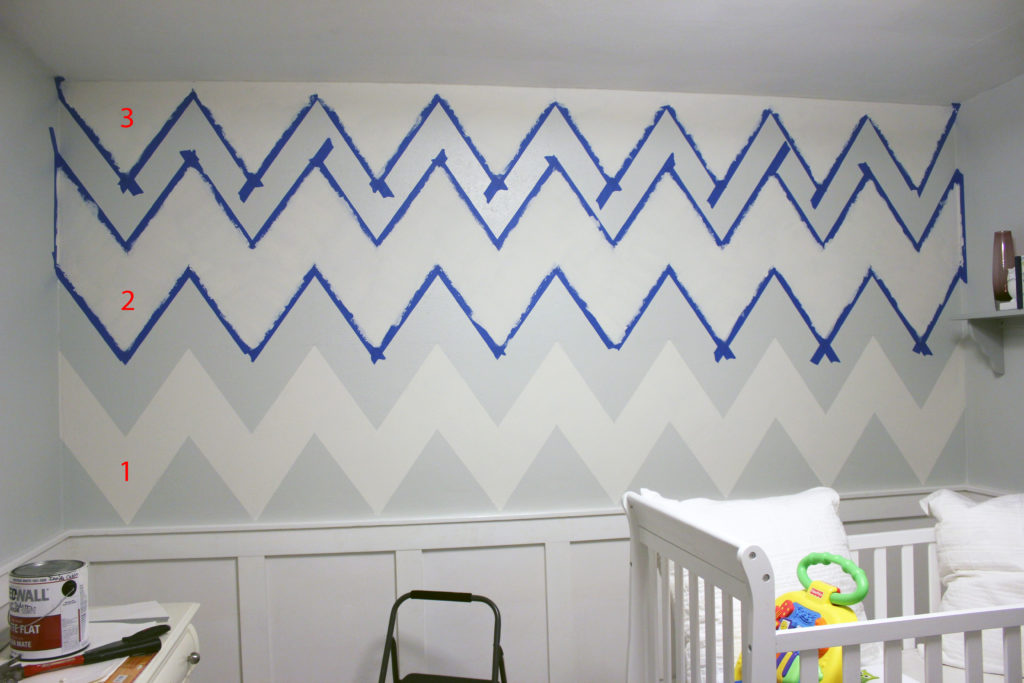
- Choose & paint base color. Now that you know your general aesthetic, it’s time to start painting the base. Your base should be the lighter of the colors. In my case, it was white. TIP: Let your base dry overnight at a minimum because the next steps involve lots & lots of tape on your freshly painted wall.
- Do your math. This is where it gets… fun. Like I said before, decide how many horizontal stripes you want to see. Measure your wall floor to ceiling, then divide that by the number of stripes you want. That number will be your individual stripe height. In my case, it was about 12 inches. TIP: If you’re a visual person like me, consider mapping out the entire design on paper first (like a mini version of your wall). Doing this will save you time in the long run.
- Measure & mark: Horizontal lines. Starting in a corner, use your tape measure and pencil to start marking your 12 inches (or whatever stripe height you decide on), up the entire wall—so floor to ceiling. Once you have one full, vertical starting point, it’s time to tape. I completed this project pre-blogging days, so I’ve simply drawn on the below pic to give you an idea of what your horizontal lines will look like in relation to your chevron stripes.
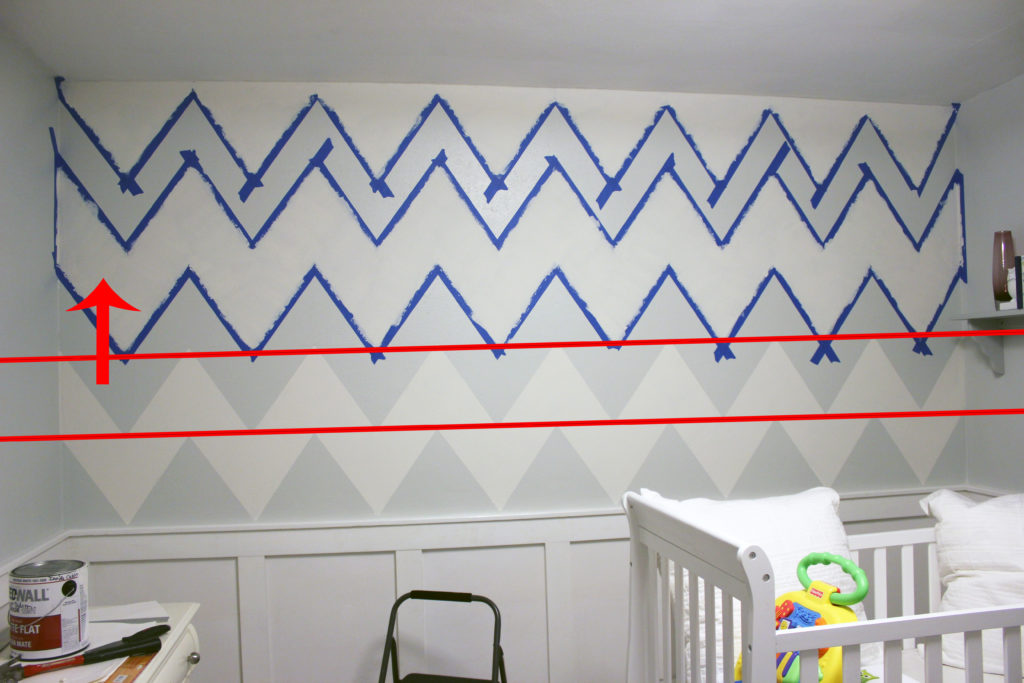
- Laser level & taping time. A laser level isn’t just a good idea with a project like this. In my opinion, it’s a must. Start with the lowest mark you just made on the wall, and use that to shoot your laser across the full width of the wall. We have a handheld laser, so this part was a 2-person job. One person lasers, while the other tapes. TIP: Make sure you are taping on the correct side of the laser line. One mistake here, and your perfect stripes won’t be so perfect.
- Measure & mark: Vertical lines. This is easier than the horizontal ones. I knew the look I wanted, so I generally knew how many vertical guidelines I would need. If you’re unsure, do this: Mark the middle of your wall at the base and at the ceiling. Then, use your level to tape that off as the starter line. You should now have two even halves. Now take each of those halves, and half them again. (See below.)
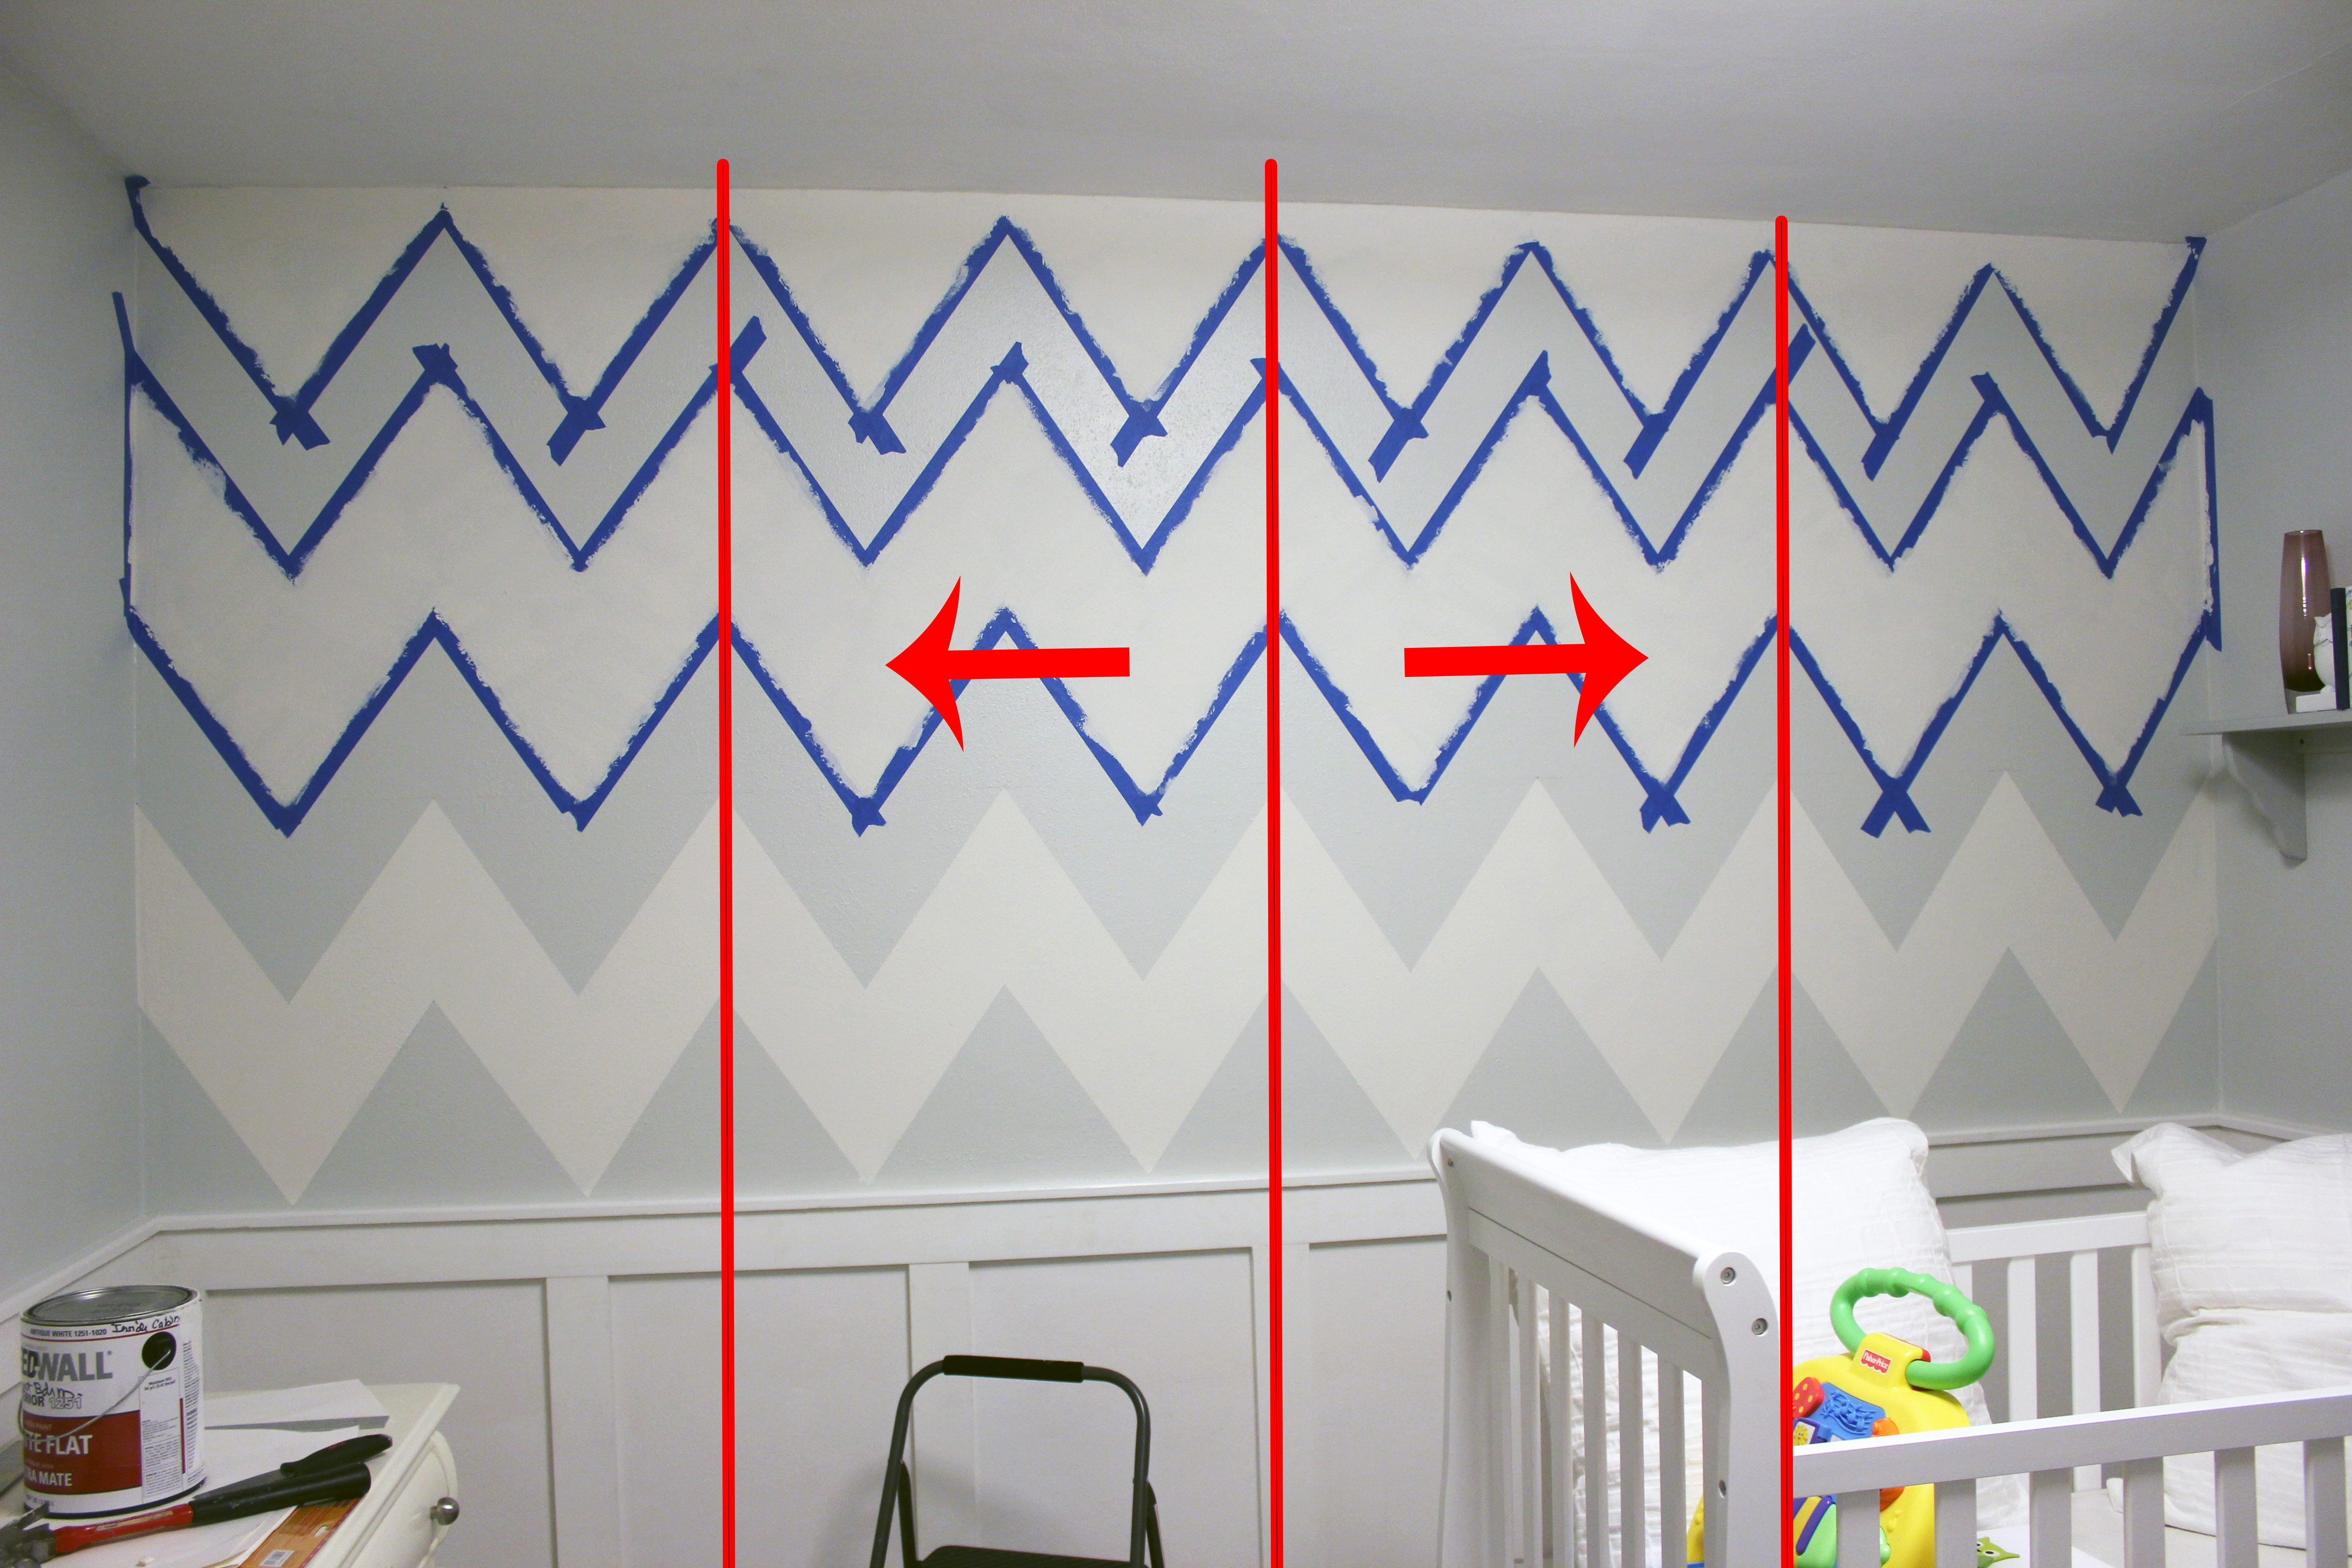
Keep this up until you have the “look” you’re after.
- Tape from corner to corner of each square. Again, this is what that will start to look like.
- Trim edges of tape. When you tape corner to corner, you will have excess tape at the “tips” of your chevron stripes.
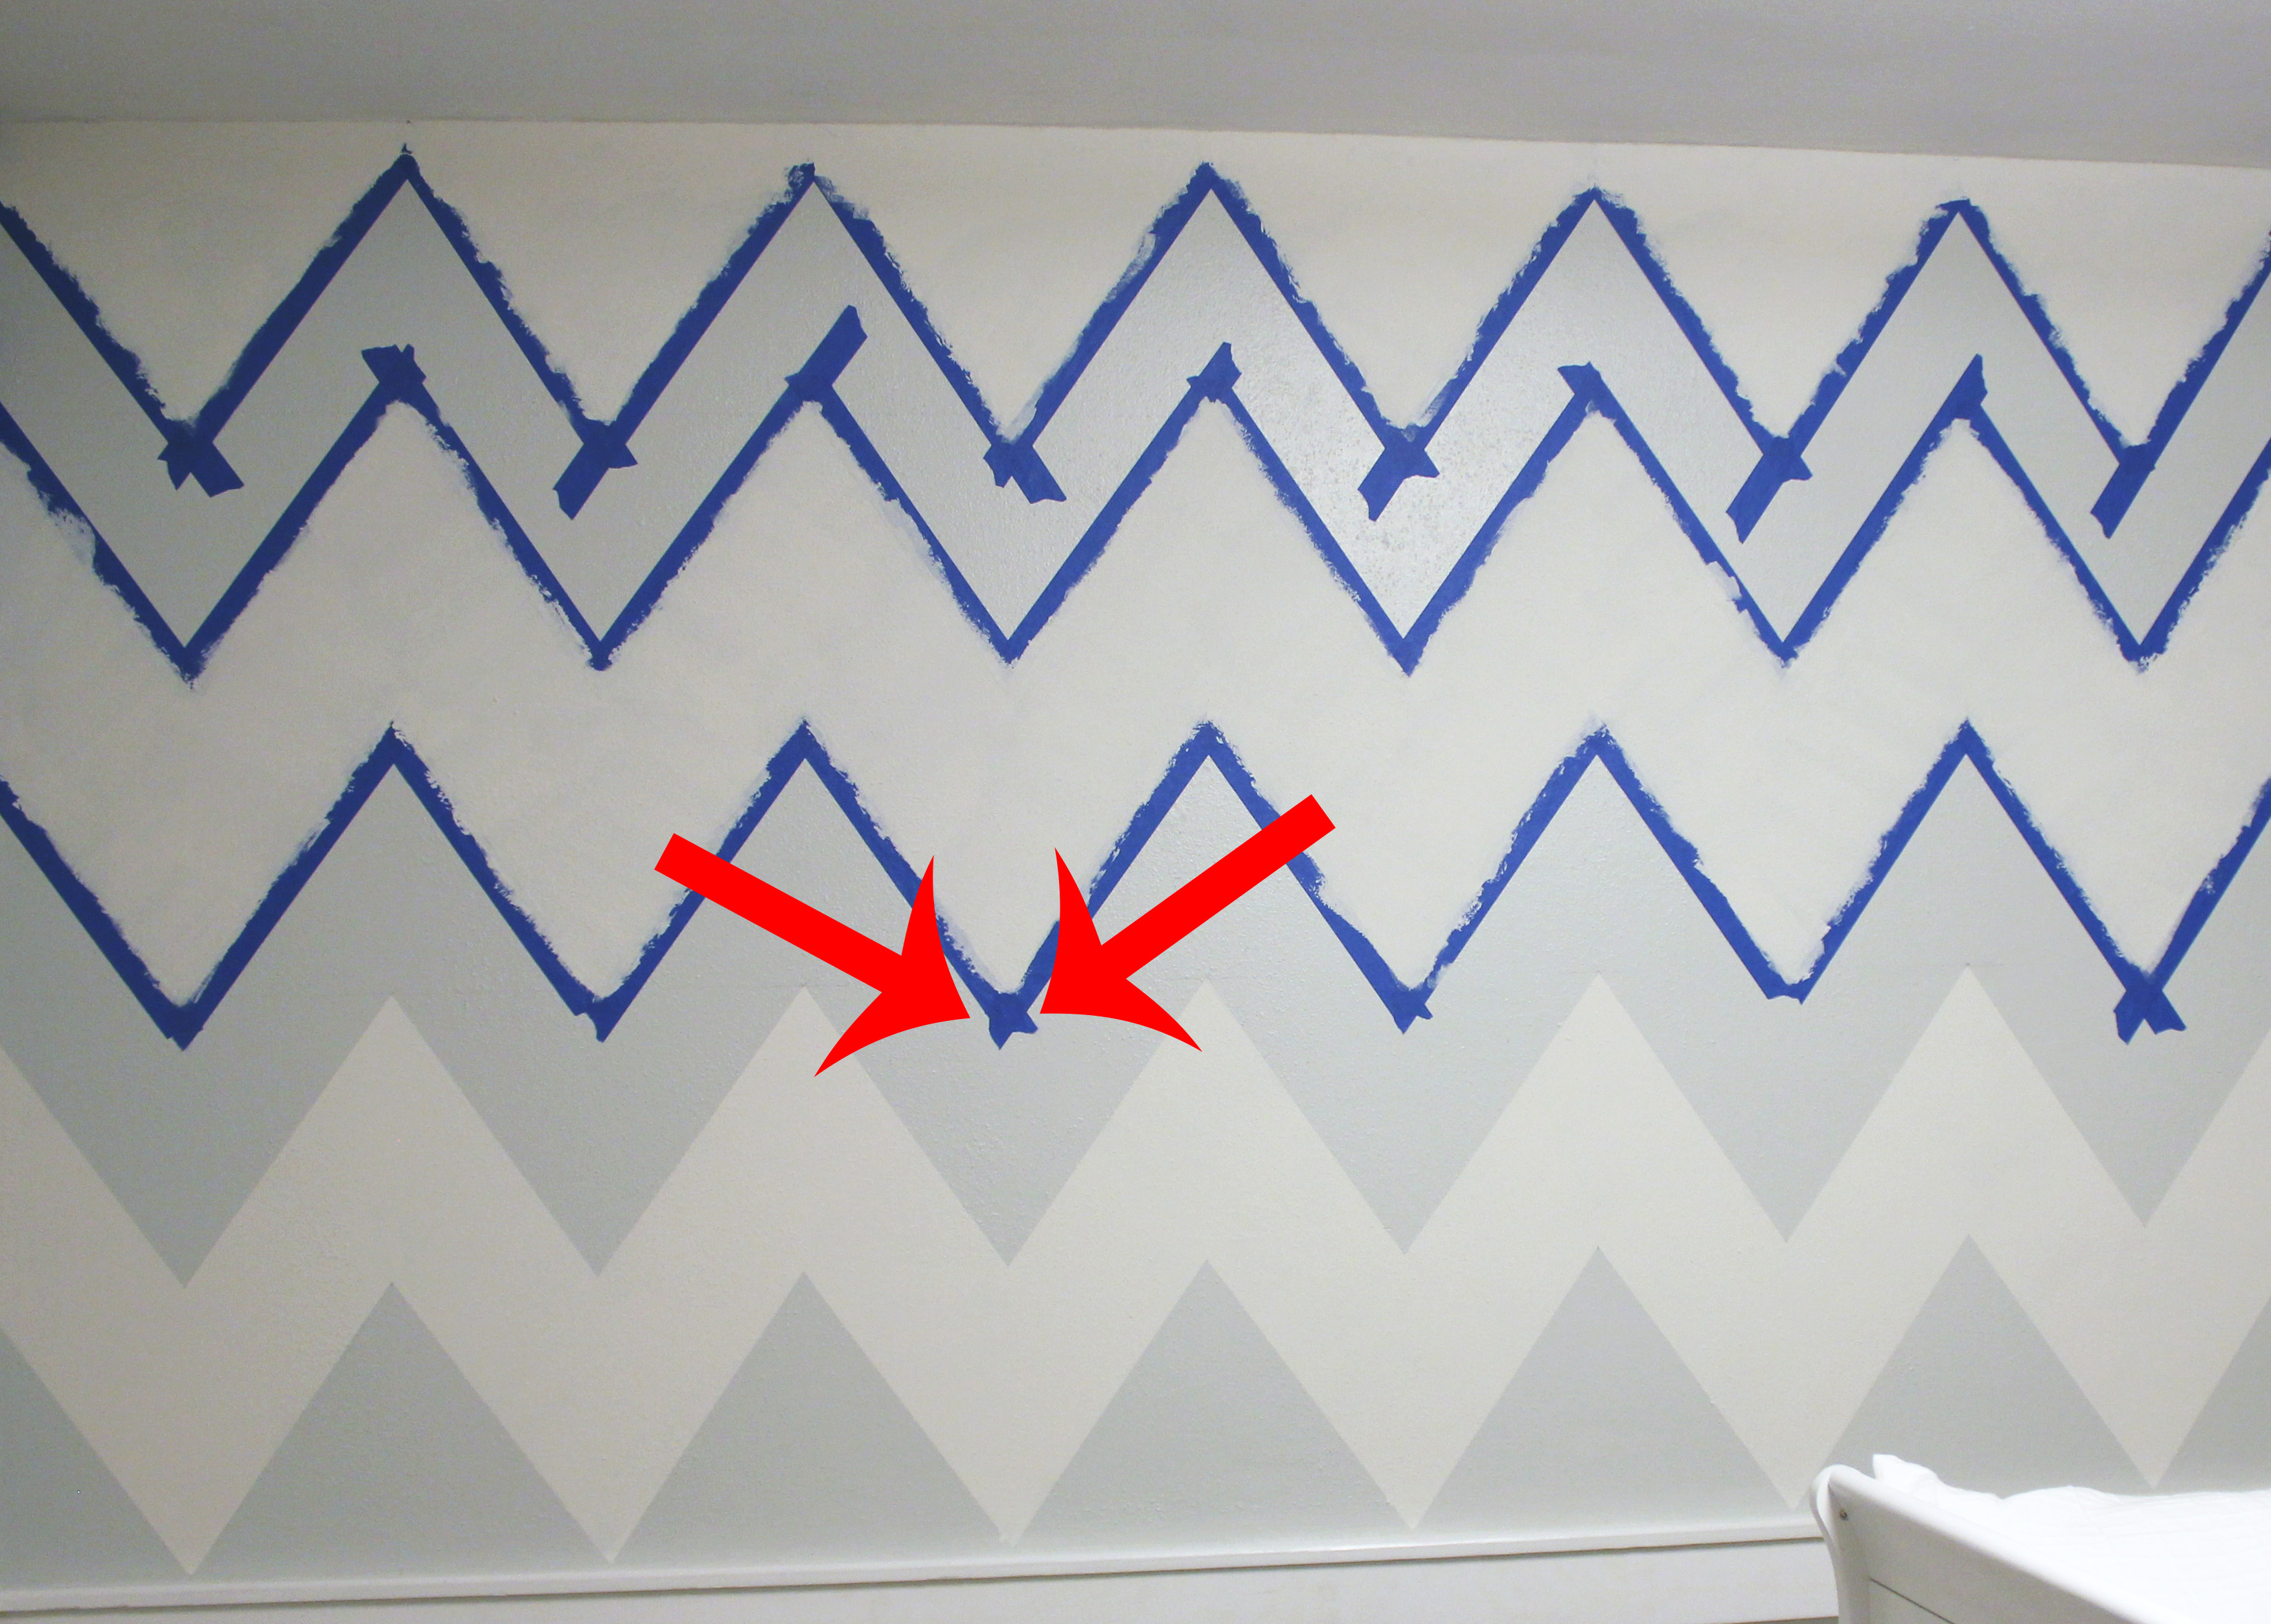
Obviously, this won’t do, so you have to remedy it somehow. Many recommend using an exacto knife (while being VERY careful not to damage your wall), while others suggest peeling off the tape at the tip, using scissors to trim and then pressing the tape back down again. I like the peel and trim method.
- Apply your darker paint color! Before you even THINK about picking up a roller, consider this… TIP: Overlap your paint. This may be the single most important tip of painting stripes of any kind. Trust me, it’s worth the extra effort. Once all your tape is up, take your base color (in this case, white), and paint it onto the edges of the stripes where your second color will be applied. What this does is create a paint “barrier” that will help prevent your darker color (grey) from bleeding through your tape. Translation: Any paint that would potentially bleed through onto your white, will now be white (yay!). You will NOT be sorry you did this. Once your “barrier” paint is dry, you’re ready to roll on your darker color.
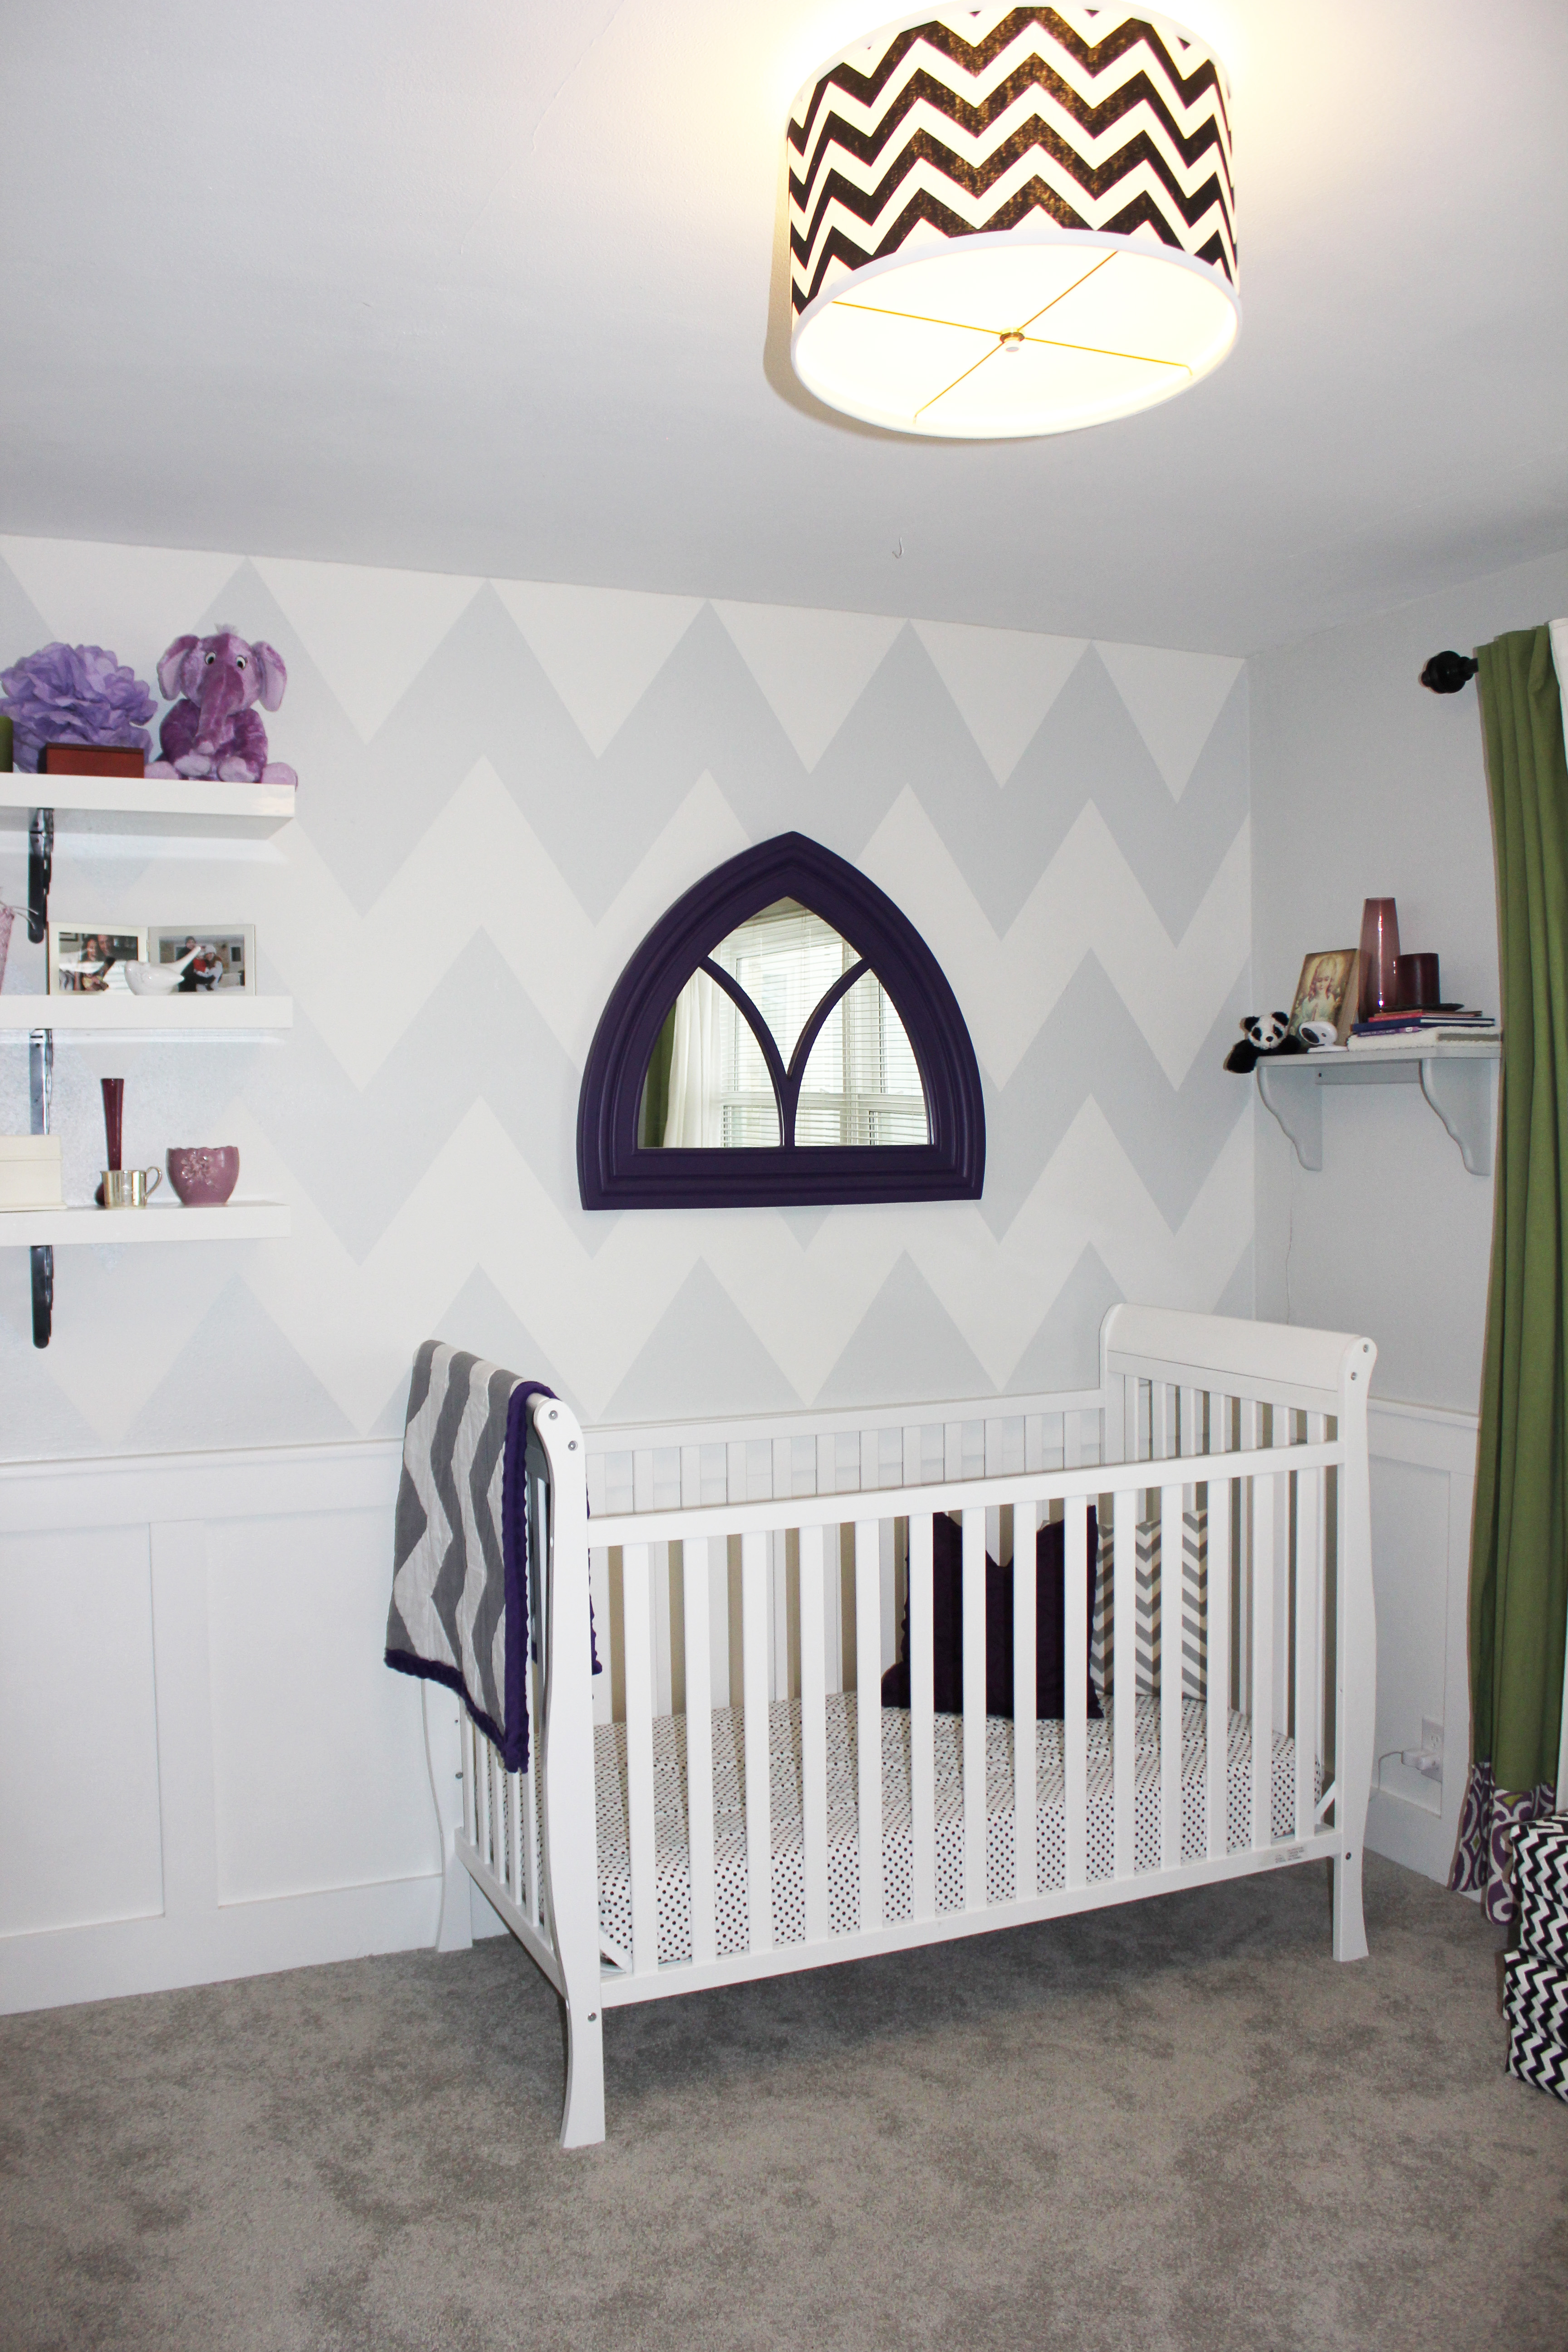
- Enjoy! #9 was the last step, not counting the drying & taking down tape part. That’s a job, too! Now take a step back, and start considering the fun part: DECORATING!


Leave a Reply