Previous post
Next post
too many ideas. too little time. (and far too much chai.)


Ribbon. Tissue paper. Plain ol’ paper. Card stock. Fabric. Paint store paint swatches. String. What do all these things have in common? They’re super cheap, for starters. That, and they may already be materials you have in your home. (I know I do.)
When it comes to decorating for a party, my own supplies are where I turn to first. And the DIY party-decorating options are endless. Especially if it’s a kid’s birthday party, I usually opt for cheap, easy and quick, because God knows there are a million other things on our to-do lists.
Quick disclaimer: For some of you, this may be a “duh” kind of post. But for others, I hope it serves as permission to take your simple craft supplies, and make something cool. I’ve created the items below for everything from holiday parties to surprise parties to kid’s birthday parties. Check ’em out, and have fun creating a party you can feel proud of.
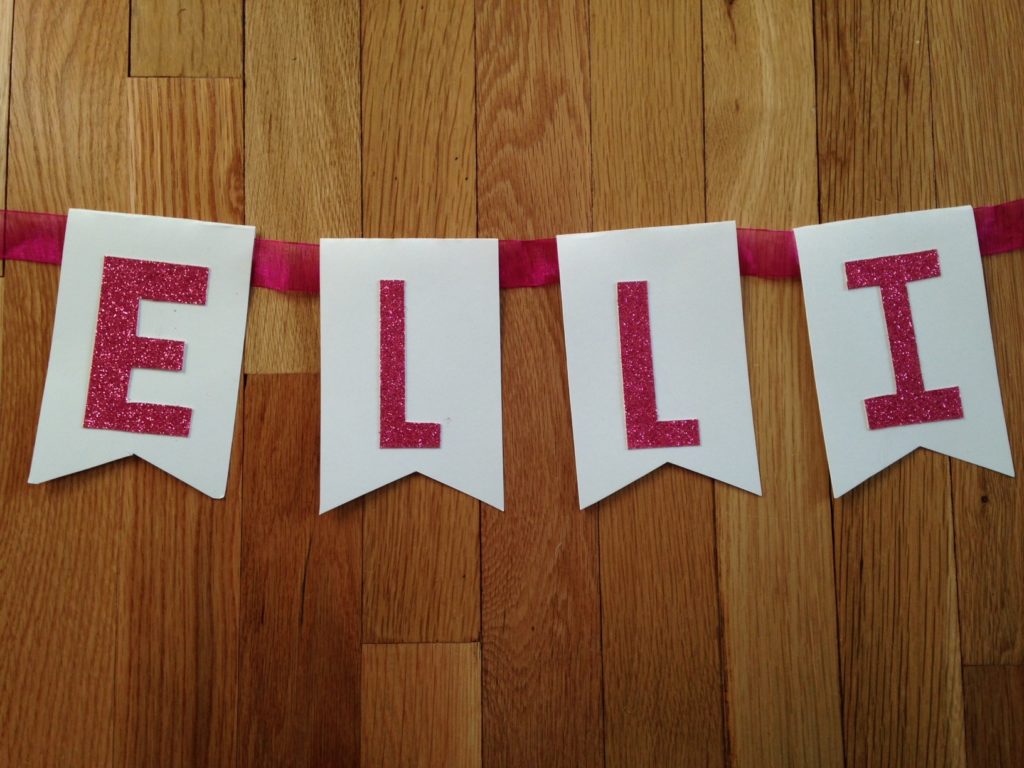
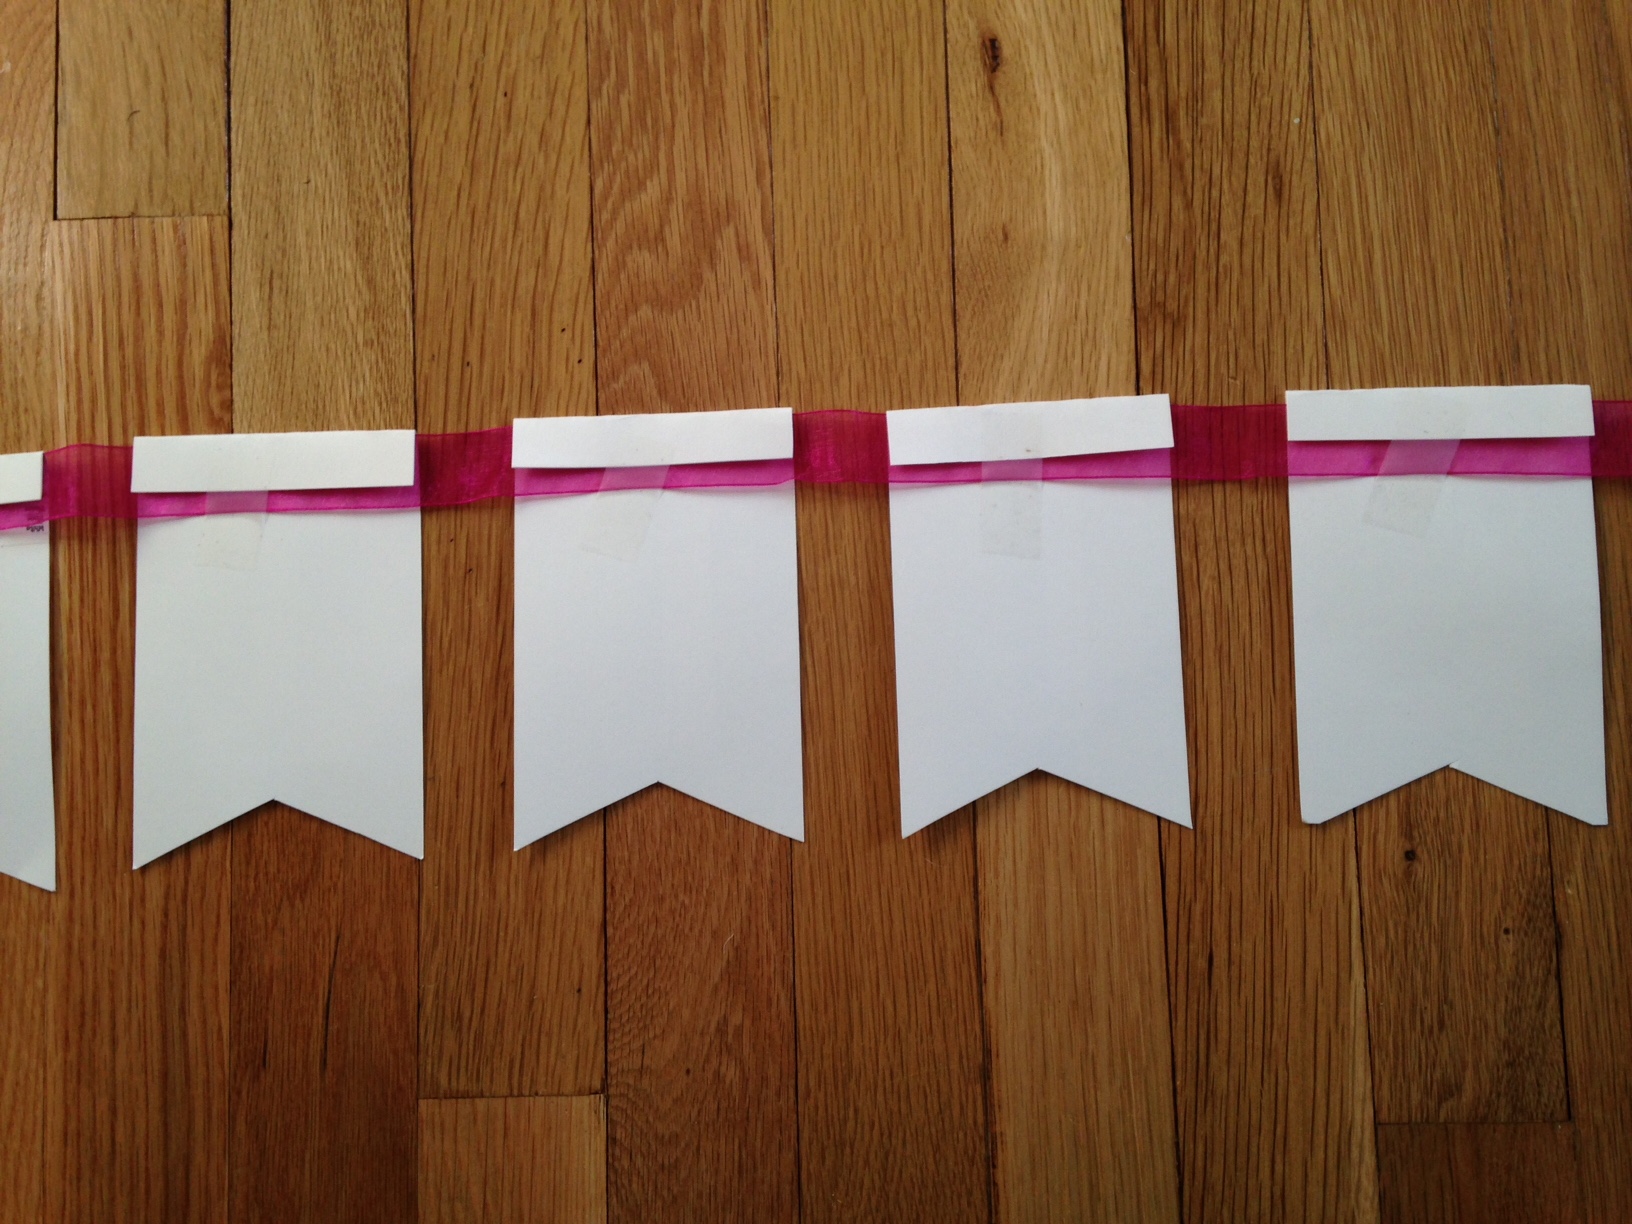
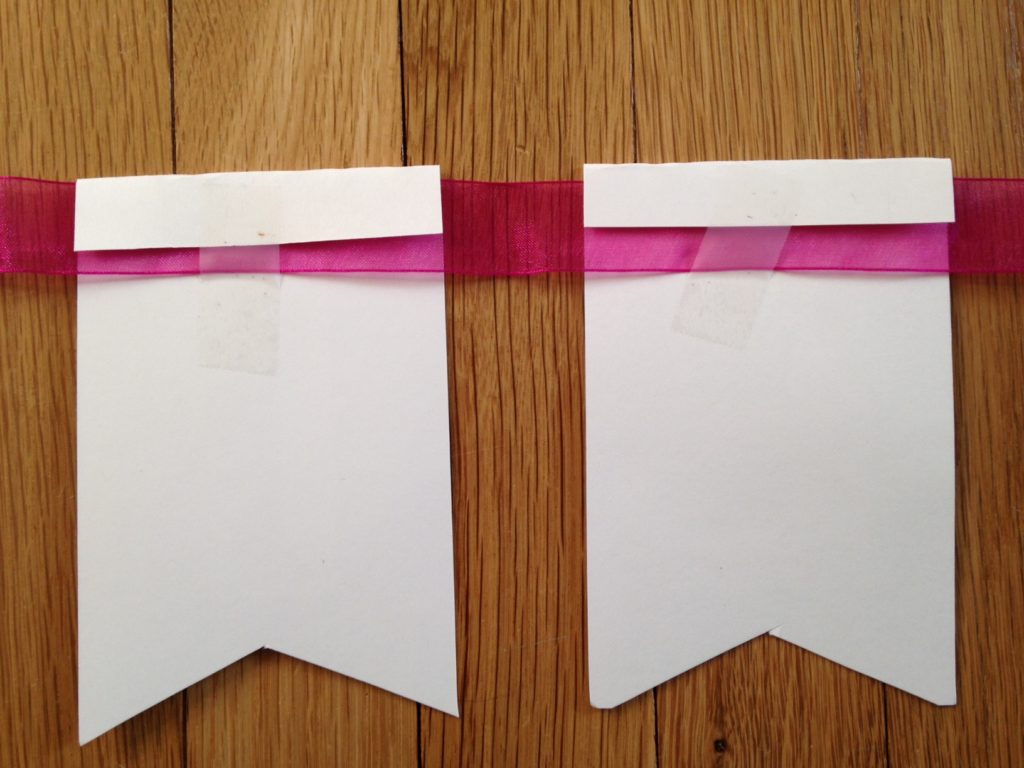
Supplies needed: Patience + paper + scissors (or exacto knife, ruler & cutting mat) + glue + tape + ribbon/string to hang.
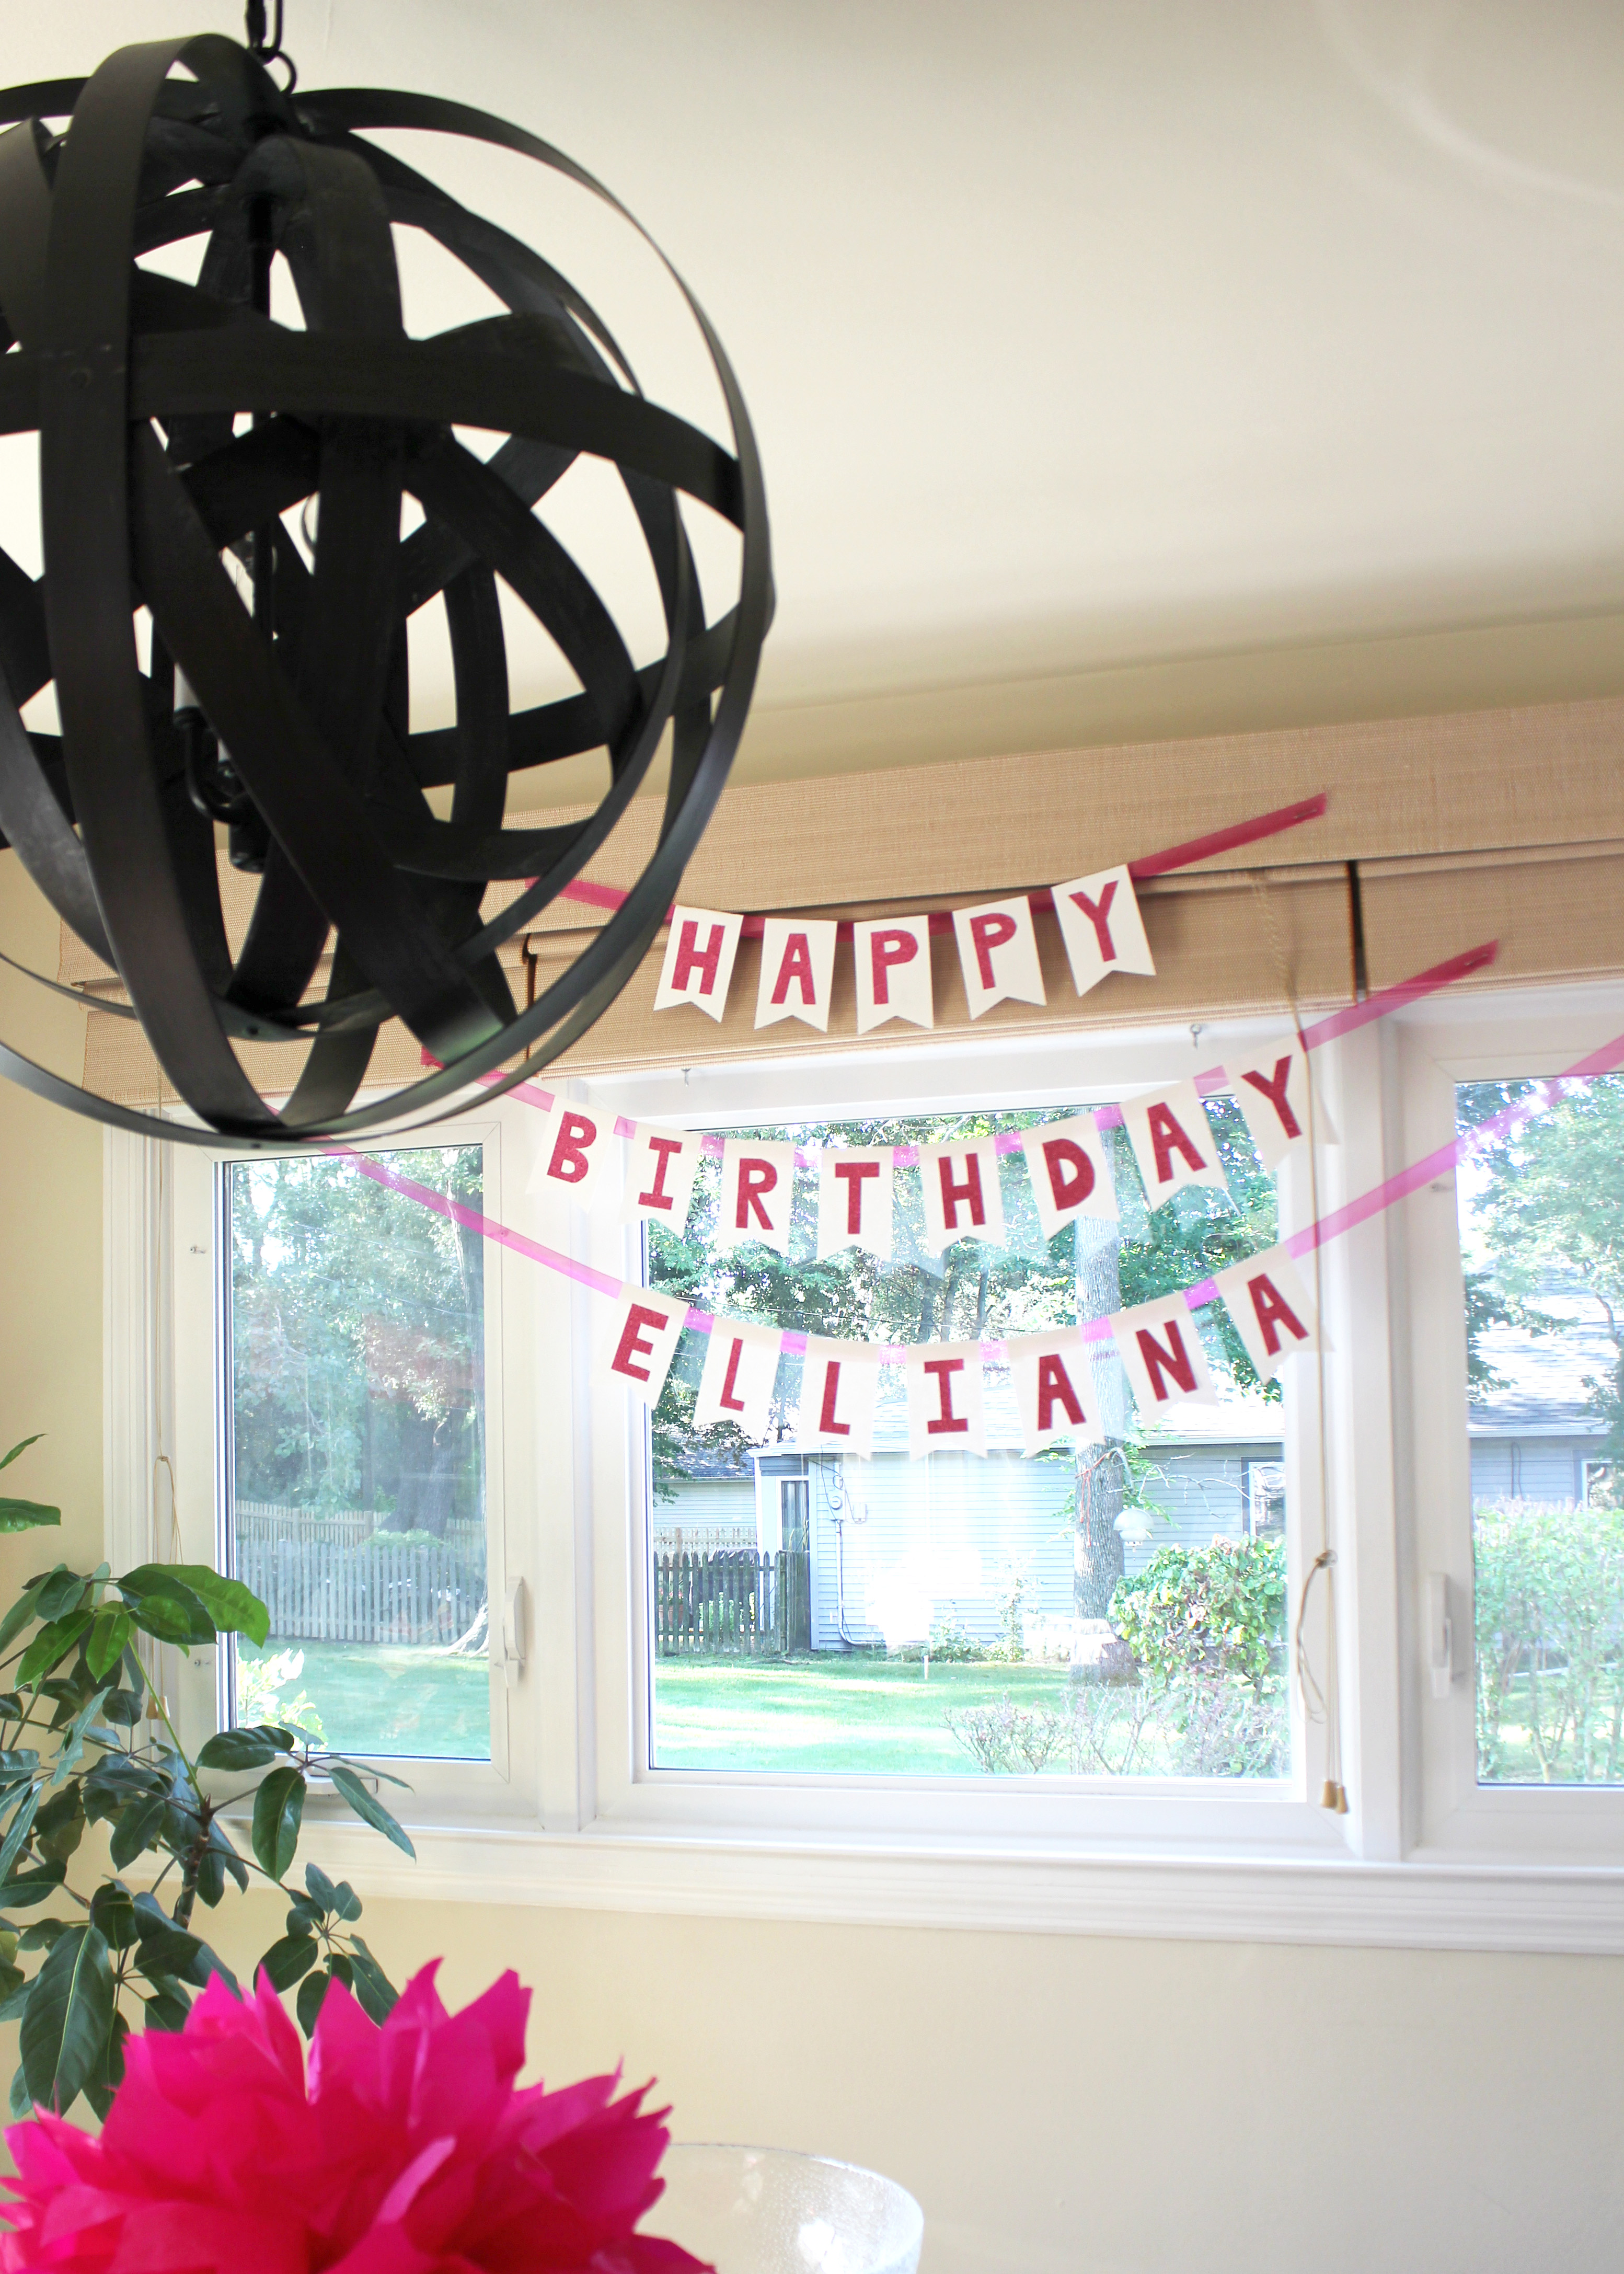
This is the easiest possible banner to make. For me, free handing letters come naturally, so I simply drew out my letters right onto my glitter paper (P.S. GLITTER PAPER IS SO CUTE!), and cut them out using an exacto knife and ruler. But you could also choose a font on the computer, and simply trace, then cut with scissors, too.
I decided I didn’t want to get fancy with the background, so I opted to cut a bunch of rectangles, and then I just glued my letters in the center. Then, to give them a more “banner-like” effect, I cut a small triangle into the bottom center of each to achieve the look. Super simple. Super cute.
The least professional part of all: To string them, I folded over a bit of the top of my paper (in my case, about a 1/2 inch) and taped that directly to my ribbon. TIP: If you don’t want your letters to shift on the ribbon, make sure you have a little ribbon peeking through so the tape connects directly to it, preventing the rectangle from sliding around.
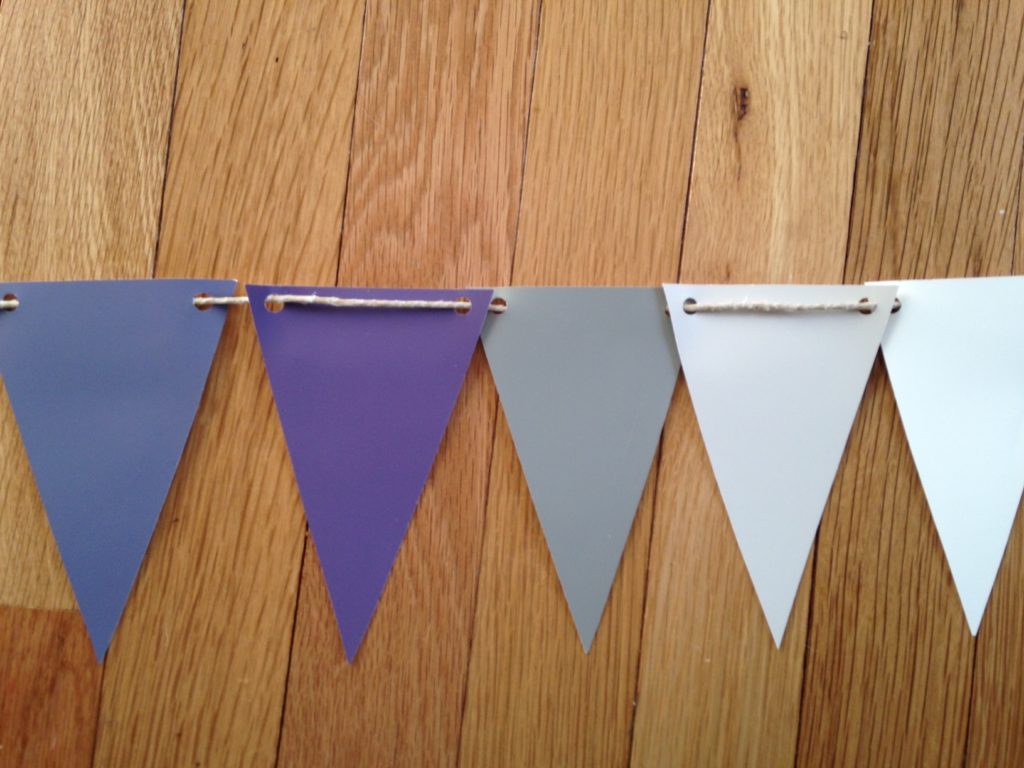
Supplies needed: Guts (to “borrow” swatches from paint store) + paint swatches + hole punch + scissors/exacto/shape cutter + hemp or other material to hang.
Paint swatches make awesome banners. The toughest part is getting up the courage to steal (I mean, take) a bunch of paint swatches from your local paint store. TIP: Plan out your color pattern beforehand, so you’re not second-guessing yourself mid-stealing.
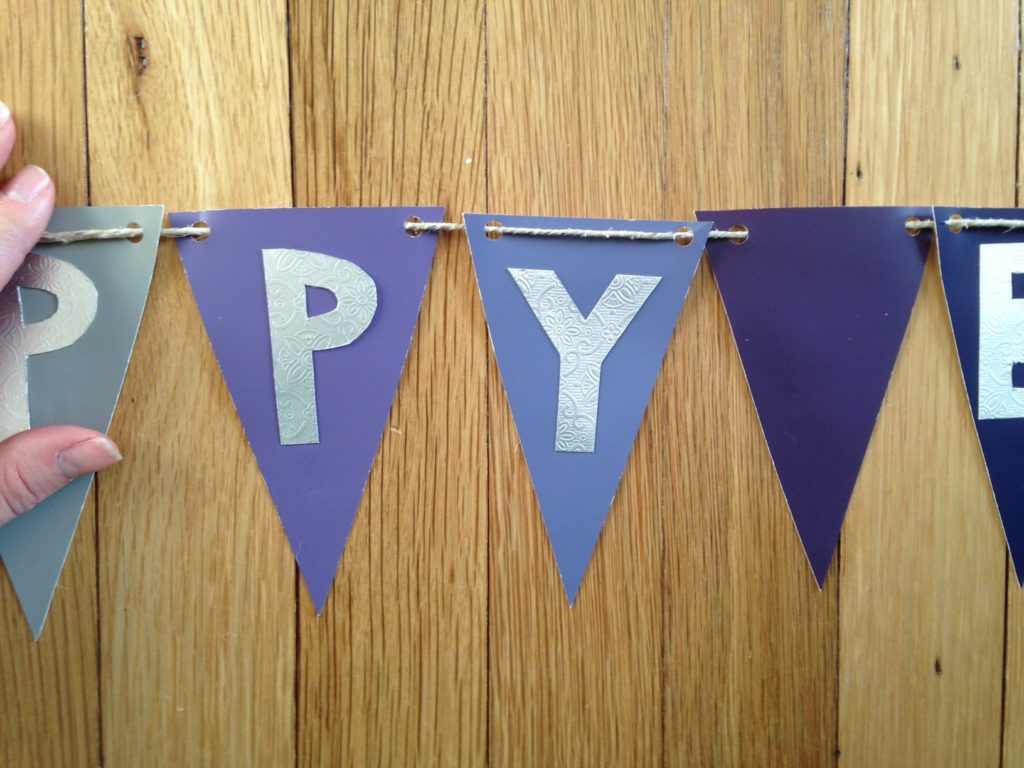
In my case, I created this for my daughter’s b-day, and since her favorite color is purple, purple was my theme. I opted for an ombre-like effect, with purple as my first color, and white as my last. Then, I just picked a few colors in between those (different shades of purples, greys & whites).
To cut my triangles, I went old-school (as I usually do): Ruler & exacto knife. But those smarter than me (ha) probably have a shape cutter that would make this job a bit quicker. Me? I’m too cheap to buy tools that are fairly easy to do myself, so exacto it was. As you can see from below, to string them together I punched holes in the top 2 corners of each triangle, and simply weaved my hemp through.
I liked the outcome so much, I made a couple. Some with plain triangles, and some with lettering.

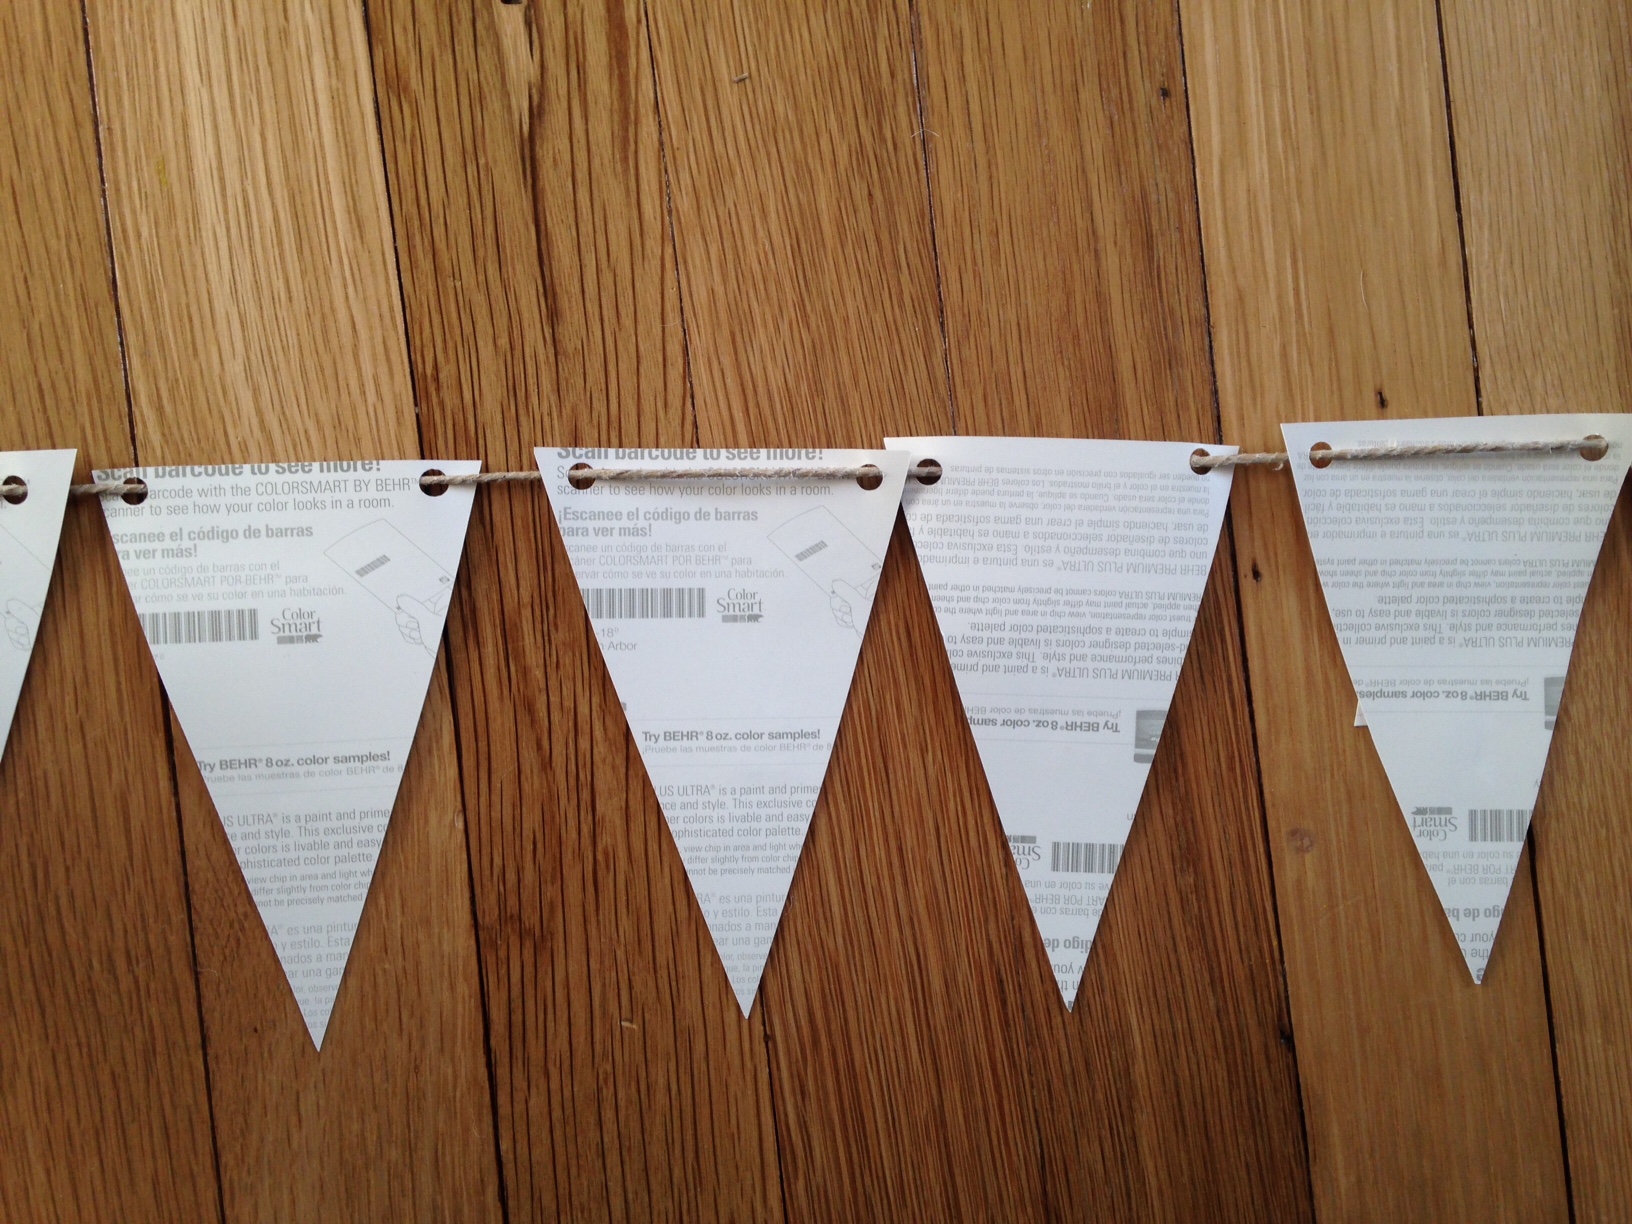
(Proof that these are paint swatches!)
Supplies needed: Tissue paper + scissors + paper clip + ribbon/fishing line to hang.
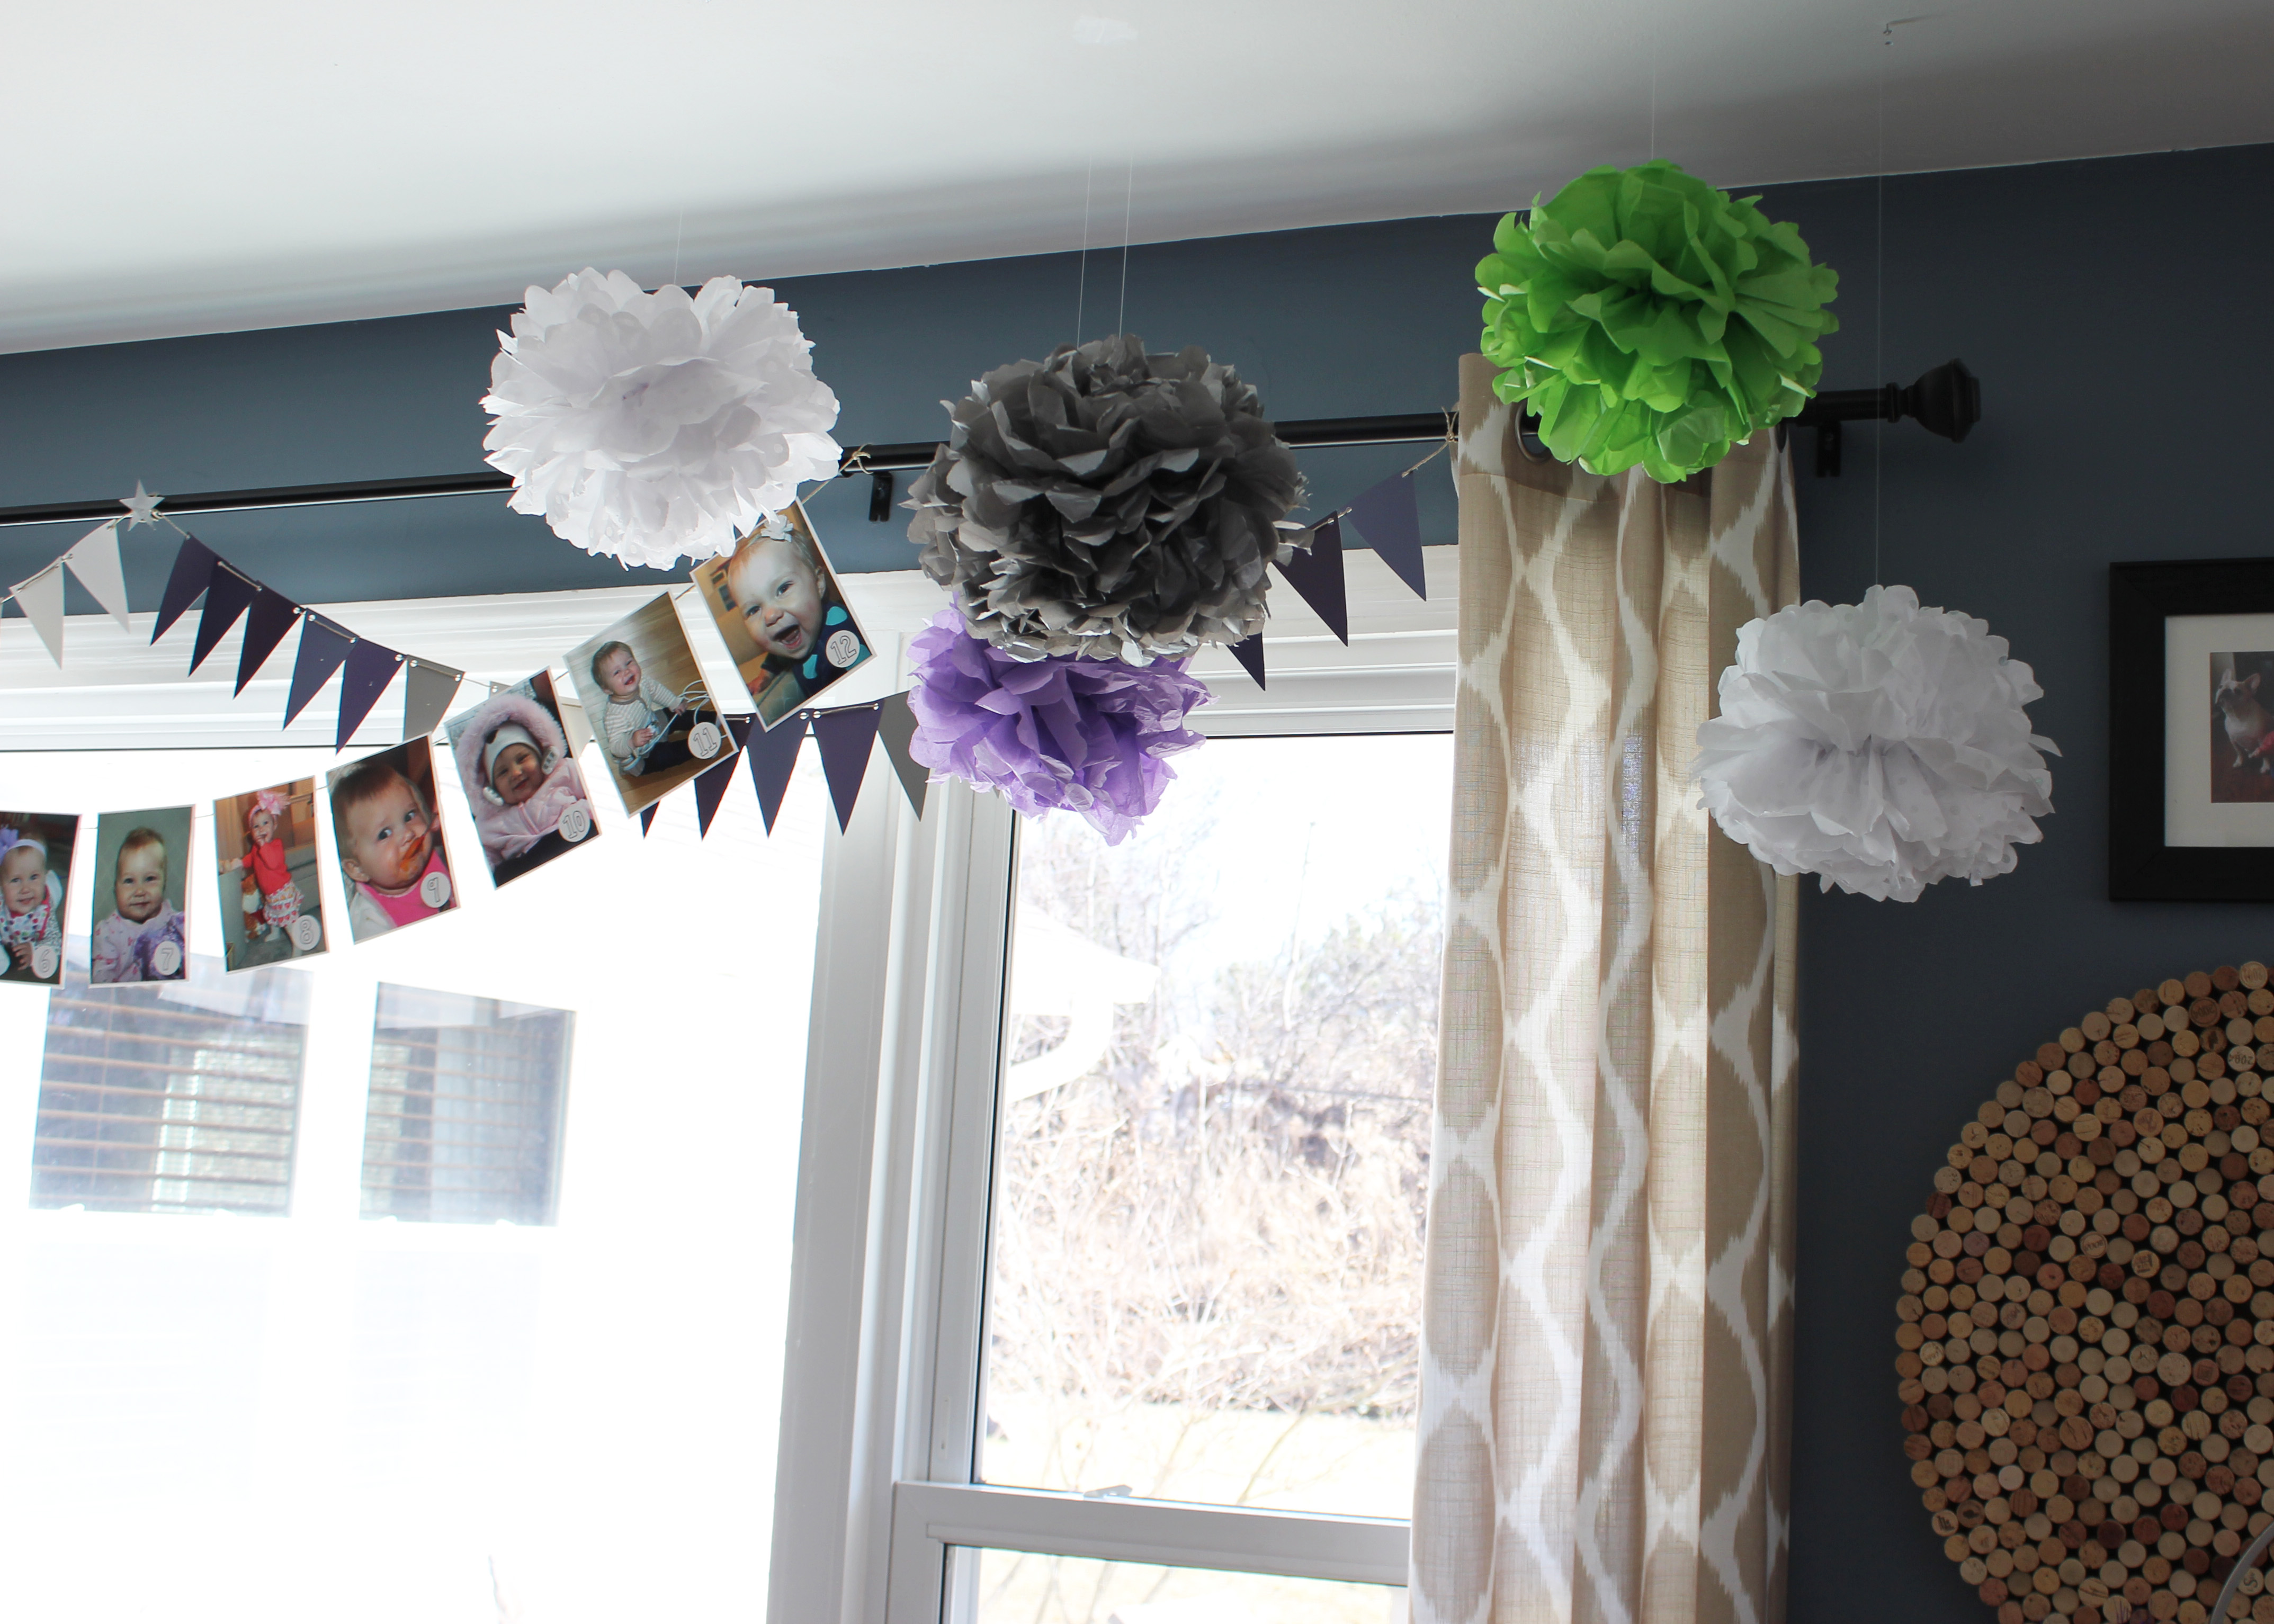
I make these pom poms ALL THE TIME. First, they are super simple, and second, I really think they jazz up a room.
To make, stack a couple pieces of tissue paper, one on top of the other. How many pieces you use, and how long and wide they are is what will determine your final pom size. TIP: All I can say is experiment here to decide what size you prefer.
Next, fold your pile of tissue paper accordion style (at 1-inch intervals). Once done, take your scissors, and shape each end the way you want. You can cut the ends into a point, or round them, or simply leave as is. Rounder edges look a bit more “flowery” (see pics below) while cutting points is a little more modern (see pic above).
Then, secure the middle. I typically use a paper clip that I unbend until it’s straight, and then I wrap it around my center, looping the very end, so it acts as a “hook” when I’m ready to hang . You can also just staple the center. That works too, but then when it comes time to hang, you’ll have to figure out how you will do that. The paper clip “hook” is my preference.
Once the center is secure, it’s time to shape. All this entails is pulling your pieces of tissue paper a part in all directions. TIP: Don’t fret if you tear the tissue paper while doing this. In the end, you won’t even notice.
That’s it! All that’s left is to hang.
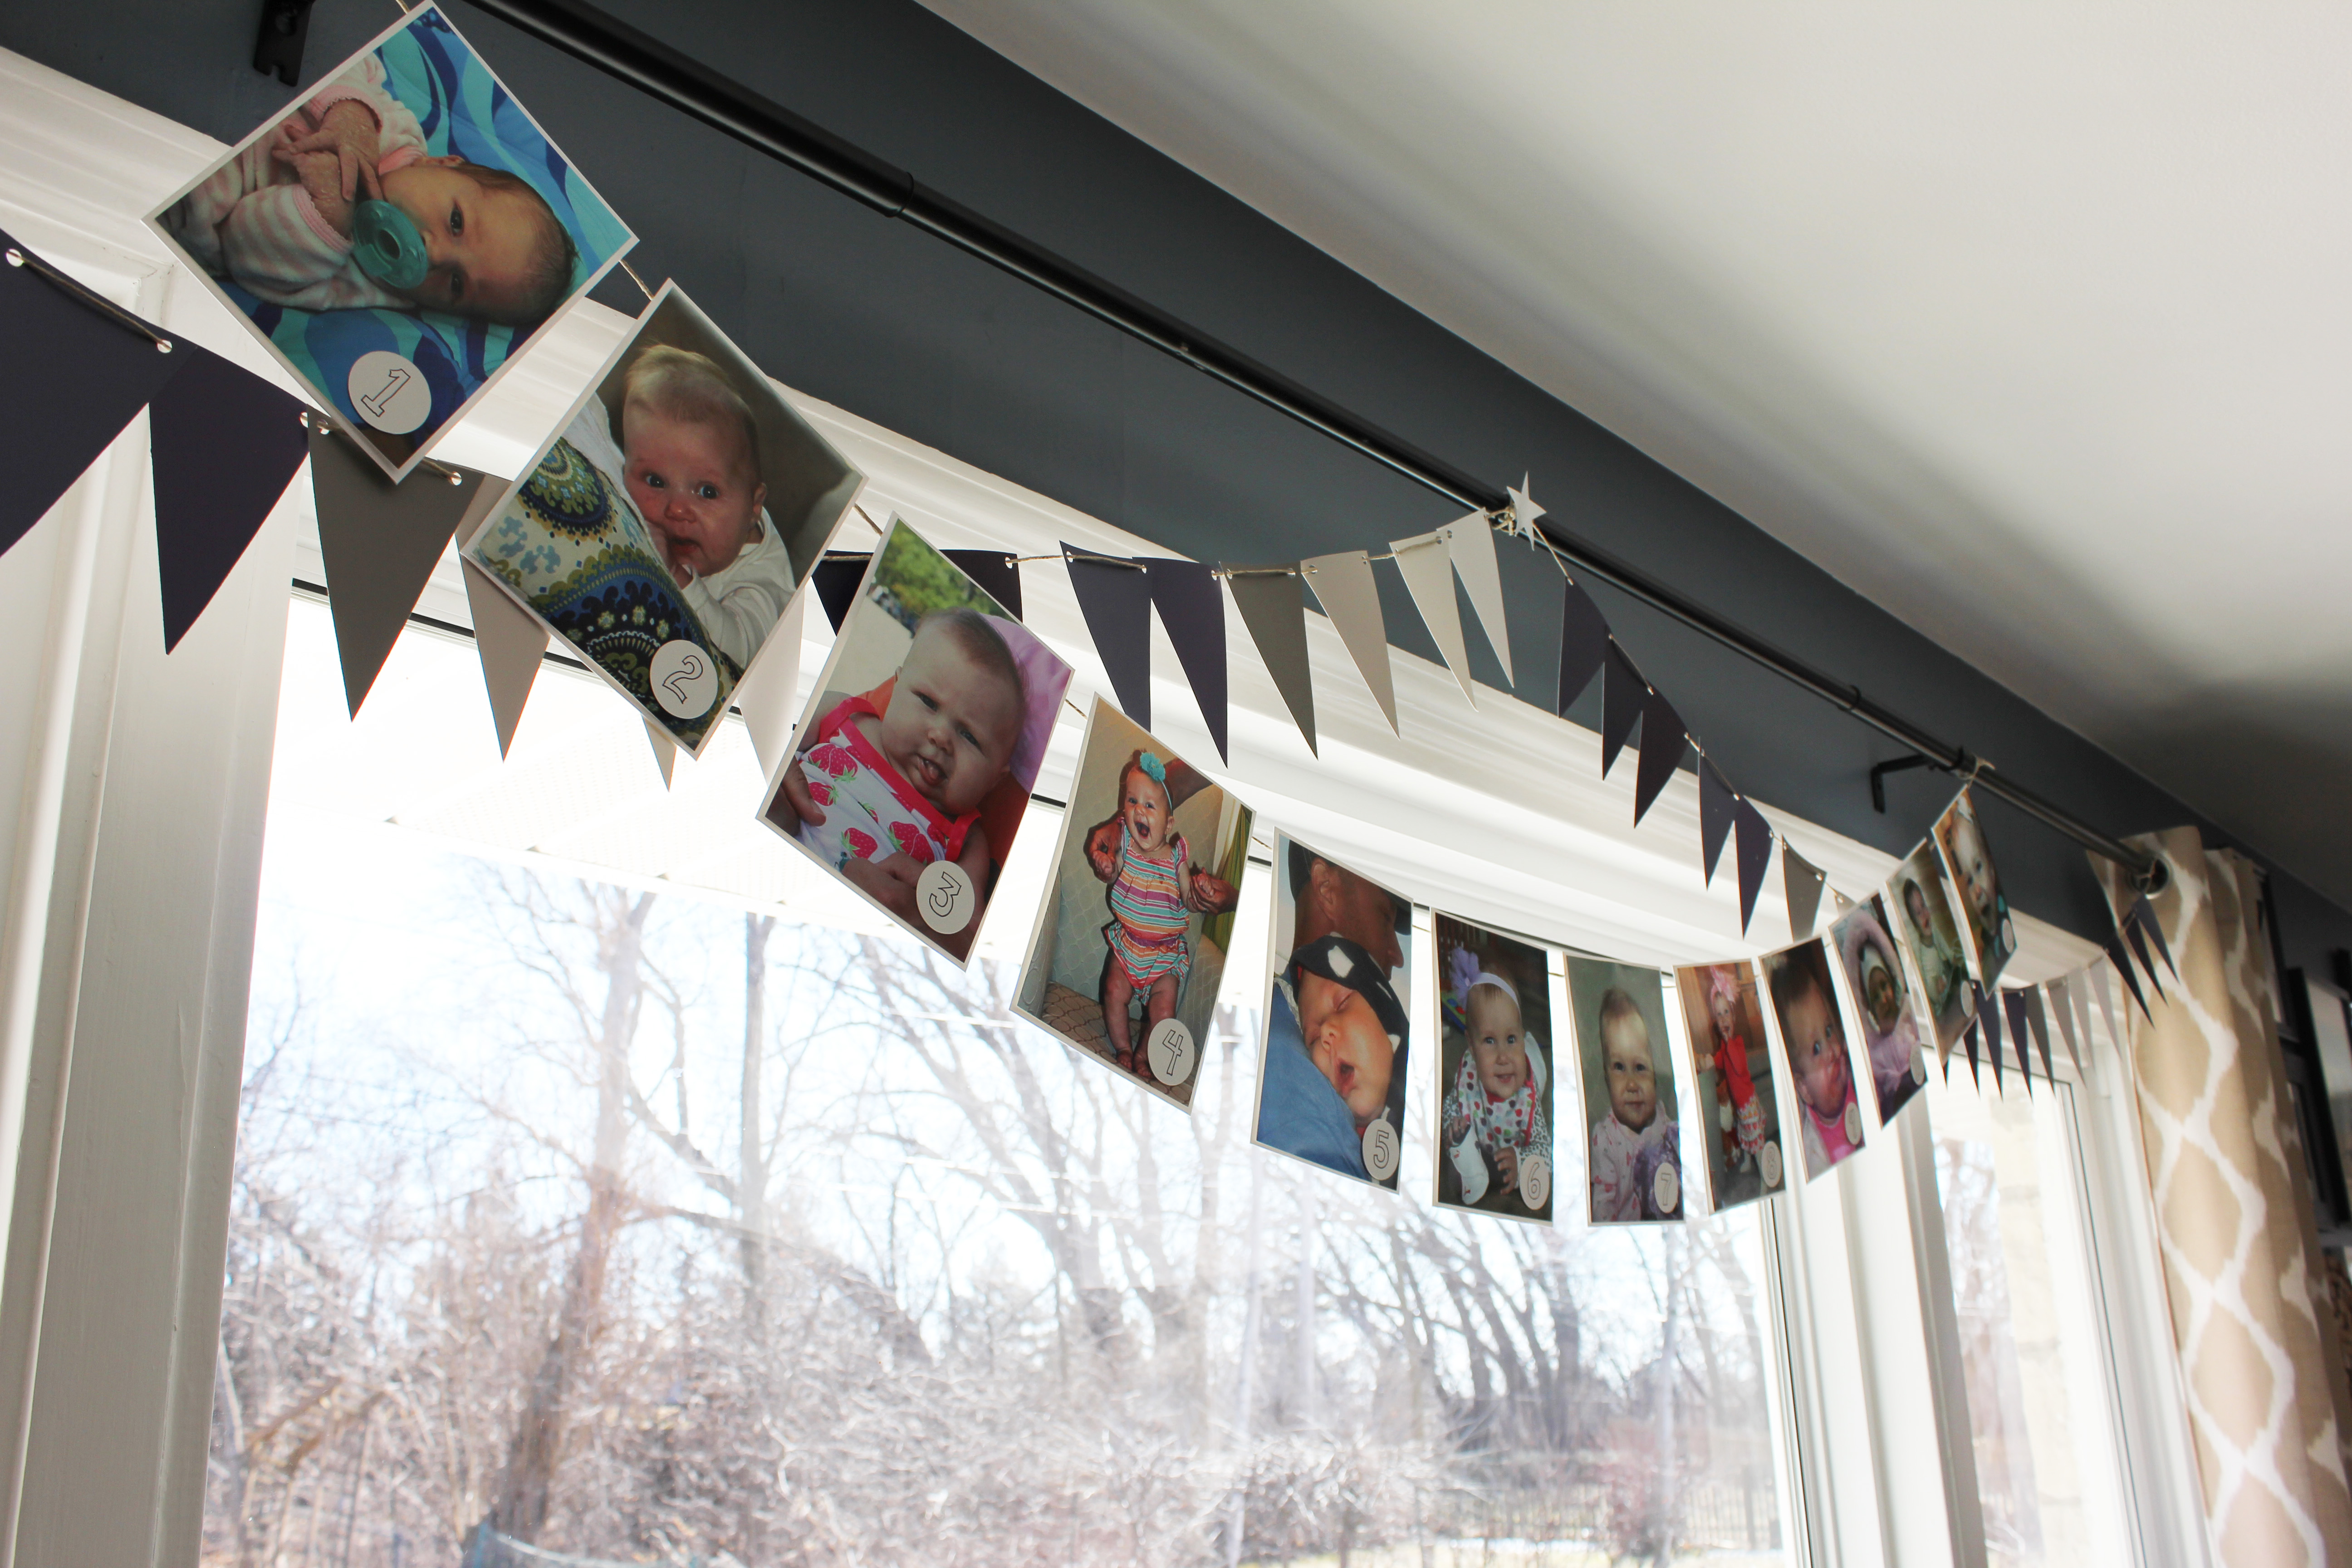
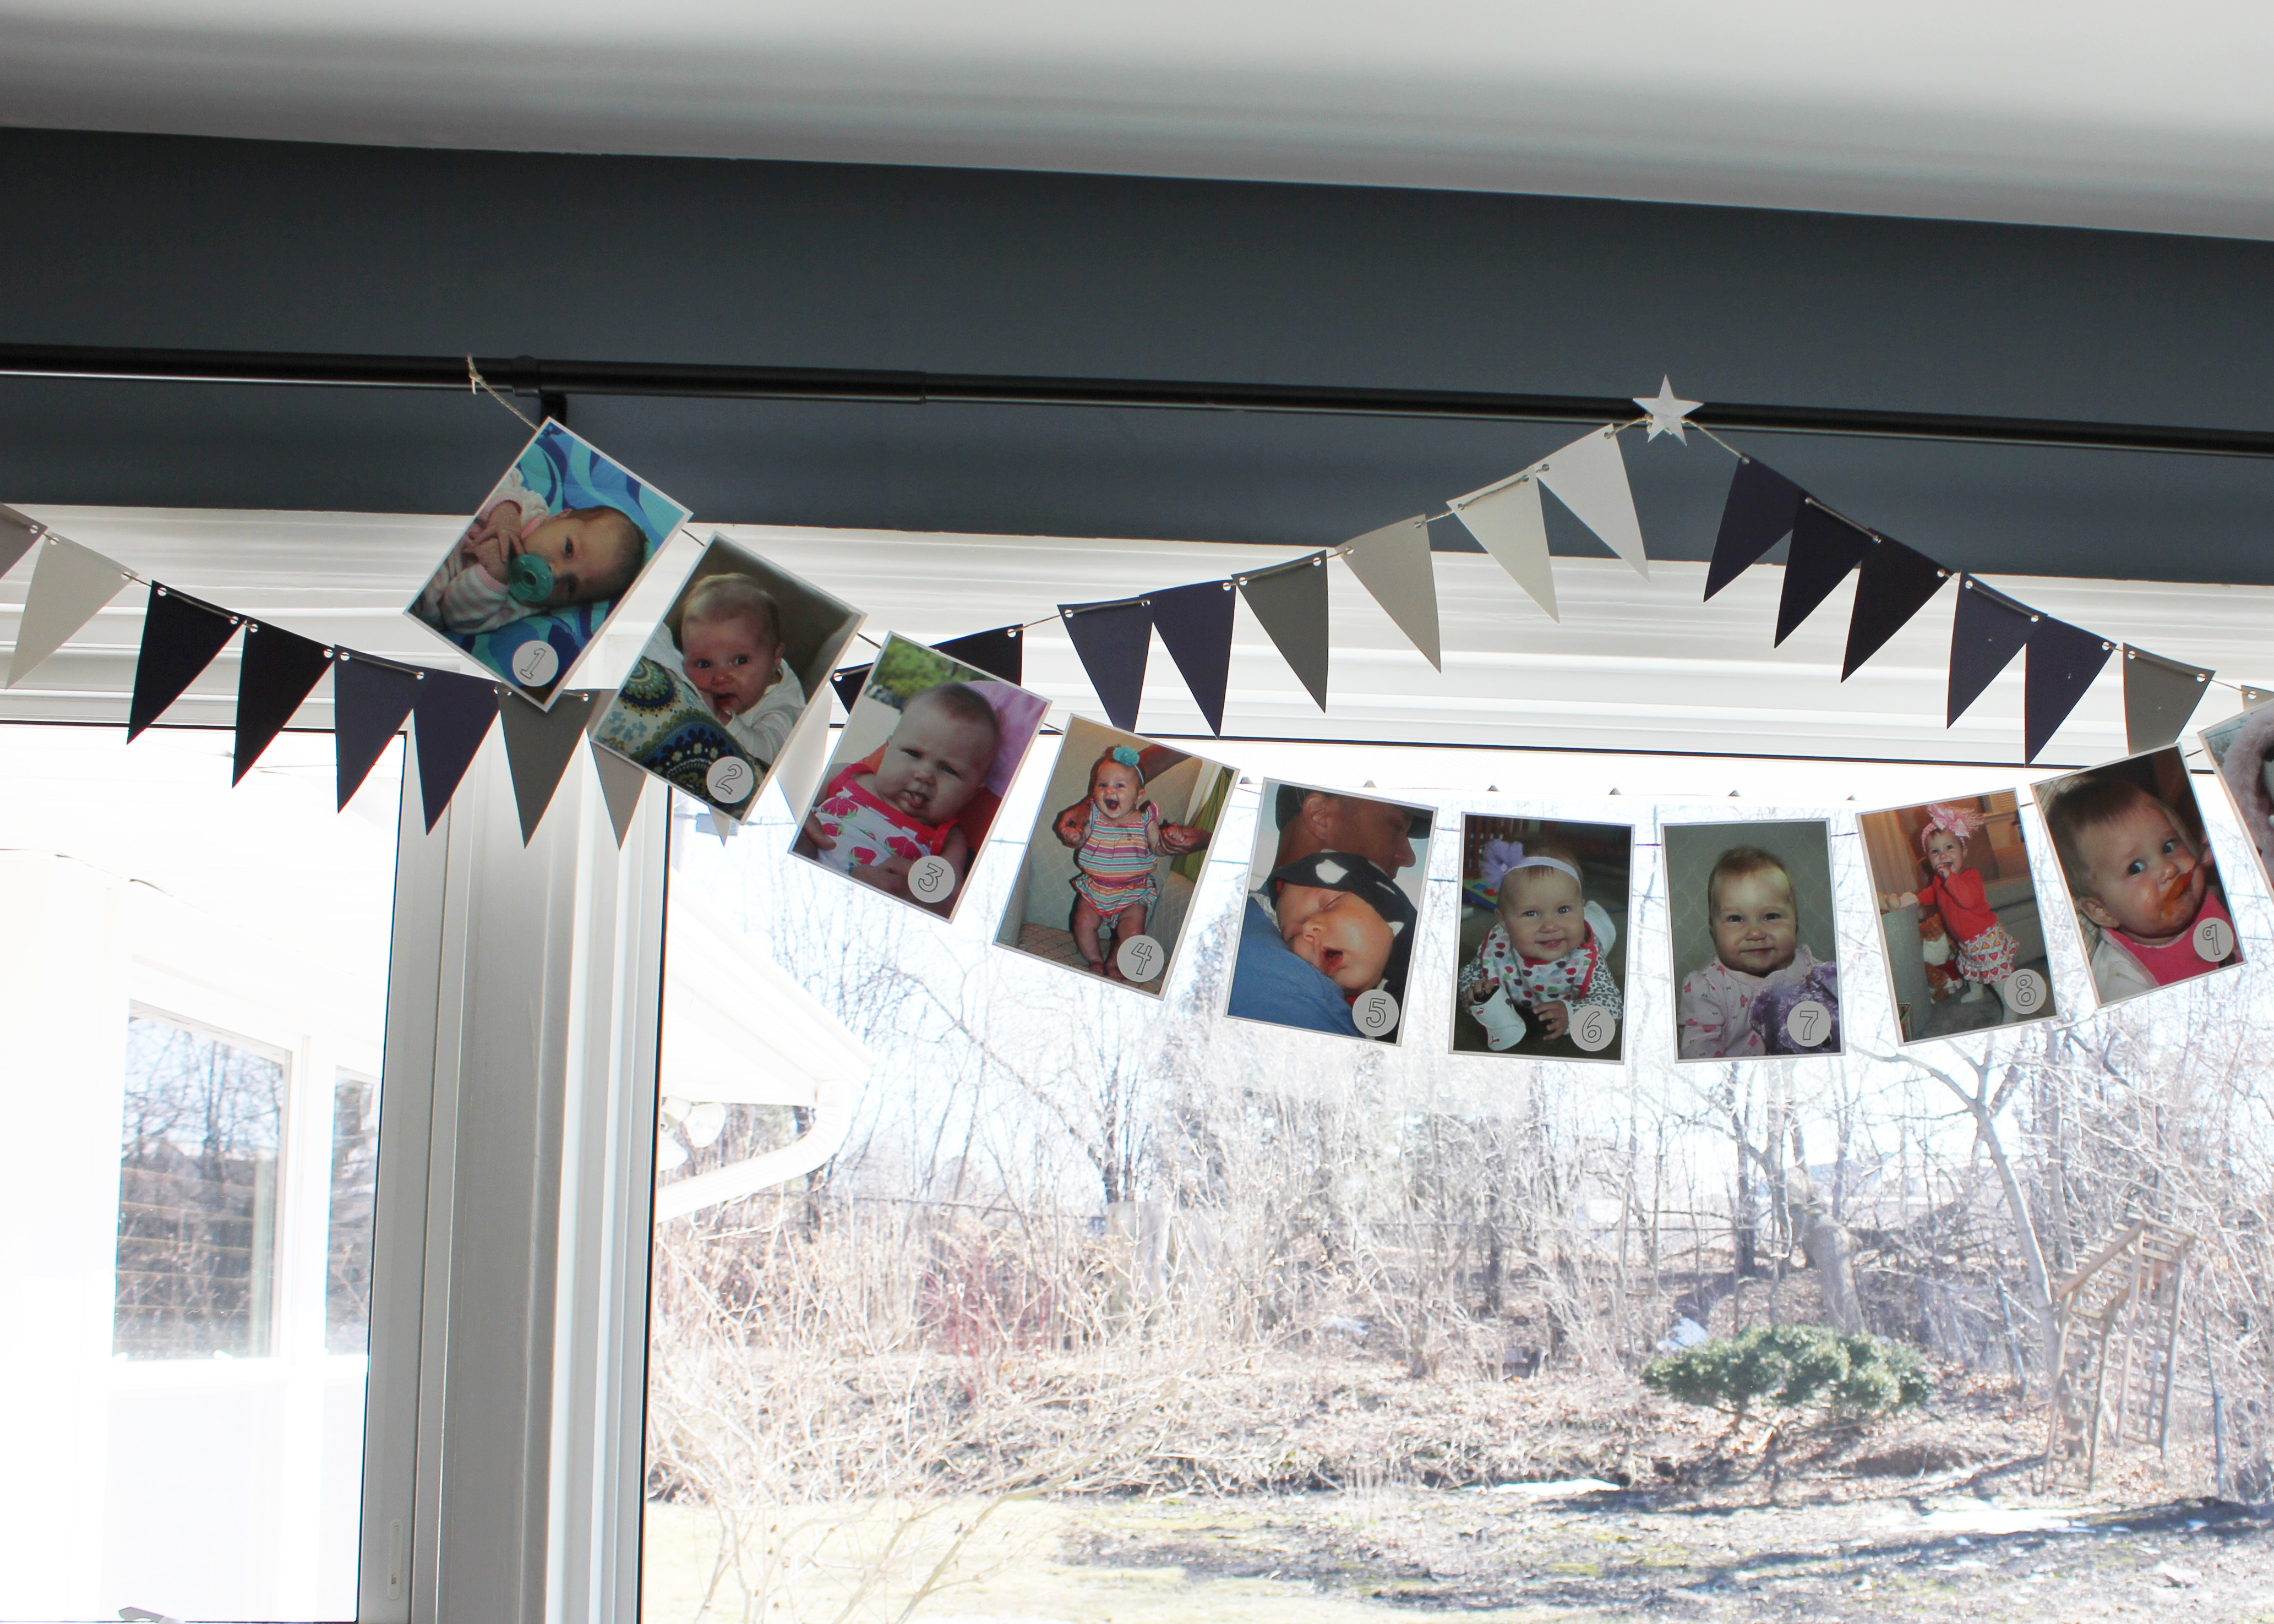
Supplies needed: Photographs + scissors + paper + pen/marker + string/hemp/ribbon/wire/fishing line to hang. A shape puncher is also a good tool to have, but like always, not 100% necessary.
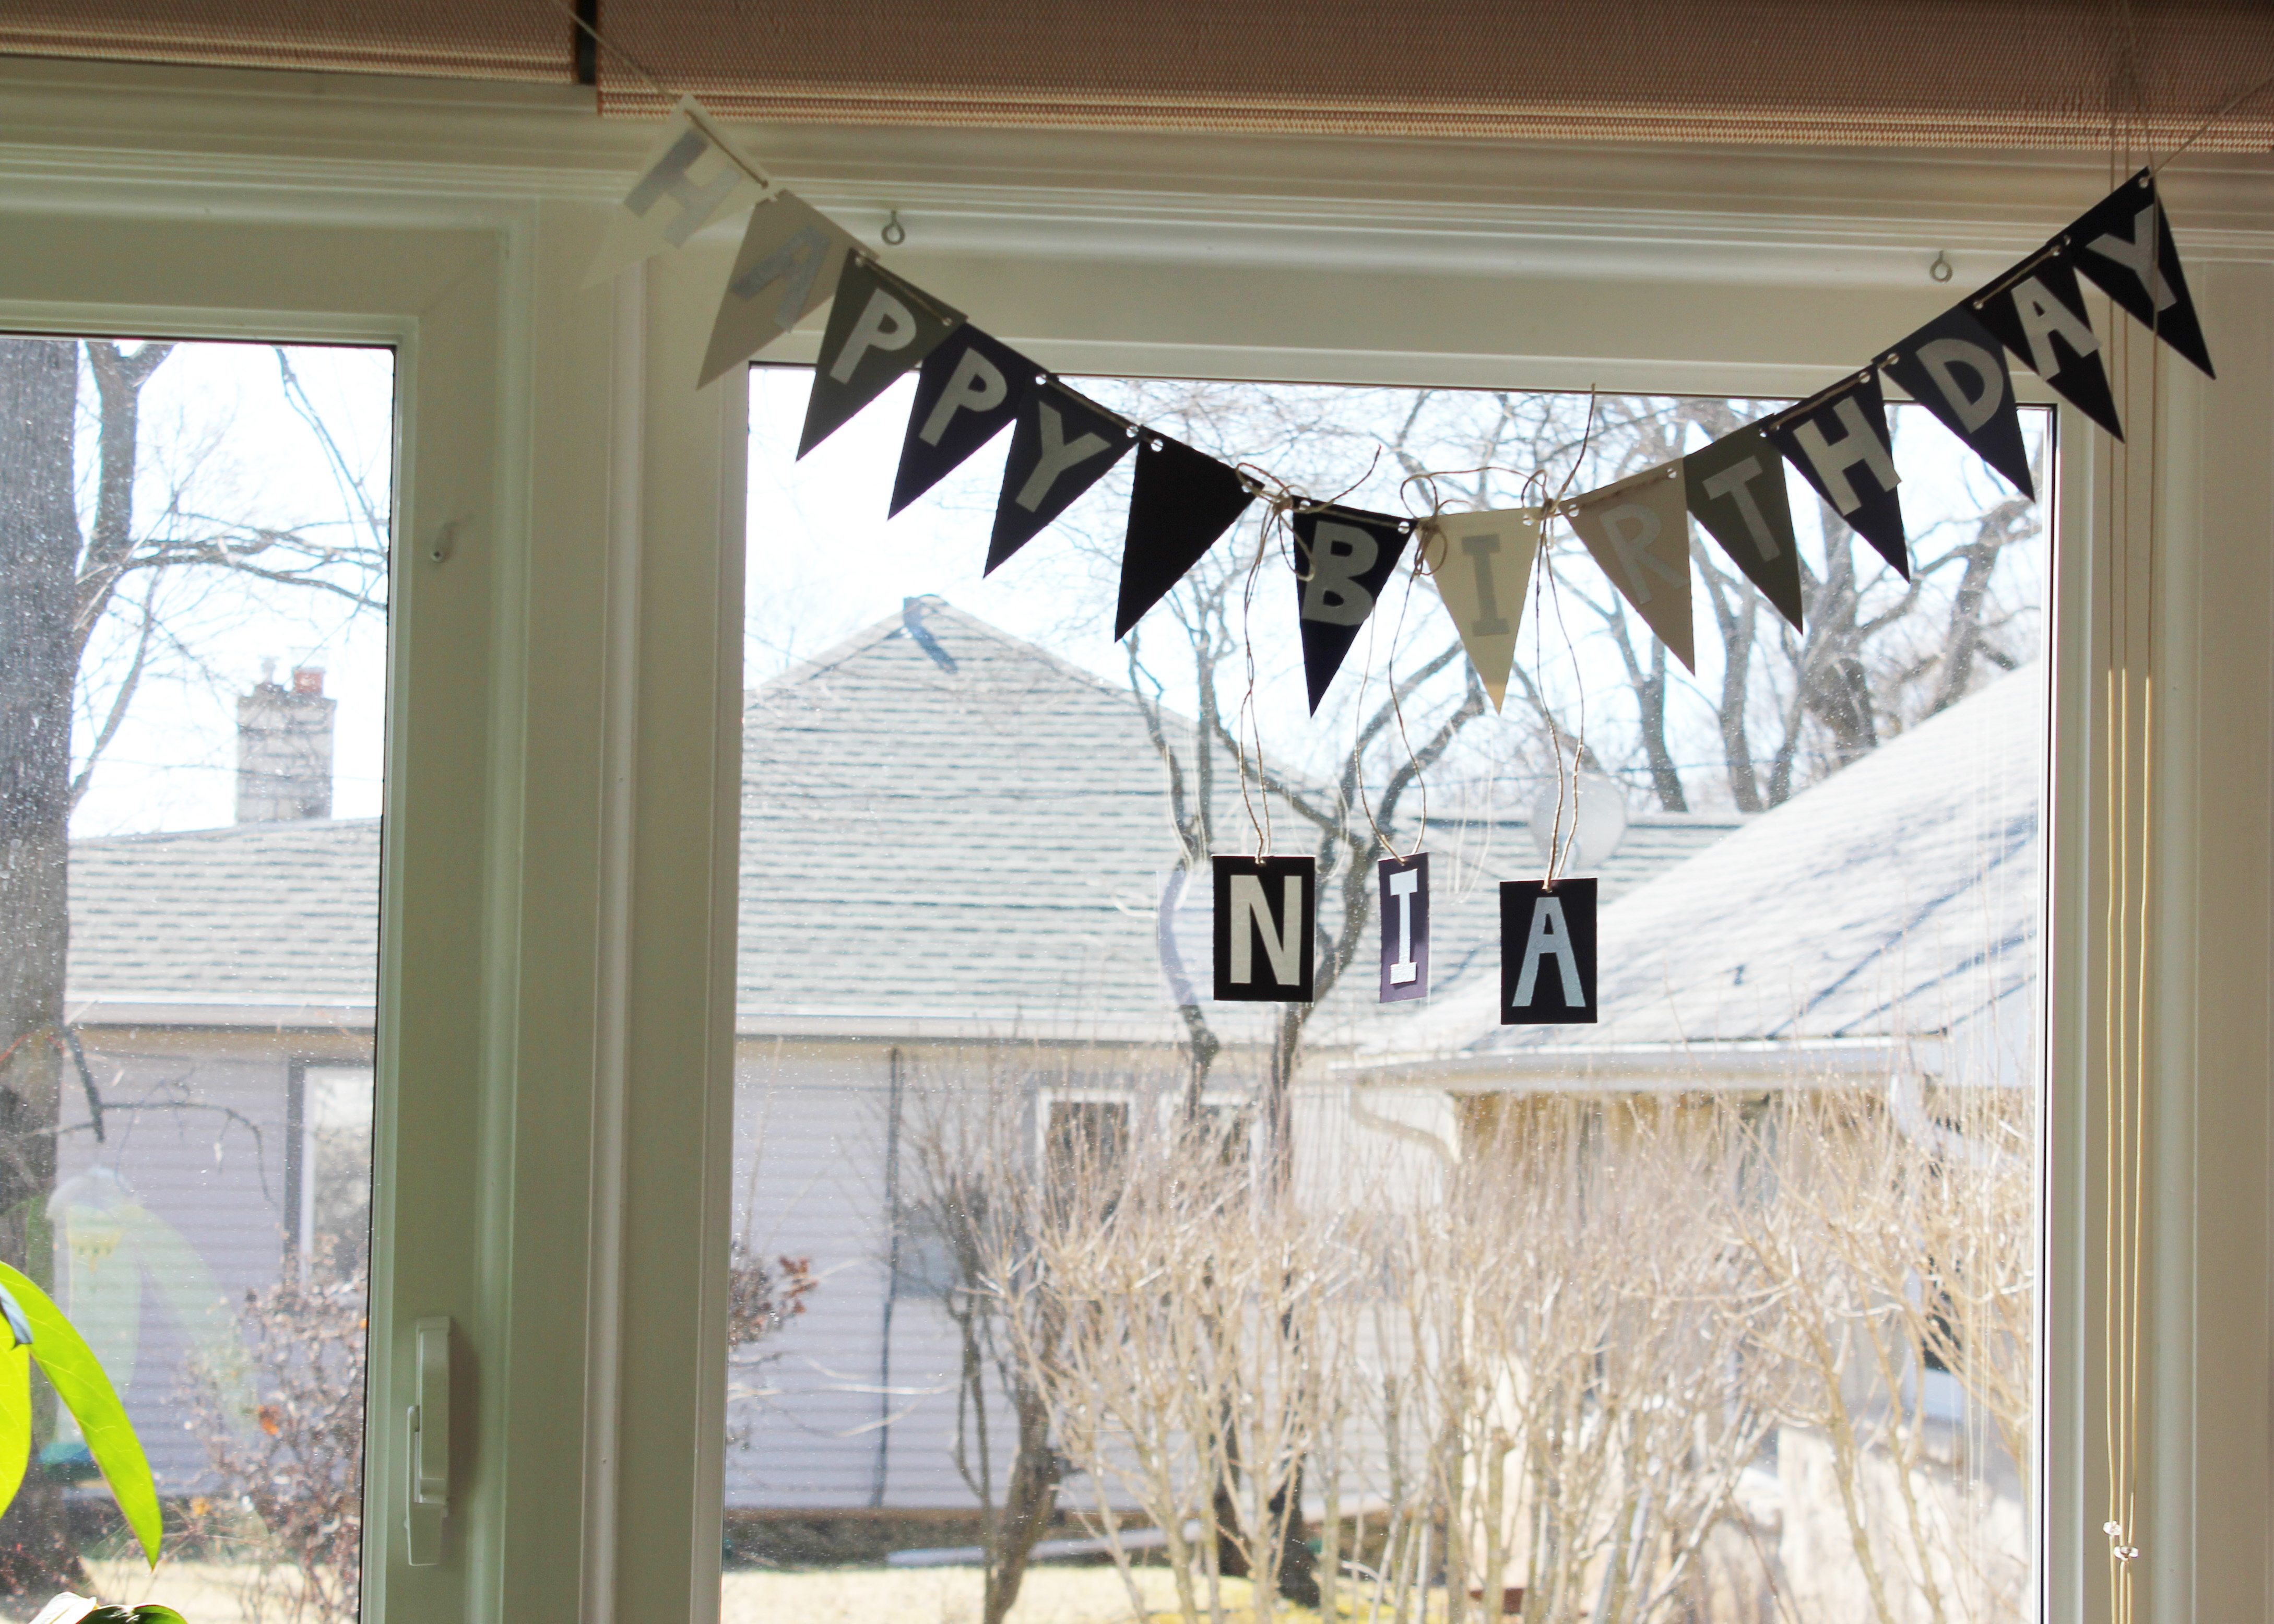
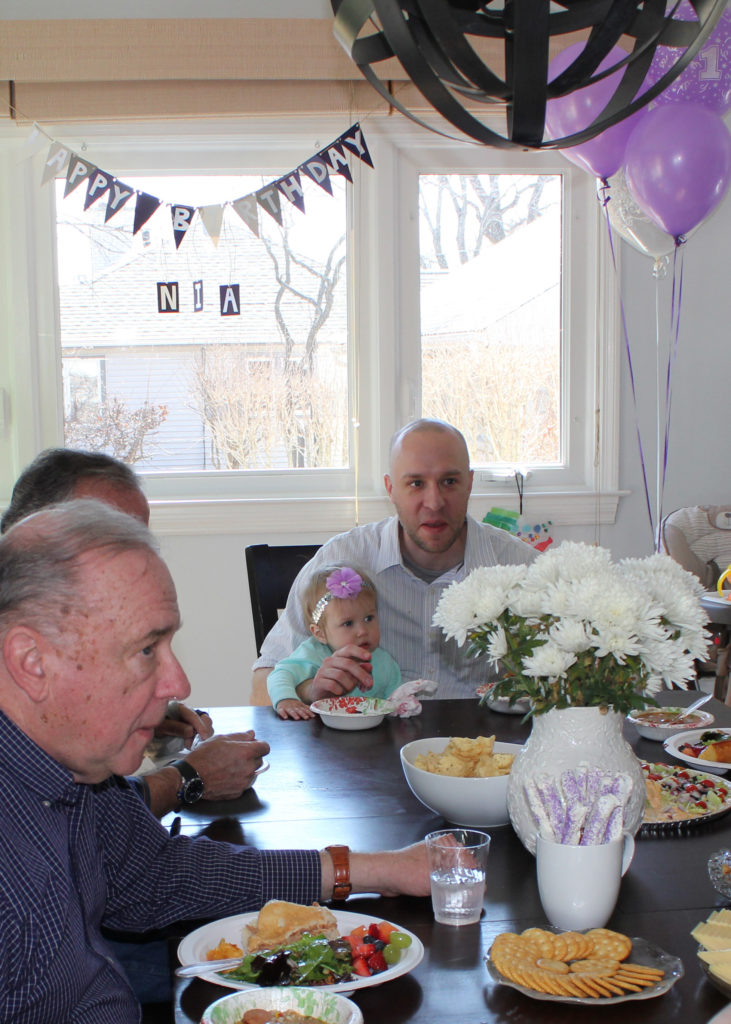
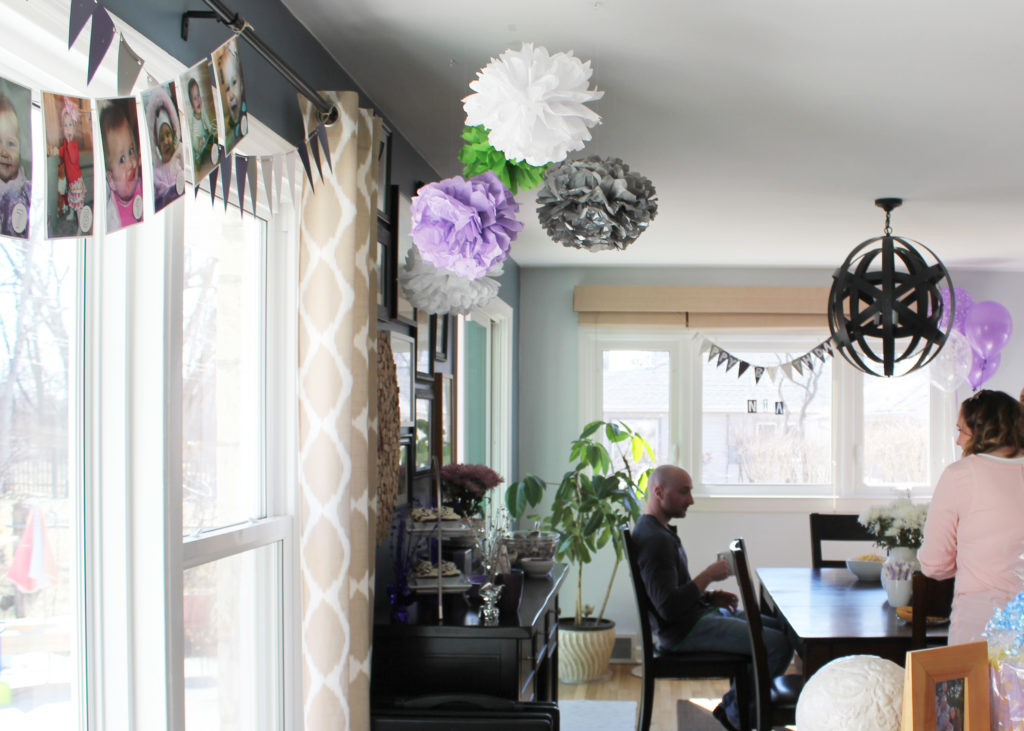
I love banners like these for birthdays, because they serve as a quick glimpse into the past. This particular banner was for Nia’s first birthday, so I strung 12 photos: 1 for each month of life. The outcome is super precious, and friends and family love the invitation to reflect on the past.
There aren’t too many steps for this one. It’s really an “anything-will-be-cute” sorta thing, so do what you think looks good. In this case, I taped my photos to slightly larger rectangles of paper, then cut circles for each photo that I labeled with the proper month. That’s it. Easy peasy. TIP: Use tape instead of glue for your photos so you can use them later to frame, or for a baby book. Enjoy!


Leave a Reply