When my husband and I were expecting our first child, there’s only one thing that made us (well, more like me) more excited than the baby human part. And that’s the thought of what baby human’s nursery could look like.
The possibilities are endless. I’m actually amazed I could ever make a decision in the first place. Which brings me to my first bit of advice for new moms who are as DIY-happy as I am:
Choose what’s most important to you (i.e. Paint color, statement wall theme, artwork, etc.) and stick with it. Don’t be sucked down the rabbit hole of the interwebs, because that, my friends, is what leads to decision paralysis. Pinterest & Google, you brilliant bastards.
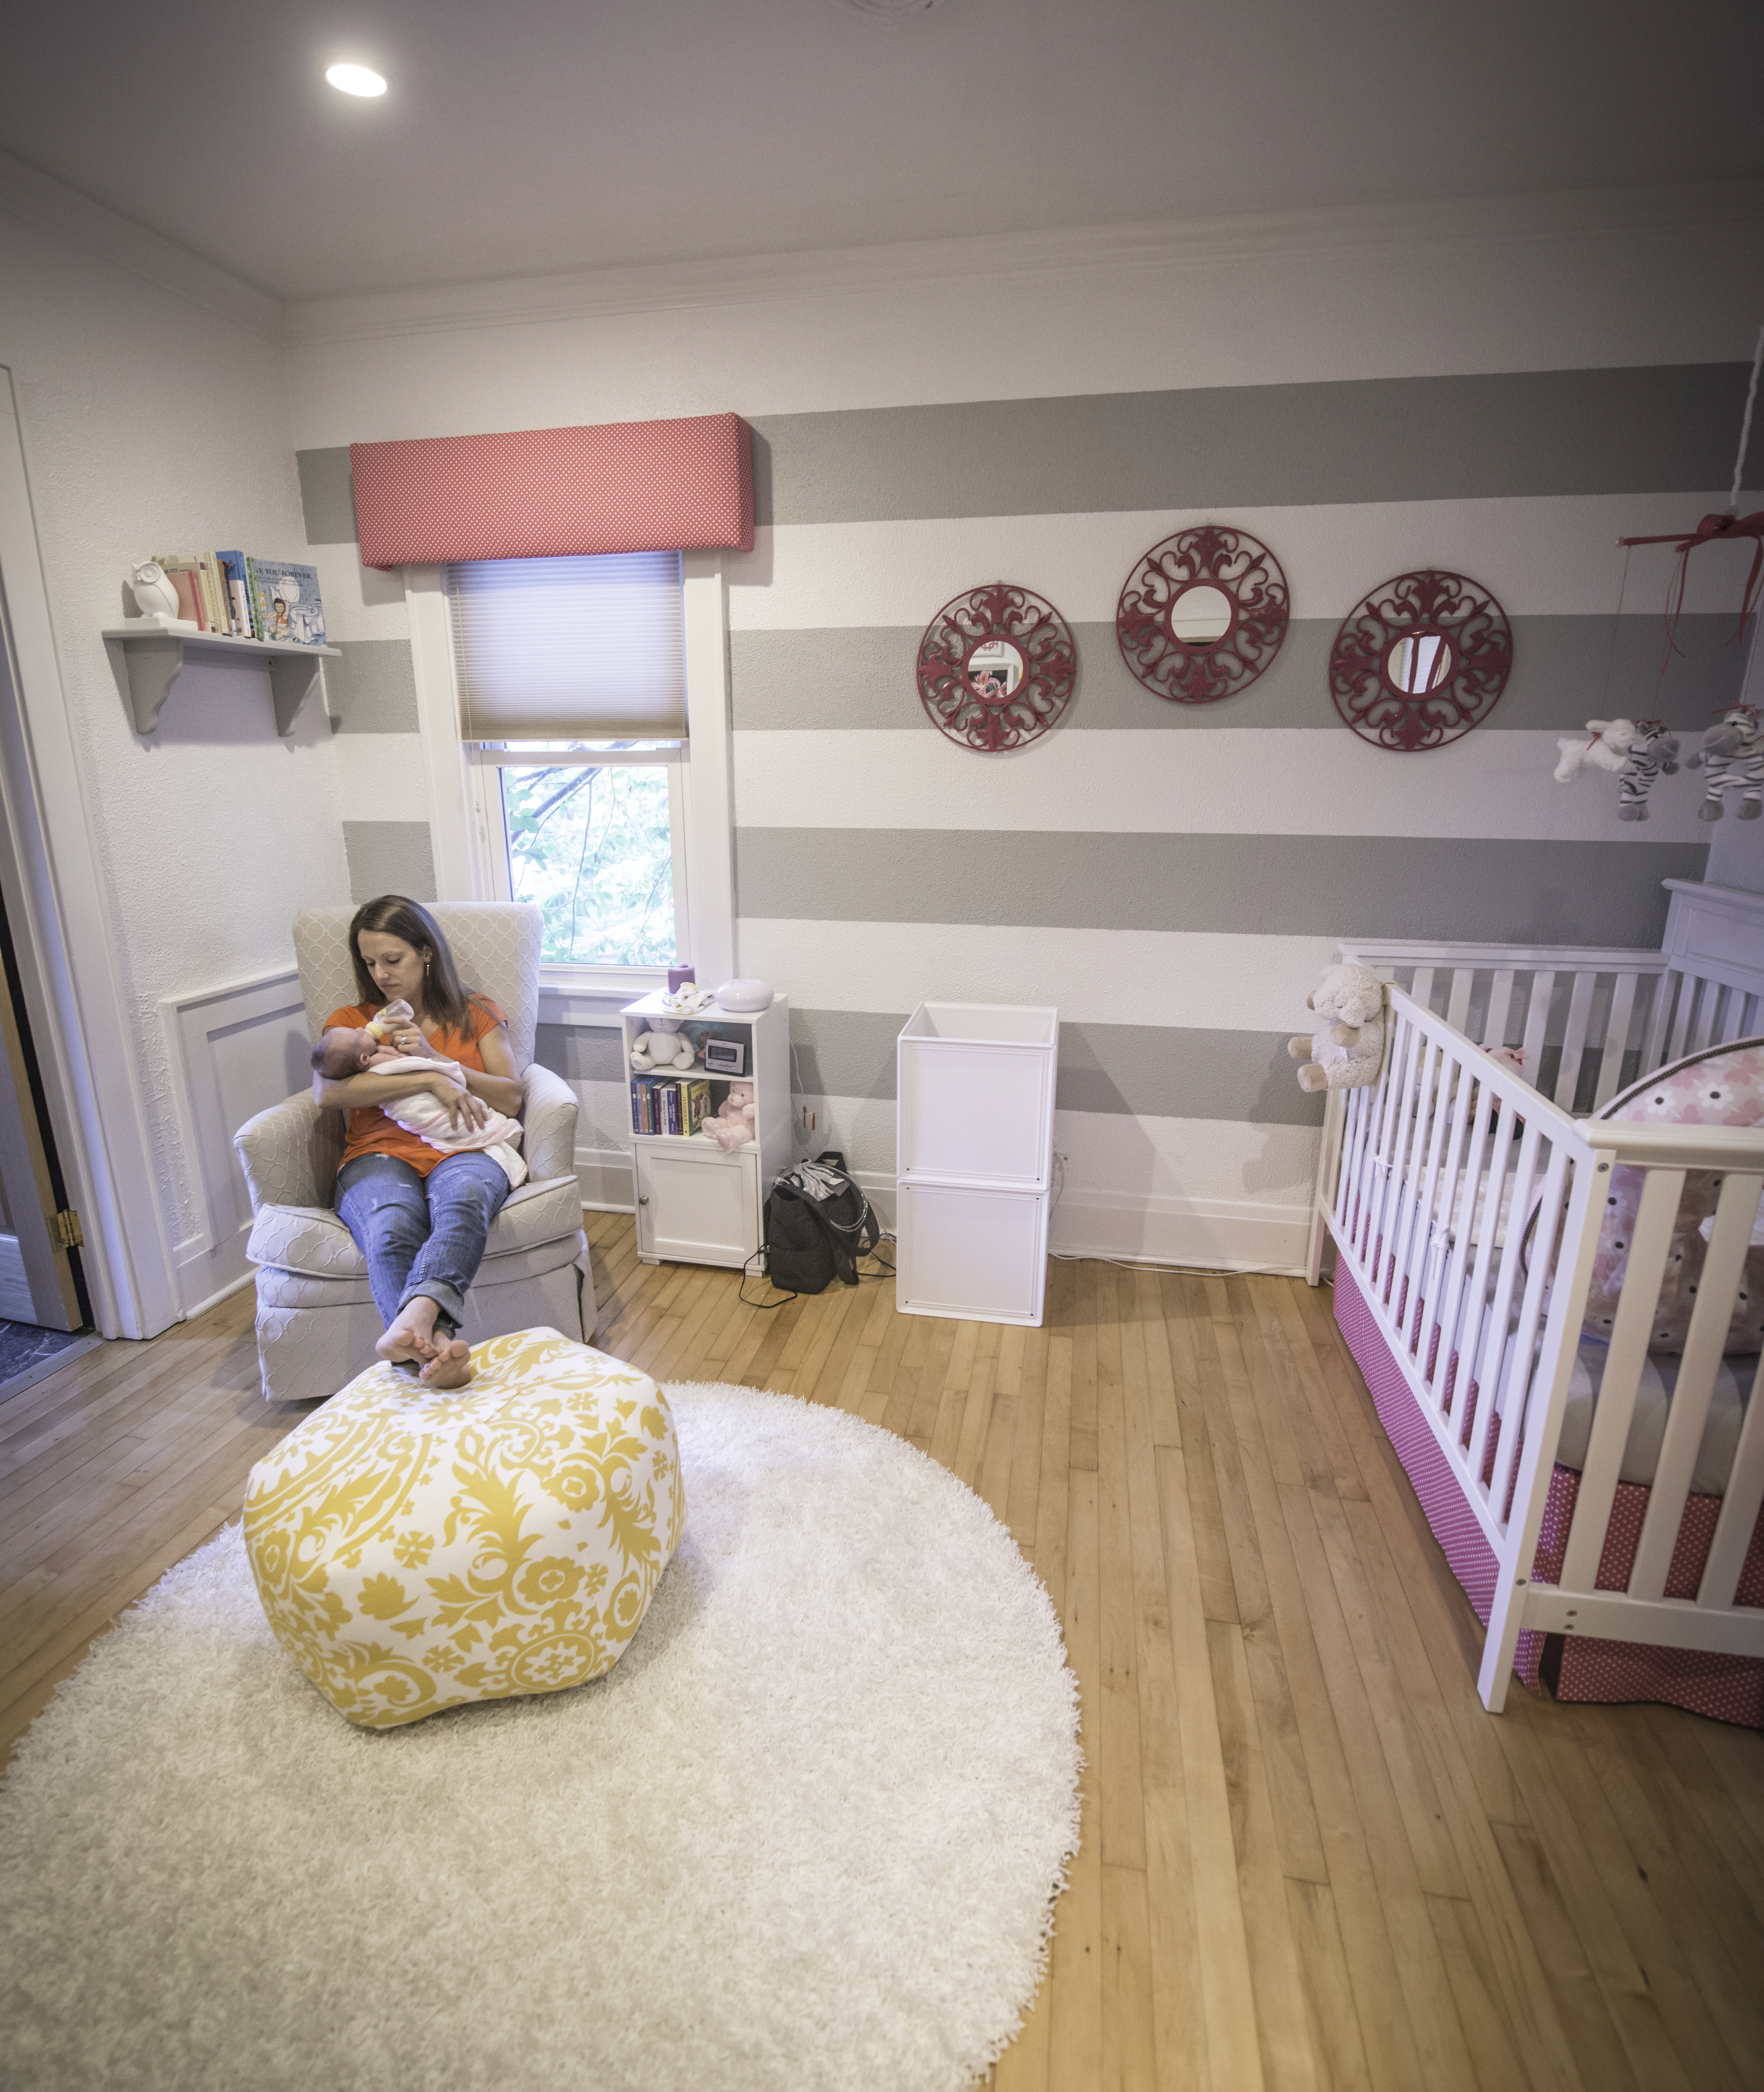
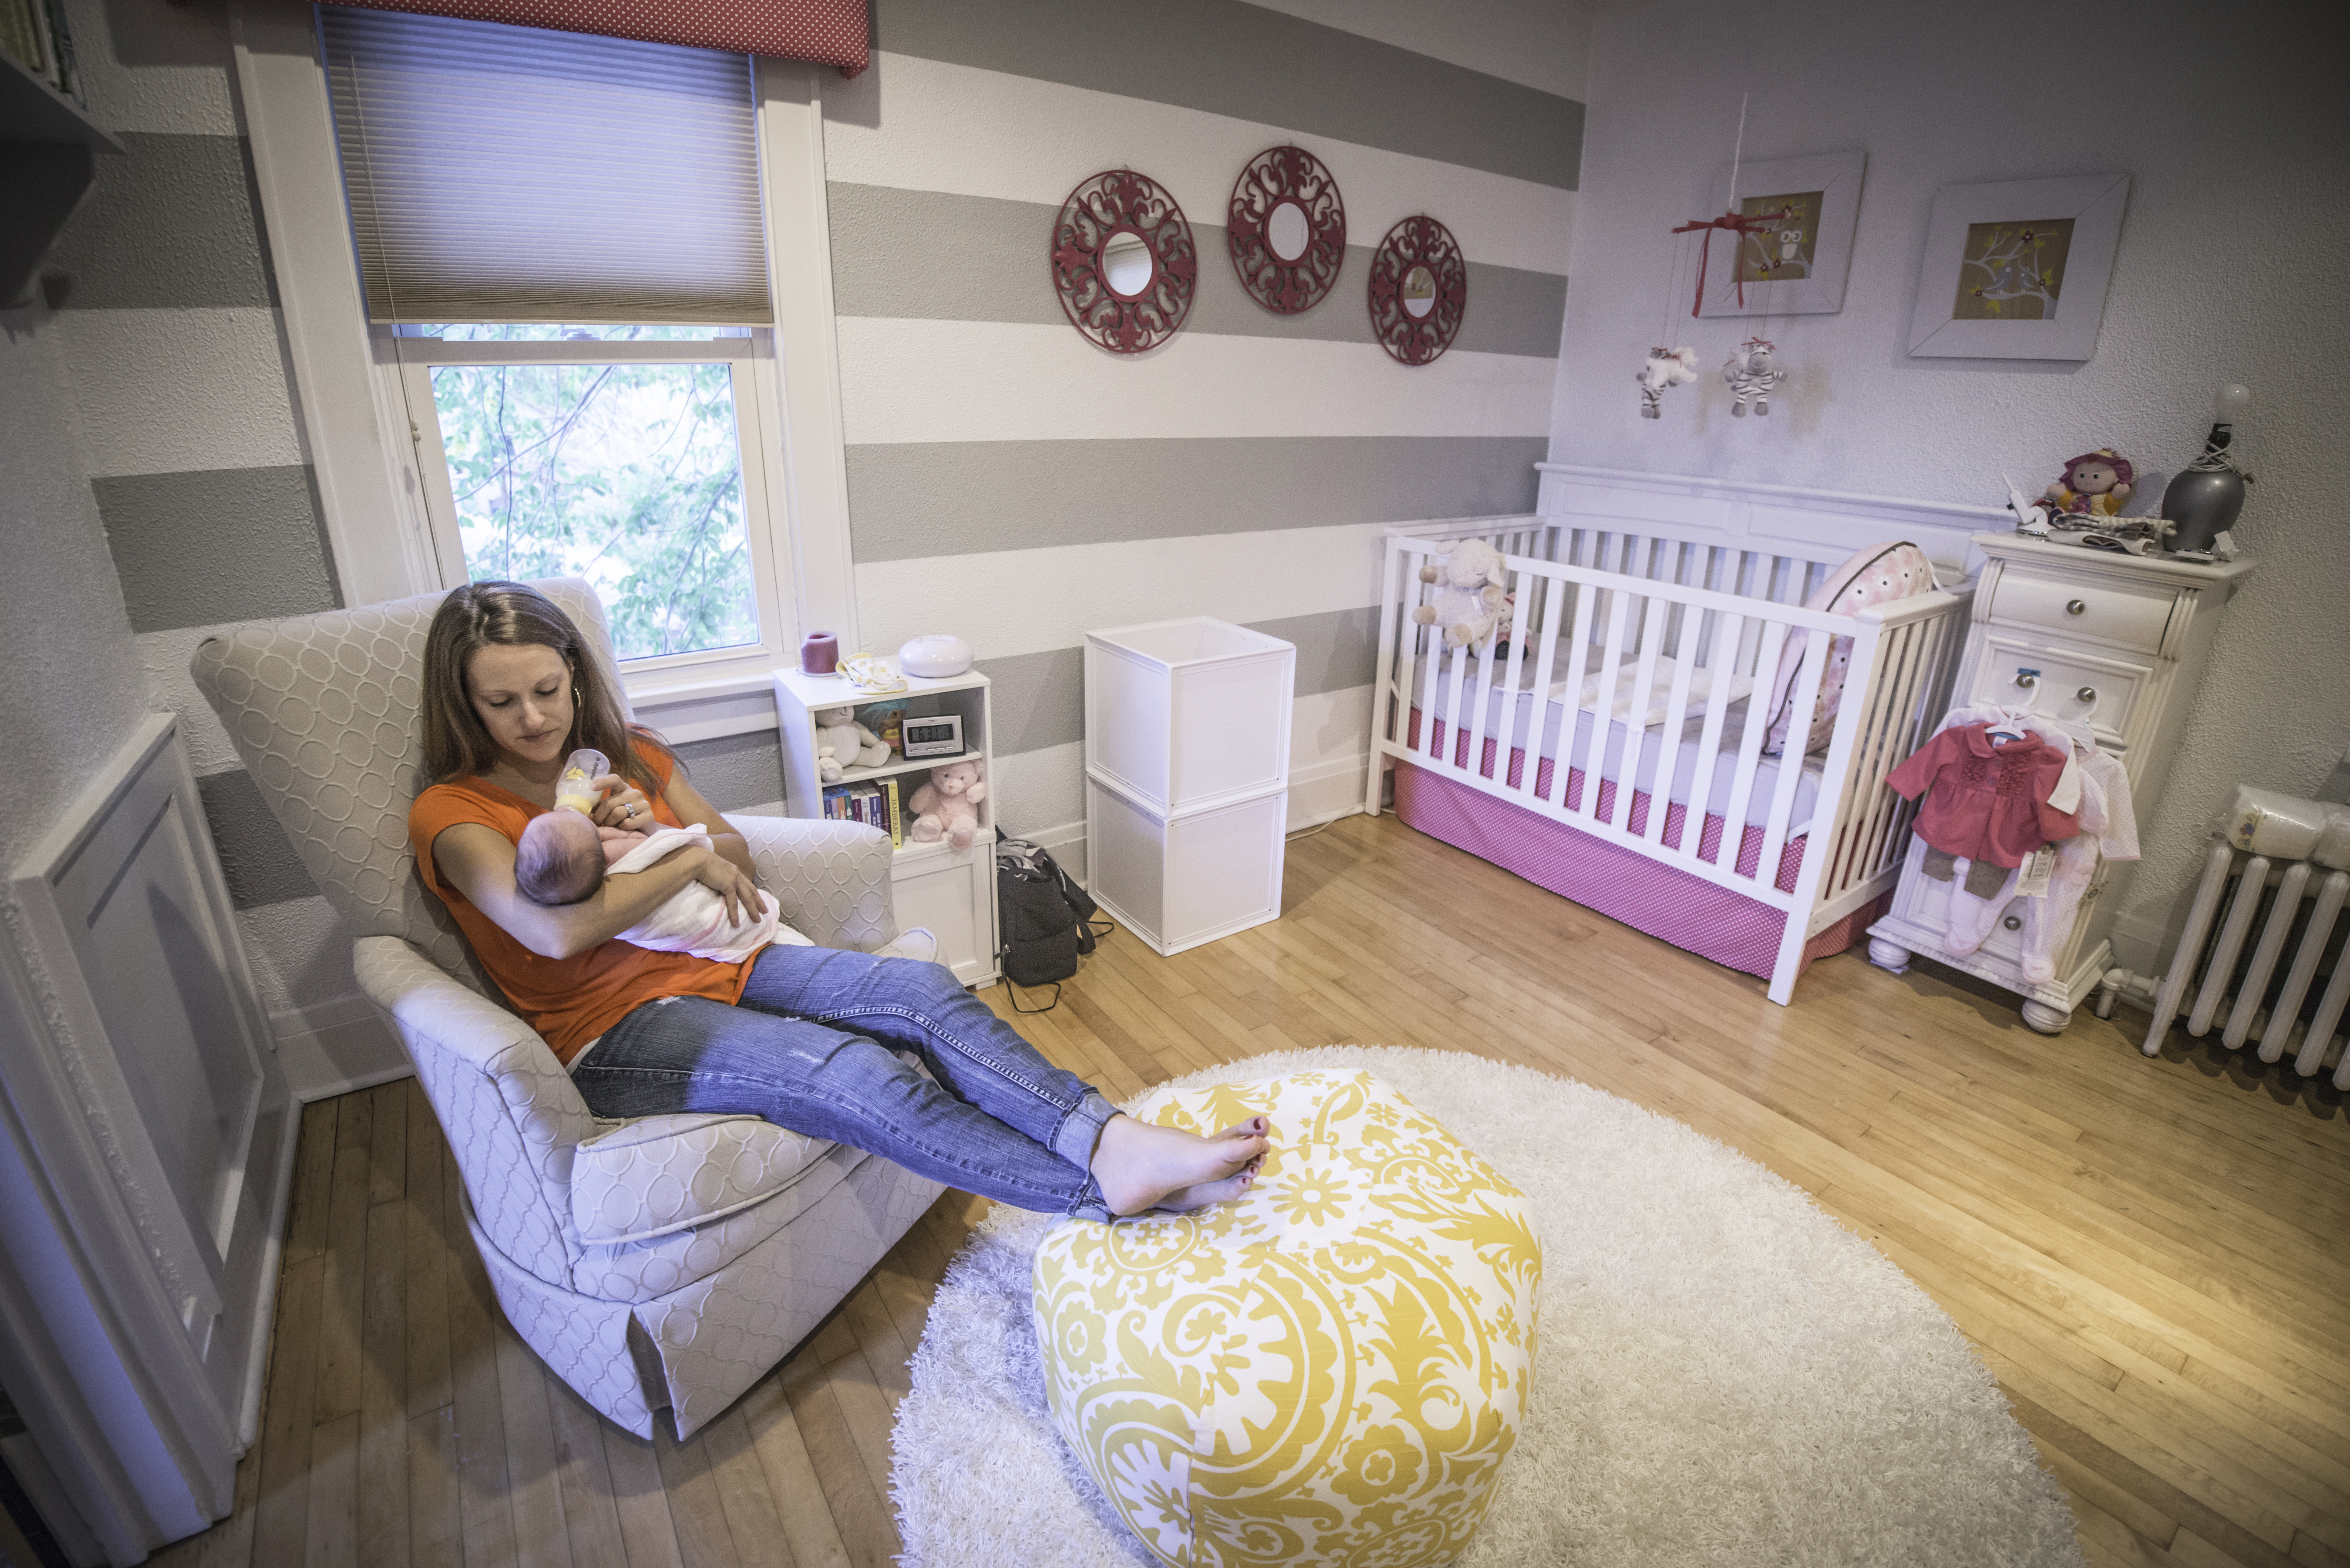
For me, it was all about color palette and a statement wall. Once we found out we were having a girl, I quickly fell in love with white, grey and fuschia, and soon decided this room needed one thing: STRIPES.
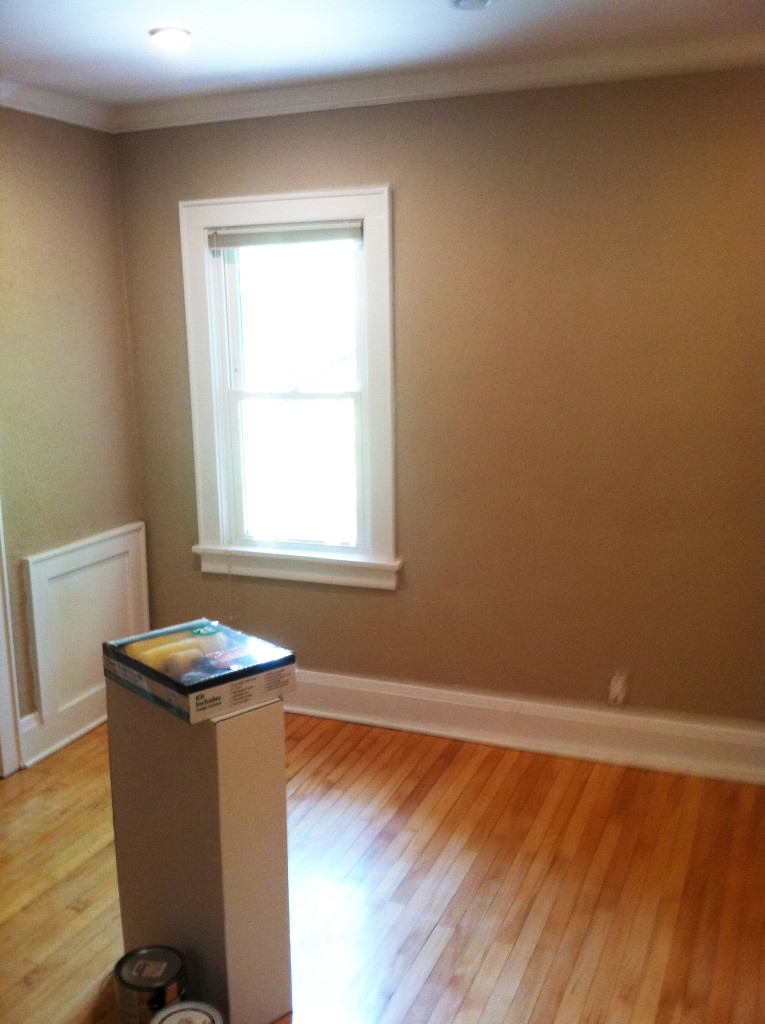
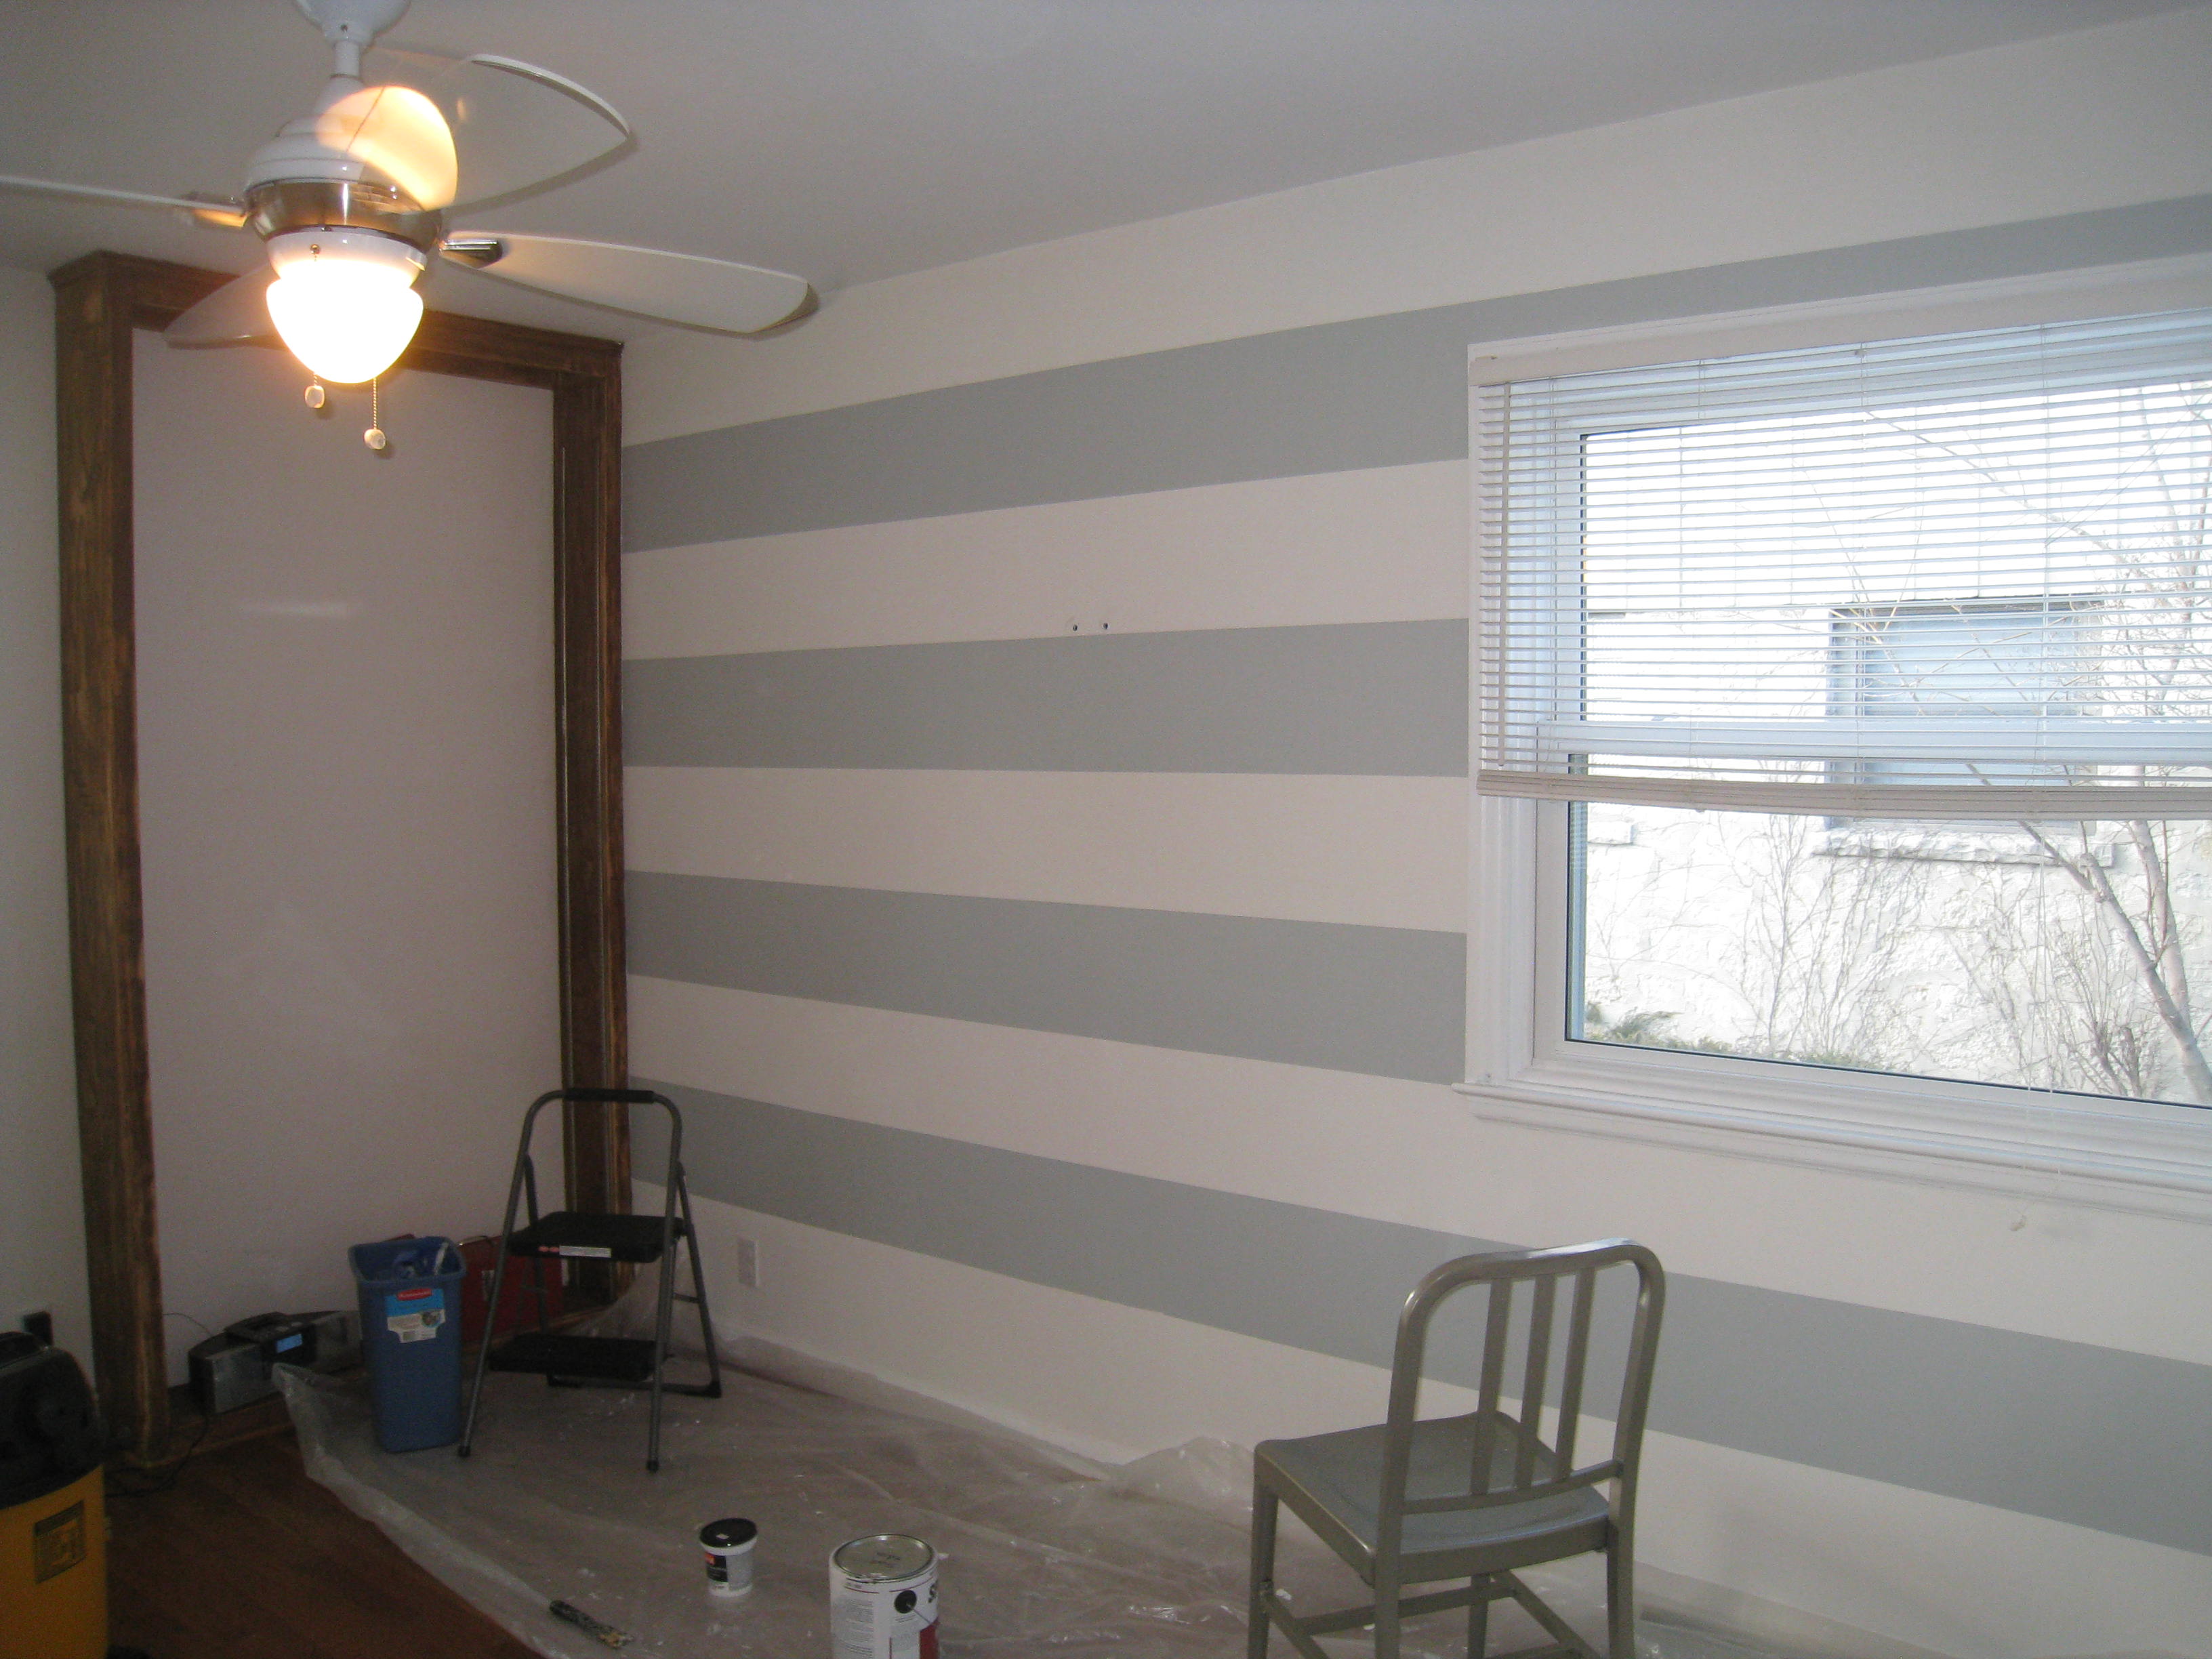
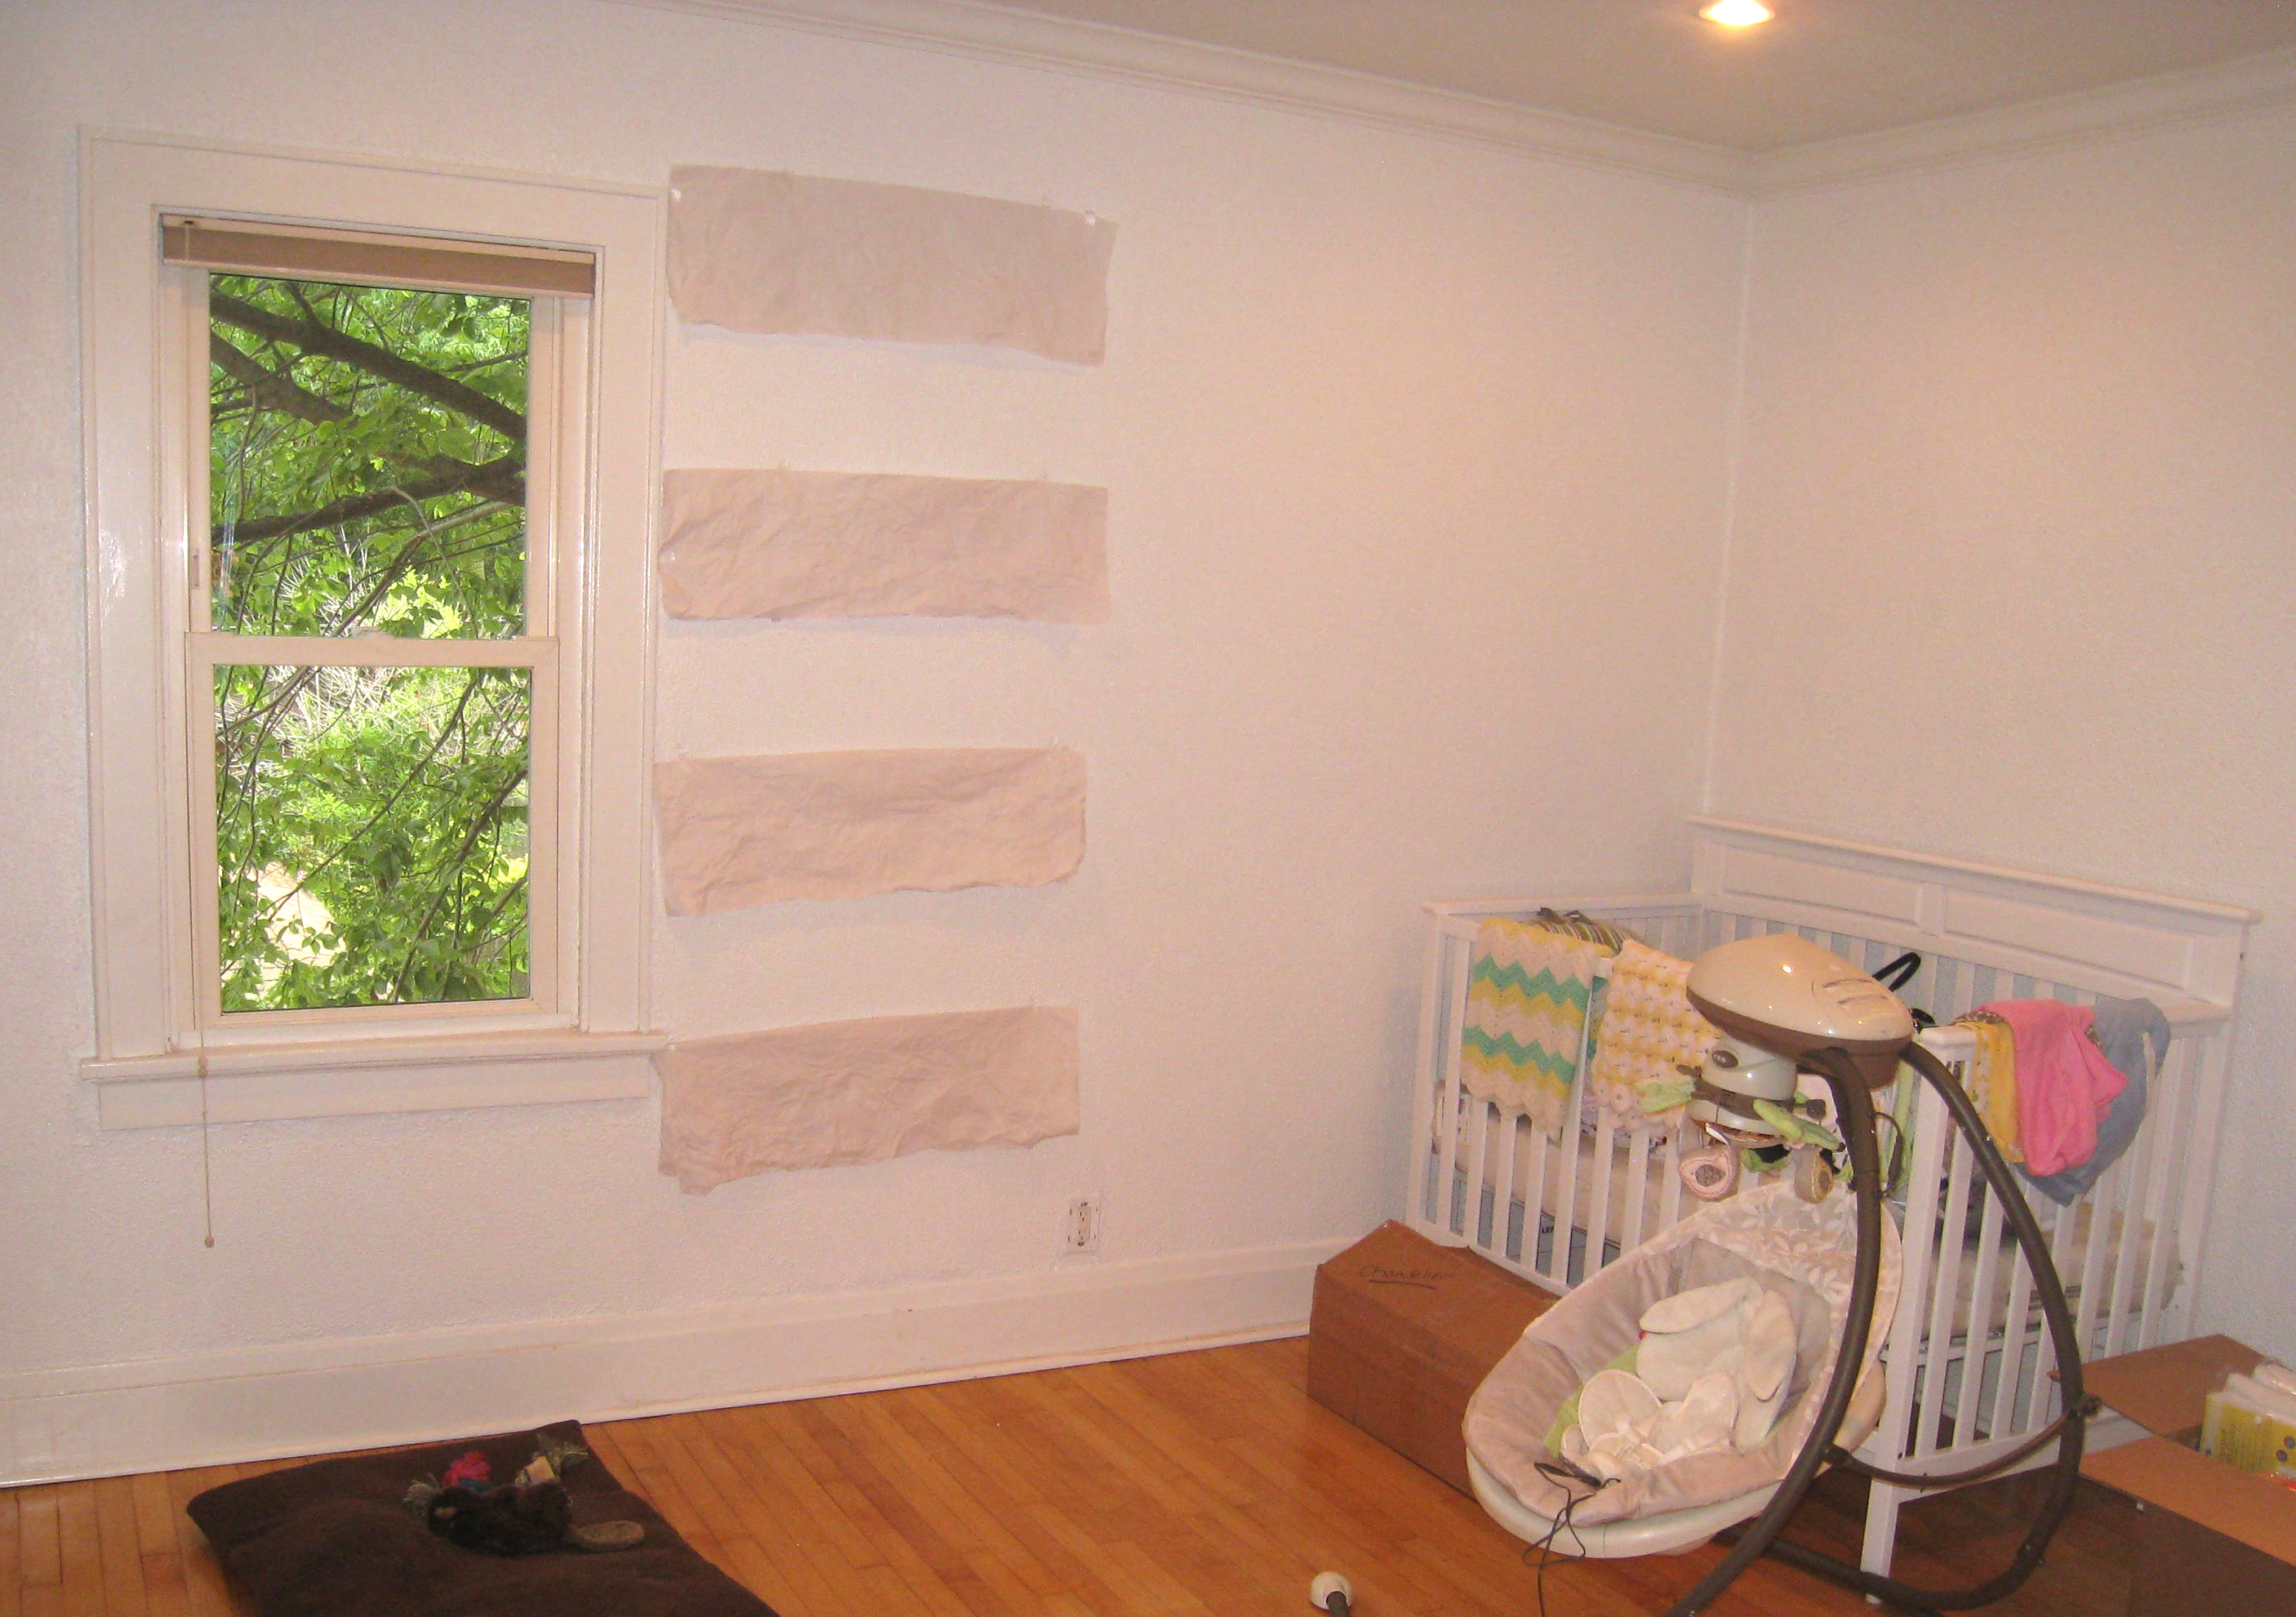
BEFORE:
(Brown. And blah to the blah. Sorry for the less-than-stellar snapshots.)

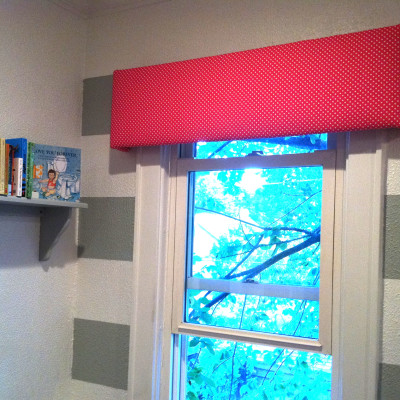
AFTER:
(Minus some finishing touches that got delayed by, well, having a baby 🙂

STEPS:
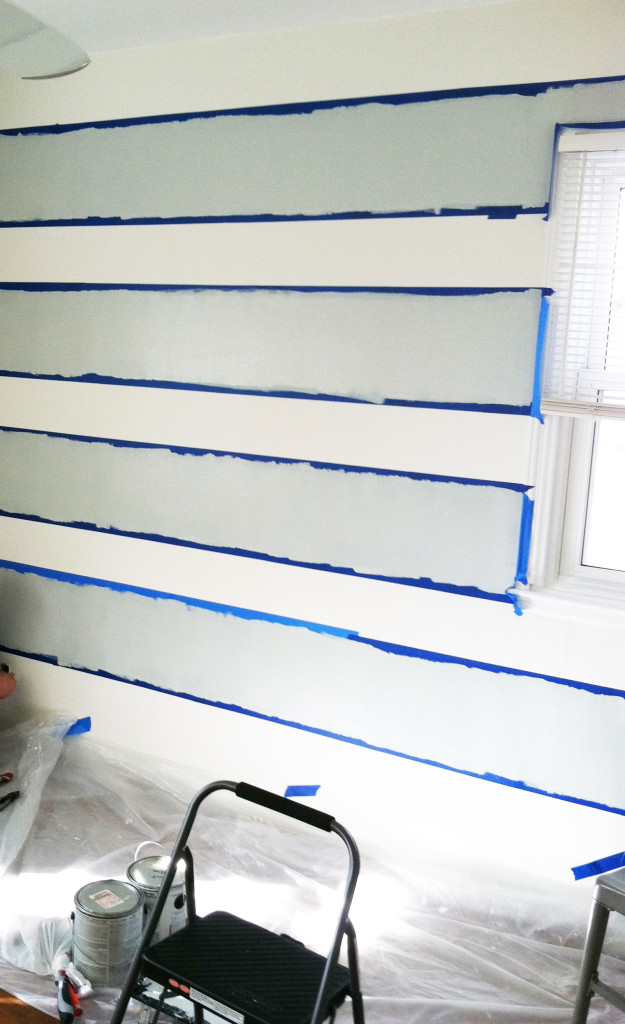
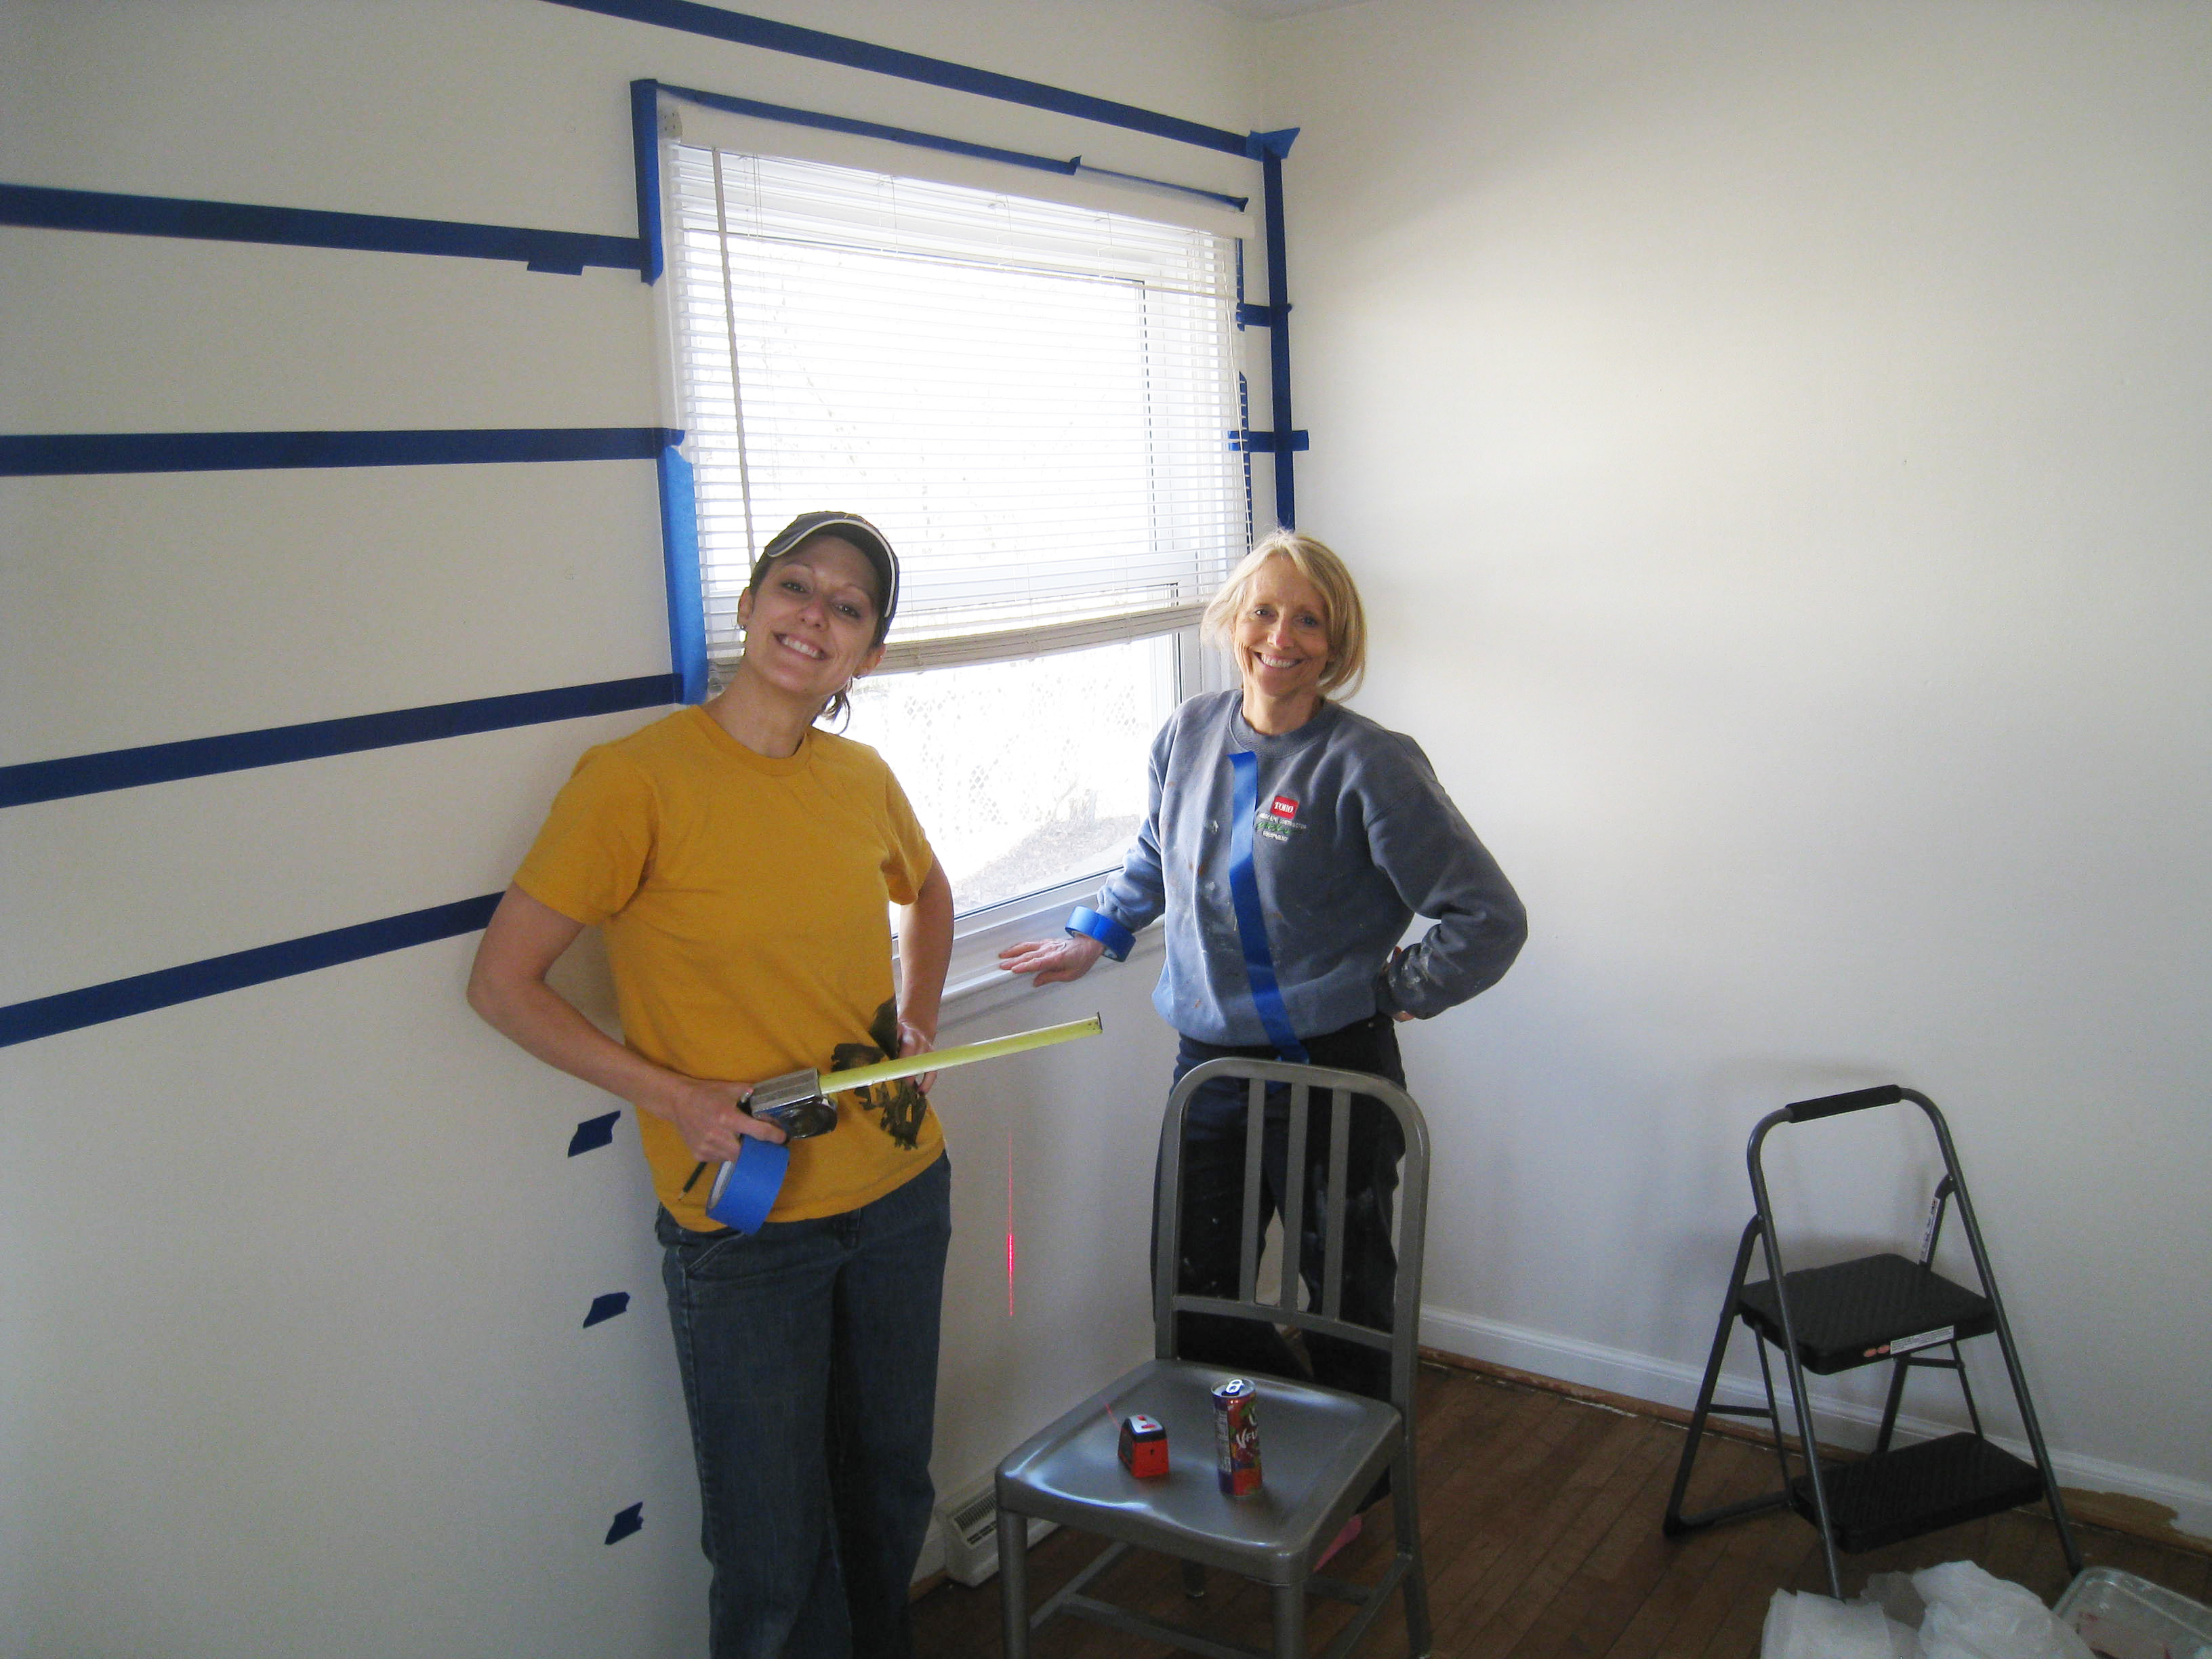
- Prep work, prep work, prep work. Preparation is key, so do yourself a favor and make sure you have everything you need before you start. Think drop cloth, painter’s tape, laser level, yard stick/tape measure, pencil, paint roller & brush, paint and maybe a ladder.
- Horizontal vs. vertical. Vertical stripes add height, while horizontal stripes add a feeling of spaciousness. We went with horizontal, mostly because the room was small, and that was the look I had in my head.
- Determine base color. Choose the lighter of the colors you have in mind as your base. In our case, we wanted grey and white stripes, so white was our base. Now, get rolling. Let that base coat dry for the proper amount of time (see back of paint can), preferably overnight.
- It’s math time. This is where it gets… fun. Decide how many stripes you think you want to see, and measure accordingly. I wanted between 4 and 6 grey stripes, so I measured floor to ceiling length, then did a little division to land on my individual stripe height. In my case, it was about 12 inches. (If you’re a visual person like me, consider mapping it on your wall first.)
- Measure & mark. Starting in a corner, use your tape measure and pencil to start marking your 12 inches (or whatever stripe height you decide on), up the entire wall—so floor to ceiling. Once you have one full, vertical starting point, it’s time to tape.
- Laser level & taping time. A laser level isn’t just a good idea with a project like this. In my opinion, it’s a must. In our case, we have a handheld laser level, so this part was a 2-person job. Start with the lowest mark you just made on the wall, and use that to shoot your laser across the full width of the wall. That’s your tape line, so get to tapin’. WARNING: Make sure you are taping on the correct side of the tape. One mistake here, and your perfect stripes won’t be so perfect.
- Overlap your paint. This may be the single most important tip of painting stripes. Trust me, it’s worth the extra effort. Once all your tape is up, take your base color (in this case, white), and paint it onto the edges of the stripes where your second color will be applied. Make sense? What this does is create a sort of paint “barrier” that will help prevent your darker color (grey) from bleeding through your tape. Translation: Any paint that would potentially bleed through onto your white, will now be white (yay!). You will NOT be sorry you did this.
- Apply darker color. Once your “barrier” paint is dry, you’re ready to roll on your darker color. And that’s the last step (not counting the drying & taking down tape part)!
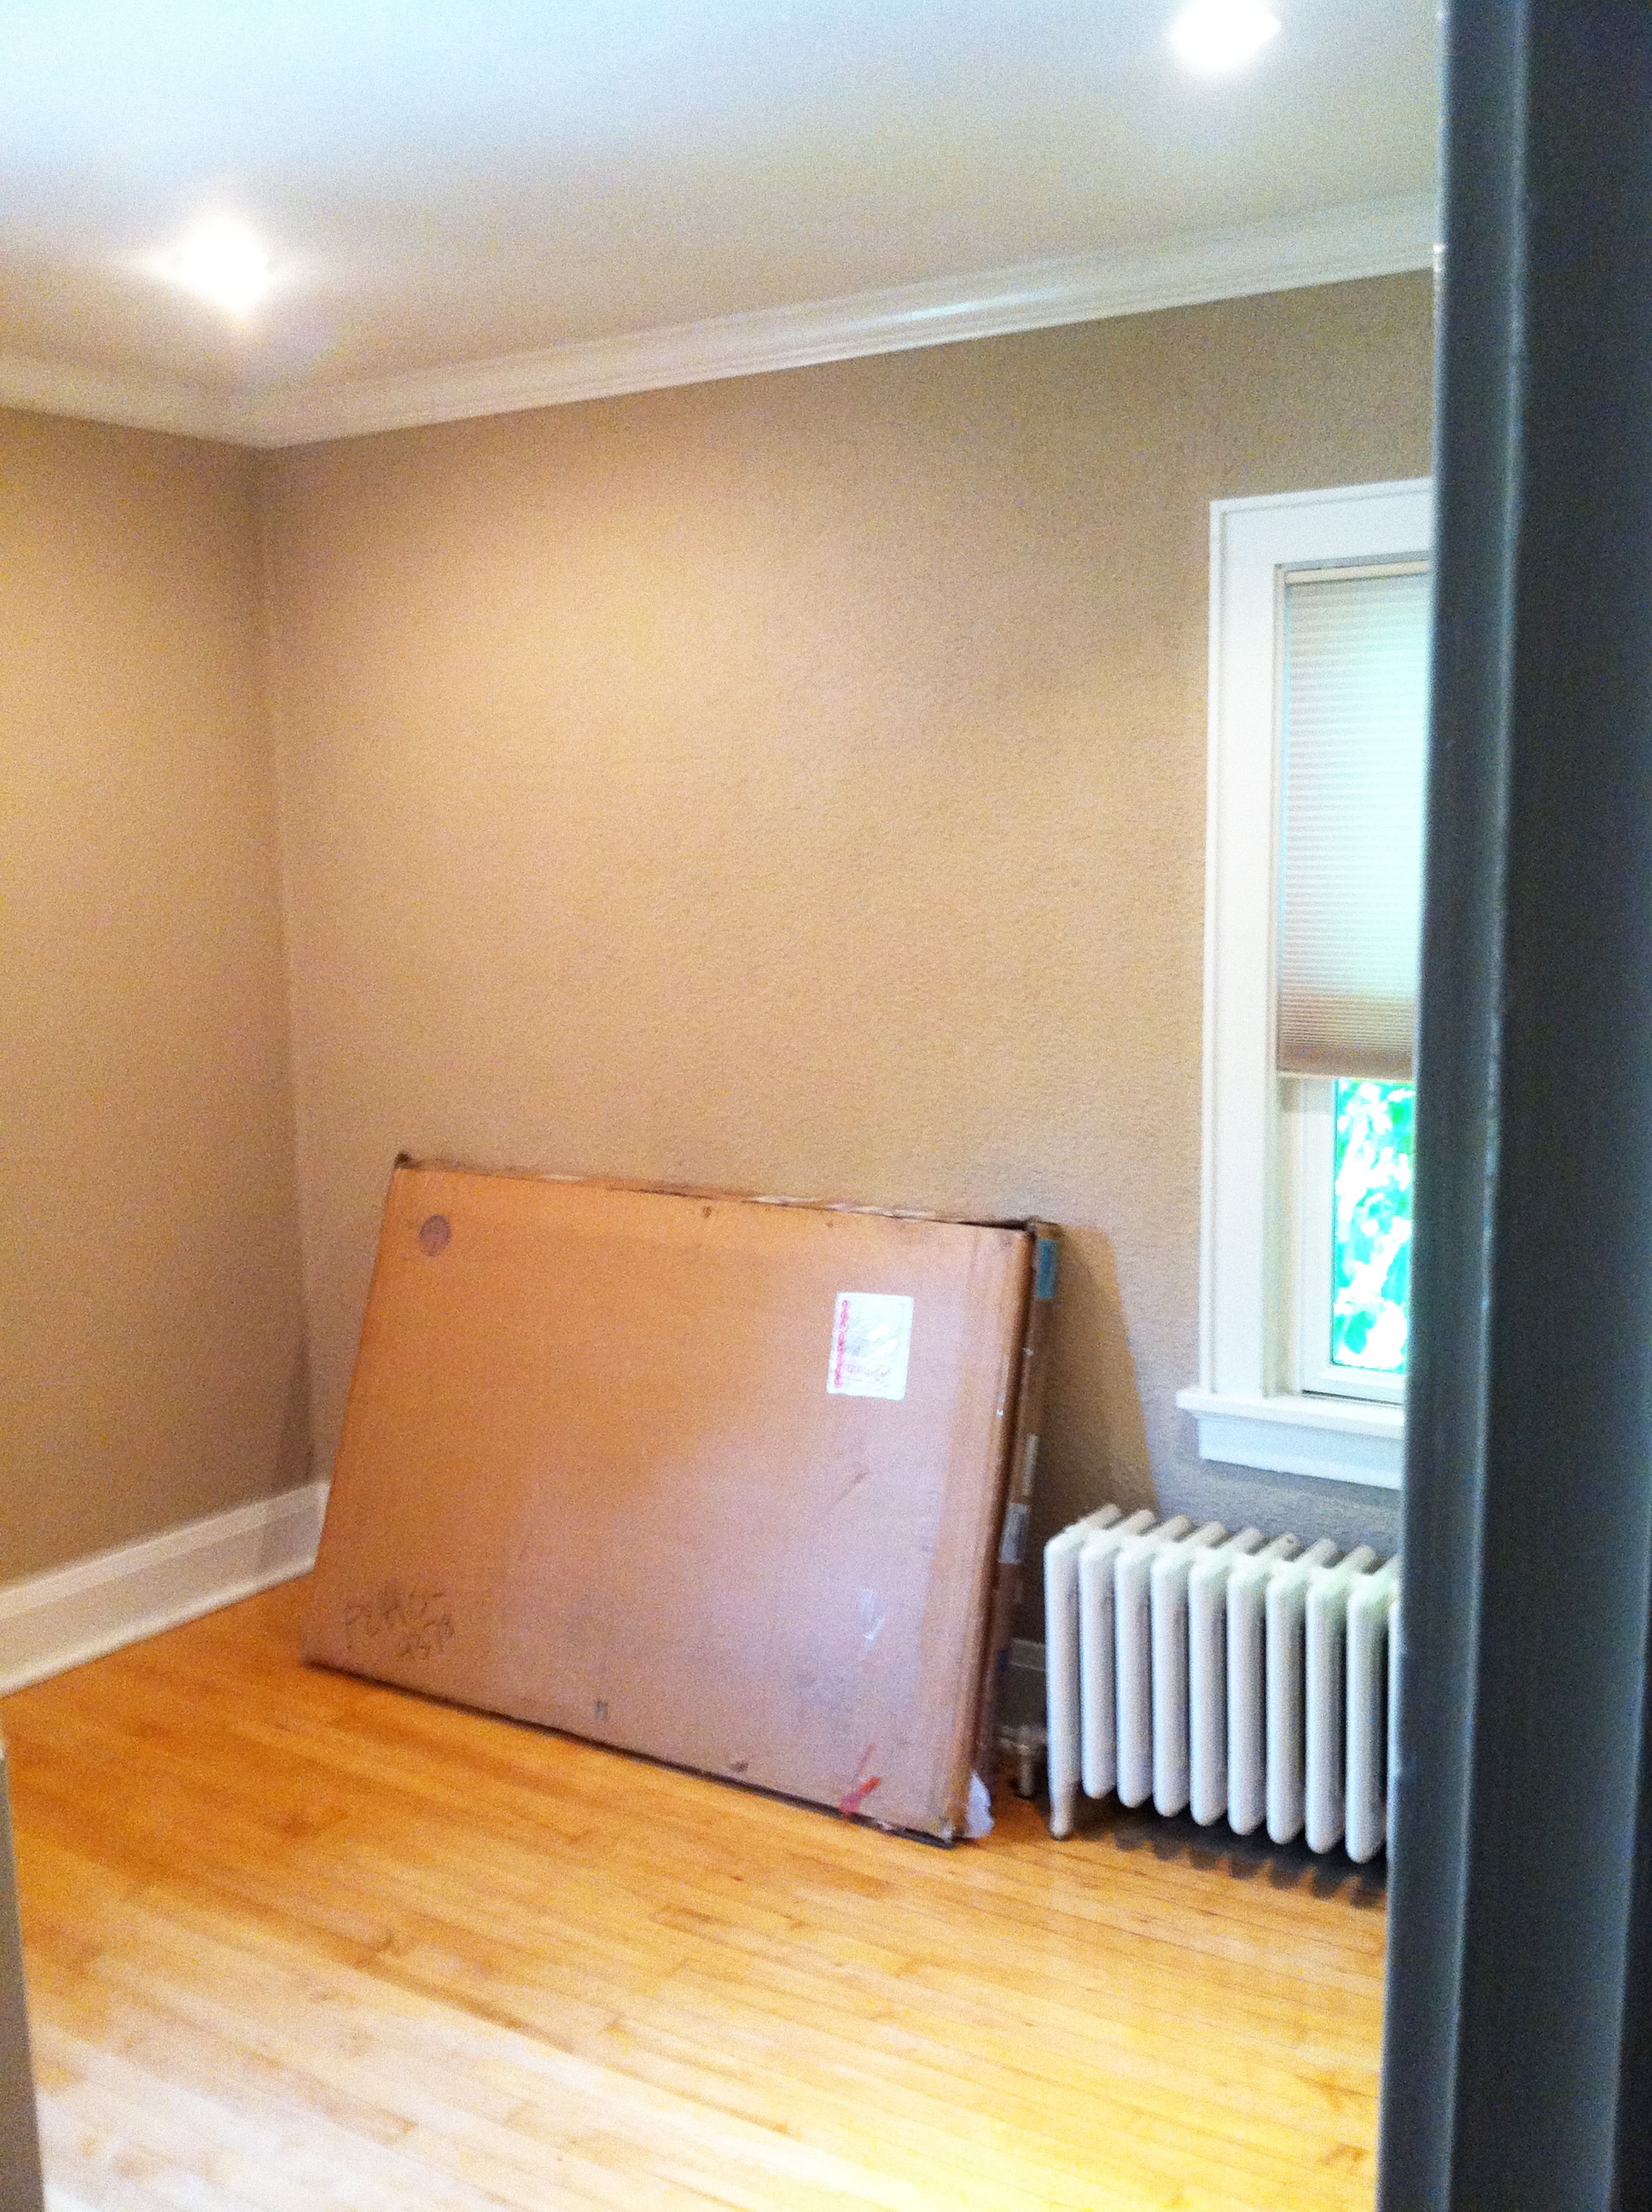
For more proof that anyone can do this, about a year after Elli was born, we bought a house. (And of course I wanted her second nursery to look the same as her first. After all, we’d worked really hard on it.) So not only did we do 1 striped nursery. We did TWO.
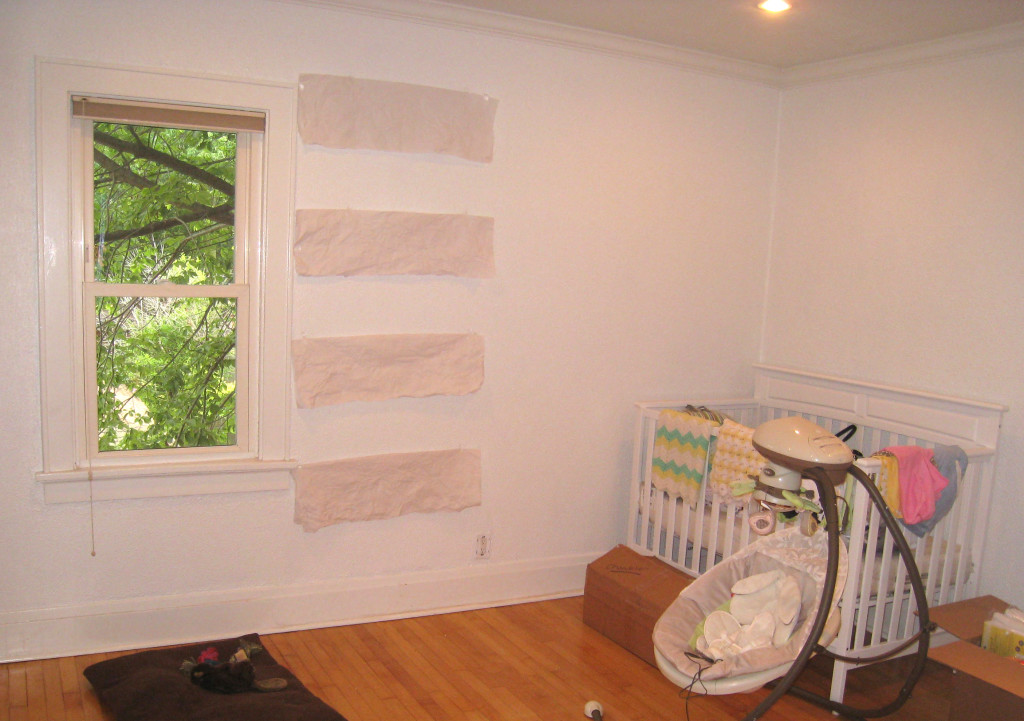
BEFORE:

AFTER:
(Here’s the finished striped wall, but for a REAL after shot, check this out.)


1 Comment